
Related Manuals for Olympus PT-EP13


Summary of Contents for Olympus PT-EP13
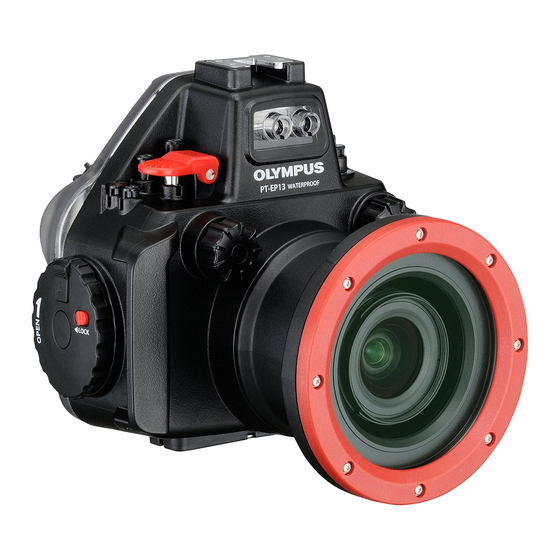
- Page 1 PT-EP13 Instruction Manual Mode d’emploi Bedienungsanleitung Manual de instrucciones...
-
Page 2: Introduction
Unauthorized copying of this manual in part or in full, except for private use, is prohibited. Unauthorized reproduction is strictly prohibited. OLYMPUS IMAGING CORP. shall not be responsible in any way for lost profits or any claims by third parties in case of any damage occurring from improper use of this product. - Page 3 OLYMPUS IMAGING CORP., we shall bear no responsibility for damage. 2 Use or storage of the product at the following locations may cause defective operation, defects, damage, fire, internal fogging, or water leakage.
- Page 4 6 Jumping into the water with the Case in your hand, throwing the Case from a boat or ship into the water, and other rough handling may cause water leakage. Please handle with sufficient care, when handing it over from hand to hand etc. 7 If the Case interior or the camera should become wet because of water leakage, etc., immediately wipe off all moisture and contact your local service station or dealer.
-
Page 5: Table Of Contents
Contents Introduction ..........................1 Please read the following items before use ................1 For safe use ........................... 1 1.Preparations......................6 Check the contents of the package ..................6 Names of the parts......................7 Using the supplied accessories....................8 Installing and removing of the monitor hood ..............8 Mounting and removing the body cap................ - Page 6 Remove any sand, dirt, etc....................20 How to Apply Grease to the O-ring ..................20 Install the O-ring ........................20 Replace consumable products ..................... 20 8.Appendix ........................21 Specifications ........................21 Supplied accessories for PT-EP13 ................21 Optional accessories...................... 21 Combination........................22 EN 5...
-
Page 7: Preparations
1. Preparations Check the contents of the package Check that all accessories are in the box. Contact your dealer if accessories are missing or damaged. • Case body (Check that the O-ring is installed.) • Silica gel (1g) • Monitor hood (on the body) •... -
Page 8: Names Of The Parts
Names of the parts 1 Open/close dial *c ON/OFF lever *p Cross-cursor button 2 Lock knob *d Mode dial lock (Erase) button 3 Slide lock *e Mode dial *r Cross-cursor button *4 Fn2 button f Finder window s Monitor window *g Fn1 button *5 ( (Movie) button t Monitor hood... -
Page 9: Using The Supplied Accessories
Using the supplied accessories Installing and removing of the monitor hood Installation Fit the holes of monitor hood into the left and right pins at the top of the monitor window. Fit the monitor hood into the finder window. Fit the bottom frame of monitor hood into the rail at the bottom of the monitor window. Removal Remove the monitor hood from the rail at the bottom of the monitor window by extending it outward. -
Page 10: Using The Diffuser
Using the diffuser When using the flash supplied with the camera, attach the diffuser. 1 Attach the diffuser to the port adapter. Diffuser Port adapter 2 Install the strap of the port adapter to the Case body. 3 Install the diffuser on the Case. Removing diffuser (with port adapter) from the Case body To remove the diffuser, pull the port adapter from the Case body. -
Page 11: Prepare The Digital Camera
Prepare the digital camera Prepare the digital camera before loading it in the Case. 1. Battery Confirmation It is impossible to change the batteries when using the Case. Make sure that you have sufficient remaining battery capacity before use. 2. Check the remaining number of pictures Check that the image storage medium has enough room for the number of pictures you want to take. -
Page 12: Advance Check Of The Case
Before using, always perform the following advance checks. CAUTION: If the advance test should show water leakage with normal handling, stop using the Case and contact your dealer or an Olympus service station. Remove the O-ring Open the Case and remove the O-ring. -
Page 13: How To Apply Grease To The O-Ring
How to Apply Grease to the O-ring Make sure that your fingers and the O-ring are 1 Apply only Olympus free of dirt, then squeeze the appropriate exclusive lubricant to each amount of exclusive lubricant onto a finger to O-ring. -
Page 14: Installing The Digital Camera
3. Installing the digital camera Open the Case 1 Slide the lock knob towards the arrow direction (1 of figure below). 2 Slide and hold the slide lock towards the arrow direction (2 of figure below) and turn the open/close dial clockwise (3 of figure below). -
Page 15: Load The Digital Camera
Load the digital camera 1 Confirm that the digital camera is OFF. 2 Put the monitor in closed position (do not pull out). 3 Raise the ON/OFF lever (1 of figure below), then set to the "OFF" position. 4 Set the digital camera lever on "1" and adjust the position of the lever of the Case (2 of figure below) to "1"... -
Page 16: Seal The Case
Seal the Case 1 Close the Case gently while aligning the mounting projection of the rear lid and groove. 2 Turn the open/close dial counter clockwise (1 of figure below) until you hear a "click" sound and lock the Case. •... -
Page 17: Water Leakage Test
Water Leakage Test The final test after loading the camera is explained below. Always perform this test. It can be performed easily in a water tank or a bathtub. Confirm the operation of the different buttons. The required time is about 5 minutes. -
Page 18: Connecting The Underwater Flash
4. Connecting the underwater flash To connect the underwater flash (optional) to the Case using an underwater optical fiber cable (optional: PTCB-E02), follow the procedures below. Connecting the underwater optical fiber cable 1 Put the underwater optical fiber cable plug into the optical fiber cable insertion slot. -
Page 19: Taking Pictures Under Water
5. Taking Pictures Under Water How to select the shooting modes You can easily set the underwater mode by assigning (Underwater Wide-Angle)/ (Underwater Macro) to Fn button of the digital camera. Select [ ] in [MENU]-[ Custom Menu]-[ Button/Dial/lever]-[Button Function]-[Fn1 Button Function] or [Fn2 Button Function], then press OK button. -
Page 20: Handling After Shooting
6. Handling After Shooting Wash the Case with pure water 1 After use, clean the protector thoroughly with pure water as soon as possible. After use in sea water, soak it in pure water for a fixed time (30 minutes to an hour) to remove any salt. 2 Operate the shutter lever and various buttons of the product in pure water to clean and remove the salt attached to the shaft. -
Page 21: Maintaining The Waterproof Function
O-ring even before a year has passed if it shows signs of damage, cracking or loss of elasticity. CAUTION: • Please use genuine Olympus silicone grease, silica gel and O-ring. • Do not try to replace the O-ring by yourself. -
Page 22: Appendix
Approx. 15 g (in the freshwater) (including camera (with flash), ED12-50mm f3.5-6.3 EZ lens, battery and media card) * We reserve the right to change the external appearance and the specifications without notice. Supplied accessories for PT-EP13 O-ring: POL-EP13 Monitor hood: PFUD-EP13... -
Page 23: Combination
Combination Lens/Four Thirds adapter Zoom gear/Focus gear Antireflective ring M.ZUIKO DIGITAL ED 9-18mm f4.0-5.6 PPZR-EP02 POSR-EP02 M.ZUIKO DIGITAL ED 14-42mm f3.5-5.6 PPZR-EP01 POSR-EP01 M.ZUIKO DIGITAL 14-42mm f3.5-5.6 II POSR-EP03/POSR-EP05 PPZR-EP02 M.ZUIKO DIGITAL 14-42mm f3.5-5.6 IIR M.ZUIKO DIGITAL 45mm f1.8 POSR-EP03/POSR-EP05 M.ZUIKO DIGITAL ED 12-50mm f3.5-6.3 EZ M.ZUIKO DIGITAL ED 60mm f2.8 Macro PPZR-EP03... - Page 25 date of issue 2014.12. ©2014 Printed in China WC821601...