Table of Contents
Advertisement
GE Consumer & Industrial
Power Protection
Operating Manual
Uninterruptible Power supply
Digital Energy™
SitePro
60 kVA
400 VAC CE / Series 7
Manufactured by:
GE Digital Energy
General Electric Company
CH – 6595 Riazzino (Locarno)
Switzerland
T +41 (0)91 / 850 51 51
F +41 (0)91 / 850 51 44
www.gedigitalenergy.com
Advertisement
Table of Contents

Related Manuals for GE Digital Energy SitePro 400 VAC CESeries 7


Summary of Contents for GE Digital Energy SitePro 400 VAC CESeries 7
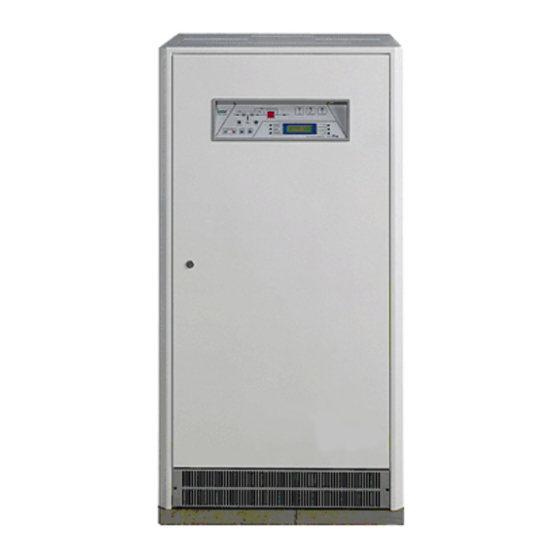
- Page 1 GE Consumer & Industrial Power Protection Operating Manual Uninterruptible Power supply Digital Energy™ SitePro 60 kVA 400 VAC CE / Series 7 Manufactured by: GE Digital Energy General Electric Company CH – 6595 Riazzino (Locarno) Switzerland T +41 (0)91 / 850 51 51 F +41 (0)91 / 850 51 44 www.gedigitalenergy.com...
- Page 2 The present publication and any other documentation supplied with the UPS system is not to be reproduced, either in part or in its entirety, without the prior written consent of GE. The illustrations and plans describing the equipment are intended as general reference only and are not necessarily complete in every detail.
- Page 3 Please carefully read the Operating Manual. It contains all the necessary information about the installation of the UPS. Thank you for choosing GE ! Manufactured by: Distributed by: Your service contact: GE Digital Energy General Electric Company CH –...
-
Page 4: Safety Instructions
While every care has been taken to ensure the completeness and accuracy of this manual, GE assumes no responsibility or liability for any losses or damages resulting from the use of the information contained in this document. -
Page 5: Table Of Contents
Table of contents Page SAFETY RULES............................... 7 SAFETY SYMBOLS AND WARNINGS............................9 INTRODUCTION............................10 DESCRIPTION.............................. 11 BLOCK DIAGRAM AND MAIN ELEMENTS ..........................11 OPERATION MODES..................................12 3.2.1 Normal operation mode VFI (Voltage Frequency Independent)..................12 3.2.2 SEM mode operation (Super Eco Mode)............................. 12 3.2.3 Mains failure operation .................................. - Page 6 CONTROL PANEL............................37 CONTROL PANEL..................................... 37 TABLE OF FUNCTIONS AND INDICATIONS ON CONTROL PANEL................37 LCD SCREEN..............................39 METERING MODE .................................... 40 ALARMS....................................... 44 PARAMETERS ....................................45 EDIT MODE......................................47 MEANING OF THE USER PARAMETERS..........................50 DESCRIPTION OF THE CHINESE LCD OPERATION ......................56 EVENTS (ALARMS AND MESSAGES)............................
-
Page 7: Safety Rules
SAFETY RULES Save these instructions! GENERAL - Move the UPS in an upright position in its original package to the final destination room. To lift the cabinets, use a forklift or lifting belts with spreader bars. - Check for sufficient floor and elevator loading capacity. - Check the integrity of the UPS equipment carefully. - Page 8 Safety instructions when working with battery EXTERNAL BATTERY MUST BE INSTALLED AND CONNECTED TO THE UPS BY QUALIFIED SERVICE PERSONNEL. INSTALLATION PERSONNEL MUST READ THIS ENTIRE SECTION BEFORE HANDLING THE UPS AND BATTERY. DANGER! Full voltage and current are always present at the battery terminals. The battery used in this system can provide dangerous voltages, extremely high currents and a risk of electric shock.
-
Page 9: Safety Symbols And Warnings
SAFETY SYMBOLS AND WARNINGS Safety warnings The text of this manual contains some warnings to avoid risk to the persons and to avoid damages to the UPS system and the supplied critical loads. The non-observance of the warnings reminding hazardous situations could result in human injury and equipment damages. -
Page 10: Introduction
UPS available, allowing you to support a greater number of today’s enterprise computing Power Factor Corrected (PFC) equipment. No single point of failure Redundant Parallel Architecture (RPA) is an exclusive GE technology. With RPA, SitePro UPS are controlled in a true peer-to-peer configuration where all critical elements and functions (including Bypass) are redundant. -
Page 11: Description
DESCRIPTION BLOCK DIAGRAM AND MAIN ELEMENTS Fig. 3.1-1 Block diagram The SitePro system can be divided into the following main elements: Control system SitePro is designed with microprocessor-controlled signal processing circuits. The interface between the operator and the unit is provided by the monitoring system on the front panel. -
Page 12: Operation Modes
OPERATION MODES 3.2.1 Normal operation mode VFI (Voltage Frequency Independent) Under normal conditions load permanently powered by the inverter with constant amplitude and frequency. The rectifier, powered by the mains, supplies the inverter and the battery-charger keeps the battery fully charged. The inverter converts the DC voltage in a new AC sine wave voltage with constant amplitude and frequency independently from the input... -
Page 13: Mains Failure Operation
3.2.3 Mains failure operation When the Mains is no longer within acceptable tolerances, the Battery will provide the DC power to the Inverter. The Inverter will maintain continuous AC power to the Load until the Battery Voltage reaches the lower limit of the Inverter operation capability. -
Page 14: Automatic Bypass
3.2.5 Automatic Bypass In normal operation, the Load is supplied by the Inverter. When the control system detects a fault in the Inverter, an overload condition or a short-circuit condition, the Automatic Bypass will transfer the critical Load to the Mains without interruption. When the Inverter recovers, or the overload or short-circuit condition is corrected, the Load will be automatically transferred back to the... -
Page 15: Parallel System Operation
PARALLEL SYSTEM OPERATION 3.3.1 Introduction to the parallel system Two or more equal power units can be paralleled to increase the output power (paralleling for capacity) or to improve the overall reliability of an UPS system (paralleling for redundancy). The outputs of parallel units are connected to a common power bus, and in normal operation the units connected on the parallel bus share the Load equally. -
Page 16: Features Of Rpa Parallel System
3.3.2 Features of RPA parallel system The SitePro parallel system is designed to provide a complete Redundant Parallel Architecture, and is free from common equipment. Not only the Inverters but also the Bypass functions are redundant. When one UPS needs maintenance or service, the Load is powered by the other units. The redundant communication bus to which all units are connected keeps each unit informed about the status of all the other units. -
Page 17: Rectifiers Paralleled On The Same Battery
A parallel system with a Common Battery for two or more UPS, requires a particular installation and adequate setting of some parameters, (accessible only through password), and can therefore only be done by a qualified GE engineer. Usually each UPS Unit runs with its own Battery. -
Page 18: Service And Technical Support
Fig. 3.5-1 Identification label WARRANTY GE, operating through its authorised agents, warrants that the standard products will be free of defects in materials and workmanship for a period of 12 months, after the date of the invoice, or such other period as may be specified. -
Page 19: Recycling At The End Of Service Life
RECYCLING AT THE END OF SERVICE LIFE NOTE ! This product has been designed to respect the environment, using materials components respecting eco-design rules. It does not contain CFCs (Carbon Fluor Clorid) or HCFCs (Halogen Carbon Fluor Clorid). compliance with environment protection recommends to the User that the UPS equipment, at the... -
Page 20: Installation
INSTALLATION TRANSPORT Forklift The UPS is packaged on a pallet suitable for handling with a forklift. Pay attention to the centre of gravity. The UPS must be moved in upright position. Do not tilt cabinets more than +/- 10° during handling. Move the UPS in it’s original package to the final destination site. -
Page 21: Delivery
DELIVERY When delivered, inspect the package integrity and the physical condition of the cabinets carefully. In case of any damage sustained during transport, immediately inform the carrier and contact your local Service Centre. A detailed report of the damage is necessary for any insurance claim. NOTE ! A damaged UPS must never be installed or connected to mains or battery! STORAGE... -
Page 22: Place Of Installation
PLACE OF INSTALLATION 4.4.1 UPS location WARNING ! UPS installation and connection must be performed by QUALIFIED SERVICE PERSONNEL only. If optional cabinets and accessories are included with the UPS, please refer to those accompanying manuals for installation and operating instructions. It is important to have a clean, dust-free place provided with proper ventilation or air-conditioning to keep the ambient within the specified operating range. -
Page 23: Battery Location
The UPS cabinet is free standing and normally does not require bolting to the floor. In any case the cabinet basement is suitable to be floor fixed, when requested by local standards. In case of parallel system, try to place the UPS modules in sequence of their numbers (marked on the packing). -
Page 24: Ventilation And Cooling
VENTILATION AND COOLING Fig. 4.5-1 Installation on plain floor Fig. 4.5-2 Installation on raised floor The heat produced by the UPS is transferred to the environment by its ventilation. Cooling air enters the cabinets through the air inlet (grids) located at the bottom and exhausted through the outlet on the roof. -
Page 25: Unpacking
For parallel systems, the delivery also includes the bus control cables for inter- connecting the UPS modules. Packing material recycling GE, in compliance with environment protection, use only environmentally friendly material. UPS packing materials must be recycled in compliance with all applicable regulations. -
Page 26: Electrical Wiring
ELECTRICAL WIRING WARNING ! UPS installation and connection must be performed by QUALIFIED SERVICE PERSONNEL only. Refer to the “Safety prescriptions - Installation” described on Section 1. 4.7.1 Mains input connection WARNING ! Ensure that the AC and DC external isolators are OFF and locked out to prevent their inadvertent operation. -
Page 27: Input/Output Overcurrent Protection And Wire Sizing
4.7.2 Input/output overcurrent protection and wire sizing The cabling of the UPS system has to be sized according to the UPS power rating. Exceptions are only allowed to suit local prescriptions. Sizing of circuit breakers, fuses and cables for input mains, output load and battery must meet the requirements of local and national electrical codes. -
Page 28: Wiring Connection
WIRING CONNECTION WARNING ! UPS installation and connection must be performed by QUALIFIED SERVICE PERSONNEL only. Refer to the “Safety prescriptions - Installation” described on Section 1. 4.8.1 Power connections Carefully read the following recommendations before proceeding: • Ensure that the AC and DC external isolators are Off, and prevent their inadverted operation. •... -
Page 29: Choice Of Ac Input For The Power Supply
4.8.2 Choice of AC input for the power supply The control and regulation circuits are supplied by two separate power supplies: one powered from AC mains input voltage and another powered by DC battery voltage. The AC power supply can be powered either by bypass mains input (standard version, suitable in most cases) or rectifier mains input. -
Page 30: Functioning As Frequency Converter
4.8.3 Functioning as frequency converter When the UPS is delivered for different output frequency with respect to the input frequency, the utomatic bypass and manual bypass functions are disabled, therefore the load cannot be transferred to mains in case of overload, short-circuit, or inverter failure. In cases where the UPS needs to be powered down for maintenance purposes, the critical load must also be powered down during this time. -
Page 31: Rpa Parallel System Connection
RPA PARALLEL SYSTEM CONNECTION WARNING ! This operation must be performed by trained personnel before the initial start-up (ensure that the UPS installation is completely powered down). 4.9.1 Power wiring of parallel units To guarantee good Load sharing between the units of a parallel system, we recommend that the cable length from the input distribution board (5) to the output distribution board (10) is equal for each unit (a+b = c+d = e+f = g+h = i+l = m+n = o+p = q+r). -
Page 32: Parallel Control Bus Connection
4.9.2 Parallel control bus connection In cases of parallel operation, the communication between the units take place through the control bus cables: Each parallel unit is equipped with an additional board “P13 – RPA Board“ where the connectors J52 (A) and J62 (B) are located. - Page 33 JB-1 JA-1 Fig. 4.9.2-2 Bus connection on terminal units Terminal units On the parallel bus PCB P34 - IM0048, of the first and last units (terminal) of the parallel system the Jumpers JP1, JP2, JP3 and JP4 MUST BE INSERTED. JB (2) JA (2) JA (1)
-
Page 34: Control Bus Cable Location
4.9.3 Control bus cable location Warning! This installation must be verified by trained personnel before the initial start-up. ENSURE THAT THE UPS INSTALLATION IS COMPLETELY POWERED DOWN. Access to the control bus connection. The control bus connection between parallel units must be made on the front of the electronic module fitted behind the front door Fig. - Page 35 JA-1 JB-1 JB-1 JA-1 JB-2 JB-2 JB-1 JA-2 JA-1 Fig. 4.9.3-4 Control Bus cable routing and connection Control bus cables routing Place and fix the cables JA-1/2/3/4/5/6/7 and JB-1/2/3/4/5/6/7 inside the UPS cabinets in the position illustrated in the drawing. NOTE ! Pay attention when cabling and routing the bus cables JA and JB inside the UPS cabinet.
-
Page 36: Layout
LAYOUT LAYOUT SitePro 60 KVA Fig. 5.1.1-2 Manual operated switches Fig. 5.1.1-1 Internal view with open doors Fig. 5.1.1-3 Control Panel Electronic Module Serial port RS232 for IMT protocol (option) Outlet grids fans Scheda Interfaccia Potenza (Power Interface Board) Customer Interface Board Alimentatore 24 VDC (opzione) UPS output switch Manual bypass switch... -
Page 37: Control Panel
CONTROL PANEL CONTROL PANEL Fig. 6.1-1 Control Panel TABLE OF FUNCTIONS AND INDICATIONS ON CONTROL PANEL Key to switch the Inverter ON (I) inverter on/off (This key is also used to reset “total off” if pressed simultaneously with total off push button). - Page 38 General alarm condition It blinks when one or more alarm is activated. The internal buzzer is ON. The LED remains lighted (with alarm condition still present) and the buzzer stops as the key “mute” has been pressed. alarm LED ON indicates that a regular maintenance service is needed. May be reset by a service technician only.
-
Page 39: Lcd Screen
LCD SCREEN This user interface consists in a permanent back lit LCD screen having: • 4 lines with 20 characters (standard version for Latin characters); • 2 lines with 10 – Chinese / 20 characters - Latin fonts (option for Chinese language markets); •... -
Page 40: Metering Mode
METERING MODE The Metering mode is entered any time the metering button is pressed. While in this mode the LCD will display a series of screens containing metering information. In this mode the buttons perform the following functions: metering scrolls forward to the next screen. alarms abandons the Metering mode and enters the Alarms mode. - Page 41 Bypass Mains data screen This screen refers to the AC source supplying the bypass. This screen displays: • The frequency. • The voltage levels of the three phase voltages. m etering M AIN S f = 50.0H z alarm s –...
- Page 42 Status load screen This screen displays: • The load level in kVA (for RPA: only this unit). • The load level as a percentage of the nominal rated load (for RPA: only this unit). • The source of the power supplied to the load. metering LOAD ON UPS Load...
- Page 43 Miscellaneous screen This screen displays: • The temperature of the inverter bridge. • The total operating time for the UPS (in hours). • The total operating time for the inverter (in hours). metering MISCELLANEOUS InvHeatsink 35 ° C alarms – UpsOperTime = 3125h InvOperTime =...
-
Page 44: Alarms
– scrolls backward to the previous screen. display the main screen for this mode. The events displayed are the standard GE events as described in the Section 7.7 - EVENTS (Alarms & Messages). The information displayed includes: • The exact date and time when the event occurred. -
Page 45: Parameters
PARAMETERS The Parameters mode is entered any time the parameters button is pressed. The LCD will display a series of screens containing the user parameters, accessible without password protection. The buttons perform the following functions: metering abandon Parameters mode and enter Metering mode. alarms abandon Parameters mode and enter Alarms mode. - Page 46 3 – Scroll to the next screen (+). The third screen is displayed. metering Tel1:002186394567 Tel1 enabled: alarms – Tel2:004017464340 Tel2 enabled: parameters 4 – Move the selection (underscore cursor) to the next parameter in this page (-). metering Tel1:002186394567 Tel1 enabled: alarms –...
-
Page 47: Edit Mode
EDIT MODE The Edit mode is entered from the Parameters mode when the ok button is pressed. During this mode the LCD will display a special editing screen for the parameter being edited. The screen contents during Edit mode is: •... - Page 48 3 – Change the selected character (-). metering EDIT MODE PHONE NUMBER 2 alarms – 005017464340 + SCROLL - CHANGE parameters 4 – Change the selected character (-). metering EDIT MODE PHONE NUMBER 2 alarms – 006017464340 + SCROLL - CHANGE parameters 5 –...
- Page 49 3 – Change to 4800. metering EDIT MODE PRINTER BAUDRATE alarms – 4800 + SCROLL - CHANGE parameters 4 – Press ok: the screen will return to parameters mode saving the new value. metering PRINTER SETUP Baud=4800 Parity=O alarms – Bits=8 Handshake=XON Print All = N parameters...
-
Page 50: Meaning Of The User Parameters
MEANING OF THE USER PARAMETERS Pressing the Parameters button displays a series of screens containing the user parameters on the LCD panel. This first parameter level in not protected by password, therefore the user can freely adapt these parameters to their needs. The meaning of the user parameters and their use is described below (buttons performance is described to Section 7.3). - Page 51 Telephone numbers m e te rin g Tel1 : Tel1 en ab led : N a la rm s – Tel2 : Tel2 en ab led : N p a ra m e te rs Tel1 This parameter specifies a first telephone number to be used for modem dial-out. The telephone number has a maximum 39 characters and cannot contain blanks.
- Page 52 Printer Set-up The UPS is capable of communicating to a serial printer, to printout disparate information. Please be sure to have a serial printer, that is a printer with a serial RS232 interface. This is the only printer-interface supported by the UPS. m etering PRINTER SETUP Baud=2400 Parity=O...
- Page 53 Operation SEM mode selection (Super Eco Mode) m etering SEM M ODE Y d1 d2 d3 d4 d5 d6 d7 alarm s – H OURS SELECTED 24 24 12 12 12 12 12 param eters SEM MODE: This parameter (values Y / N) enables or disables the operation in SEM mode (Intelligent Energy Management).
- Page 54 Example 2: SEM STOP before SEM START. SEM START 18:00, SEM STOP 06:00 for weekday d4 - Tuesday. Means that on d4 - Tuesday the SEM mode is active between 00:00 and 06:00 and between 18:00 and 23:59. Weekday - Saturday - Sunday - Monday - Tuesday...
- Page 55 Example 5: An equivalent set of parameters for Example 4 is. Weekday - Saturday - Sunday - Monday - Tuesday - Wednesday - Thursday - Friday SEM START 00:00 00:00 18:00 18:00 06:00 09:00 12:00 SEM STOP 23:59 20:00 18:00 06:00 06:00 09:00...
-
Page 56: Description Of The Chinese Lcd Operation
DESCRIPTION OF THE CHINESE LCD OPERATION All the functions implemented for the standard 4 x 20 LCD are implemented in the Chinese version too. Due to the limitation of the number of characters the viewing of various screens is implemented by scrolling. -
Page 57: Events (Alarms And Messages)
EVENTS (ALARMS AND MESSAGES) Each of the following listed events can be displayed on the LCD screen or on PC where the “PowerJump Manager” or “PowerJump DataShield” is installed. Alarms and Messages are differently specified because the alarms are indicating an abnormal functioning of the UPS (which are additionally signalled with the LED alarm and acoustically with the buzzer), while the messages indicate the various states of operation of the UPS (stored in the events list, but not activating the LED alarm and the buzzer). - Page 58 Code Alarms Meaning Rectifier voltage hasn’t reached the set value (probably fault on RECTIFIER 4140 regulation loop). CONTROL FAILURE LED 3 on control panel is blinking. Inverter output fuses blown (F5, F6, F7). INVERTER 4301 Signalled by trip indicators. FUSES FAILURE Inverter can be started manually after replacement of fuses.
- Page 59 Load is locked on mains because 3 transfers on mains have been detected in a short time, defined by parameter (default 30 LOAD LOCKED 4530 seconds). ON MAINS The transfer will be free after a time defined by parameter (default 30 sec.). LOAD ON MAINS BY Load is transferred to mains because the error detector 4531...
-
Page 60: Messages List
7.7.2 Messages list Code Message Meaning The microprocessor has detected an incorrect operation: WATCHDOG 4002 transfers the load on mains and performs a program reset. RESET The inverter will restart automatically and will supply the load. RECTIFIER Rectifier input mains is again within the admitted tolerance 4111 MAINS OK (voltage, frequency and phase). - Page 61 Code Message Meaning LOAD Push-button “load off” on the UPS Control Panel has been 4561 pressed, with the output circuit breaker Q1 closed. DETOUR The auxiliary contact indicates that manual bypass Q2 was 4562 closed. DETOUR The auxiliary contact indicates that manual bypass Q2 was 4564 opened.
-
Page 62: Event Report Sitepro
7.7.3 Event report SitePro In case of failure or malfunctioning, before calling the nearest Service Centre, please note the most important data of your UPS and the most recent events. In order to make the diagnosis easier from our Diagnostic Centre we suggest you make a copy of this page, fill it out with the requested data and send it by fax Unit No.: Series No.:... -
Page 63: Operation
8 OPERATION This symbol refers to the operations of a parallel system. These steps are not applicable for single units. 8.1 START-UP PROCEDURES Verify that the input/output connections have been performed by qualified personnel before connecting mains input voltage and verify that the equipment is correctly grounded. Only open the front door, do not remove any panels. -
Page 64: Initial Start-Up
8.1.1 Initial start-up NOTE ! Before proceeding to turn on the UPS system, ensure that the AC and DC external isolators are OFF, and prevent their inadverted operation. Ensure that the output load distribution can be powered and all the output isolators are open. - Page 65 5. Close the output switch Q1. The UPS output terminals must be supplied by the mains power through the automatic bypass. The LCD display must indicate the status “LOAD ON BYPASS”. Now the control panel should indicate a normal situation (No alarms). LED “service check”...
- Page 66 For parallel systems perform the following procedure on each unit, starting from unit no. 1. 1. Switch ON the mains voltage – As for the single version. 2. Check for correct phase rotation – As for the single version. 3. Close the input switch Q4 – As for the single version. 4.
-
Page 67: Start-Up Procedure After Maintenance Shut Down
8.1.2 Start-up procedure after maintenance shut down. NOTE ! UPS system has been turned OFF following the maintenance shut down procedure and the load is still powered by the maintenance switches Q2. The load must be transferred back to the UPS system. Open the front door and make sure that: The safety screens are fixed in their position. - Page 68 For parallel systems perform the following procedure on each unit, starting from unit no. 1. 1. If not already supplied (separate mains inputs), switch-ON the mains power to the rectifier input. 2. Close the input switch Q4 – As for the single version. 3.
-
Page 69: Start-Up An Additional Unit In A Redundant Parallel System
8.1.3 Start-up an additional unit in a redundant parallel system. Initial situation: The load is still powered by the other units supplying the parallel bus. This unit will be powered on and connected to the parallel bus in order to share the load with each other's. -
Page 70: Shut Down Procedures
This symbol refers to the operations of a parallel system. These steps are not applicable for single units. 8.2 SHUT DOWN PROCEDURES Different procedures can be followed to turn Off the UPS parallel system: • Complete Shut Down SitePro single and parallel UPS system. The UPS system and the critical load have to be completely powered down. -
Page 71: Complete Shut Down
8.2.1 Complete Shut Down NOTE ! Follow this procedure only in case the UPS system and the load must be completely powered-down. Initial situation: The load is powered by the unit(s) supplying the parallel bus. The UPS parallel system must be completely powered down. With the UPS in normal operation and the inverter supplying the load, the switches Q1 and Q4 are ON, Q2 is OFF, and the external battery circuit breaker or battery fuses inserted. - Page 72 For parallel systems perform the following procedure on each unit, starting from unit no. 1. WARNING! Before doing the following operations, make sure that you have shut down all equipment, which is normally powered by the UPS. 1. Switch OFF all the inverters by pressing the key “O” on the control panel of each unit. NOTE ! Pressing the key "OFF"...
-
Page 73: Maintenance Shut Down Of Ups System
8.2.2 Maintenance shut down of UPS system WARNING ! Not following this procedure can cause protected loads to shut down! Never close or open either Q1 or Q2 with the inverter running. Initial situation: The load is powered by the UPS. The complete UPS system has to be turned OFF, while providing the load power by mains through the maintenance bypass switch Q2. - Page 74 For parallel systems perform the following procedure on each unit, starting from unit no. 1. 1. Switch OFF all the inverters by pressing the key “0” on the control panel of each unit. NOTE ! While the system is redundant, pressing the key "OFF" shuts down the inverter and it will stay OFF.
-
Page 75: Shut Down Of A Single Unit Ups In A Parallel System
8.2.3 Shut down of a single unit UPS in a parallel system INITIAL SITUATION: The load is powered by the UPS redundant parallel system. One unit of the system has to be turned Off, while the load is shared between the other units supplying the parallel bus. -
Page 76: Customer Interface
CUSTOMER INTERFACE CUSTOMER INTERFACE Serial port J3 - RS232 (sub D - female 9 pin) Suitable for IMV protocol Pin 2: TX (out) Pin 3: RX (in) Pin 5: GND J2 (sub D-female 25p) – Output signals on voltage free contacts J2 / 1, 2, 3 NO, C, NC Mains Failure... -
Page 77: Serial Port J3 - Rs232 (Sub D, Female 9 Pin)
Total remote management of the system using new generation software JUMP (Java Universal Management Platform) for system protection and management of systems using GE UPS. JUMP system is written in JAVA and supports virtually all platforms having “JAVA runtime environment”. -
Page 78: Output Signals On Voltage-Free Contacts
9.1.3 Output signals on voltage-free contacts The interface board provides 6 voltage free relay contacts giving some UPS critical alarms and operation mode. These signals are available either on connector J2- (sub D, female 25 pin) or terminal blocks X1. The meaning of the alarms on the free contacts in standard configuration (default) is the following: X1 / 1, 2, 3 J2 / 1, 2, 3... -
Page 79: Epo (Emergency Power Off)
9.1.5 EPO (Emergency Power Off) Be aware: The reliability of the system depends on this contact NC (Normally Closed)! An external Emergency switch (Normally Closed voltage- free contact) can be connected on terminals X2 / 1, 2 or connector J2 / 12, 25 of the P4 - Interface Customer. Remove the cable short-circuiting terminals X2 when using this external switch. -
Page 80: Gen Set Signalling (Gen On)
9.1.6 Gen Set Signalling (GEN ON) If an emergency generator set supplies the UPS in case of Mains Failure and the generator is considerably unstable in frequency, it should be suitable to install the signal “Generator ON” on X1 / 11, 22 or J2 / 11, 24). -
Page 81: Options
Simple Network Management Protocol The Advanced SNMP Card is an interface to the Ethernet Network, and provides UPS information via the standard SNMP Protocol (UPS-MIB (RFC-1628); GE Single MIB; GE Parallel MIB). The UPS can therefore be managed by a Network... -
Page 82: Options In Additional Cabinets
10.3 OPTIONS IN ADDITIONAL CABINETS Rectifier and/or bypass transformer Located in additional cabinet 500 mm. harmonic filter Located in additional cabinet 500 mm. 12 pulses rectifier without galvanic isolation Located in additional cabinet 500 mm. 12 pulses rectifier with galvanic isolation Located in additional cabinet 500 mm. -
Page 83: Disposition Options
10.4 DISPOSITION OPTIONS = Standard SitePro 60 kVA harmonic trap input filter = Rectifier and/or bypass transformer = Battery cabinet 750 mm / 29.53” 2a = 12 pulses rectifier with/without galvanic isolation = Battery cabinet 1100 mm / 43.30” The following table shows the weights in kg / lbs of the most common configurations: 12 pulses 12 pulses Rectifier... -
Page 84: Connection For Options
10.5 CONNECTION FOR OPTIONS WARNING ! The installation and cabling of the options must be performed by QUALIFIED SERVICE PERSONNEL only. MAKE SURE THAT THE UPS INSTALLATION IS COMPLETELY POWERED DOWN. Refer to the “Safety prescriptions - Installation” described on Section 1. 10.5.1 Auxiliary Power Supply (APS) 24 VDC PA = Auxiliary Power Supply 24 VDC XB = Terminals for connection... -
Page 85: Top Cable Entry Box
10.5.2 Top cable entry box Fig. 10.5.2-1 Top cable entry box assembly In case the power cables enter the UPS cabinet by the top, an optional “Top Cable Entry Box” must be provided: • Remove the bottom grid “A” from the left side of the UPS cabinet. •... -
Page 86: Remote Signalling Box (Rsb)
Alarm AUX. BUZZER yellow/brown STOP OPERATION Mute Test GE Digital Energy P.S.: The above mentioned colors are suitables only for XY standard cable 216mm 8 1/2" Fig. 10.5.2-1 Remote Signalling Box connection Terminals X3, X4 and X15 fitted inside the Remote Signalling Box. -
Page 87: Maintenance
If this lamp lights up during the normal operation, that means that the unit has not been serviced for the last 20’000 hours by an GE trained technician. We highly recommend that you contact your Service Centre for preventive maintenance work. - Page 88 UPS room conditions and temperature The UPS room and the battery room have to be maintained clean and free from dust. A high temperature of the UPS room and of the battery room affect the lifetime of several components inside the equipment. The battery is very sensitive to room temperatures above 25°C (77°F).
-
Page 89: Notes
12 NOTES 12.1 NOTES FORM It is recommended to note in this section Notes, with date and short description all the operations performed on the UPS, as: maintenance, components replacement, abnormal situations, etc. Date Description Done by Modifications reserved Pagina 89/90 OPM_SPE_XXX_60K_60K_7GB_V010.doc Operatine Manual SitePro 60 kVA... -
Page 90: Annex
13 ANNEX 13.1 TECHNICAL DATA SHEETS Can be found included in the last section and are listings of the technical data of the UPS. 13.2 TECHNICAL DIAGRAMS These are included in the last sections and include assembly layouts and functional drawings. Modifications reserved Pagina 90/90 OPM_SPE_XXX_60K_60K_7GB_V010.doc...