Table of Contents
Advertisement
Quick Links
Advertisement
Table of Contents

Related Manuals for Yamaha RX7


Summary of Contents for Yamaha RX7
- Page 1 YAMAHA ® AUTHORIZED PRODUCT MANUAL DIGITAL RHYTHM PROGRAMMER...
- Page 2 YAMAHA DIGITAL RHYTHM PROGRAMMER OWNER’S MANUAL...
-
Page 3: About This Manual
“rap screams” as well. One hundred (!) digitally recorded voices are yours for the choosing. We wish you years of enjoyment with your new RX7, the ultimate rhythm ( + bass + backing + melody) programmer. -
Page 4: Table Of Contents
CONTENTS GETTING ACQUAINTED WITH THE RX7 REAL TIME WRITE ........10 ... 1 TIME SIGNATURE AND BASIC CONNECTIONS ............. 10 PATTERN LENGTH ..........POWER ......10 WRITING A PATTERN • ..........AUDIO ..10 Writing with the Instrument Keys •... - Page 5 CHAINS JOB#02: RECEIVE CHANNEL....34 ............. JOB#03: TRANSMIT CHANNEL ....35 JOB#01: CHAIN PLAYBACK..... 23 JOB#04: NOTE NUMBER ASSIGN ..35 JOB#02: CHAIN EDIT ........ JOB#05: NOTE INITIALIZE ....... 36 JOB#03: CHAIN NAME ......23 JOB#06: PITCH BEND RANGE ....36 JOB#04: CHAIN CLEAR ......
-
Page 6: Getting Acquainted With The Rx7
• Mono Sound System To get an idea of how versatile the RX7 is, next call up de- If you only have a mono amplification system available, be monstration Song No. 01, “TROPICAL”, which has a totally sure to connect it to the RX7 L/MONO OUTPUT different atmosphere. - Page 7 This completes programming of a popular, basic 16-beat rhythm Pattern. Press STOP/CONTINUE to exit from the Real Time Write mode, then listen to your new Pattern without the metronome click by pressing START. Basically, that’s all there is to creating your own rhythms with the RX7!
-
Page 8: Basic Concepts And Features
BASIC CONCEPTS AND FEATURES The RX7 has so many features, it may seem a bit intimidating at first. On the other hand, when you hear the demonstration programs, you will no doubt want to learn how to create complex accompaniment arrangements like that for your own music. -
Page 9: Sequences-Patterns, Songs And Chains
A Pattern consists of one or more bars (measures), and can be input (programmed) either in real time, i.e. live, or step Take a look at the RX7 control panel illustrated below. It by step. has been organized into four functional groups of keys con-... -
Page 10: Writing On The Rx7
(as do SONG and EDIT SONG for certain operations). EDITING All Jobs and their numbers are listed on the control panel With the RX7, it is very easy to correct or alter Patterns in Job Menu for easy reference. almost any conceivable way AFTER they have been written. -
Page 11: Programming
The following sections of this Manual provide a detailed, • Add Finishing Touches: Editing systematic guide to all RX7 operations. You can locate the Once you have written a Song (or some Patterns), you can desired function by first having a look at the CONTENTS,... -
Page 12: Sound Data And Memory Configuration
SOUND DATA AND MEMORY CONFIGURATION... -
Page 13: Patterns
* Edit Patterns by adjusting the pitch, level, pan, decay and effect on/off settings for each note. * Check which voices/parameters were used in any Pattern. When power is turned on, the RX7 is automatically set for Pattern Selection, i.e. it is in Pattern Mode. * To use Pattern functions, always enter Pattern Mode first. -
Page 14: Tempo
1 . Press CLICK/TEMPO CHANGE. The lower line of the by turning Quantize OFF. (Actually, even when this function display will show the current Click rate and whether the is OFF, the RX7 is still quantizing to an extremely fine rate Click metronome is on or off. of 1/96.) -
Page 15: Step Write
Click guide. If the Pattern is longer than OPERATION one bar, the LCD will indicate the current bar number as the RX7 cycles through the Pattern. TIME SIGNATURE AND PATTERN LENGTH Adjust Tempo and Click if necessary. Once you get the 1 . -
Page 16: Writing With A Midi Keyboard
* If you want to use voices currently not assigned to any the sound will be damped immediately. instrument keys, use KEY ASSIGN JOB #0l prior to * As long as the DAMP LED is lit, all RX7 Instrument keys writing. are damped and cannot be used to play any voices. -
Page 17: Stepwrite
If even this fails and you still can’t write the BD line in beat QUANTIZE HI-HAT Real Time, all is not lost - you can do it with Step Write. 1/16 STEPWRITE FUNCTION Create or alter a Pattern step by step. In this mode, you can take your time entering one note after the other. -
Page 18: Swing
A setting of 67% creates a triplet-type shuffle effect. Step Write PTN10 bar01 : beat001 Current bar Current beat (step) 3. Input (write) the desired voice by tapping its Instrument SWING=67% key. Rests or blank steps are input by pressing + l/YES. Voices can be heard when input and during successive cycles. -
Page 19: Pattern Copy/Append
• With this function, you can create new, larger CLEARING ENTIRE PATTERNS APPEND: Patterns by joining existing ones, appending 2 . Press numeric key 1 to specify Pattern Clear. The display one Pattern to the end of the other. will ask you to confirm: * Only Patterns with the same time signature can be joined. -
Page 20: Edit Pattern
Write while DAMP was on. No sound will be heard for note. this note. One of the most versatile and creative functions of the RX7, * If you want to select an instrument currently not played Edit Pattern lets you step through a Pattern note by note,... -
Page 21: Songs
Name and Initial Tempo are called up by a Job number according to the menu above ACCENT 1. * To use Song functions, first make sure that the SONG LED is lit, showing that the RX7 is in Song Mode. -
Page 22: Repeat Playback
In order to make room for the inserted Part in an existing STOP/CONTINUE again. Pressing START instead re- song, the RX7 shifts all subsequent Parts forward. Example: commences playback from the beginning of the Song. To insert a Part consisting of Pattern 99 between Parts 02 and 03, select Part 03 for insertion. -
Page 23: Repeat Commands
You can now input the desired number of repetitions REPEAT COMMANDS with the numeric keys and then continue editing. FUNCTION Enters Repeat commands in a Song for re- PART COPY petition of specified Parts. Instead of entering the same Pattern numbers over and over FUNCTION Copy a specified number of consecutive Parts again in a Song, you can use Repeat commands. -
Page 24: Tempo Change Commands
Enter the three-digit numbers of the first and final Parts of the section to be copied, then press + 1/YES or EN- TER to complete data input. Copying is completed, and the LCD will display the number of the empty Part location now following the end of the copied section. -
Page 25: Song Copy
2. Press numeric key 1 to select Up or key 2 for Down. 2. Press + 1/YES. The LCD will ask Input the degree (value) of volume change with the nu- meric keys. 3. Press + 1/YES to confirm (or - 1/NO to cancel Song SONG COPY Clear). -
Page 26: Job#02: Mark Set
Should you make a mistake during number entry Lower case letters can be input by holding down (for instance forgetting to start with a zero for SHIFT/COMPARE while pressing a letter key. numbers under 100), the display will show The cursor is moved backward and forward with the - 1/NO and +1/YES keys. - Page 27 OPERATION 1. Select the Song whose initial tempo you want to set, enter Edit Song mode and select Job #04. The lower line of the display will show whether the Initial Tempo setting is on or off. If necessary, turn Initial Tempo on with + 1/YES. (Initial Tempo can be turned off by pressing - 1/NO, then ENTER.) Press ENTER to display the current Initial Tempo value.
-
Page 28: Chains
* Select a Chain and play it at the desired tempo. * Erase (clear ) a Chain. On the RX7, the word “Chain” refers to a combination of Songs, ordered as “Steps ” within the Chain. You can thus create accompaniment sequence s for whole groups of Songs, either for live performance or recording. -
Page 29: Job#04: Chain Clear
Input a Chain name of up to eight characters as explained above for Mark name entry. Pressing ENTER afte r writing the Chain name returns you to the Chain Playback display . JOB #04: CHAIN CLEAR FUNCTION Erasing entire Chains . OPERATION Select the Chain you want to eras e and enter Job #04. -
Page 30: Edit Voice
EDIT VOICE OVERVIEW The Edit Voice mode lets you: * Edit (alter) parameters such as pitch, level or pan position for any voice. * Create special effects for individual voices, including pitch bends, vibrato and tremolo. * Store edited data in the internal memory. * Reset an edited voice to its original values. -
Page 31: Job#02: Pitch
(Lost data can be retrieved from the edit recall buffe r with Job #09.) The expression “bend ” as used for th e RX7 r efers to linear pitch bend effects which automatically raise or lower the pitch of a note while it is being played. -
Page 32: Job#06: Pan
Adjust the volume (= level) with the DATA slider or 3. Confirm by pressing + 1/YES, or press - 1/NO to cancel. - 1/NO and + 1/YES keys. If you chose YES, the message JOB #06: PAN FUNCTION Sets basic pan position of selected voice. will appear, and the “e”... -
Page 33: Job #10: Lfo
Set LFO parameters for selected voice. which can be avoided by raising the poly number. On th e RX7, LFOs (Low Frequency Oscillators) can be used The poly number value is also set to over 1 with instruments to alte r th e pitch and/or volume of voices for a variety of such as Brass or DX7-Orchestra when these are to be used effects such as vibrato, tremolo or “distortion”. - Page 34 Range Function Parameter 1: Simul number 2 ~ 4 Determines number of “repeats”. 2: Delay time Time between repeats (in units of 10 milliseconds). 0 ~ 5 0 3: Pitch -600 ~ +600 Pitch difference between the individual repeat sounds and the original sound (in units of 10 cent). 4: Level -63 ~ +63 Volume difference between the individual repeat...
-
Page 35: Key Assign
KEY ASSIGN OVERVIEW The Key Assign mode lets you: * Assign any voice to any Instrument key. * Assign one voice to the whole upper row of Instrument keys. * Alter the pitch, level, pan and decay of voices for each Instrument key. * Adjust the accent levels for each Voice. -
Page 36: Job#03: Multi Voice
Example: The MULTI LED lights up, and you can now continue immediately with Multi Step setting as described below. JOB #04: MULTI STEP FUNCTION The above display means that the decay value of 16 for the To change the pitch, level, pan and/or decay selected key is 5 units larger (+) than the basic Edit Voice of the Multi Voice for each upper-row In- value of 11. -
Page 37: Job#05: Accent Level
that key will then sound the same, since they are “overstepping” the minimum/maximum Edit Voice value. If this happens, you may want to alter the respective Edit Voice parameter value. 1: PITCH Step - 2 0 0 ~ + 2 0 0 cents (in 10-cent steps), Select the voice whose Accent you wish to program with i.e. -
Page 38: Job#07: Key Data Save
Input the desired Key Data parameter number with the respective numeric key and and press + 1/YES. * Data numbers 1 through 4 correspond to the Key Data saved with Job #07, while numbers 5 through 9 call up layouts that are permanently stored in the RX7 memory. -
Page 39: Midi
For examples, they allow you to: * Play any or all RX7 voices from up to 16 external keyboards and/or sequencers by assigning MIDI note numbers to each RX7 instrument and MIDI channels to as many as 16 of them. -
Page 40: Job#03: Transmit Channel
“p” and OFF (“-”). RX7 voice as a sound source (if that channel is set to “p” with Job #02). * Attempting to specify “v” for more than one channel turns * Also read the information concerning Jobs #02 and #03. -
Page 41: Job#05: Note Initialize
2. To switch between the two types of displays. “Note * The RX7 can not memorize this kind of MIDI pitch bend number assign to voice” or “Note number assign to data as a sequence data. This function is provided to en- pitch”, use numeric key 1 (Voice) or 2 (Pitch). - Page 42 Transmit bulk data to other MIDI equipment. To be able to use this function, the external MIDI device must be set to receive bulk data. Make sure that the same device number is selected on both the RX7 and the other MIDI device. OPERATION 1.
-
Page 43: Sync
RX7's Internal Clock, whose speed can be adjusted with the Tempo functions. With Sync set to Internal, you can also use the RX7 to control the Clock rate of external MIDI devices such as sequencers or other drum machines from the RX7 MIDI OUT terminal. -
Page 44: Utility
This is a very helpful function when you want to try out different voice combinations for Patterns after having pro- grammed them. FUNCTION Erases all Patterns from the RX7 memory. * If you only want to change voices in a single Pattern, it OPERATION must be selected before using this Job. -
Page 45: Job#06: All Songs Clear
1, 2 or 3. Press +1/YES. Confirm by pressing +1/YES again. Confirm by pressing +1/YES again. JOB #06: ALL SONGS CLEAR FUNCTION Erases all Songs and Chains from the RX7 memory. OPERATION 1. Select Job #06. Press +1/YES. Confirm by pressing +1/YES again. -
Page 46: Cassette/Cartridge
#30 (Format new RAM 4 cartridges for use in RX7.) * “All” means the entire data currently stored in the RX7 memory, i.e. sequence data for up to 100 Patterns, 20 Songs and 3 Chains and/or all current voice data. -
Page 47: Job#01-05: Save Data
You can now specify the number of the Pattern to be the following data: saved as well as the desired destination in the RAM The 5 sets of Key Data currently stored in the RX7 cartridge. (Use ACCENT 2 to switch between The accent levels of all voices them.) -
Page 48: Job#11-15: Load Data
3. Enter the Pattern number directly with the numeric keys, then press +1/YES. The display will ask you to confirm: then 4. Press +1/YES again. The display will show “executing”, then “completed”. indicating that the data has been loaded to the RX7. -
Page 49: Job#21-25: Verify Data
3. You can now specify the Pattern number and cartridge Refer to the CASSETTE/CARTRIDGE Menu on the RX7 location you want to verify. (Use ACCENT 2 to switch front panel and the TABLE OF CASSETTE/CARTRIDGE between them.) -
Page 50: Job#30: Format Cartridge
Any new RAM4 Data Cartridge (or one that has been pre- viously used with other equipment) has to be formatted with this Job before it can used with the RX7. Make sure that the cartridge is inserted correctly, with the MEMORY PROTECT switch set to OFF. -
Page 51: Error Messages
ERROR MESSAGES You have probably already encountered some of the error messages mentioned in preceding sections. In general, the RX7 will display an error message if: * An operating mistake has been made. * Memory or other limits have been reached. - Page 52 You have tried to save, load or verify a Pattern no data! containing no data. You have tried to verify cartridge data, but the RX7 1. Save the data again, then execute the Verify contains different data than that contained in the operation once more.
-
Page 53: Specifications
(e.g., Single Pattern data) but the tion once more. data error RX7 contains different data to that contained on the cassette. There is a checksum data error in data that you have Repeat the Load or Verify operation, making sure tried to verify or load from cassette. -
Page 54: Midi Implementation C H A R T
[ D i g i t a l R y t h m P r o g r a m m e r ] D a t e : 9 / 1 8 , 1 9 8 7 M o d e l M I D I I m p l e m e n t a t i o n C h a r t V e r s i o n : 1 . -
Page 55: Drum Set" Chart
RX7 “DRUM SET” CHART Write voice names on the corresponding instrument keys PAN POSITIONS PAN VALUE JOB #02 PITCH DECAY JOB #03 JOB #04 BEND JOB #05 VOICE LEVEL JOB #06 JOB #02 PITCH write offset values LEVEL combined values DECAY See p.33 for reference. -
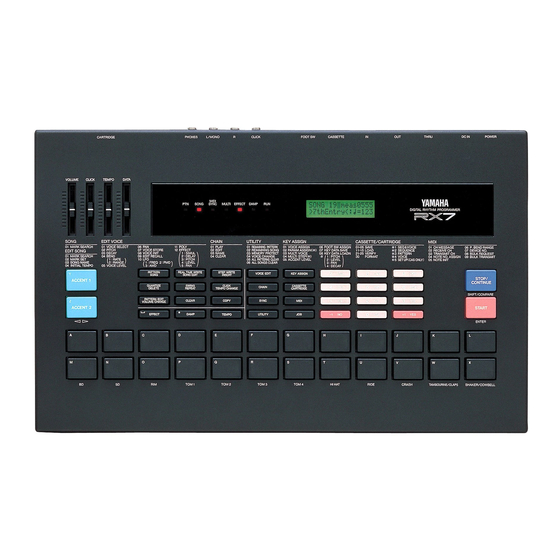
Page 56: Control & Rear Panel
CONTROL & REAR PANEL ***CONTROL PANEL*** VOLUME CLICK TEMPO DATA P T N SONG MIDI SYNC MULTI EFFECT DAMP STOP/CONTINUE START Instrument keys ACCENT 1, 2 Pattern/Song keys EFFECT DAMP TEMPO Mode/Job keys Numeric key pad -1 NO / +1 YES keys Job Menu ***REAR PANEL*** POWER ON/OFF... - Page 58 This series of Yamaha professional music equipment uses frequencies that appear in the radio fre- quency range and if installed in the immediate proximity of some types of audio or video devices (within three meters), interference may occur.
- Page 59 YAMAHA YAMAHA CORPORATION P.O. Box 1, Hamamatsu, Japan VE17510 88 04 1.0 R3...
- Page 60 Recyclable ® YAMAHA RX7 OM Yamaha Corporation of America 6600 Orangethorpe Avenue, P.O. Box 6600, Buena Park, CA 90622-6600 Recycled 11/17/98 98109...