
Related Manuals for Kenwood KDC-D300


Summary of Contents for Kenwood KDC-D300
- Page 1 KDC-D300 CD-PLAYER INSTRUCTION MANUAL COMPACT © B64-1430-00 (E) (MC) DIGITAL AUDIO 00/2 1 99/12 11 10 9 8 7 6 5 4 3 2 1...
-
Page 2: Table Of Contents
Contents Before use Safety Precautions ...3 Handling Compact Discs ...5 Operations Buttons and Display ...6 Playing CDs ...6 Switching Spectrum Analyzer Display...7 Presetting Disc Names ...7 Eject ...8 Display Level Adjustment ...8 Theft Deterrent Faceplate ...8 Installation Accessories...9 Installation Procedure...10 Connections ...11 Installation ...11 Troubleshooting guide ...13... -
Page 3: Safety Precautions
• If the unit starts to emit smoke or strange smells, turn off the power immediately and consult your Kenwood dealer. • Make sure not to get your fingers caught between the faceplate and the unit. - Page 4 Right after you turn on the car heater in cold weather, dew or condensation may form on the lens in the CD player of the unit. Called lens fogging, CDs may be impossible to play. In such a situation, remove the disc and wait for the condensation to evaporate.
-
Page 5: Handling Compact Discs
Handling Compact discs Playing a CD that is dirty, scratched or warped can cause the sound to skip and the unit to operate incorrectly, resulting in worsened sound quality. Take the following precautions to prevent your CDs from getting scratched or damaged. Handling CDs •... -
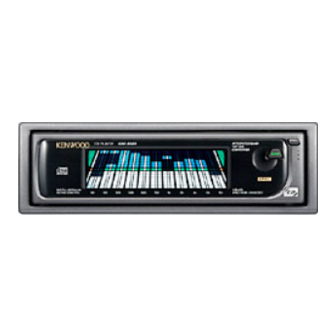
Page 6: Operations Buttons And Display
Operations Buttons and Display CD PLAYER KDC-D300 DIGITAL OPTIMUM SERVO CONTROL Setting of the O-N switch will be required depending on the Centre unit that is to be connected. (See Page 10.) The operations you perform and the resultant operation of the unit will differ depending on the setting of the O-N switch. -
Page 7: Switching Spectrum Analyzer Display
Switching Spectrum Analyzer Display You can select the display to enjoy sounds with eyes. Operation for "N" Setting: Each time you press the DISP button, the spectrum analyzer display switches as following table; Operation for "O" Setting: Selecting CD play source mode. Each time you press the DISP button, the spectrum analyzer display switches as follows;... -
Page 8: Eject
Press the release button and drop open the faceplate. In its dropped condition, whilst drawing the faceplate to one side, pull it to the front and remove it. Release button CD PLAYER KDC-D300 INTEGRATED QUAD 1 BIT D/A CONVERTER DISP... -
Page 9: Accessories
Reattaching Faceplate: Hold the faceplate so that the operation face faces the front toward you and press until it locks. The faceplate will be set and the unit will be operational. NOTE When there is difficulty in setting the faceplate, align the depression on the left side of the faceplate with the shaft of the unit, then lock. -
Page 10: Installation Procedure
• Mount the unit so that the mounting angle is 30° or less. Connections Centre unit Control input KDC-D300 Speaker input cable( 2CAUTION If the speaker input cable is not connected, or connected wrongly, the spectrum analyser will not be displayed. -
Page 11: Installation
Installation Installation Firewall or metal support Accessory2 Metal mounting strap Self-tapping (commercially available) screw (commercially available) On cars where there is no compartment in the centre for installing a car audio unit: Use the spacer 3 to affix the centre unit sleeve and the sleeve attached to the main unit in such a way that they are correctly aligned both depthwise and horizontally. - Page 12 Installation Removing the hard rubber frame Engage the catch pins on the removal tool and remove the two locks on the lower level. Lower the frame and pull it forward as shown in the figure. Lock Accessory1 Removal tool When the lower level is removed, remove the upper two locations.
-
Page 13: Troubleshooting Guide
Troubleshooting Guide What might seem to be a malfunction in your unit may just be the result of slight misoperation or miswiring. Before calling service, first check the following table for possible problems. PROBLEM The disc control mode cannot No cable has been connected to the disc changer input be selected. - Page 14 Press the reset button on the centre unit. If the "E- 99" code does not disappear, consult your nearest service centre. The protective circuit in the unit activates when the temperature inside the CD player exceeds 60°C (140°F), stopping all operation.
-
Page 15: Specifications
Specifications Specifications subject to change without notice. CD player section Laser diode ...GaAlAs ( =780 nm) Digital filter (D/A)...8 Times Over Sampling D/A Converter ...1 Bit Spindle speed ...500 – 200 rpm (CLV) Wow & Flutter ...Below Measurable Limit Frequency response (±1 dB) ...5 Hz – 20 kHz Total harmonic distortion (1 kHz) ...0.01 %...