
Related Manuals for Uniden XDECT 8155 Series


Summary of Contents for Uniden XDECT 8155 Series
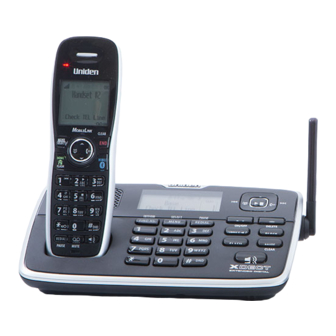
- Page 1 XDECT 8155 Series For more exciting new products please visit our website: Australia: www.uniden.com.au New Zealand: www.uniden.co.nz...
-
Page 2: Important Safety Instructions
IMPORTANT SAFETY INSTRUCTIONS When using your telephone equipment, basic safety precautions should always be followed to reduce the risk of fire, electric shock and injury to persons, including the following: • This unit is NOT waterproof. DO NOT expose this unit to moisture. • DO NOT expose this unit to rain. - Page 3 *Only 1 repeater is included per combo • If any item is missing or damaged, contact your place of purchase immediately. Never use damaged products! • Need help? Get answers at our website: www.uniden.com.au for Australian model www.uniden.co.nz for New Zealand model.
-
Page 4: Table Of Contents
CONTENTS IMPORTANT SAFETY INSTRUCTIONS ............. 2 INSTALLING YOUR PHONE ................6 Charge the Battery ............................6 Connect the Telephone Cord ........................7 Mounting the base unit on a wall ......................8 Set Up the Repeater ............................9 SETTING UP THE MObILELINk bLUETOOTH™ CONNECTION ....13 GETTING TO kNOW YOUR PHONE ............ - Page 5 FEATURES OF THE XDECT 8155 SERIES • 1.8GHz Extended DECT Technology • Bluetooth MobileLink • Multi (12) Handset Capable • Multi Repeater Capable • Wall Mountable Base • Room Monitor • 10 Speed Dial • Power Failure Mode • Extra Large Backlit LCD Display with Date & Time •...
-
Page 6: Installing Your Phone
INSTALLING YOUR PHONE Charge the Battery 1) Unpack all handsets, battery packs, and battery covers. If any battery cover is already on the handset, press in on the notch and slide the cover down and off. 2) Line up the red and black wires on the battery pack with the label inside the Black handset. -
Page 7: Connect The Telephone Cord
If... Try... • reseating the handset the CHARGE light • checking the AC adaptor does not turn on connection • seeing if the outlet is controlled by a wall switch # Charge all handsets completely (about 15-20 hours) before using them. Connect the Telephone Cord Use the telephone cord to connect the TEL LINE jack to a standard telephone wall jack. -
Page 8: Mounting The Base Unit On A Wall
Mounting the base unit on a wall 1. Connect the AC adaptor and telephone cords as shown below. Remember to route the AC adaptor cord through the channel. 2. Line up the four tabs on the wall mount bracket (two at the top and two at the bottom) with the four notches on the bottom of the base. -
Page 9: Set Up The Repeater
Set Up the Repeater • The repeater is not a telephone; it must be registered to a phone base before using. • Any repeater that came packaged with a base are already registered to that base for you. • For instructions on registering repeaters to the base, see page 49. How it Works Base coverage area The base signal is... - Page 10 Connect the Repeater Power Cord Use the included adaptor to connect the repeater to a regular indoor (240 V AC) power outlet. Wall-mount holes Placing the Repeater Here are a few tips for placing your repeater so that you get the clearest Registration signal and the maximum range: button...
- Page 11 Testing the Location Place the repeater in its final position and connect the AC adaptor. The LINK light will flash for a few seconds, then stay on. If... Try... • checking the repeater’s AC adaptor the Link light • connecting the adapter to a different outlet. doesn’t turn on • making sure the repeater is not near the Link light...
- Page 12 # Remember to use appropriate anchors for the wall material. 2. Keeping the AC adaptor cord out of the way, place the repeater over the screw heads and slide it down into place. To remove the unit from the wall, just slide it up and lift it off the screw heads.
-
Page 13: Setting Up The Mobilelink Bluetooth™ Connection
SETTING UP THE MOBILELINK BLUETOOTH™ CONNECTION The XDECT 8155 with MobileLink technology can connect with mobile phones that support the Bluetooth V2.1 handsfree profile. Visit our website on the front cover or contact customer service for a detailed list of tested mobile phones. • If you are not certain of the profiles supported by your Bluetooth phone or if you have difficulty pairing your phone to the XDECT 8155, see the manual that came with your phone. - Page 14 6. When your phone accepts the Bluetooth connection, the XDECT 8155 sounds a confirmation tone. The Bluetooth device number icon on the base and the handset display light up. # Most mobile phones automatically transfer the audio to a Bluetooth device as soon as it pairs; if yours does not, look in your mobile phone’s Bluetooth setup for a “transfer audio”...
-
Page 15: Getting To Know Your Phone
GETTING TO KNOW YOUR PHONE Parts of the Base FIND HANDSET/ REDIAL/PAUSE INTERCOM PHONEBOOK/LEFT SPEAKER MENU/SELECT CALLER ID/ RIGHT DOWN DELETE BLOCK MUTE/ CLEAR SPEAKER 12-KEY DIAL PAD DO NOT DISTURB ANSWER MACHINE ON/OFF Key (Icon) What it does • While this station is ringing: mute the ringer for MUTE/CLEAR this call only. - Page 16 • In standby: start playing messages. PLAY/STOP • While a message is playing: stop playing messages. • In the menu or a list: exit the menu completely. • In standby or during a call: open the PHONEBOOK/ phonebook. LEFT • In any menu or list: go up one level. (If you are already at the top level, the phone exits the menu and returns to the previous operation.) • During text entry: move the cursor to the left.
- Page 17 • In standby: page a handset using the intercom. FIND HANDSET/ • During a call: put the call on hold & start a call INTERCOM transfer. • In standby: start a speakerphone call (get a dial SPEAKER tone). • During a speakerphone call: hang up. • In standby: start a telephone call using a paired MOBILE Bluetooth phone.
-
Page 18: Parts Of The Handset
Parts of the Handset CLEAR CLEAR/END MENU/SELECT PHONEBOOK HOME HOME/FLASH MOBILE DOWN 12-key dial pad #/DND LOCK REDIAL/PAUSE SPEAKER REDIAL Microphone MESSAGE/MUTE... - Page 19 Key Icon What it does • In standby: open the menu. MENU/SELECT • In the menu or any list: select the highlighted item. • In standby: start a telephone call on your land line HOME/FLASH (get a dial tone). • During a call: switch to a waiting call. • During a call: hang up.
-
Page 20: Reading The Displays
Reading the Displays On the Base Time & Date Status icons Answering system status Message Counter On the Handset Answering system status... - Page 21 The table shows the possible status icons and what they mean. Since the icons appear based on what the phone is doing, you won’t see all the icons at the same time. Icon What it means The signal from the base is 1) weak through 4) strong. The ringer is turned off and will not ring for new calls.
-
Page 22: Using The Menus
USING THE MENUS Press MENU/SELECT open the menu. Press to choose MENU/SELECT the current option. Press and hold to exit the menu. Press PHONEBOOK to rotate DOWN to go back a screen through the options. If you don’t press any keys for about 30 seconds, the handset exits the menu. - Page 23 Bluetooth Setup Menu Use the Bluetooth Setup menu to pair to a mobile phone to the XDECT 8155 and select a mobile phone, if you pair more than one. When you select the Bluetooth Setup Menu, the option Add Mobile displays on the LCD.
- Page 24 Date & Time Menu Use this menu to set the clock. Enter the date (DD/MM/YY) and time, select AM or PM. Use to move the cursor past a digit without changing it. If you have CID service, you can set it to provide the time (Global Setup/ Time Adjustment).
- Page 25 Entering Text on Your Phone Use the 12-key dial pad anytime you want to enter text into your phone (a name in the phonebook, the handset banner, etc.). If two letters in a row use the same key, enter the first letter; wait for the cursor to move to the next space and enter the second letter.
-
Page 26: Using Your Phone
USING YOUR PHONE This section explains the most common functions on the phone. To... From the Landline... From the Mobile... make a call, dial the Press HOME/FLASH Press MOBILE. If two number, then or SPEAKER. or more mobile phone is paired, the phone prompts you to choose one. -
Page 27: Using Your Bluetooth Connection
Using Your Bluetooth Connection After you have paired your mobile phone with the XDECT 8155 (see page 13), you can make and receive calls from your mobile phone through the XDECT 8155. To use the Bluetooth menu options, press MOBILE with the phone in standby, then select a mobile phone. -
Page 28: Changing The Volume
Changing the Volume To change the... When... Press... earpiece volume for you are listening to that to increase the each handset earpiece or speaker volume. (playing messages, to decrease it. DOWN etc.) speaker volume ringer volume (If you The phone is in turn the ringer all standby. -
Page 29: Using The Caller Id And Redial Lists
Using the Caller ID and Redial Lists Caller ID (CID) is a service available from your telephone provider that shows the phone number (and sometimes the caller’s name) of incoming calls. Contact your telephone provider for more information. Caller ID List Redial List • The phone saves the • Each handset remembers the... - Page 30 To.. Press... open the CID list CID, then use the UP and DOWN keys to enter the list. Up to 5 entries display at a time. open the redial list REDIAL/PAUSE UP to select the previous number. scroll through the lists DOWN to select the next number.
-
Page 31: Using Call Waiting
Using Call Waiting Call Waiting, a service available from your telephone provider, lets you receive calls while you are on another call. Caller ID on Call Waiting (CIDCW) service displays Caller ID information for a waiting call. If you get a Call Waiting call, the phone sounds a tone and displays any CID information received from the waiting call. - Page 32 displays a confirmation screen. To cancel downloading, press END/ CLEAR. • Each time you download a phonebook, the XDECT 8155 overwrites any previous copy of that phonebook. The XDECT 8155 automatically cancels the download if it receives an incoming call or someone tries to make an outgoing call.
- Page 33 For individual entry options, select a Mobile Link number and press MENU/ SELECT to display the following options: To.. Press... save this mobile phonebook MENU/SELECT twice to open the entry to the home phonebook menu, then select Store Into PB. edit the current entry MENU/SELECT twice to open the menu, then select Edit.
- Page 34 Chain Dialing If you often have to enter a series of digits or a code number during a call, you can save that code number to a phonebook entry and use the phonebook to send the code number. 1) Make your call normally. 2) When you hear the prompt that tells you to enter the number, open the phonebook and find the entry that contains your code number.
-
Page 35: Using Special Features
USING SPECIAL FEATURES Power Failure Back Up System When a power failure occurs, the charged handset temporarily supplies power to the base unit. You can then make and receive calls using a handset. However, none of the keys on the base unit are functional during the power failure mode. -
Page 36: Dnd (Do Not Disturb)
# Some of the functions are not available under the power failure back up system. Examples are: • You cannot edit the phonebook (For eg, store a number). • Redial/CID will not be stored. • You cannot operate the Answering System • You cannot operate the Bluetooth function. -
Page 37: Multihandset Features
Multihandset Features # To use the features in this section, you need at least 2 handsets. Your base supports a total of 12 cordless handsets: the one that came with the base and up to 11 accessory handsets. You must register accessory handsets to the base before using them. (Handsets that came packaged with the base are already registered.) Handsets that aren’t registered display a Not Registered message. -
Page 38: Privacy Mode
Privacy Mode To activate privacy mode on a land line call in progress, press MENU/ SELECT. As long as privacy mode is on, you’ll see a in the display, and no other handsets can join your call. Privacy mode turns off automatically when you hang up;... -
Page 39: Intercom
Intercom • Whenever the phone is in standby, you can make an intercom call between handsets without using the phone line. • You can make an intercom call from any handset, but only two handsets can be in an intercom call at any time. • If an outside call comes in during an intercom page, the phone cancels the page so you can answer the incoming call. -
Page 40: Using The Answering System
USING THE ANSWERING SYSTEM # The answering system works with landline calls only. Answering System Options (Answering Setup) You can set or change the answering system options from any handset (optional). Just open the menu and select Answering Setup. Select this option... To... -
Page 41: Personalize The Greeting
Personalize the Greeting Your personal outgoing message or greeting can be from 2 to 30 seconds long. If you don’t record a greeting, the system uses a pre-recorded greeting: Hello, no one is available to take your call. Please leave a message after the tone. - Page 42 Play All Messages To... From the base From a handset (Optional) Press PLAY/STOP Press MESSAGE/ MUTE and select Play Messages. play new messages The system announces the number of new & old messages, then plays each new message (followed by the day and time) in the order it was received.
-
Page 43: Screening Your Calls
Screening Your Calls You can use the answering system for call screening. While the system takes a message, you can listen on the base speaker (if you turn on Call Screen) or from a handset. Only one handset can screen calls at a time. If another handset tries to screen calls, it beeps and returns to standby. - Page 44 Dialing In to Your System 1. Call your phone number and wait until the system answers. (If the system is turned off, it answers after 15 rings and sounds a series of beeps.) 2. During the greeting or beeps, press # and immediately enter your security code.
-
Page 45: Important Information
IMPORTANT INFORMATION Solving Problems If you have any trouble with your phone, check this section first. If you need help, visit our website listed on the front cover. General Problems Possible Solutions The phone keeps ringing when You may have to change the line I answer on an extension. - Page 46 Caller ID Problems Possible Solutions • Let calls ring twice before Caller ID information does not answering. display. • Make sure your Caller ID service is active. Multihandset Problems Possible Solutions • Reset the handset (see page 48). I can’t register a new handset. • See if you have 12 registered handsets.
- Page 47 Bluetooth Problems Possible Solutions • Making sure your phone is in pairing The XDECT 8155 won’t pair mode. with my phone. • Check your phone’s manual for instructions on Bluetooth device pairing. • Making sure your phone supports the Bluetooth hands-free profile. • Checking the link order for that phone.
-
Page 48: Installing A Line Filter Or Dsl Filter
Installing a Line Filter or DSL Filter A telephone line filter or DSL filter prevents services that use the phone line from causing interference on your phone. To get a line filter, contact your service provider or look in an electronics store. Plug the filter into the telephone wall jack and plug the base into the filter. - Page 49 Registering Repeaters to the Base If you are having trouble with a repeater or if you want to replace one, you need to register the repeater to the base. # Connect the repeater close to the base for easy access to the necessary buttons and indicators.
- Page 50 • Do not charge the batteries in any charger other than the one specified in the owner’s manual. Using another charger may damage the battery or cause it to explode. # Rechargeable batteries must be recycled or disposed of properly. # Uniden works to reduce lead content in our products and accessories.
-
Page 51: Index
INDEX Line Filter 48 Answering System 40 Liquid Damage 48 Auto Talk 23 Any Key Answer 23 Multihandset Feature 37 Mute 19 Banner 23 Battery 50 Noise 48 Bluetooth 13 Paging Handsets 39 Personal Ring 23 Caller ID 29 Phonebook 31 Call Transfer 38 Power Failure Backup 35 Call Waiting 31... -
Page 52: One-Year Limited Warranty
Please refer to our Uniden website for any details or warranty durations offered in addition to those contained below. Warrantor The warrantor is either Uniden Australia Pty Limited ABN 58 001 865 498 (“Uniden Aust”) or Uniden New Zealand Limited (“Uniden NZ”) as the case may be. - Page 53 Product does not conform with this warranty, you should deliver the Product, together with satisfactory evidence of your original purchase (such as a legible copy of the sales docket) to Uniden at the addresses shown below. You should contact Uniden regarding any compensation that may be payable for your expenses incurred in making a warranty claim.
- Page 56 ©2013 Uniden Australia Pty Ltd/Uniden New Zealand Limited Printed in Vietnam U01UN569BZZ(0)
- Page 57 XDECT 8105WP Waterproof Accessory Handset For more exciting new products please visit our website: Australia: www.uniden.com.au New Zealand: www.uniden.co.nz...
-
Page 58: Save These Instructions
IMPORTANT SAFETY INSTRUCTIONS When using your telephone equipment, basic safety precautions should always be followed to reduce the risk of fire, electric shock and injury to persons, including the following: • The charger is NOT waterproof: Do not use or place the charger near water (e.g., near a bathtub, wash bowl, kitchen sink or laundry tub, in a wet basement or near a swimming pool). - Page 59 Never use damaged products! Need help? Get answers at our website: • www.uniden.com.au for Australian model • www.uniden.co.nz for New Zealand model. Understanding the Waterproof Handset The handset complies with JIS7 water submersion specifications. It can remain submerged under 1m of water for up to 30 minutes without damage or loss of functionality.
- Page 60 INSTALLING YOUR HANDSET Charge the Battery The handset’s rechargeable battery is already installed. Before you can charge the battery, you have to power it on. 1. Remove the cardboard spacer. 2. Press the power on/off (activation) pin according to the directions on the label.
- Page 61 The accessory handset won’t work until you register it to a compatible Uniden cordless phone! Compatible Bases This handset is designed for use with Uniden’s XDECT 8115 and XDECT 8155 bases. Other compatible bases include Uniden’s XDECT6135, SSE35/37 and DECT31xx series.
-
Page 62: Test The Connection
Test the Connection Pick up the handset and press TALK/FLASH. Make sure you get a dial tone. (Press END to hang up.) If.. Try.. • you don’t hear a dial tone Making sure the handset is fully charged, before trying again. • the display shows Registration Failed RESETTING THE HANDSET... -
Page 63: Battery Information
• All features and operation for the handset are described in the owner’s manual for one of the bases listed under the Compatible Bases section. • Owner’s manuals for all Uniden phones are available on our website for free downloading. AC Adaptor... - Page 64 Using another charger may damage the battery or cause it to explode. Rechargeable batteries must be recycled or disposed of properly. Uniden works to reduce lead content in PVC coated cords in our products & accessories.
- Page 67 Please refer to our Uniden website for any details or warranty durations offered in addition to those contained below. Warrantor: The warrantor is either Uniden Australia Pty Limited ABN 58 001 865 498 (“Uniden Aust”) or Uniden New Zealand Limited (“Uniden NZ”) as the case may be.
- Page 68 Product does not conform with this warranty, you should deliver the Product, together with satisfactory evidence of your original purchase (such as a legible copy of the sales docket) to Uniden at the addresses shown below. You should contact Uniden regarding any compensation that may be payable for your expenses incurred in making a warranty claim.