Lennox Elite Series XP13 Units Installation Instructions Manual
Elite xp13 series
Hide thumbs
Also See for Elite Series XP13 Units:
- Brochure & specs (4 pages) ,
- Installation instructions manual (24 pages) ,
- Installation instructions manual (32 pages)
Table of Contents
Advertisement
E2009 Lennox Industries Inc.
Dallas, Texas, USA
RETAIN THESE INSTRUCTIONS
FOR FUTURE REFERENCE
WARNING
Improper
installation,
service or maintenance can cause personal injury,
loss of life, or damage to property.
Installation and service must be performed by a
licensed professional installer (or equivalent) or a
service agency.
CAUTION
Physical contact with metal edges and corners
while applying excessive force or rapid motion can
result in personal injury. Be aware of, and use
caution when working near these areas during
installation or while servicing this equipment.
IMPORTANT
The Clean Air Act of 1990 bans the intentional
venting of refrigerant (CFCs, HFCs, and HCFCs) as
of July 1, 1992. Approved methods of recovery,
recycling or reclaiming must be followed. Fines
and/or
incarceration
noncompliance.
IMPORTANT
This unit must be matched with an indoor coil as
specified in Lennox' Engineering Handbook.
Coils previously charged with HCFC−22 must be
flushed.
05/09
*2P0509*
adjustment,
alteration,
may
be
levied
for
INSTALLATION
INSTRUCTIONS
®
Elite
Series XP13 Units
HEAT PUMPS
506270−01
05/09
Supersedes 01/09
Table of Contents
. . . . . . . . . . . . . . . . . . . . . . . . . . . . . . .
. . . . . . . . . . . . . . . . . . . . . . . . . . . . . . .
. . . . . . . . . . . . . . . . . . . . . . . . . . . . . . . . . .
Shipping and Packing List
Check the unit for shipping damage and listed times below
are intact. If damaged, or if parts are missing, immediately
contact the last shipping carrier.
1
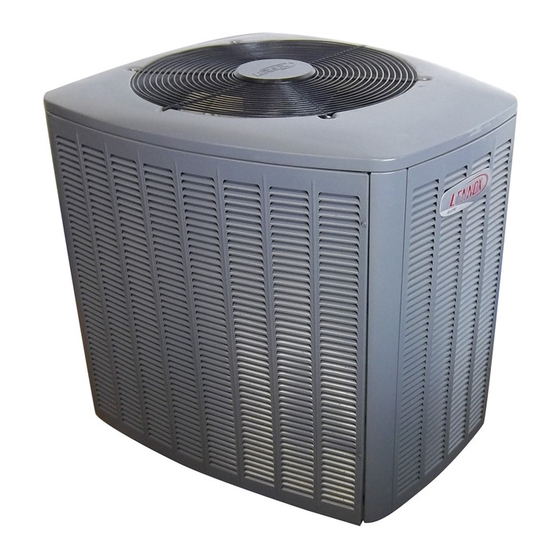
Assembled XP13 outdoor unit
XP13 Heat Pumps
The XP13 Heat Pumps, which will also be referred to in this
instruction as the outdoor unit, uses HFC−410A
refrigerant. This outdoor unit must be installed with a
matching indoor unit and line set as outlined in the Lennox
XP13 Engineering Handbook.
This outdoor unit is designed for use in systems that use
check thermal expansion valve (CTXV) refrigerant
metering devices.
Page 1
. . . . . . . . . . . . . . . . . . . . . .
. . . . . . . . . . . . . . . . . . . . . . . . . . . . .
. . . . . . . . . . . . . . . . . . . . . . . . . . .
. . . . . . . . . . . . . . . . .
. . . . . . . . . . . . . . . . . . .
. . . . . . . . . . . . . . . . .
. . . . . . . . . . . . . . . . . . .
. . . . . . . . . . . . . . . . . . . . . . . . . . .
. . . . . . . . . . .
. . . . . . . . . . . . . . . . . . . . . . . . . . .
. . . . . . . . . . . . . . . . . . . . . . . . . . . . . .
. . . . . . . . . . . . . . . . . . . . . . . . .
. . . . . . . . . . .
. . . . . . . . . . . . . . . . . . . . . . . . .
. . . . . . . . . . . . . . .
. . . . . . . . . . . . . . . . . . . . . . . . . . . . .
. . . . . . . . . . . . . . . . . . . . . . . .
. . . . . . . . . . . . .
506270−01
*P506270-01*
Litho U.S.A.
1
1
2
3
. . . . .
5
6
6
7
9
10
11
12
. . . . . . . .
13
13
15
16
17
18
18
22
23
23
26
Advertisement
Table of Contents

Related Manuals for Lennox Elite Series XP13 Units


Summary of Contents for Lennox Elite Series XP13 Units
-
Page 1: Table Of Contents
HFC−410A IMPORTANT refrigerant. This outdoor unit must be installed with a matching indoor unit and line set as outlined in the Lennox XP13 Engineering Handbook. This unit must be matched with an indoor coil as specified in Lennox’... -
Page 2: Unit Dimensions
Unit Dimensions − Inches (mm) and Parts Arrangement CAPACITOR DEFROST BOARD OUTDOOR FAN CONTACTOR COMPRESSOR REVERSING HIGH PRESSURE SUCTION LINE VALVE SWITCH CONNECTION FILTER DRIER/ VAPOR LINE LIQUID LINE CONNECTIONS LIQUID LINE CONNECTION VAPOR VALVE AND GAUGE PORT/SUCTION TOP VIEW LINE CONNECTIONS XP13 PARTS ARRANGEMENT DISCHARGE AIR... -
Page 3: General Information
1/6 TURN available from address shown below, or contact 11 12 11 12 your supervisor. Lennox Industries Inc. P.O. Box 799900 Dallas, TX 75379−9900 General Information These instructions are intended as a general guide and do Figure 1. Cap Tightening Distances not supersede local codes in any way. - Page 4 DISTRIBUTOR HEAT PUMP REVERSING VALVE CHECK EXPANSION VALVE NOTE − ARROWS INDICATE DIRECTION BI−FLOW OF REFRIGERANT FLOW. FILTER / OUTDOOR DRIER COIL MUFFLER HIGH PRESSURE PRESSURE INDOOR UNIT LIQUID SERVICE PORT VAPOR GAUGE MANIFOLD SERVICE PORT LIQUID VAPOR LINE HFC−410 LINE VALVE COMPRESSOR...
-
Page 5: Recovering Refrigerant From Existing System
To Open and Close Ball−Type Service Valve: NOTE − Use recovery machine instructions for specific setup requirements. A valve stem cap protects the valve stem from contamination and assures a leak−free seal. METHOD 2: 1. Remove stem cap with an appropriately sized wrench. Use this method if the existing outdoor unit is equipped 2. -
Page 6: Removing Existing Outdoor Unit
property, not from the installation property. Install the Removing Existing Outdoor Unit unit as far as possible from the property line. Perform the following task at the existing outdoor unit: When possible, do not install the unit directly outside Disconnect line set at the service valves. a window. -
Page 7: Removing And Installing Panels
ELEVATING THE UNIT (SMALL−BASE UNITS) NOTE − Keep the height of extenders short enough to ensure a sturdy installation. If it is necessary to extend If additional elevation is necessary, raise the unit by further, consider a different type of field−fabricated extending the length of the unit support feet. - Page 8 INSTALLING PANEL HOLD DOOR FIRMLY TO THE HINGED ANGLE MAY BE TOO SIDE TO MAINTAIN Install the louvered panels as follows: EXTREME FULLY−ENGAGED TABS 1. Position the panel almost parallel with the unit as PREFERRED ANGLE illustrated in figure 13, detail D with the screw side as FOR INSTALLATION close to the unit as possible.
-
Page 9: New Or Replacement Line Set
Installation of line set on vertical runs is illustrated in from the outdoor unit (braze connections) to the indoor unit figure 16. coil (flare or sweat connections). Use Lennox L15 (sweat, non−flare) series line set, or use field−fabricated refrigerant Installation of a transition from horizontal to lines as listed in table 2. -
Page 10: Brazing Connections
Brazing Connections IMPORTANT - REFRIGERANT LINES MUST NOT CONTACT WALL. LIQUID LINE OUTSIDE WALL SUCTION LINE Use the following procedure to braze the line set to the new WOOD BLOCK air conditioner unit. Figure 18 is provided as a general BETWEEN STUDS guide for preparing to braze the line set to the air conditioner unit. -
Page 11: Removing Indoor Unit Metering Device
REMOVE CAP AND CORE FROM ATTACH CUT AND DEBUR BOTH LIQUID AND SUCTION GAUGES SERVICE PORTS SERVICE PORT MUST BE OPEN TO ALLOW EXIT SERVICE POINT FOR NITROGEN VALVE SUCTION LINE outdoor INDOOR UNIT UNIT LIQUID LINE SERVICE VALVE FLOW NITROGEN WRAP BRAZE LINE SET NITROGEN... -
Page 12: Flushing The System
LIQUID SENSING BULB existing traps. Polyol ester (POE) oils are used in LINE Lennox units charged with HFC−410A refrigerant. Residual mineral oil can act as an insulator, Figure 21. Typical TXV Removal preventing proper heat transfer. It can also clog the expansion device, and reduce the system 1. -
Page 13: Installing New Indoor Unit Metering Device
INVERTED HCFC−22 CYLINDER CONTAINS CLEAN HCFC−22 TO 1/8 TURN GAUGE BE USED FOR FLUSHING. 1/2 TURN 11 12 MANIFOLD 11 12 HIGH PRESSURE PRESSURE SUCTION LINE SERVICE VALVE OUTDOOR UNIT CLOSED OPENED EXISTING INDOOR unit LIQUID LINE SERVICE VALVE Figure 23. Tightening Distance RECOVERY CYLINDER TANK... -
Page 14: Testing For Leaks
and expose surface of the Teflon ring with refrigerant 8. Connect the equalizer line from the TXV to the oil. equalizer suction port on the suction line. Finger tighten the flare nut plus 1/8 turn (7 ft−lbs) as illustrated 5. Attach the liquid line assembly to the CTXV. Finger in figure 23. -
Page 15: Evacuating The System
WARNING WARNING Fire, Explosion and Personal Safety Danger of Equipment Damage. Avoid deep Hazard. vacuum operation. Do not use compressors to evacuate a system. Extremely low vacuums can Failure to follow this warning could cause internal arcing and compressor failure. result in damage, personal injury or Damage caused by deep vacuum operation will death. -
Page 16: Servicing Unit Delivered Void Of Charge
Figure 28. Typical Wiring Diagram 9. When the absolute pressure requirement above has Servicing Units Delivered Void of Charge been met, disconnect the manifold hose from the If the outdoor unit is void of refrigerant, clean the system vacuum pump and connect it to an upright cylinder of using the procedure described below. -
Page 17: Electrical Connections
Electrical In the U.S.A., wiring must conform with current local codes and the current National Electric Code (NEC). In Canada, wiring must conform with current local codes and the current Canadian Electrical Code (CEC). Refer to the furnace or blower coil installation instructions for additional wiring application diagrams and refer to unit nameplate for minimum circuit ampacity and maximum overcurrent protection size. -
Page 18: Start−Up And Charging Procedures
SETTING UP TO CHECK CHARGE Start−Up and Charging Procedures 1. Close manifold gauge set valves. Connect the center manifold hose to an upright cylinder of HFC−410A. IMPORTANT 2. Connect the manifold gauge set to the unit’s service ports as illustrated in figure 2. If unit is equipped with a crankcase heater, it should low pressure gauge to vapor service port be energized 24 hours before unit start−up to... - Page 19 WEIGH IN 1. Check Liquid and suction line pressures 2. Compare unit pressures with Table 4, Normal Operating Pressures. Refrigerant Charge per Line Set Length 3. Conduct leak check; evacuate previously outlined. 4. Weigh in the unit nameplate charge plus Ounces per 5 feet (g per 1.5 m) Liquid Line any charge required for line set differences...
- Page 20 Table 3. Unit Indoor Matchups for Subcooling −018 Target *Add charge Subcooling Subcooling Target INDOOR MATCHUPS *Add charge Heat Cool Subcooling Subcooling (+5ºF) (+1ºF) INDOOR MATCHUPS Heat Cool CH33–31B (+5ºF) (+1ºF) CH33–36C CBX26UH–018 CH33–42 CBX26UH–024 CH33–44, –48 CBX27UH–018/024 CR33–36 CBX32MV–018/024 CR33–48 CBX32MV–024/030 CR33–50/60...
- Page 21 Table 4. Normal Operating Pressures − Liquid +10 and Vapor +5 PSIG* IMPORTANT Use table 4 as a general guide when performing maintenance checks. This is not a procedure for charging the unit (Refer to Charging / Checking Charge section). Minor variations in these pressures may be expected due to differences in installations.
-
Page 22: Defrost System
Pressure Switch Event Settings System Operation The following are the auto reset values for low and high pressures switches: The outdoor unit and indoor blower cycle on demand from High Pressure (auto reset) − trip at 590 psig, reset at the room thermostat. -
Page 23: Maintenance
DEFROST CONTROL TIMING PINS Table 6. Defrost Control Board Diagnostic LED Mode Green LED (DS2) Red LED (DS1) Each timing pin selection provides a different accumulated compressor run time period for one defrost No power to con- trol cycle. This time period must occur before a defrost cycle is initiated. -
Page 24: Homeowner Information
Although special care has been take to keep 1. Air Filter Ask your Lennox dealer to show you where exposed edges to a minimum, physical contact with metal edges and corners while apply your indoor unit’s filter is located. - Page 25 Emergency Heat setting to obtain temporary heat without Programmable Thermostats the risk of serious damage to the heat pump. Your Lennox system controlled In emergency heat mode, all heating demand is satisfied programmable thermostat. These thermostats provide the by auxiliary heat; heat pump operation is locked out. After a...
-
Page 26: Start−Up And Performance Checklist
Start−Up and Performance Checklist Job Name Job no. Date Job Location City State Installer City State Unit Model No. Serial No. Service Technician Nameplate Voltage Rated Load Ampacity Compressor Amperage: Maximum Fuse or Circuit Breaker Electrical Connections Tight? - Indoor Filter clean? - Supply Voltage (Unit Off) Indoor Blower RPM S.P.