NuTone QuieTTest QT200 Installation Instructions Manual
Quiettest series twin blower ventilator
Hide thumbs
Also See for QuieTTest QT200:
- Selection manual (36 pages) ,
- Installation instructions manual (7 pages)
Advertisement
Available languages
Available languages
Table of Contents
- 1 Installation Instructions
- 2 Mounting the Housing
- 3 Power Unit Installation
- 4 Grille Installation
- 5 Maintenance
- 6 Installation in Existing Construction
- 7 One-Year Limited Warranty
- 8 If You Need Assistance or Service
- 9 Installation de la Grille
- 10 Entretien
- 11 Garantie Limitée de un an
- Download this manual
QuieTTest
MODELS: QT200 & QT300
For Ceiling Installation
WARNING
TO REDUCE THE RISK OF FIRE, ELECTRIC SHOCK, OR
INJURY TO PERSONS, OBSERVE THE FOLLOWING:
1. Use this unit only in the manner intended by the manufacturer. If
you have questions, contact the manufacturer at the address or
telephone number listed in the warranty.
2. Before servicing or cleaning unit, switch power off at service
panel and lock service disconnecting means to prevent power
from being switched on accidentally. When the service
disconnecting means cannot be locked, securely fasten a
prominent warning device, such as a tag, to the service panel.
3. Installation work and electrical wiring must be done by qualified
personnel in accordance with all applicable codes and
standards, including fire-rated construction.
4. Sufficient air is needed for proper combustion and exhausting of
gases through the flue (chimney) of fuel burning equipment to
prevent back drafting. Follow the heating equipment manufacturer's
guideline and safety standards such as those published by the
National Fire Protection Association (NFPA), and the American
Society for Heating, Refrigeration and Air Conditioning
Engineers (ASHRAE), and the local code authorities.
5. When cutting or drilling into wall or ceiling, do not damage
electrical wiring and other hidden utilities.
6. Ducted fans must always be vented to the outdoors.
7. If this unit is to be installed over a tub or shower, it must be
marked as appropriate for the application.
8. Never place a switch where it can be reached from a tub or shower.
9. When applicable local regulations comprise more restrictive
installation and/or certification requirements, the aforementioned
requirements prevail on those of this document and the installer
agrees to conform to these at his own expenses.
10. When performing installation, servicing or cleaning this unit, it is
recommended to wear safety glasses and gloves.
CAUTION
For general ventilating use only. Do not use to exhaust hazardous
or explosive materials and vapors.
INSTALLATION INSTRUCTIONS
•
Suitable for use with solid state speed controls
•
Uses standard 3¼" x 10" ducting
•
Designed for ceiling installation
•
Do not mount over bathtub or shower stall enclosure
•
Not for use in kitchens
•
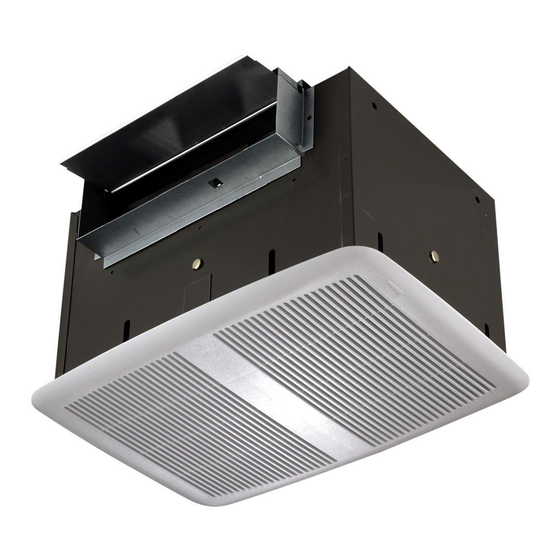
The ventilator consists of the housing, mounting brackets, junction box,
power unit/blower assembly, damper section and grille assembly
FAN MUST NOT BE INSTALLED IN A CEILING THERMALLY
INSULATED TO A VALUE GREATER THAN R-40.
FOR BEST RESULTS
•
When installing the ventilator in a new construction site, install the
housing during the rough-in construction of the building. The power
unit and grille should be installed after the finished ceiling is in place.
•
To install the ventilator in an existing building, an accessible area
(attic or crawl space) is required from above the planned location.
Twin Blower Ventilator
®
READ & SAVE THESE INSTRUCTIONS
Register your product online
at www.nutone.ca
POWER
UNIT
HANGER
ROD
BD0009
VERTICAL
DISCHARGE
3¼" x 10"
DUCT
KNOCKOUTS
BH0039
INSTALLATION
IN A NEW CONSTRUCTION SITE
PREPARATION
CAUTION: When handling the power unit do not reach in the end
openings and bend the blower wheels.
Refer to Figure 1.
1. Remove power unit from housing assembly.
(a) If necessary, unplug power plug from the connector.
(b) Loosen wing nut on hanger rods that hold the power unit.
(c) Unfasten hanger rods from slots and remove power unit.
(d) Set power unit aside until needed.
2. Refer to Figure 2. Remove one of the wiring knockouts from
the housing.
3. The ventilators can be ducted for either vertical or horizontal
discharge.
4. Refer to Figure 3. Mount 3¼" x 10" damper section on top of
housing for vertical discharge or on the side of housing for
horizontal discharge with two screws (included).
1
INSTALLATION INSTRUCTIONS
ROOF CAP
FAN
HOUSING
HORIZONTAL
DISCHARGE
POWER
CONNECTOR
SLOTS
WING NUT,
HANGER ROD
FIGURE 1
WALL CAP
FIGURE 2
85669000C
Advertisement
Table of Contents

Related Manuals for NuTone QuieTTest QT200


Summary of Contents for NuTone QuieTTest QT200
-
Page 1: Installation Instructions
INSTALLATION INSTRUCTIONS READ & SAVE THESE INSTRUCTIONS QuieTTest Twin Blower Ventilator ® Register your product online MODELS: QT200 & QT300 at www.nutone.ca For Ceiling Installation POWER CONNECTOR POWER WARNING UNIT TO REDUCE THE RISK OF FIRE, ELECTRIC SHOCK, OR SLOTS INJURY TO PERSONS, OBSERVE THE FOLLOWING: 1. -
Page 2: Mounting The Housing
GREEN ground lead. 4. Reinstall junction box and tighten screws. 5. Connect supply wire to switch. NOTE: Switch must be purchased separately. Refer to NuTone's catalog. POWER UNIT INSTALLATION JUNCTION BO0013 1. Refer to Figure 7. The power unit mounts with two hanger rods to the mounting brackets. -
Page 3: Grille Installation
GRILLE INSTALLATION MOUNTING 1. Refer to Figure 8. Squeeze grille mounting springs and insert BRACKET into slots in the housing. 2. Press grille firmly into place against ceiling. HOOK HANGER RODS FROM INSIDE TO OUTSIDE MAINTENANCE • WARNING: Risk of fire or electrical shock; disconnect the power before cleaning or performing any maintenance on the ventilator. -
Page 4: One-Year Limited Warranty
INCLUDING, BUT NOT LIMITED TO, IMPLIED WARRANTIES OF MERCHANTABILITY OR FITNESS FOR A PARTICULAR PURPOSE. During this one-year period, Broan-NuTone Canada will, at its option, repair or replace, without charge, any product or part which is found to be defective under normal use and service. - Page 5 DIRECTIVES D'INSTALLATION LIRE ET CONSERVER CES DIRECTIVES Ventilateur QuieTTest à rotor double ® Enregistrez votre produit en MODÈLES : QT200 et QT300 ligne à www.nutone.ca Pour plafond CONNECTEUR D'ALIMENTATION AVERTISSEMENT BLOC-MOTEUR POUR RÉDUIRE LES RISQUES D’INCENDIE, D’ÉLECTROCUTION FENTES OU DE BLESSURES CORPORELLES, OBSERVEZ LES...
- Page 6 4. Remettre en place la boîte de jonction et serrer ses vis. 5. Raccorder le câble d'alimentation à l'interrupteur. NOTE : l'interrupteur doit être acheté séparément. Voir le catalogue NuTone. INSTALLATION DU BLOC-MOTEUR BOÎTE DE 1. Voir Figure 7. Le bloc-moteur s'installe à l'aide de deux tiges de...
-
Page 7: Installation De La Grille
INSTALLATION DE LA GRILLE SUPPORT 1. Voir Figure 8. Serrer les ressorts de montage de la grille DE MONTAGE et les insérer dans les fentes du boîtier. 2. Appuyer fermement sur la grille pour qu'elle vienne contre ACCROCHER LA TIGE DE le plafond. -
Page 8: Garantie Limitée De Un An
PRODUITS OU EN RAPPORT AVEC CELLES-CI. Cette garantie annule toutes les garanties précédentes. Pour obtenir le service après-vente aux fins de la garantie, vous devez (a) aviser Broan-NuTone Canada à l’adresse ou au numéro de téléphone ci-dessous, (b) donner le numéro du modèle et l’identification de la pièce et (c) décrire la nature de tout défaut du produit ou de la pièce. Lorsque vous demandez le service après-vente aux fins de la garantie, vous devez présenter une preuve de la date d’achat originale.