Table of Contents
Advertisement
Quick Links
Advertisement
Table of Contents

Related Manuals for UTStarcom 5800


Summary of Contents for UTStarcom 5800
- Page 1 Quick Start Guide...
-
Page 2: Table Of Contents
Contents 1. What’s in the Box? ....................3 2. Your Phone at a Glance ...................4 3. Setting up your Phone ....................9 4. Setting up an E-mail Account ................12 5. Personalizing your Phone ..................13 6. Browsing the Web ....................15 7. Using the Camera ....................16 8. -
Page 3: What's In The Box
1. What’s in the Box? Battery AC Adapter USB Sync Cable User Manual and Mini-USB Quick Start Guide Stereo Headset Pouch Smartphone Splitter Adapter Getting Started Disc Y-Splitter Cable... -
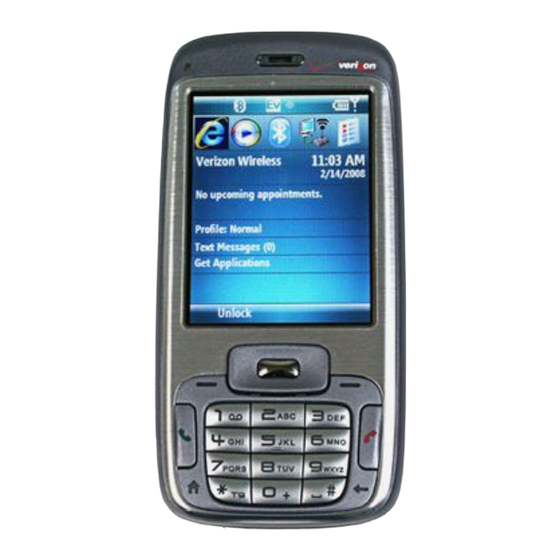
Page 4: Your Phone At A Glance
2. Your Phone at a Glance... - Page 5 Item Function 1. Speaker Listen to phone call. Sense dark conditions and activate a backlight under the keypad and the QWERTY keyboard 2. Light Sensor automatically, glowing in dark. 3. Display Screen 4. NAVIGATION Use to scroll left, right, up, or down. Press the center to use as the ENTER button.. CONTROL/ENTER 5.
- Page 7 Item Function Press to turn on (more than 1 second) and off the phone. Or press and quickly release the 15. POWER POWER button to display the Quick List, which allows you to change profiles, open Comm Manager, and enable/disable phone lock. 16.
-
Page 8: Led Indicator Lights
LED indicator lights Various colors that might display in the two LED Indicators are summarized here. Left LED Status Solid green Battery is fully charged. Blank Battery case is empty or the phone is off. Solid amber Battery is charging or the phone is using ActiveSync to synchronize with a PC. Solid red Battery is not installed or battery is over-discharged. -
Page 9: Setting Up Your Phone
3. Setting up your Phone With the following simple steps, you can easily set up and start using your phone. Install and charge the battery New batteries are shipped partially charged. Before you start using your phone, it is recommended that you install and charge the battery. -
Page 10: Install The Microsd Card
Install the microSD card You can install a microSD (Secure Digital) card on your phone to have an alternative storage place for your images, video, music, and other phone data. • Slide in the microSD card into the slot with its gold contacts facing up and gently push until it clicks securely in place. - Page 11 Microsoft Windows Mobile® Device Center is the replacement for Microsoft® ActiveSync® on Windows Vista™. Insert the Getting Started Disc into the CD drive of your PC. Follow the instructions on the installation wizard screen to install Windows Mobile Device Center. Connect the phone to your PC and turn on your phone.
-
Page 12: Setting Up An E-Mail Account
4. Setting up an E-mail Account You can easily set up an e-mail account that you have with an Internet service provider (ISP), a web- based email or an account that you access using a VPN server connection (typically a work account) on your phone. -
Page 13: Personalizing Your Phone
To send an e-mail or SMS message On the Home screen, click Start > Messaging. Select an e-mail account, or select Text Messages. Then, click Select. Click New or Menu > New. Enter the e-mail address or phone number of one or more recipients, separating them with a semicolon (;). - Page 14 To set a picture as the background On the Home screen, click Start > Pictures & Videos. Select the picture you want to set as the background. Click View or press ENTER for a larger view of the image. Click Menu > Use as Home Screen. Use NAVIGATION to select the portion of the picture you want to use, and click Next.
-
Page 15: Browsing The Web
To set the date and time On the Home screen, click Start > Settings > Clock & Alarm > Date and Time. In Time zone, select your time zone. In Date, edit the month, day, or year. In Time, edit the hour, minute, and second. Click Done. -
Page 16: Using The Camera
7. Using the Camera Taking photos and shooting video clips with audio is easy with your phone’s built-in camera. To open Camera or Video Recorder, do any of the following: • On the Home screen, click Start > Camera or Video Recorder. -
Page 17: Using Pictures & Videos
8. Using Pictures & Videos The Pictures & Videos program allows you to view pictures and play GIF animation files and video clips on your phone. You can also view the pictures as a slide show, beam them, send them via a messaging program, edit them, or set them as the background on the Home screen. -
Page 18: Protecting Your Phone
To play videos On the Home screen, click Start > Pictures & Videos. Video files appear as thumbnails with a icon. Select a video and click Play to play it with the built-in Windows Media Player. 9. Protecting your Phone You can protect your phone from unauthorized use by requiring a type of password called a simple PIN (personal identification number) or a strong alphanumeric password. - Page 19 To enable the phone lock On the Home screen, click Start > Settings > Security > Device lock. Select Prompt if device unused for then select the amount of time for the phone to be inactive before automatically locking. Select the Password type then enter and confirm your password. Click Done.
-
Page 20: Knowing Status Indicators
10. Knowing Status Indicators The Home screen displays important information, such as upcoming appointments, status indicators. The following table lists some of the common status indicators with their description. Icon Description Icon Description New SMS message No battery or battery fault New e-mail message Signal strength Roaming... -
Page 21: Learn More
Icon Description Icon Description XT9 text input mode, uppercase Voice privacy currently unavailable XT9 text input mode, caps lock Voice privacy available and turned on Ringer off Location settings off Speakerphone on Location settings on Vibrate call alert Bluetooth On or Visible mode Microphone muted Bluetooth headset connected Sync error... -
Page 22: Warranty
UTStarcom Personal Communications (the Company) warrants to the original retail purchaser of this UTStarcom handheld portable cellular telephone, that should this product or any part thereof during normal consumer usage and conditions, be proven defective in material or workmanship that results in product failure within the first twelve (12) month period from the date of purchase, such defect(s) will be repaired or replaced (with new or rebuilt parts) at the Company’s option, without charge for parts or... - Page 23 In addition, if your wireless device utilizes a SIM or Multimedia card, please remove the card before submitting the device and store for later use when your device is returned, UTStarcom Personal Communications is not responsible for and does not guarantee restoration of any third-party software, personal information or memory data contained in, stored on, or integrated with any wireless device, whether under warranty or not, returned to UTStarcom Personal Communications for repair or service.
- Page 24 This Warranty gives you specifi c legal rights, and you may also have other rights, which vary from state to state or province to province. IN USA: IN CANADA: UTStarcom Personal Communications UTStarcom Canada Company 555 Wireless Blvd. 5535 Eglinton Avenue West, Suite# 234...