Table of Contents
Advertisement
Quick Links
Advertisement
Table of Contents

Related Manuals for UTStarcom CDM 1080


Summary of Contents for UTStarcom CDM 1080
-
Page 2: Table Of Contents
WELCOME Thank you for choosing the CDM180 camera phone. This new mobile handset features dual LCD screen displays with a unique landscape-oriented main screen. There is a 262K color 1.8” TFT display on the inside, and a smaller 65K 1.0” sub-display on the outside. - Page 3 TABLE OF CONTENTS ASSIGN A PHONE NUMBER TO A GROUP...40 CHANGE GROUP NAME ...41 SEND TXT MSG. GROUP ...41 SEND PIX MSG. GROUP ...42 ERASE GROUP ...42 SPEED DIALS...43 RECENT CALLS ...44 MISSED...44 RECEIVED ...45 DIALED...46 ALL ...47 VIEW TIMERS ...48 SETTINGS ...49 SOUNDS ...49 MASTER VOLUME ...49...
- Page 4 TABLE OF CONTENT CHAPTER 7. MOBILE WEB 2.0 ...119 STARTING INTERNET BROWSER...120 LAUNCHING MOBILE WEB 2.0 ...120 BROWSER MENU...120 VZW HOME...120 Chapter 7 BACK ...120 FORWARD ...120 REFRESH...121 HISTORY ...121 ADDRESS...121 CLEAR MEMORY...121 SETTINGS...122 ADVANCED...123 EXIT...123 CHAPTER 8. SAFETY AND WARRANTY ...125 SAFETY INFORMATION FOR WIRELESS HANDHELD PHONES ...126 DRIVING SAFETY ...127 ELECTRONIC DEVICES ...128...
-
Page 5: Inside The Package
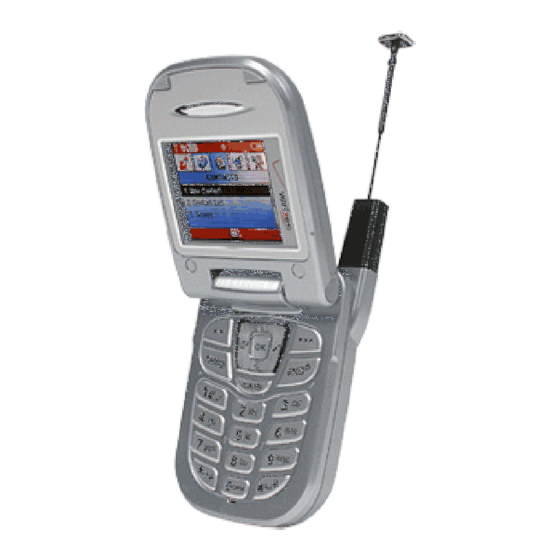
INSIDE THE PACKAGE This package should include all items pictured below. If any are missing or different, immediately contact the retailer where you purchased the phone. Handset User Manual Handstrap AC Travel Charger Standard Battery HANDSET DESCRIPTION The CDM180 weighs 3.5oz. The dimensions are 2.99" x 2.14" x .95". Antenna Camera Lens Earjack... -
Page 6: System Status Bar Indicator Display Area
HANDSET DESCRIPTION Message Contacts Menu In Idle Mode Web Browser - Press Up to access the Web Browser, Down to access the Short Cut Key, Right for Get It Now and Left for Get Pix &Flix. Get Pix & Flix Get It Now Inside the menu - Within a menu, use to scroll through... -
Page 7: Battery Usage
HANDSET DESCRIPTION Alarm Appears when either a calendar or an alarm is set. Vibrate Only Phone will vibrate when call is received. All Off Indicates the ringer volume is set to off. Missed Calls Voicemail indicates you have voicemail messages. New Messages New TXT or voice message. -
Page 8: Battery Charging
BATTERY USAGE BATTERY CHARGING POWER CONNECTION Plug the AC Charger into a standard outlet. Plug the other end of the AC Charger into the bottom of your phone. The battery must be installed onto the phone. • When you charge the battery with the phone power off, you will see a charging status screen. -
Page 9: Battery Handling Information
BATTERY HANDLING INFORMATION Only use the battery and charger approved by the manufacturer. Only use the battery for its original purpose. Try to keep batteries in a temperature between 41ºF (5ºC ) and 95ºF (35ºC). If the battery is stored in temperatures above or below the recommended range, give it time to warm up or cool down before using. -
Page 10: Turning The Phone On / Off
TURNING THE PHONE ON / OFF TURNING THE PHONE ON Press and hold until your “Power On” logo appears and the tone sounds. • To select a logo, refer to page 61 for more details. (Settings>Display>Power on/off Animations) for more detail. •... -
Page 11: Menu Summary
MENU SUMMARY Get It Now 1. Get Tunes & 1. Get New Tones 2. Record New 2. Get Pix & Flix 1. Take Pix 2. Pix Gallery 3. Pix Place 4. Pix Service 3. Get Fun & Games 4. Get News & Info 5. -
Page 12: Basic Functions
BASIC FUNCTIONS MAKING A CALL Enter a phone number. To modify the phone number you have entered : • To erase one digit at a time press • To erase the entire number, press and hold To find the phone number with your contact list : •... -
Page 13: Wait/Pause Feature
BASIC FUNCTIONS WAIT/PAUSE FEATURE Pauses are used for automated systems (i.e., voice mail, calling cards). Insert a pause after a phone number then enter another group of numbers. The second set of numbers is dialed automatically after the pause. This feature is useful for dialing into systems that require a code. To insert a wait/pause, enter a phone number then press [OPTIONS]. -
Page 14: Call Waiting Function
BASIC FUNCTIONS CALL WAITING FUNCTION Notifies you of an incoming call when you are already on a call by sounding a beep tone and displaying the caller’s phone number. To answer another call while on the phone, press . This places the first call on hold. To switch back to the first caller, press again. -
Page 15: During A Call
DURING A CALL To display menu options during a call, press MUTE (UNMUTE) With mute activated, the caller cannot hear you or any sounds from your side but you can still hear them. Press [MUTE]. To deactivate, press [UNMUTE]. The phone will automatically un-mute in Emergency Call or Callback mode. -
Page 16: Making An Emergency Call
MAKING AN EMERGENCY CALL The 911 feature puts the phone in the Emergency Call Mode when you dial the preprogrammed emergency number, 911. It also operates in the lock mode and out of the service area. 911 IN LOCK MODE The 911 call service is available even in the lock mode. -
Page 17: Storing A Phone Number
STORING A PHONE NUMBER The phone book stores up to 500 entries. Enter phone number, press choose “Create New” or “Update Existing”. Press [OK] to select. If “Create New” is selected, the phone number will appear above a list. Press the Navigation Key up or down to choose the type of number you’re adding, as indicated by the icon. -
Page 18: Standard Input Mode
ENTERING LETTERS, NUMBERS & SYMBOLS STANDARD INPUT MODE Use the digit keys to enter letters, numbers and characters. Enter letters using the key pad as follows: Repetitions Repetitions Key Pad Time 2 times 3 times 2ABC 3DEF 4GHI 9WXYZ To change the input mode, press To enter a space, press automatically move to the next column. -
Page 19: Numeric Mode
ENTERING LETTERS, NUMBERS & SYMBOLS NUMERIC MODE Allows you to enter numbers. Press [Abc] and scroll to the input mode to change to “123 (Numeric mode)”. To enter a number, press a digit key. SYMBOL MODE Allows you to enter symbols. Press [Abc] and scroll to the input mode to change to “Symbols (Symbol mode)”. -
Page 20: Chapter 4. Menu Function
MEMO Chapter 4 MENU FUNCTION This chapter addresses accessing the menu and using its functions and features to customize your phone. CONTACTS RECENT CALLS SETTINGS TOOLS... -
Page 21: Contacts
CONTACTS Stores up to 500 entries, each of which can be assigned to a group. Entries can be retrieved by name or group. NEW CONTACT Adds a new entry. Press [MENU], then select “Contacts” menu, then press “New Contact”. To enter a name or number, use the Navigation Key to select the phone book field. -
Page 22: Groups
CONTACTS GROUPS User can classify contact entries into groups. With predefined group categories, FAMILY and WORK, you can define up to 28 additional categories. Each group category can contain up to 10 contact entries and you can erase, add, and edit group categories with exception of predefined categories. -
Page 23: Send Pix Msg. Group
CONTACTS SEND PIX MSG. GROUP Press [MENU], then select “Contacts” menu, then press “Groups”. Select an existing group name with the Navigation Key. To select “Send Pix Msg”, press Input “Text”, “Picture”, “Sound”, “Subject”, then press [OPTIONS] to select “Preview”, “Add Quick Text”, “Save As Drafts”, “Priority Level”, “Remove Picture”, “Remove Sound”, “Add Slide”. -
Page 24: Recent Calls
RECENT CALLS MISSED Displays information about the 20 most recently missed calls. To see a list of the 20 most recently missed calls, press [MENU], then select “Recent Calls” menu, press “Missed”. If the number is already stored in your phone book, only the name appears. -
Page 25: Dialed
RECENT CALLS DIALED Displays information about the 20 most recently dialed numbers. To see a list of the 20 most recently dialed numbers, press [MENU], then select “Recent Calls” menu, press If the number is already stored in your phone book, only the name appears. -
Page 26: View Timers
RECENT CALLS VIEW TIMERS Displays the usage time. The 11 timers include (Last Call, All Calls, Received Calls, Dialed Calls, Roaming, Transmit Kilobytes, Received Kilobytes, Total Kilobytes, Last Reset, Lifetime Calls, Lifetime Data Counter): Press [MENU], then select “Recent Calls” menu, press “View Timers”. -
Page 27: Call Sounds
SETTINGS CALL SOUNDS To select a ringer type for incoming calls: CALL RINGTONE Press [MENU], then select “Settings & Tools” menu, then press “Sounds” then select “Call Sounds”, then press Select your desired ringer type. Up or Down key : Select “Ringer”. Press Play/Pause to Play/Pause the ringer. -
Page 28: Keypad Voume
SETTINGS PIX MESSAGE Press [MENU], then select “Settings & Tools” menu, then press “Sounds” then select “Alert Sounds”, then press Select “Tone”, “Vibrate”, or “Reminder”, then select one of the following: Tone : Select your desired ringer type. Vibrate : Select “On” or “Off”. Reminder : Select “Once”, “Every 2 Minutes”, “Every 15 Minutes”... -
Page 29: Service Alerts
SETTINGS SERVICE ALERTS SERVICE CHANGE Sounds an alert when leaving a service area and entering a roaming service area. Press [MENU], then select “Settings & Tools” menu, then press “Sounds” then select “Service Alerts”, then press Select “On” or “Off”, then press MINUTE BEEP Sounds an alert every minute during a call. -
Page 30: Alarm Sounds
SETTINGS ALARM SOUNDS To select a ringer type for alarm sound: ALARM TONE Press [MENU], then select “Settings & Tools” menu, then press “Sounds” then select “Alarm Sounds”, then press Select your desired ringer type. Up or Down key : Select “Ringer”. Press Play/Pause to Play/Pause the ringer. -
Page 31: Backlight
SETTINGS BACKLIGHT Backlights the display and key pad and activates dimming for easy viewing in dark places. Press [MENU], then select “Settings & Tools” menu, then press “Display” then select “Backlight”, then press Select one of the following options: Always On, Always Off, 5 Seconds, 15 Seconds, 30 Seconds. Press [OK] to save it. -
Page 32: Screensaver
SETTINGS SCREENSAVER Press [MENU], then select “Settings & Tools” menu, then press “Display” then select “Screensaver”. Select Default to choose a pre-installed display, Downloads or Pix # to choose a display you have downloaded to your phone. To launch “Get It Now Pix Services”, press [GET NEW]. -
Page 33: System
SETTINGS SYSTEM SYSTEM SELECT Selects the Preferred System. Press [MENU], then select “Settings & Tools” menu, then press “System” then select “System Select”. Select one of the following options: Automatic B Automatic A Home Only Press [OK] to save it. SETTINGS NAM SELECTION Enables Auto NAM (Number Assignment Modules) or manually... -
Page 34: Device Info
SETTINGS DEVICE INFO Displays the information of your phone: MY NUMBER Displays phone number of the device (MDN/MIN number and carrier) : Press [MENU], then select “Settings & Tools” menu, then press “System” then select “Device Info”, then press MDN/MIN number and carrier name are displayed. -
Page 35: Security
SETTINGS SECURITY Prevents unauthorized use of your phone. The following settings can be restricted: COMMON CODE Press [MENU], then select “Settings & Tools” menu, then press “System” then select “Security”, then enter your password, press [OK]. The default password is the last 4 digits of your phone number. Select “Common Code”. -
Page 36: Language
SETTINGS SPECIAL #’s Stores 3 phone numbers that can be called even in the lock mode. Press [MENU], then select “Settings & Tools” menu, then press “System” then select “Security”, then enter your password, press [OK]. The default password is the last 4 digits of your phone number. Select “Special #’s”. -
Page 37: Short Cut Key
SETTINGS SHORT CUT KEY Your phone offers you the option of assigning a short-cut key (Down Navigation Key) to a favorite or often-used function. To assign a shortcut to the key: Press [MENU], then select “Settings & Tools” menu, press “System”... -
Page 38: Auto Retry
SETTINGS AUTO RETRY Automatically redials a call up to 5 times after a set time interval. Press [MENU], then select “Settings & Tools” menu, then press “Call Settings” then select “Auto Retry”. Retry time to field is shown. Press the Navigation Key left or right to choose the amount of time. -
Page 39: Voice Services
SETTINGS VOICE SERVICES VOICE DIAL Voice Dial allows you to call a person by simply saying their name. To access Voice Dial: Press [MENU], then select “Settings & Tools” menu, then press “Call Settings” then select “Voice Services”, then press 2.1. -
Page 40: Dtmf Tones
SETTINGS To play voice memo, select the message you want to play then press [PLAY]. To send voice memo, select the message you want to send then press [SEND] to access the “New Pix Msg” see “New Pix Msg” on page 100. If saved voice memo, press one of the following options: l Set As Ringtone... -
Page 41: Clock Format
SETTINGS CLOCK FORMAT MAIN CLOCK To change the main clock’s appearance on the standby screen: Press [MENU], then select “Settings & Tools” menu, then press “Clock Format” then select “Main Clock”. Select one of the following: Digital Analog To save, press [OK]. -
Page 42: Tools
TOOLS CALENDAR Sets an event and reminds you of that event. ADD NEW Press [MENU], then select “Settings & Tools” menu, then press “Tools” then select “Calendar”. Move the Navigation Key left, right, up or down to choose a date in the calendar then press Press [OPTIONS] to 1. -
Page 43: Alarm Clock
TOOLS ALARM CLOCK Press [MENU], then select “Settings & Tools” menu, then press “Tools” then select “Alarm Clock”. Select one of the entries using the Navigation Key. To set a new alarm, choose alarm 1, 2 or 3. To edit an existing alarm, select that alarm. Press [OK]. -
Page 44: Notepad
TOOLS NOTEPAD Your phone includes an internal notepad that can be used to compose and store reminders and notes. ADD MEMO To compose a memo (there is an 80-letter limit): Press [MENU], then select “Settings & Tools” menu, then press “Tools”... -
Page 45: Stop Watch
TOOLS STOP WATCH Simultaneously times up to six different events. To operate the stop watch: Press [MENU], then select “Settings & Tools” menu, then press “Tools” then select “Stop Watch”. To measure a time period. 1. To start the stop watch, press 2. -
Page 46: Get It Now
GET IT NOW GET TUNES & TONES DOWNLOADING NEW TUNES & TONES Press [MENU], then select “Get It now” menu or press , then press Tones” then select “Get New” the select “New Provider”, press . (Get It Now will launch and take you to the download menu.) Use the Navigation Key to select a provider’s browser, press... -
Page 47: Get Pix & Flix
GET IT NOW GET PIX & FLIX TO TAKE PIX Press [MENU], then select “Get It now” menu, then press “Get Pix & Flix” or press press and hold side camera key, then select “Take Pix”. Press side camerakey or press and hold the flip cover of your phone is opended. -
Page 48: Pix Gallery
GET IT NOW PIX GALLERY In Review Mode you can view all the pictures you have taken, store selected images in your phone, send pictures to the Online Album, delete images and access additional picture options. Press [MENU], then select “Get It now” menu, then press “Get Pix &... -
Page 49: Get Fun & Games
GET IT NOW GET FUN & GAMES DOWNLOADING NEW FUN & GAMES Press [MENU], then select “Get It now” menu, then press “Get Fun & Games” then select “Get New”. (Get It Now - Get Fun & Games service will launch.) Hotkey Press then... -
Page 50: Get Going
GET IT NOW GET GOING CONNECTING GET GOING Press [MENU], then select “Get It now” menu, then press “Get Going”, then select “Get New”. Hotkey Press then "Get Going". The Get It Now - Get Going service will launch. Chapter 6 VOICE MAIL, TXT, PIX MESSAGING This chapter addresses Voice Mail, TXT, Pix Messaging functions... -
Page 51: When A New Message Arrives
WHEN A NEW MESSAGE ARRIVES The following display appears when a new message arrives. To display the message, select “View Now”, then press [OK]. NEW TXT MSG To send a new TXT message: Press [MENU], then select “Messaging” menu, press “New TXT Msg”... -
Page 52: New Pix Msg
NEW PIX MSG To send a new pix message: Press [MENU], then select “Messaging” menu, press “New Pix Msg” or press [MESSAGE], press “New Pix Msg”. Under “To”, input the phone number and press By pressing [ADD], you can choose from the following: 1. -
Page 53: Inbox
INBOX The Inbox manages received TXT/PIX/Web Alert messages. To access: Press [MENU], then select “Messaging” menu, press “Inbox” or press [MESSAGE], press “Inbox”. : Lock : Priority : Read : Unread : EMS Unread Select a message, then press The message is displayed. To delete a message, press [ERASE], press If you select WAP Push message, press... -
Page 54: Lock/Unlock
INBOX LOCK/UNLOCK To lock or unlock the TXT or PIX message. Select “Lock” to lock the message or “Unlock” to unlock the message, then press MESSAGE INFO To show received pix message information. Manages sent TXT/PIX messages or messages waiting to be sent. Press menu, press press... -
Page 55: Resend
SENT RESEND To resend a TXT or PIX message. ERASE To erase this message, select “Erase”. Select “Yes” or “No”, then press ADD TO CONTACTS Select to save number to contacts. LOCK/UNLOCK To lock or unlock the TXT or PIX message. Select “Lock”... -
Page 56: Voicemail
VOICEMAIL Displays the number of voice mails and accesses them by pressing Press [MENU], then select “Messaging” menu, press “Voicemail” or press [MESSAGES], press “Voicemail”. FIRST TIME USER Dial *86 then press [SEND]. At the recording, press To set up your account follow the voice tutorial. EXISTING USER Dial *86 then press [SEND]. -
Page 57: Mobile Im
MOBILE IM Get the instant scoop with instant messaging (IM). Choose from a variety of popular IM programs such as AOL Instant Messenger, MSN Messenger and Yahoo! Messenger. Some things just can’t wait to be said. So say it without speaking it. Instant message it. Instantly, cool. -
Page 58: Erase All
ERASE ALL Press [MENU], then select “Messaging” menu, press [OPTIONS] or press [MESSAGE], press [OPTIONS]. 2.1. To erase all the inbox messages, press [ERASE INBOX]. 2.2. To erase all the drafts messages, press [ERASE DRAFTS]. 2.3. To erase the sent messages, press [ERASE SENT]. -
Page 59: Auto View Txt
SETTINGS AUTO VIEW TXT If the “Auto View Txt” is set to on, the user will be able to view the message. If the “Auto View Txt” is set to off, the user can view the message by entering SMS Menu-> Inbox. Press [MENU], then select “Messaging”... -
Page 60: Voice Mail
SETTINGS VOICE MAIL# Press [MENU], then select “Messaging” menu, press [SETTINGS] or press [MESSAGE], press [SETTINGS]. Press [VOICE MAIL#]. Input a new voice call back number or edit voice call back number. To press [OPTIONS]. Select either a Wait (“W” appears) or a Pause (“P”... -
Page 61: Font Size
SETTINGS FONT SIZE Press [MENU], then select “Messaging” menu, press [SETTINGS] or press [MESSAGES], press [SETTINGS]. Press [FONT SIZE]. Select “Small”, “Large” or “Normal” with the Navigation Key. Press [OK]. Chapter 7 MOBILE WEB 2.0 This chapter addresses Internet services and web browsing. For more detailed information contact your service provider. -
Page 62: Vzw Home
STARTING INTERNET BROWSER LAUNCHING MOBILE WEB 2.0 Now you can access news, sports, weather, and e-mail from your phone. Mobile Web 2.0 keeps you updated by providing access to up-to-date information such as news, sports, weather and stock quotes when you subscribe to Internet service with your service provider. -
Page 63: Advanced
BROWSER MENU SETTINGS To select “Settings”. Press , then press Downloads : Selecting the “Downloads” item allows the user to enable/disable downloading images, background sounds, and object downloads when a URL is accessed. Restart Browser : Selecting “Restart Browser” causes the history and cache to be cleared and returns the user to the homepage.