
Related Manuals for Uniden DECT 1515


Summary of Contents for Uniden DECT 1515
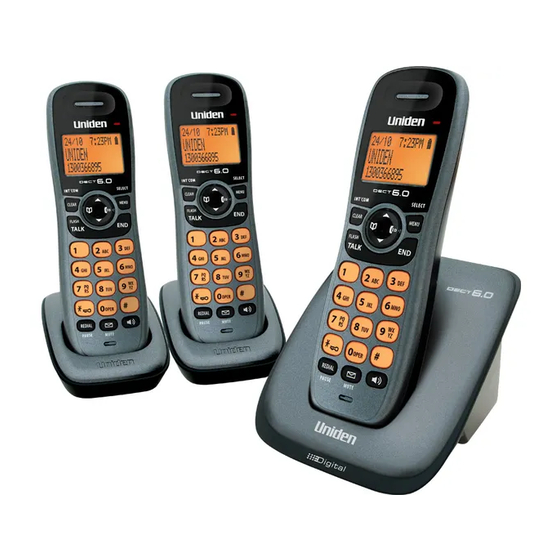
- Page 1 DECT 1515 Series For more exciting new products please visit our website: Australia: www.uniden.com.au New Zealand: www.uniden.co.nz...
- Page 2 Important Safety Instructions! When using your telephone equipment, basic safety precautions should always be followed to reduce the risk of fire, electric shock and injury to persons, including the following: x This unit is NOT waterproof. DO NOT expose this unit to rain or moisture. x Do not use this product near water, for example, near a bath tub, wash bowl, kitchen sink or laundry tub, in a wet basement or near a swimming pool.
- Page 3 3 of each - Telephone cord x If any items are missing or damaged, contact your place of purchase immediately. Never use damaged products! x Need Help? Get answers at our website: www.uniden.com.au for Australian model www.uniden.co.nz for New Zealand model...
-
Page 4: Table Of Contents
Contents Getting Started ...................5 Installing Your Phone ................5 Charge the Battery ................5 Connect the Telephone ..............6 Test the Connection ................. 6 Getting to Know Your Phone ..............7 Part of the base ................7 Parts of the handset ................ 8 Reading the Display ............... 10 Using the Menu ..................11 Handset Setup Menu / Day &... -
Page 5: Getting Started
GETTING STARTED Installing Your Phone 1. Unpack all handsets, battery packs, Charge the Battery and battery covers. If you need to remove a battery cover, press in on the notch and slide the cover down and off. 2. Line up the battery connector with the jack inside the handset. (The battery connector will only fit one way.) 3. -
Page 6: Connect The Telephone
Use the telephone cord to connect the jack on the base to a Connect the Telephone Cord standard telephone wall jack. TEL LINE 1. Pick up the handset from the cradle and press . You should Test the Connection hear a dial tone, and the display should say Talk. TAlk x If you don't hear a dial tone or the display says Check Tel Line, try checking the connection between the base and the phone jack. -
Page 7: Getting To Know Your Phone
Getting to Know Your Phone Parts of the base FIND CHARGInG ContACts Base keys/LEDs and how they work Key (icon) What it does - In standby: page all handsets. FiND... -
Page 8: Parts Of The Handset
Parts of the handset Earpiece STATUS Display PHONEBOOK / CALLER ID/ LEFT RIGHT CLEAR / INTERCOM MENU/ SELECT DOWN TALK / FLASH Twelve- key dial KEYPAD LOCK REDIAL/ PAUSE SPEAKER MESSAGES/ Microphone MUTE Charging contacts Handset keys/LEDs and how they work Key (icon) What it does - In standby: start an intercom call. - Page 9 Key (icon) What it does - In standby: start a telephone call (get a dial tone). TAlk/FlAsh - During a call: switch to a waiting call. - During a call: hang up. - In the menu or any list: exit and go to standby. - In standby: open the menu.
-
Page 10: Reading The Display
This table shows possible status icons and what they mean. Since the Reading the Display icons appear based on what you're doing with the phone, you won't ever see all of these icons at the same time. Icon What it means The ringer is turned off and will not ring for new calls. -
Page 11: Using The Menu
Using the Menu To open the menu, press Press MENU/SELECT MENU/SELECT. to choose the highlighted option The cursor < > Handset Setup <HANDSET SETUP> Handset Setup HANDSET SETUP shows the highlighted Ans. Setup T-coil Day & Time T-coil option. Day & Time Ringer Tones To move the Global Setup... -
Page 12: Global Setup Menu
The settings on this menu affect all handsets. Only one handset at a Global Setup Menu time can change these menu options. Do not change this setting unless instructed to by Set Line Mode customer service. This feature adds “0” or “00” at the beginning of the number received from Caller ID. -
Page 13: Using Your Phone
USING YOUR PHONE Basics To... Earpiece Speakerphone make a call: Dial the Press Press TAlk/FlAsh spEAkEr number, then answer a call Press Press TAlk/FlAsh spEAkEr hang up Press or put the handset in the cradle. switch between the Press spEAkEr speaker &... -
Page 14: Using The Caller Id And Redial Lists
Caller ID (CID) is a service available from your telephone provider Using the Caller ID and Redial Lists that shows the phone number (and sometimes the caller’s name) of incoming calls. Contact your telephone provider for more information. Caller ID list Redial list - Each handset - When a call comes in, the phone displays the... -
Page 15: Using Call Waiting
Call Waiting, a service available from your telephone provider, lets you Using Call Waiting receive calls while you are on another call. Caller ID on Call Waiting (CIDCW) service displays Caller ID information for a waiting call. For Australian model: Press and then press to accept the waiting call. -
Page 16: Using The Phonebook
The phone can store up to 70 entries in its phonebook. All handsets Using the Phonebook share the same phonebook, so only one handset may access the phonebook at a time. To... Press... Open/close the phonebook phoNEbook/lEFT. (to scroll through the phonebook DowN Scroll through the entries from A to Z) or... -
Page 17: Using Special Features
USING SPECIAL FEATURES If you often have to enter a series of digits or a code number during a Chain Dialing call, you can save that code number to a phonebook entry and use the phonebook to send the code number. 1. -
Page 18: Privacy Mode / Intercom
To prevent other handsets from joining a call: Privacy Mode 1. Start your call as usual, then press . The display shows mENu/sElECT 2. Press again to turn privacy mode on (you'll see a in Call Privacy. the display). mENu/sElECT x Privacy mode turns off automatically when you hang up. -
Page 19: Call Transfer
Call Transfer To... Follow these steps: 1. Press to put the call on hold. ClEAr/iNTErCom 2. Select the handset you want to page (select All to transfer a call page all handsets at the same time). 3. When another handset accepts the call, you'll be disconnected (press to rejoin the call). -
Page 20: Getting Your Messages
When you sign up for a voice mail service, your service provider Setting Up Your Voice Mail should give you an access number. If you don’t have this information, contact your provider before you start. 1. With the phone in standby, open the menu. 2. -
Page 21: Solving Problems
SOLVING PROBLEMS If you have any trouble with your phone, try these simple steps first. If you need help, visit our website listed on the front cover. If… try… - Checking the telephone cord connection. - Disconnecting the base AC adapter. Wait a No handsets can make few minutes, then reconnect it. -
Page 22: Weak Or Hard To Hear Audio / Noise Or Static On The Line
If a caller’s voice sounds weak or Weak or Hard To Hear Audio Do you use a T-Coil hearing aid? soft, the signal might be blocked • If you have a hearing aid equipped by large metal objects or walls; with a telecoil (T-coil) feature, the you might also be too far from interaction between the hearing aid the base, or the handset’s battery... -
Page 23: Installing A Line Filter Or Dsl Filter
If static is on 1 handset or in 1 If static is on all handsets or in all location: locations: - Check nearby for one of the - Check near the base for the common interference sources. source of interference. - Try moving the handset away - Try moving the base away from a suspected source, or try... -
Page 24: Liquid Damage
Moisture and liquid can damage your cordless phone. Liquid Damage x If the exterior housing of the handset or base is exposed to moisture or liquid, wipe off the liquid, and use as normal. x If moisture or liquid is inside the plastic housing (i.e. liquid can be heard in the phone or liquid has entered the handset battery compartment or vent openings on the base), follow these steps: Handset... -
Page 25: Ac Adapter And Battery Information
AC Adapter and Battery Information • Use only the supplied AC adapters. Be sure to use the proper adapter for the base & any chargers. • Do not place the power cord where it creates a trip hazard or where it could become chafed and create a Base/Charger fire or electrical hazard. -
Page 26: Mounting The Base On A Wall
You can mount your base directly to the wall using the horizontally Mounting the Base unit on a Wall aligned mounting slots at the back of the base unit. Before doing this, consider the following: x Avoid electrical cables, pipes, or other items behind the mounting location that could cause a hazard when inserting screws into the wall. - Page 27 An optional wall mount bracket can be purchased from our online Optional Wall Mount Bracket store to mount the base to a standard wall plate that has vertically aligned mount holes. Visit our website; www.uniden.com.au for Australia or www.uniden.co.nz for New Zealand.
-
Page 28: Index
INDEX Any Key Answer AutoTalk Banner Battery Preparing and charging Replacement and handling Caller ID Caller ID service Calling Call Waiting Deleting Storing Using Viewing Call transfer feature Chain dialing Clock (see Day & Time) Conference Calling Day & Time E, F, G Earpiece volume Find handset Hands-free conversation... - Page 29 INDEX M, N, O Making a call Mute 9, 13 Noise P, Q Package contents Paging handset (see Find handset) Phonebook Editing 12, 16 Erasing Making calls Storing Viewing Chain dialing Privacy mode Receiving a call Redialing a call Ringer volume Setting up base unit 5, 6...
-
Page 30: One-Year Limited Warranty
(1) year from the date of the original retail sale. If a warranty claim is made, this warranty will not apply if the Product is found by Uniden to be: (A) Damaged or not maintained in a reasonable manner or as recommended in the relevant Uniden Owner’s Manual;... - Page 31 Procedure for obtaining warranty service: Depending on the country in which the Product was first purchased, if you believe that your Product does not conform with this warranty, you should deliver the Product, together with satisfactory evidence of your original purchase (such as a legible copy of the sales docket) to Uniden at the addresses shown below. You should contact Uniden regarding any compensation that may be payable for your expenses incurred in making a warranty claim. Prior to delivery, we recommend that you make a backup copy of any phone numbers, images or other data stored on your Product, in case it is lost or damaged during warranty service.
- Page 32 THANK YOU FOR BUYING A UNIDEN PRODUCT. © 2011 Uniden Australia Pty Limited. Uniden New Zealand Ltd. Printed in Vietnam U01UN386ZZZ(0)