JVC HX-Z30 Instructions Manual
Compact component system
Hide thumbs
Also See for HX-Z30:
- Service manual (70 pages) ,
- Instructions manual (64 pages) ,
- Service manual (64 pages)
Table of Contents
Advertisement
Quick Links
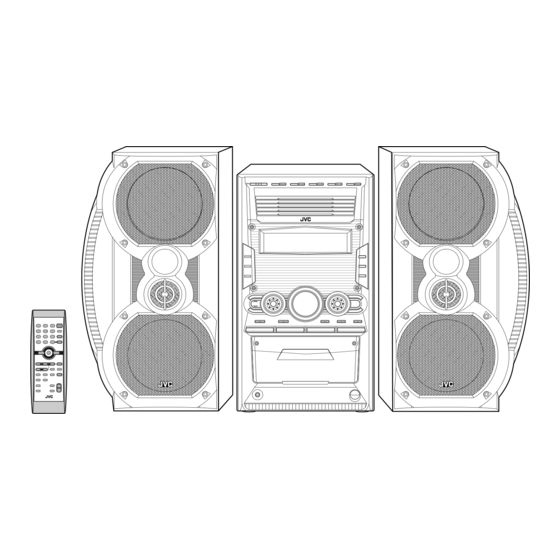
COMPACT COMPONENT SYSTEM
HX-Z30
HX-Z10
SP-HXZ30
Consists of CA-HXZ30 and SP-HXZ30
—
Consists of CA-HXZ10 and SP-HXZ10
—
CA-HXZ30
SP-HXZ10
INSTRUCTIONS
SP-HXZ30
CA-HXZ10
For Customer Use:
Enter below the Model No. and Serial No.
which are located either on the rear, bot-
tom or side of the cabinet. Retain this
information for future reference.
Model No.
Serial No.
SP-HXZ10
GVT0100-001B
[J]
Advertisement
Chapters
Table of Contents
Troubleshooting

Related Manuals for JVC HX-Z30


Summary of Contents for JVC HX-Z30
- Page 1 COMPACT COMPONENT SYSTEM HX-Z30 — HX-Z10 — SP-HXZ30 INSTRUCTIONS Consists of CA-HXZ30 and SP-HXZ30 Consists of CA-HXZ10 and SP-HXZ10 SP-HXZ30 CA-HXZ30 SP-HXZ10 CA-HXZ10 SP-HXZ10 For Customer Use: Enter below the Model No. and Serial No. which are located either on the rear, bot- tom or side of the cabinet.
- Page 2 HX-Z30: 35 kg / 78 lbs HX-Z10: 30 kg / 67 lbs – G-1 –...
- Page 3 For Canada/pour le Canada CAUTION: TO PREVENT ELECTRIC SHOCK, MATCH WIDE BLADE OF PLUG TO WIDE SLOT, FULLY INSERT. ATTENTION: POUR EVITER LES CHOCS ELECTRIQUES, INTRODUIRE LA LAME LA PLUS LARGE DE LA FICHE DANS LA BORNE CORRESPONDANTE DE LA PRISE ET POUSSER JUSQUAU FOND.
- Page 4 Introduction We would like to thank you for purchasing one of our JVC products. Before operating this unit, read this manual carefully and thoroughly to obtain the best possible performance from your unit, and retain this manual About This Manual This manual is organized as follows: •...
-
Page 5: Table Of Contents
Contents Location of the Buttons and Controls ... 3 Getting Started ... 6 Common Operations ... 9 Listening to FM and AM Broadcasts ... 12 Disc Play Introduction ... 13 Playing Back Discs ... 15 Playing Back Tapes ... 20 Recording ... -
Page 6: Location Of The Buttons And Controls
Location of the Buttons and Controls Become familiar with the buttons and controls on your unit. Front Panel Front Panel STANDBY COMPACT DIGITAL AUDIO EXTENDED C O M P A C T C O M P O N E N T S Y S T E M SUPER BASS CD1 READY... - Page 7 Display Window See pages in parentheses for details. Front Panel (standby/on) button and STANDBY lamp (9, 24, 25) 2 Disc trays (CD1 – CD5) 3 Remote sensor 4 Display window 5 Indication lamp panel 1 CD ready lamps (13) • CD1 READY, CD2 READY, CD3 READY, CD4 READY, CD5 READY 2 SOUND TURBO lamp (10) 3 SUBWOOFER lamp (10)
-
Page 8: Remote Control
Remote Control RM-SHXZ10A REMOTE CONTROL STANDBY COMPACT DIGITAL AUDIO EXTENDED C O M P A C T C O M P O N E N T S Y S T E M SUPER BASS C D 1 READY C D 2 READY C D 3 READY C D 4 READY SOUND TURBO... -
Page 9: Getting Started
Getting Started Supplied Accessories Make sure that you have all the following items. The number in parentheses indicates the quantity of each piece supplied. • AM loop antenna (1) • FM antenna (1) • Remote control (1) • Batteries (2) If anything is missing, consult your dealer immediately. -
Page 10: Connecting Speakers
AM antenna ANTENNA AM EXT LOOP FM 75 COAXIAL AM loop antenna (supplied) If the cords are covered with insulation, remove a short section of insulation at the end of each cord by twisting and pulling it off. Press and hold the clamp of the AM LOOP terminals on the rear of the unit. -
Page 11: Connecting Other Equipment
Connecting Other Equipment You can connect an external audio component used only as a playback device. • DO NOT connect any equipment while the power is on. • DO NOT plug in any equipment until all connections are complete. To connect an external audio component Be sure that the plugs of the audio cords are colored: White plugs and jacks are for left audio signals, and red ones for right audio signals. -
Page 12: Common Operations
Common Operations Turning On or Off the Power To turn on the unit, press STANDBY/ON on the remote control) so that the STANDBY lamp goes off. To turn off the unit (standby), press (or STANDBY/ON on the remote control) again so that the STANDBY lamp lights up. -
Page 13: Adjusting The Volume
Adjusting the Volume You can adjust the volume level only while the unit is turned on. The volume level can be adjusted in 32 steps (VOLUME MIN, VOLUME 1 – VOLUME 30, and VOLUME MAX). The volume level control does not affect recording. -
Page 14: Creating Your Own Sound Mode-User Mode
Surround modes* DANCE: Increases resonance and bass. HALL: Adds depth and brilliance to the sound. STADIUM: Adds clarity and spreads the sound, as in an outdoor stadium. SEA (Sound Effect Amplifier) modes ROCK: Boosts low and high frequency. Good for acoustic music. -
Page 15: Listening To Fm And Am Broadcasts
Listening to FM and AM Broadcasts Tuning in to a Station Press FM/AM. The unit automatically turns on and tunes in to the previously received station (either FM or AM). • Each time you press the button, the band alternates between FM and AM. -
Page 16: Disc Play Introduction
Disc Play Introduction This unit has been designed to play back the following discs: • CD (Audio CD)/CD-R (CD-Recordable)/CD-RW (CD- ReWritable) • MP3 disc (MP3 files recorded on a CD-R or CD-RW)* When playing a CD-R or CD-RW User-edited CD-Rs (CD-Recordable) and CD-RWs (CD-ReWritable) can be played back only if they have been “finalized.”... - Page 17 How are MP3 files recorded and played back? MP3 “tracks (files)” can be recorded in “group”—folders in PC terminology. During recording, the tracks and groups can be arranged similarly to the tracks and folders of computer data. “Root” is similar to the root of a tree. Every track and group can be linked to the root.
-
Page 18: Playing Back Discs
Playing Back Discs Loading Discs On the unit ONLY: Press 0 for the disc tray (CD1 – CD5) you want to load a disc onto. The unit automatically turns on and the disc tray comes out. Place a disc correctly on the circle of the disc tray, with its label side up. -
Page 19: Basic Disc Operations
Select a group and track to start playing. 1) Turn ¢ / 4 (or press ¢ (¡) / 4 (1) on the remote control) to select a group you want, then press CD 3¥8. The track number starts flashing. Track number flashes 2) Turn ¢... -
Page 20: Programming The Playing Order Of The Tracks -Program Play
Programming the Playing Order of the Tracks —Program Play You can arrange the playing order of the tracks before you start playing. You can program up to 100 tracks. • To use Repeat Play (see page 19) for Program Play, press REPEAT after starting Program Play. -
Page 21: Playing At Random-Random Play
To check the program contents On the remote control ONLY: Before playing, you can check the program contents by pressing ¢ (¡) or 4 (1). • ¢ (¡) : Shows them in the programed order. • 4 (1) : Shows the programed tracks in the reverse order. -
Page 22: Repeating Tracks Or Discs-Repeat Play
Repeating Tracks or Discs—Repeat Play You can have all the discs, the program or the individual track currently playing repeat as many times as you like. Press REPEAT during or before play. • Each time you press the button, Repeat Play mode changes as follows: REPEAT ALL REPEAT 1DISC... -
Page 23: Playing Back Tapes
Playing Back Tapes You can play back type I tapes. Playing Back a Tape Press 0 EJECT for the cassette deck. Insert a cassette with the exposed part of the tape down. Close the cassette holder gently. Press TAPE 2 3. The tape play starts and the tape direction indicator (3 or 2) starts flashing slowly to indicate the tape's running direction. -
Page 24: Recording
Recording IMPORTANT: • It should be noted that it may be unlawful to re-record pre-recorded tapes, records, or discs without the consent of the owner of copyright in the sound or video recording, broadcast or cable program and in any literary, dramatic, musical, or artistic embodied therein. -
Page 25: Synchronized Recording
Synchronized Recording By using Synchronized Recording, you can start and stop both disc play and tape recording at the same time. Everything on the disc goes onto the tape in the order it is on the disc, or according to the order you have made for Program Play. -
Page 26: Using The Timers
Using the Timers There are three timers available—DAILY (Daily Timer), REC (Recording Timer), and SLEEP (Sleep Timer). • You can set the timers whether the unit is on or off. Before using the timers, set the clock built in the unit. (See page 9.) Using Daily Timer With Daily Timer, you can wake up to your favorite music or... - Page 27 Turn ¢ / 4 to select the source to play, then press SET/DISPLAY. “SET” appears for about 1 second. • As you turn ¢ / 4, the source changes as follows: TUNER FM TUNER AM AUX IN TAPE TUNER FM: tunes in to a specified preset FM station. = Go to step 6.
-
Page 28: Using Recording Timer
Using Recording Timer With Recording Timer, you can make a tape of a radio broadcast automatically. How Recording Timer actually works The unit automatically turns on, tunes in to the specified station, sets the volume level to “VOLUME MIN,” and starts recording when the on-time comes. -
Page 29: Using Sleep Timer
To turn on or off Recording Timer after it has been Press CLOCK/TIMER repeatedly until “REC” appears on the display. The REC (Recording Timer) indicator starts flashing on the display and the (Timer) indicator remains lit. To turn off the Recording Timer, press CANCEL/DEMO. -
Page 30: Maintenance
Maintenance To get the best performance from the unit, keep your discs, tapes, and mechanism clean. General Notes In general, you will have the best performance by keeping your discs and the mechanism clean. • Store discs in their cases, and keep them in cabinets or on shelves. -
Page 31: Troubleshooting
Troubleshooting If you are having a problem with your unit, check this list for a possible solution before calling for service. If you cannot solve the problem from the hints given here, or the unit has been physically damaged, call a qualified person, such as your dealer, for service. -
Page 32: Specifications
Specifications Amplifier section—CA-HXZ30 Output Power SUBWOOFERS: MAIN SPEAKERS: 80 W per channel, min. RMS, driven into Audio input sensitivity/impedance (Measured at 1 kHz, with tape recording signal 300 mV) Speakers/impedance: Tuner FM tuning range: AM tuning range: CD player Disc capacity: Dynamic range: Signal-to-noise ratio: 90 dB Wow and flutter:... - Page 33 Amplifier section—CA-HXZ10 Output Power SUBWOOFERS: 165 W per channel, min. RMS, driven into 6 Ω at 63 Hz with no more than 10% total harmonic distortion. MAIN SPEAKERS: 75 W per channel, min. RMS, driven into 6 Ω at 1 kHz with no more than 10% total harmonic distortion.
- Page 34 If service is not available locally, box the product carefully, preferably in the original carton, and ship, insured, with a copy of your bill of sale plus a letter of explanation of the problem to the nearest JVC Factory Service Center, the name and location of which will be given to you by the toll-free number.
- Page 35 To prevent electrical shock, do not open the cabinet. There are no user serviceable parts inside. Please refer to qualified service personnel for repairs. Accessories To purchase accessories for your JVC product, please call toll free: 1 (800) 882-2345 or on the web at www.JVC.com BT-51001-5 (0301) ®...
- Page 36 VICTOR COMPANY OF JAPAN, LIMITED 2003 VICTOR COMPANY OF JAPAN, LIMITED 0203MWMMDWJEM...
- Page 37 COMPACT COMPONENT SYSTEM SYSTEME DE COMPOSANTS COMPACT HX-Z30 — HX-Z10 — SP-HXZ30 INSTRUCTIONS MANUEL D’INSTRUCTIONS Consists of CA-HXZ30 and SP-HXZ30 Consists of CA-HXZ10 and SP-HXZ10 SP-HXZ30 CA-HXZ30 SP-HXZ10 CA-HXZ10 SP-HXZ10 For Customer Use: Enter below the Model No. and Serial No.
- Page 38 HX-Z30: 35 kg / 78 lbs HX-Z10: 30 kg / 67 lbs – G-1 –...
- Page 39 For Canada/pour le Canada CAUTION: TO PREVENT ELECTRIC SHOCK, MATCH WIDE BLADE OF PLUG TO WIDE SLOT, FULLY INSERT. ATTENTION: POUR EVITER LES CHOCS ELECTRIQUES, INTRODUIRE LA LAME LA PLUS LARGE DE LA FICHE DANS LA BORNE CORRESPONDANTE DE LA PRISE ET POUSSER JUSQUAU FOND.
- Page 40 Introduction We would like to thank you for purchasing one of our JVC products. Before operating this unit, read this manual carefully and thoroughly to obtain the best possible performance from your unit, and retain this manual About This Manual This manual is organized as follows: •...
- Page 41 Contents Location of the Buttons and Controls ... 3 Getting Started ... 6 Common Operations ... 9 Listening to FM and AM Broadcasts ... 12 Disc Play Introduction ... 13 Playing Back Discs ... 15 Playing Back Tapes ... 20 Recording ...
-
Page 42: Location Of The Buttons And Controls
Location of the Buttons and Controls Become familiar with the buttons and controls on your unit. Front Panel Front Panel STANDBY SOUND TURBO COMPACT DIGITAL AUDIO EXTENDED C O M P A C T C O M P O N E N T S Y S T E M SUPER BASS C D 1 READY... - Page 43 Display Window See pages in parentheses for details. Front Panel (standby/on) button and STANDBY lamp (9, 24, 25) 2 Disc trays (CD1 – CD5) 3 Remote sensor 4 Display window 5 Indication lamp panel 1 CD ready lamps (13) • CD1 READY, CD2 READY, CD3 READY, CD4 READY, CD5 READY 2 SOUND TURBO lamp (10) 3 SUBWOOFER lamp (10)
- Page 44 Remote Control RM-SHXZ10A REMOTE CONTROL STANDBY COMPACT DIGITAL AUDIO EXTENDED C O M P A C T C O M P O N E N T S Y S T E M SUPER BASS C D 1 READY C D 2 READY C D 3 READY C D 4 READY C D 5 READY...
-
Page 45: Remote Control
Getting Started Supplied Accessories Make sure that you have all the following items. The number in parentheses indicates the quantity of each piece supplied. • AM loop antenna (1) • FM antenna (1) • Remote control (1) • Batteries (2) If anything is missing, consult your dealer immediately. -
Page 46: Connecting Speakers
AM antenna ANTENNA AM EXT LOOP FM 75 COAXIAL AM loop antenna (supplied) If the cords are covered with insulation, remove a short section of insulation at the end of each cord by twisting and pulling it off. Press and hold the clamp of the AM LOOP terminals on the rear of the unit. -
Page 47: Connecting Other Equipment
Connecting Other Equipment You can connect an external audio component used only as a playback device. • DO NOT connect any equipment while the power is on. • DO NOT plug in any equipment until all connections are complete. To connect an external audio component Be sure that the plugs of the audio cords are colored: White plugs and jacks are for left audio signals, and red ones for right audio signals. -
Page 48: Common Operations
Common Operations Turning On or Off the Power To turn on the unit, press STANDBY/ON on the remote control) so that the STANDBY lamp goes off. To turn off the unit (standby), press (or STANDBY/ON on the remote control) again so that the STANDBY lamp lights up. -
Page 49: Adjusting The Volume
Adjusting the Volume You can adjust the volume level only while the unit is turned on. The volume level can be adjusted in 32 steps (VOLUME MIN, VOLUME 1 – VOLUME 30, and VOLUME MAX). The volume level control does not affect recording. -
Page 50: Creating Your Own Sound Mode-User Mode
Surround modes* DANCE: Increases resonance and bass. HALL: Adds depth and brilliance to the sound. STADIUM: Adds clarity and spreads the sound, as in an outdoor stadium. SEA (Sound Effect Amplifier) modes ROCK: Boosts low and high frequency. Good for acoustic music. -
Page 51: Listening To Fm And Am Broadcasts
Listening to FM and AM Broadcasts Tuning in to a Station Press FM/AM. The unit automatically turns on and tunes in to the previously received station (either FM or AM). • Each time you press the button, the band alternates between FM and AM. -
Page 52: Disc Play Introduction
Disc Play Introduction This unit has been designed to play back the following discs: • CD (Audio CD)/CD-R (CD-Recordable)/CD-RW (CD- ReWritable) • MP3 disc (MP3 files recorded on a CD-R or CD-RW)* When playing a CD-R or CD-RW User-edited CD-Rs (CD-Recordable) and CD-RWs (CD-ReWritable) can be played back only if they have been “finalized.”... - Page 53 How are MP3 files recorded and played back? MP3 “tracks (files)” can be recorded in “group”—folders in PC terminology. During recording, the tracks and groups can be arranged similarly to the tracks and folders of computer data. “Root” is similar to the root of a tree. Every track and group can be linked to the root.
-
Page 54: Playing Back Discs
Playing Back Discs Loading Discs On the unit ONLY: Press 0 for the disc tray (CD1 – CD5) you want to load a disc onto. The unit automatically turns on and the disc tray comes out. Place a disc correctly on the circle of the disc tray, with its label side up. -
Page 55: Basic Disc Operations
Select a group and track to start playing. 1) Turn ¢ / 4 (or press ¢ (¡) / 4 (1) on the remote control) to select a group you want, then press CD 3¥8. The track number starts flashing. Track number flashes 2) Turn ¢... -
Page 56: Programming The Playing Order Of The Tracks -Program Play
Programming the Playing Order of the Tracks —Program Play You can arrange the playing order of the tracks before you start playing. You can program up to 100 tracks. • To use Repeat Play (see page 19) for Program Play, press REPEAT after starting Program Play. -
Page 57: Playing At Random-Random Play
To check the program contents On the remote control ONLY: Before playing, you can check the program contents by pressing ¢ (¡) or 4 (1). • ¢ (¡) : Shows them in the programed order. • 4 (1) : Shows the programed tracks in the reverse order. -
Page 58: Repeating Tracks Or Discs-Repeat Play
Repeating Tracks or Discs—Repeat Play You can have all the discs, the program or the individual track currently playing repeat as many times as you like. Press REPEAT during or before play. • Each time you press the button, Repeat Play mode changes as follows: REPEAT ALL REPEAT 1DISC... -
Page 59: Playing Back Tapes
Playing Back Tapes You can play back type I tapes. Playing Back a Tape Press 0 EJECT for the cassette deck. Insert a cassette with the exposed part of the tape down. Close the cassette holder gently. Press TAPE 2 3. The tape play starts and the tape direction indicator (3 or 2) starts flashing slowly to indicate the tape’s running direction. -
Page 60: Recording
Recording IMPORTANT: • It may be unlawful to record or playback copyrighted material without the consent of the copyright owner. • The recording level is automatically set correctly, so it is not affected by the VOLUME, the SUBWOOFER LEVEL, and the SOUND MODE controls, or the SOUND TURBO button. -
Page 61: Synchronized Recording
Synchronized Recording By using Synchronized Recording, you can start and stop both disc play and tape recording at the same time. Everything on the disc goes onto the tape in the order it is on the disc, or according to the order you have made for Program Play. -
Page 62: Using The Timers
Using the Timers There are three timers available—DAILY (Daily Timer), REC (Recording Timer), and SLEEP (Sleep Timer). • You can set the timers whether the unit is on or off. Before using the timers, set the clock built in the unit. (See page 9.) Using Daily Timer With Daily Timer, you can wake up to your favorite music or... - Page 63 Turn ¢ / 4 to select the source to play, then press SET/DISPLAY. “SET” appears for about 1 second. • As you turn ¢ / 4, the source changes as follows: TUNER FM TUNER AM AUX IN TAPE TUNER FM: tunes in to a specified preset FM station. = Go to step 6.
-
Page 64: Using Recording Timer
Using Recording Timer With Recording Timer, you can make a tape of a radio broadcast automatically. How Recording Timer actually works The unit automatically turns on, tunes in to the specified station, sets the volume level to “VOLUME MIN,” and starts recording when the on-time comes. -
Page 65: Using Sleep Timer
To turn on or off Recording Timer after it has been Press CLOCK/TIMER repeatedly until “REC” appears on the display. The REC (Recording Timer) indicator starts flashing on the display and the (Timer) indicator remains lit. To turn off the Recording Timer, press CANCEL/DEMO. -
Page 66: Maintenance
Maintenance To get the best performance from the unit, keep your discs, tapes, and mechanism clean. General Notes In general, you will have the best performance by keeping your discs and the mechanism clean. • Store discs in their cases, and keep them in cabinets or on shelves. -
Page 67: Troubleshooting
Troubleshooting If you are having a problem with your unit, check this list for a possible solution before calling for service. If you cannot solve the problem from the hints given here, or the unit has been physically damaged, call a qualified person, such as your dealer, for service. -
Page 68: Specifications
Specifications Amplifier section—CA-HXZ30 Output Power SUBWOOFERS: MAIN SPEAKERS: 80 W per channel, min. RMS, driven into Audio input sensitivity/impedance (Measured at 1 kHz, with tape recording signal 300 mV) AUX: Speakers/impedance: SUBWOOFERS: MAIN SPEAKERS: Tuner FM tuning range: AM tuning range: CD player Disc capacity: Dynamic range:... - Page 69 Amplifier section—CA-HXZ10 Output Power SUBWOOFERS: 165 W per channel, min. RMS, driven into 6 Ω at 63 Hz with no more than 10% total harmonic distortion. MAIN SPEAKERS: 75 W per channel, min. RMS, driven into 6 Ω at 1 kHz with no more than 10% total harmonic distortion.
- Page 70 VICTOR COMPANY OF JAPAN, LIMITED EN, FR 2003 VICTOR COMPANY OF JAPAN, LIMITED 0203MWMMDWJEM...