Table of Contents
Advertisement
Quick Links
1. Speed
- Mono : Up to 16 ppm in A4 (17 ppm in Letter)
- Color : Up to 4 ppm in A4 (4 ppm in Letter)
2. Printing Resolution
- Max. 2400x600 dpi effective output
3. Processor
- CHORUS3 (360Mhz), Proprietary SOC
4 Printer language emulation :
SPL-Color (3185)/SPL,PCL-Color(3185N/W/FN/FW)
Service Manual
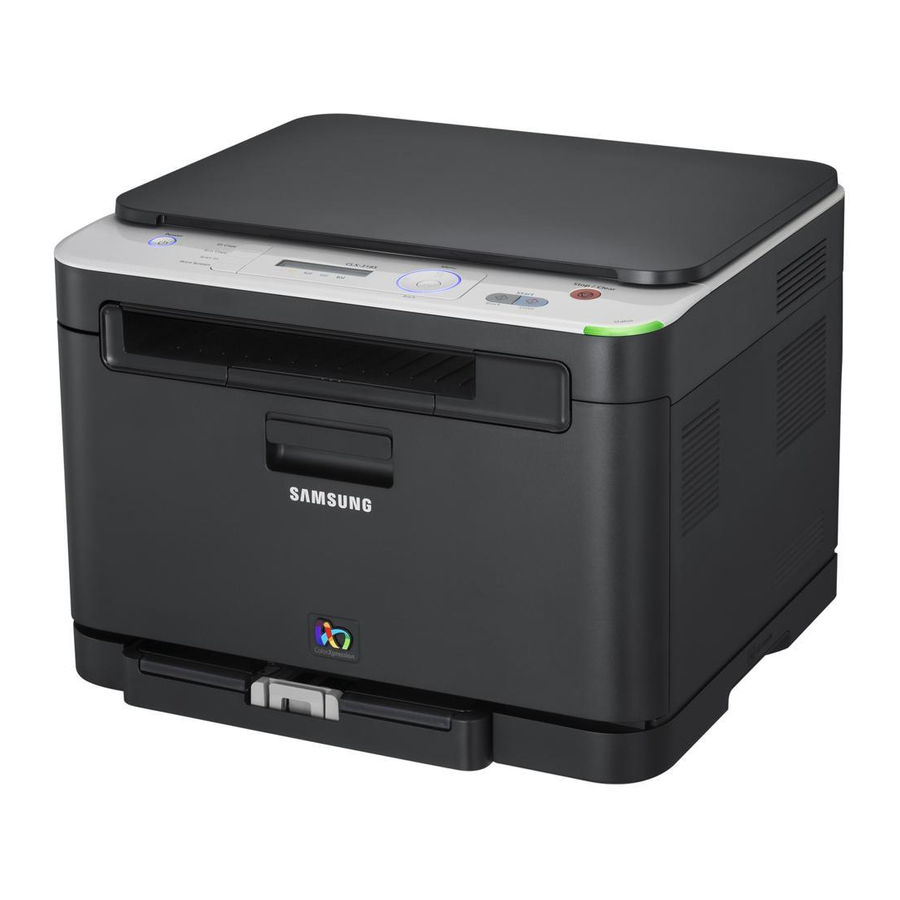
DIGITAL COLOR LASER MFP
CLX-3185 Series
3185/3185N/3185W/3185FN/3185FW
5. Memory : 128MB(3185)/256MB(3185N/W/FN/FW)
6. One 10/100 base Tx Network connector (3185N/W/FN/FW)
Wireless LAN: 802.11b/g/n (3185W/FW)
7. Toner cartridge
- Black : 1K (initial) / 1.5K (sales)
- Color : 0.7K (initial) / 1K (sales)
8. Cassette 150 sheets
ADF 15 sheets (3185FN/FW)
9. Color : Black
Advertisement
Table of Contents
Troubleshooting

Related Manuals for Samsung CLX-3185


Summary of Contents for Samsung CLX-3185
-
Page 1: Service Manual
Service Manual DIGITAL COLOR LASER MFP CLX-3185 Series 3185/3185N/3185W/3185FN/3185FW 1. Speed 5. Memory : 128MB(3185)/256MB(3185N/W/FN/FW) - Mono : Up to 16 ppm in A4 (17 ppm in Letter) 6. One 10/100 base Tx Network connector (3185N/W/FN/FW) - Color : Up to 4 ppm in A4 (4 ppm in Letter) Wireless LAN: 802.11b/g/n (3185W/FW) -
Page 2: Table Of Contents
Contents chapter 1 Precautions 1.1 Safety warning …………………………………………………… 1-1 1.2 Caution for safety ………………………………………………… 1-2 1.3 ESD precautions ………………………………………………… 1-5 chapter 2 Product Specification and feature 2.1 Product Specifications …………………………………………… 2-1 2.1.1 Product Overview …………………………………………… 2-1 2.1.2 Prouduct Specification ……………………………………… 2-2 2.1.3 Model Comparison Table ……………………………………... - Page 3 Contents 3.1.1 Precautions when assembling and disassembling ……… 3-1 3.1.2 Preautions when handling PBA …………………………… 3-1 3.1.3 Releasing Plastic Latches ………………………………… 3-1 3.2 Parts for Maintenance and Repair ……………………………… 3-2 3.2.1 Replacement interval for parts with a limited life ………… 3-2 3.2.2 Printer Cleaning ………………………………………………...
- Page 4 Contents 4.1.2 Understanding The Status LED …………………………… 4-3 4.1.3 Paper path …………………………………………………… 4-4 4.1.4 Menu Map …………………………………………………… 4-9 4.1.5 F/W Upgrade ………………………………………………… 4-13 4.1.6 Tech Mode …………………………………………………… 4-14 4.1.7 EDC Mode …………………………………………………… 4-19 4.1.8 Periodic Defective Image …………………………………… 4-23 4.1.9 Error Message ……………………………………………… 4-24 4.2 Troubleshooting ………………………………………………...
-
Page 5: Safety Warning
High voltages and lasers inside this product are dangerous. This product should only be serviced by a factory trained service technician. (2) Use only Samsung replacement parts. There are no user serviceable parts inside the product. Do not make any unauthorized changes or additions to the product as these could cause the product to malfunctions and create an electric shocks or fire hazards. -
Page 6: Caution For Safety
Take care not to cut or damage the power cable or plugs when moving the machine. (9) Use caution during thunder or lightning storms. Samsung recommends that this machine be disconnected from the power source when such weather conditions are expected. Do not touch the machine or the power cord if it is still connected to the wall socket in these weather conditions. -
Page 7: Handling Precautions
1.2.4 Assembly / Disassembly precautions Replace parts carefully and always use Samsung parts. Take care to note the exact location of parts and also cable routing before dismantling any part of the machine. Ensure all parts and cables are replaced correctly. -
Page 8: Disregarding This Warning May Cause Bodily Injury
- The equipment must be installed near the socket outlet and must be accessible. - Be sure to fix and plug in the power cable securely after the installation so that no one trips over it. Service Manual Samsung Electronics... -
Page 9: Esd Precautions
9. Minimize bodily motions when handling unpackaged replacement ESDs. Normal motions, such as the brushing together of clothing fabric and lifting one’s foot from a carpeted floor, can generate static electricity sufficient to damage an ESD. Service Manual Samsung Electronics... -
Page 10: Product Spec And Feature
The smallest & quietest C-MFP in the world Target Home & SOHO CLX-3185FN/3185FW (4 in 1 model) CLX-3185/3185N/3185W (3 in 1 model) 1. Speed 5. Memory : 128MB(3185)/256MB(3185N/W/FN/FW) - Mono : Up to 16 ppm in A4 (17 ppm in Letter) 6. -
Page 11: Prouduct Specification
2.1.2 Prouduct Specification Specifications are correct at the time of printing. Product specifications are subject to change without notice. See below for product specifications. 2.1.2.1 General Specifications Item CLX-3185/3185N/3185W CLX-3185FN/3185FW Major Features Multi-Pass Color Laser Multi-Pass Color Laser 2400dpi class 2400dpi class USB2.0... -
Page 12: Print Specifications
Product spec and feature Item CLX-3185/3185N/3185W CLX-3185FN/3185FW Humidity Operating 30~80% RH 30~80% RH Storage (Un-Packed) 30~80% RH 30~80% RH Storage (Packed) 30~85% RH 30~85% RH Memory Standard - 3185 : 128MB 256MB - 3185N/W : 256MB Type DDR2 SDRAM DDR2 SDRAM... -
Page 13: Scan Specifications
Product spec and feature 2.1.2.3 Scan Specifications Item CLX-3185/3185N/3185W CLX-3185FN/3185FW Scan Method Color CIS Color CIS Scan Speed Approx. 18sec through ADF Gray Approx. 25sec Color Approx. 35sec Scan Speed Approx. 15sec Approx. 15sec through Platen Gray Approx. 20sec Approx. 20sec Color 75dpi/300dpi Approx. -
Page 14: Copy Specifications
Product spec and feature 2.1.2.4 Copy Specifications Item CLX-3185/3185N/3185W CLX-3185FN/3185FW Copy Quality Text 600x600dpi(Optical: 300x300dpi) 600x600dpi(Optical: 300x300dpi) Selection or (Platen & ADF) for Platen Original Image Mixed 600x600dpi(Optical: 300x300dpi) 600x600dpi(Optical: 300x300dpi) type selection (Platen & ADF) for Platen Mode: (Color) -
Page 15: Telephone Specifications
Product spec and feature Item CLX-3185/3185N/3185W CLX-3185FN/3185FW Copy Mode(=Quality) Text, Mixed, Magazine, Film Photo Text, Mixed, Magazine, Film Photo Auto return to default mode Changeable Default mode Contrast, Image, Reduce/Enlarge, Contrast, Image, Reduce/Enlarge, No. of Copies No. of Copies Special Copy... -
Page 16: Fax Specifications
Product spec and feature 2.1.2.6 Fax Specifications Item CLX-3185/3185N/3185W CLX-3185FN/3185FW Compatibility ITU-T G3 Communication System PSTN/PABX Modem Speed 33.6Kbps TX Speed 3sec(Mono/Standard/ECM-MMR. ITU-T G3 No1.standard) Compression MH/MR/MMR/JPEG/JBIG Color Fax Resolution Mono.Std 203*98dpi Mono.Fine 203*196dpi Mono.S.Fine 300*300dpi Color 200*200dpi Scan 3 sec/ LTR... -
Page 17: Paper Handling
Product spec and feature Item CLX-3185/3185N/3185W CLX-3185FN/3185FW Junk Fax barrier Secure Receive Memory Back-up Yes(Flash Memory) Battery Backup Rx FAX Duplex Print Out Receive Mode Fax, TEL, Ans/Fax Capacity 2MB(100 Pages) (Mono) Optional Memory Max locations to store to 1 Group... - Page 18 Product spec and feature Item CLX-3185/3185N/3185W CLX-3185FN/3185FW Paper Type Cassette A4, A5, A6, Letter, Legal, A4, A5, A6, Letter, Legal, Executive, Folio, ISO B5, JIS B5 Executive, Folio, ISO B5, JIS B5 Transparency : (Mono Print Only) Transparency : (Mono Print Only) GlossyPhoto160 g/ ㎡...
- Page 19 Product spec and feature Item CLX-3185/3185N/3185W CLX-3185FN/3185FW Language [Windows] [Windows] Locallization - Korean, English, French, Germa N, - Korean, English, French, Germa N, Italian, Spanish, Russian, Dutch, Italian, Spanish, Russian, Dutch, E.Portuguese, B.Portuguese, Fi E.Portuguese, B.Portuguese, Fi Nish, Swedish, Norwegian, Danish Nish, Swedish, Norwegian, Danish S.Chinese, T.Chinese, Polish,...
- Page 20 JC97-03188B ADF Pick up roller Approx 20,000 Images JC97-03186A * Average A4-/letter-sized page count based on Std. ISO 19798 of individual colors on each page. Usage conditions and print patterns may cause results to vary. 2-11 Service Manual Samsung Electronics...
-
Page 21: Model Comparison Table
150 CST 150 CST, 1 Manual 250 CST, 1 Manual 250 CST, 10 MP Paper Input ADF 15 sheets SCF 250 sheets ADF 50 sheets Toner 1.5K/1K 2K/1K 2.5K/2K Dim. (WDH) 454x380.5x355.4 413.2x364.5x333 437x508x525mm 497x406x393mm 2-12 Service Manual Samsung Electronics... -
Page 22: System Overview
User’s interface. The Scanner part is composed of an ADF and a Platen and is connected with the Main Controller by Harnesses. The Fax part and the ADF scanner part are not populated in the Model of CLX-3185 and CLX-3185N. - Page 23 Product spec and feature - Rear view This illustration may differ from your machine depending on its model. Rear door handle USB port Rear door Network port Power cord receptacle a. CLX-3185N/W only 2-14 Service Manual Samsung Electronics...
- Page 24 Document feeder input tray Document feeder cover Document feeder output tray Toner cartridges USB port Waste toner container Tray 1 Imaging unit Front door handle Scanner lid Front door Scanner glass Document output tray Scan unit 2-15 Service Manual Samsung Electronics...
- Page 25 Product spec and feature - Rear view This illustration may differ from your machine depending on its model. Rear door handle Network port Rear door Telephone line socket Power cord receptacle Extension telephone socket (EXT) USB port 2-16 Service Manual Samsung Electronics...
- Page 26 Roller DEVE Y DEVE Y DEVE M DEVE M DEVE C DEVE C DEVE K DEVE K Roller Roller Waste Waste Tank Tank Regi. Regi. Roller Roller Pick up Pick up Roller Roller Cassette Cassette 2-17 Service Manual Samsung Electronics...
- Page 27 • Consisted of LD(Laser Diode) and Polygon Motor Control. Error Phenomenon Polygon Motor Error The Rotation of Polygon Motor can not reach stable Hsync Error Though the rotation of Polygon Motor reach stable, the signal of Hsync is not occurred 2-18 Service Manual Samsung Electronics...
- Page 28 A pressure roller mounted under a heat roller is made of a silicon resin, and the surface also is coated with Teflon. When a paper passes between a heat roller and a pressure roller, toner adheres to the surface of a paper permanently. 2-19 Service Manual Samsung Electronics...
- Page 29 • Each Toner Kit consists of Developer and Deve. Main Frame ⑨ Driver Ass’y • It is a power delivery unit by gearing • By driving the motor, it supplies the power to the feeding unit, the fusing unit, and the distributing unit. 2-20 Service Manual Samsung Electronics...
- Page 30 - CX86710 (SFX336) : Existing Modem Chip which adds SSD (System Side Device) for interfacing between LSD and DIB of FM336Plus Core - CX20493 (LSD) : LIU (Line Interface Unit) Chip which is controlled by SSD and satisfies each PSTN Requirements by modulating internal Configuration with connecting Tel Line 2-21 Service Manual Samsung Electronics...
- Page 31 3) CIS Operating Part : CMOS Sensor use +3.3V - CIS Maximum Operating Frequency : 5MHz - CIS Line time : 0.75ms @mono 300dpi (TBD) - White Data output Voltage : 1.7V -(Mono Copy, 5ms/line) 2-22 Service Manual Samsung Electronics...
- Page 32 Blade on OPC on OPC ITB Unit ITB Unit P2: Image P2: Image on Media on Media Media Path Media Path Blade Blade Developer Developer Eraser Eraser Charger Charger Laser Scanning Unit Laser Scanning Unit 2-23 Service Manual Samsung Electronics...
- Page 33 2. AC + DC Voltage is being used to develop toner into latent image on OPC because non-contact developing method is adopted 3. Y, M, C, and K Images are sequentially developed onto OPC and transferred onto Intermediate Transfer Belt (hereafter ITB) to form a color image on ITB 2-24 Service Manual Samsung Electronics...
- Page 34 T2 Roll engagement and disengagement ⑥ Fusing • 3 Roll system -> short warm-up time (35sec) • Post Pressure Roll 1. Color Image on media is melted down and fixed into media by fusing process 2-25 Service Manual Samsung Electronics...
-
Page 35: H/W Description
Product spec and feature 2.2.2 H/W description 2.2.2.1 H/W configuration 2-26 Service Manual Samsung Electronics... -
Page 36: Main Controller Pba
Fuser Clutch con(2P) NOR FLASH(32MB/4M) SCAN Motor Con(4P) USB Controller Network Conn Image process USB Conn PHY Chip Wireless con (6P) SCAN MOTOR DRIVER IC USB Host con(5P) Serial Flash(4MB) Empty sensor(3P) Initial Crum PBA 2-27 Service Manual Samsung Electronics... -
Page 37: Main Pba Description
Product spec and feature 2.2.2.3 Main PBA Description CLX-3185 Series CLX-3185 Series in in- in in- 1 only 1 only 1 only 1 only in in- in in- 1 only 1 only 1 only 1 only Modem Modem Modem Modem Main B’d... - Page 38 ▪ Motor 1 BLDC ▪ LSU ▪ Fuser Control the Fuser’s temperature ▪ HVPS Control the high voltage outputs ▪ ADC Reading the Fuser’s temperature and the high voltage outputs’ feedback ▪ Cover Open Sensing 2-29 Service Manual Samsung Electronics...
- Page 39 Peak Loading Current 2.2 A 2.7 A Ripple Noise <100mVp-p <500mVp-p Maximum Output 10.2W Peak Output 64.8W Protection for loading shortage and Shut down or Fuse Shut down or Output overflowing current Protection Voltage Drop 2-30 Service Manual Samsung Electronics...
- Page 40 BIAS AC +141V 3% +141V 3% BIAS DC BIAS DC -1300V 15% -1300V 15% -295V 3% -295V 3% SUPPLY DC SUPPLY DC -595V 3% -595V 3% Charger Charger -1000V 3% -1000V 3% Main Main Regi Regi 2-31 Service Manual Samsung Electronics...
- Page 41 • Output voltage: AC 250V ~ 1650Vp-p 1.5% (supply voltage is connected to ZENER Diode 350V) DC -50V ~ -600V DC 3% • ERROR type: 1. if Deve is GND, density will be extremely down. 2. if Deve is floating (for insecure terminal contact), density will be extremely down. 2-32 Service Manual Samsung Electronics...
-
Page 42: Crum
Product spec and feature 2.2.3 CRUM The CLX-3185 series engine will be equipped with electronics that can read and write data into EEPROM otherwise known as CRUMs that reside within 1) C, M, Y, K Toner cartridges. The CRUM has a company ID. -
Page 43: S/W Structure And Descriptions
Printer F/W. Hence the Status Monitor can stop polling because the Printer F/W informs the Status Monitor that printing job is complete. 2.3.3 Status Monitor Status Monitor has no user interface. It shows only HTML help when any error occurs during printing jobs. 2-34 Service Manual Samsung Electronics... -
Page 44: Network Interface
Set option value polling interval enable/disable Set last error status polling interval Sharing Registry Info System Status Monitor Printer Driver Registry Get option value Get last error status enable/disable polling interval Sharing Registry Info 2-35 Service Manual Samsung Electronics... -
Page 45: System F/W Flow
Color Registration measure Auto Color Registration pattern printing Video data Color Registration adjustment P Sync. Page Sync. modify Video signal L Sync. Line Sync. modify generator clock Video Clock Freq. modify temperat temperature control sensor 2-36 Service Manual Samsung Electronics... -
Page 46: Alarm Shortage
• SCF Cove Open 4. Service Call : Unrecoverable Error • Engine LSU Error • Main Motor Error • Engine Fuser Over(Low) Heat Error + Open Heat Error • Transfer Belt Error 5. Others • Ready IP Conflict 2-37 Service Manual Samsung Electronics... -
Page 47: Crum Overview
- Indicates how many pages are printed by using the consumable • Dot Count - Toner Cartridge Only - Indicates how many dots are printed by using the toner cartridge • Image Count • Model ID 2-38 Service Manual Samsung Electronics... -
Page 48: Initailize Flow
Product spec and feature 2.3.10 Initailize Flow 2-39 Service Manual Samsung Electronics... - Page 49 Product spec and feature 2-40 Service Manual Samsung Electronics...
-
Page 50: Disassembly And Reassembly
3.1.1 Precautions when assembling and disassembling * Use only approved Samsung spare parts. Ensure that part number, product name, any voltage, current or temperature rating are correct. Failure to do so could result in damage to the machine, circuit overload, fire or electric shock. -
Page 51: Parts For Maintenance And Repair
** Image counts based on one color on each page. If you print documents in full color (Cyan, Magenta, Yellow, Black), the life of this item will be reduced by 25%. Service Manual Samsung Electronics... -
Page 52: Printer Cleaning
* Do not touch transfer roller when cleaning inside of machine. If transfer roller gets dirty, printing quality could be low. * Please refer to the User Manual for cleaning instructions. Service Manual Samsung Electronics... -
Page 53: Information Related To Disassembly And Assembly
(hot water sets the toner). Do not touch the developer roller surface as contamination will reduce print quality. Take care not to damage the roller’s surface when installing or removing a toner cartridge. Service Manual Samsung Electronics... -
Page 54: Screws Used In The Printer
6003-000282 ELA UNIT-LSU LD SCREW-TAPTYPE;BH,+,-,B,M3,L8,ZPC(BLK),SWRCH18A,- 6002-000308 CARTRIDGE TONER Y SCREW-TAPTYPE;PH,+,-,B,M2.6,L6,ZPC(WHT),SWRCH18A,- 6002-000308 CARTRIDGE TONER M SCREW-TAPTYPE;PH,+,-,B,M2.6,L6,ZPC(WHT),SWRCH18A,- 6002-000308 CARTRIDGE TONER C SCREW-TAPTYPE;PH,+,-,B,M2.6,L6,ZPC(WHT),SWRCH18A,- 6002-000308 CARTRIDGE TONER K SCREW-TAPTYPE;PH,+,-,B,M2.6,L6,ZPC(WHT),SWRCH18A,- 6003-000282 DRUM UNIT SCREW-TAPTYPE;BH,+,-,B,M3,L8,ZPC(BLK),SWRCH18A,- 6001-000485 SCREW-MACHINE;PH,+,-,M2.6,L4,ZPC(WHT),SWRCH18A,FP,- 6003-000282 SCREW-TAPTYPE;BH,+,-,B,M3,L8,ZPC(BLK),SWRCH18A,- 6003-000196 SCREW-TAPTYPE;PWH,+,B,M3,L10,NI PLT,SWRCH18A Service Manual Samsung Electronics... - Page 55 SCREW-TAPTYPE;PWH,+,B,M3,L10,NI PLT,SWRCH18A 6003-000196 FUSER SCREW-TAPTYPE;PWH,+,B,M3,L10,NI PLT,SWRCH18A 6003-000196 HARNESS-GND SCREW-TAPTYPE;PWH,+,B,M3,L10,NI PLT,SWRCH18A 6003-000196 HOUSING-HARNESS SCREW-TAPTYPE;PWH,+,B,M3,L10,NI PLT,SWRCH18A 6003-000196 HVPS SCREW-TAPTYPE;PWH,+,B,M3,L10,NI PLT,SWRCH18A 6003-000196 SCREW-TAPTYPE;PWH,+,B,M3,L10,NI PLT,SWRCH18A 6003-000196 SCREW-TAPTYPE;PWH,+,B,M3,L10,NI PLT,SWRCH18A 6003-000196 MAIN-BOARD SCREW-TAPTYPE;PWH,+,B,M3,L10,NI PLT,SWRCH18A 6003-000196 PBA SUB-ADF SCREW-TAPTYPE;PWH,+,B,M3,L10,NI PLT,SWRCH18A 6003-000269 SMPS SCREW-TAPTYPE;BH,+,-,S,M3,L6,ZPC(WHT),SWRCH18A,- Service Manual Samsung Electronics...
- Page 56 Main Board JC39-00925A ADF Joint Board ADF IF Board JC39-00926A ADF Motor ADF Joint Board JC39-00927A Scan home sensor OPE Board JC39-00928A LIU Board Main Board JC39-00515A USB HOST Board Main Board JC39-00964A Speker LIU Board JC39-01405A Service Manual Samsung Electronics...
-
Page 57: Disassembly Procedure
2. Remove the right side cover by unhooking after open the front cover. 4. Open the front cover. Unplug the connector after removing the connector cover. And then remove the front cover. Service Manual Samsung Electronics... -
Page 58: Adf Assy (Only 4 In 1 Model)
ADF pad ADF pad ADF pad 4. If the ADF roller is defective, remove the ADF 2. Lift the ADF Assy up. open unit. 5. Release the stacker by pushing it to the direction of arrow. Service Manual Samsung Electronics... - Page 59 Disassembly and Reassembly 6. Remove the Side covers after removing 8. Remove the 4 screw. And remove the guide 2 screws. path unit. 7. Remove the guide path cover after removing 4 screws. 3-10 Service Manual Samsung Electronics...
-
Page 60: Ope Unit
3. Release the OPE unit after unplugging 2 connectors. 2. Remove the hook of the OPE unit. First, remove the rear area of the OPE unit, and then remove the front area of the OPE unit. 3-11 Service Manual Samsung Electronics... -
Page 61: Sheet Adf
Disassembly and Reassembly 3.4.4 Sheet ADF Open the ADF cover. And remove the ADF sheet by using a sharp tool like tweezers SHEET-ADF SHEET-ADF SHEET-ADF SHEET-ADF 3-12 Service Manual Samsung Electronics... -
Page 62: Scanner Assy
4 in 1 4 in 1 3 in 1 3 in 1 4 in 1 4 in 1 2. Open up the Scan Assy. Remove the Holder link. And remove the link scan from the rail. 3-13 Service Manual Samsung Electronics... -
Page 63: Cis Unit
3.4.6 CIS unit Before disassembling the CIS unit, remove the ADF assy, OPE unit. (Refer to 3.4.2~3) 1. Lift the scan upper up. 2. Release the belt. 3. Remove the CIS unit after unplug the cable. 3-14 Service Manual Samsung Electronics... -
Page 64: Middle Cover
3.4.7 Middle Cover Before disassembling the middle cover, remove all covers and Scan Assy. (Refer to 3.4.1~2,5) 1. Open the front cover. Remove the 2 screws. 2. Remove 4 screws. Remove the link-holder. And remove 1 screw. 3-15 Service Manual Samsung Electronics... - Page 65 Disassembly and Reassembly 3. Remove 1 screw. Unplug 3 connectors. Screw Screw Screw Screw 4. Unplug the fan connector from the HVPS. Release the middle cover. 3-16 Service Manual Samsung Electronics...
-
Page 66: Wireless Lan Pba (Only Wireless Model)
Disassembly and Reassembly 3.4.8 Wireless LAN PBA (Only wireless model) 1. Open the DADF. Remove the WLAN PBA cover. 2. Remove the WLAN PBA after removing 1 screw and 1 connector. 3-17 Service Manual Samsung Electronics... -
Page 67: Itb
Disassembly and Reassembly 3.4.9 ITB 1. Open the front cover. Unplug the connector from OPE PBA. 2. Hold the ITB and take out it to the direction of arrow. 3-18 Service Manual Samsung Electronics... -
Page 68: Fuser
2. Remove the 4 screw, and move the shaft as connector as shown below. shown below. And remove the Fuser unit. Caution - The fuser is very hot. So turn the printer off and wait until the printer to cool before replacing 3-19 Service Manual Samsung Electronics... -
Page 69: Hvps Board
1. Remove the 5 screws and unplug the 2 connectors, 1 flat cable. And remove the one hook of the center. 3.4.12 Main PBA 1. Remove the harness cover after remove the one 2. Remove the all harness and 4 screws. And screw. release the Main PBA. 3-20 Service Manual Samsung Electronics... -
Page 70: Smps Board
1. To remove the LSU from the bottom of the SET, 2. Release the LSU unit after remove the 2 Flat first remove the harness cover after remove the cable. 2 screws. And remove the 3 screws. Harness cover Harness cover 3-21 Service Manual Samsung Electronics... -
Page 71: Holder Pad
Disassembly and Reassembly 3.4.15 Holder Pad 1. Remove the sub PBA. And release the Guide 2. Release the holder pad after remove the hook Pick up unit after remove the 4 screws. of both side. 3-22 Service Manual Samsung Electronics... -
Page 72: Transfer Roller Assy
Disassembly and Reassembly 3.4.16 Transfer roller Assy 1. Remove the Transfer roller by pushing the hook from the rear cover. 3-23 Service Manual Samsung Electronics... -
Page 73: Pick Up Roller
1. Remove the hook from the position A and push to the left side. 2. Separate the Pick up roller Ass’y after release the position B. 3. Remove the hook of the part C, B in sequence. 4. Separate the Pick up rubber. 3-24 Service Manual Samsung Electronics... -
Page 74: Main Drive Unit
3.4.18 Main drive unit 1. Remove the main PBA and SMPS board. (Refer to 3.4.12~13) 2. Remove the cover switch after removing 1 screw. Cover-Switch Cover-Switch Cover-Switch Cover-Switch 3. Release the main drive unit after removing 7 screws. 3-25 Service Manual Samsung Electronics... -
Page 75: Alignment And Troubleshooting
4.1 Alignment and Adjustments 4.1.1 Control Panel overview This control panel may differ from your machine depending on its model. ■ CLX-3185/CLX-3185N Power Allow you to turn the power on and off. Eco Copy Reduces toner consumption and paper usage. - Page 76 Shows the current status of the wireless network connection. (CLX-3185FW) 16 Status LED Shows the status of your machine. 17 Start (Color) Begins a printing job in color mode. 18 On Hook Dial Engages the telephone line. Service Manual Samsung Electronics...
-
Page 77: Understanding The Status Led
• A paper jam has occurred. • The door is opened. Close the door. • There is no paper in the tray. Load paper in the tray. • The machine has stopped due to a major error. Check the display message. Service Manual Samsung Electronics... -
Page 78: Paper Path
Roller Roller DEVE Y DEVE Y DEVE M DEVE M DEVE C DEVE C DEVE K DEVE K Roller Roller Waste Waste Tank Tank Regi. Regi. Roller Roller Pick up Pick up Roller Roller Cassette Cassette Service Manual Samsung Electronics... -
Page 79: Clearing Paper Jams
2. Pull out tray 1 out of the machine. If the paper does not move when you pull, or if you do not see the paper in this area, check the fuser area around the toner cartridge. 4. Insert the tray 1 back into Service Manual Samsung Electronics... - Page 80 The inner cover will then close automatically. Lower down the scan unit gently until it is completely closed. Make sure that it is securely latched. Printing automatically resumes. 5. Close the rear door. Printing automatically resumes. Service Manual Samsung Electronics...
- Page 81 If you do not see the jammed paper or if there is any resistance when you pull, stop and go to the 5. Pull up the fuser lever. next step. 3. Open the rear cover. Service Manual Samsung Electronics...
- Page 82 8. Lower down the scan unit gently and slowly until it completely closed. Make sure that it is securely latched. 7. Carefully take the jammed paper out of the machine. 9. Pull down the fuser lever. 10. Close the rear door. Printing automatically resumes. Service Manual Samsung Electronics...
-
Page 83: Menu Map
Original Type ECM Mode Eco Copy Send Report Image TCR Receiving Receive Mode Ring To Answer Stamp RCV Name RCV Start Code Auto Reduction Discard Size Junk Fax Setup DRPD Mode Change Default Resolution Darkness Auto Report Service Manual Samsung Electronics... - Page 84 WLAN Default Alarm Sound WLAN Signal Speaker Ringer Clear Setting Report Network Info. All Report Configuration a. CLX-3185/CLX-3185N/CLX-3185FN only Supplies Info b. CLX-3185FN/CLX-3185FW only Address Book c. CLX-3185N/CLX-3185FN/CLX-3185FW only Send Report Sent Report Fax RCV Report Schedule Jobs Junk Fax Report Network Info.
-
Page 85: Useful Menu Item For Service
4. Press the left/right arrow until the item you want to clear appears and press OK. 5. Press OK when Yes appears to confirm clearing. 6. Repeat steps 4 through 5 to clear another item. 7. Press Stop/Clear to return to ready mode. 4-11 Service Manual Samsung Electronics... - Page 86 7. Press Stop/Clear to return to ready mode. d) Finding the serial number When you call for service or register as a user on the Samsung website, the machine’s serial number by taking the following steps. 1. Press Menu on the control panel.
-
Page 87: F/W Upgrade
4) Download F/W via USB ※ In the case of Download Mode, If STOP Key is pressed when Printer is not connected to computer with USB, Error message happens (Error message : Image Error, Reset Printer) picture#1 picture#2 4-13 Service Manual Samsung Electronics... -
Page 88: Tech Mode
Fax option 3 in 1 Data Setup Machine Test Report Clear All Mem Switch Test All Report Clear Counts Dram Test Configuration Rom Test Supplies Info Shading Test Error Info Usage Page Component Check Service Support 4-14 Service Manual Samsung Electronics... - Page 89 CLEAR COUNTS The function resets the the count information for Total page, FLT Scan, ADF Scan, Image count, Transfer belt, Fuser, Transfer roller, Tray1 roller. Please reset the count after replacing the related part. 4-15 Service Manual Samsung Electronics...
- Page 90 Use this list to check for send and receive errors. If a communication error occurs while the machine is in TECH mode, the protocol list will print automatically. OTHER ITEM This list provides a list of the user system data settings and tech mode settings. 4-16 Service Manual Samsung Electronics...
-
Page 91: Configuration Report
Alignment & Troubleshooting Configuration report 4-17 Service Manual Samsung Electronics... - Page 92 Alignment & Troubleshooting supplies information report 4-18 Service Manual Samsung Electronics...
-
Page 93: Edc Mode
Charger Transfer Roll Transfer Roll Magenta Magenta Cyan Cyan FCF P/U Roller FCF P/U Roller T2 REVERSE T2 REVERSE Black Black Dev DC Dev DC Dev AC Vpp Dev AC Vpp Dev AC Dev AC 4-19 Service Manual Samsung Electronics... - Page 94 If cover is opened, " Opened“ message will be displayed. If not, "Closed" message will be. Tray1 Empty If paper exists in the tray, "With Paper" will be displayed. If not, "Without Paper" message will be. 4-20 Service Manual Samsung Electronics...
- Page 95 Left/Right arrow is selected, x% is increased or decreased. And “DUTY : x%” message will be displayed. * is disappeared. And then “enter” key is pushed, x%*” message will be displayed. When “Upper Level” is pushed, * is disappeared. 4-21 Service Manual Samsung Electronics...
- Page 96 When “enter” key is pushed, “* xdot” message will be displayed. “*” displayed current setting. And then Left/Right arrow is selected, xdot is increased or decreased. “*” is disappeared. And then “enter” key is pushed, “*” will be displayed. 4-22 Service Manual Samsung Electronics...
-
Page 97: Periodic Defective Image
T1 roller Pressure Pressure Heat roller Heat roller roller roller T2 roller T2 roller Supply roller Supply roller Charge roller Charge roller Deve roller Deve roller Regi roller Regi roller Pick up roller Pick up roller 4-23 Service Manual Samsung Electronics... -
Page 98: Error Message
3. Replace the main board. C1-2110 Prepare Toner Small amount of toner is left in the Prepare a new cartridge for a yellow cartridge. replacement. ∇ The estimated cartridge life of toner is close. 4-24 Service Manual Samsung Electronics... - Page 99 Not compatible The yellow toner cartridge is not Install the yellow toner cartridge Yellow toner suitable for your machine. with a Samsung-genuine cartridge C1-3110 Prepare Toner Small amount of toner is left in the Prepare a new cartridge for a magenta cartridge.
- Page 100 Not compatible The magenta toner cartridge is not Install the yellow toner cartridge magenta toner suitable for your machine. with a Samsung-genuine cartridge C1-4110 Prepare Toner Small amount of toner is left in the Prepare a new cartridge for a cyan cartridge.
- Page 101 Not compatible The black toner cartridge is not Install the yellow toner cartridge Black toner suitable for your machine. with a Samsung-genuine cartridge C3-1110 Prepare IMG unit The estimated life of imaging unit is Prepare a imaging unit for close.
- Page 102 If the problem persist, replace the LSU unit. U2-1114 Error #U2-1114 LSU does not work but the Lready Turn off the machine then on. Turn off then on signal is detected. If the problem persist, replace the LSU unit. 4-28 Service Manual Samsung Electronics...
-
Page 103: Troubleshooting
Green LED on? - Main PBA error - Panel PBA error Refer to Ready or Error LED ON? 4.1.8 LED Status Power save Error Message Test Print printing Refer to "Solution Quality is of Image Problem" Nomal? 4-29 Service Manual Samsung Electronics... -
Page 104: Troubleshooting Checklist
• See “Solving General Printing Problems” does not resolve the printer • See “Solving Print Quality Problems” problem, check the following • See “Common Windows Problems” troubleshooting sections. • See “Common Macintosh Problems” • See “Common Linux Problems” 4-30 Service Manual Samsung Electronics... -
Page 105: Solving General Printing Problems
The printer is not Check the power switch and the receiving power. power source. The printer is not Select Samsung CLX-3185 series selected as the default printer. as your default printer. Check the printer for the following: Close the printer cover. - Page 106 The printer driver Software Section. Try printing a may be incorrectly installed. test page. Check the LEDs on the control The printer is malfunctioning. panel to determine if the printer is indicating a system error. 4-32 Service Manual Samsung Electronics...
- Page 107 Paper has been loaded incorrectly. Check that the paper guides are set correctly. Remove excess paper from the There is too much paper in the tray. tray. Use only paper that meets printer The paper is too thick. specifications. 4-33 Service Manual Samsung Electronics...
- Page 108 4 ppm in color mode. From the Start menu, choose If using Windows 98/Me, the Settings and Printers. Right-click Spooling Setting may be set the Samsung CLP-31x series incorrectly. printer icon, choose Properties, click the Details tab, and then choose the Spool Settings button.
- Page 109 Or, ensure that the paper size in the printer driver settings matches the paper selection in the software application settings you use. 4-35 Service Manual Samsung Electronics...
- Page 110 An incorrect type of Use only paper that meets printer paper is being used. specifications. After opening the front cover, There may be debris remove the imaging unit and then inside the printer. clear the debris. 4-36 Service Manual Samsung Electronics...
- Page 111 The software Try printing a job from another application is malfunctioning. application. Exit Windows and reboot the The operating system computer. Turn the printer off and is malfunctioning. then back on again. 4-37 Service Manual Samsung Electronics...
- Page 112 1200dpi [Normal] or 600dpi [Draft]. [Best] and then try printing again. If you increase the photo size in the The resolution of the software application, the resolution photo is very low. will be reduced. Reduce the photo size. 4-38 Service Manual Samsung Electronics...
-
Page 113: Solving Print Quality Problems
So the If the problem persists, replace AaBbCc contact is unstable. Or the output of the HVPS board. the HVPS is abnormal. AaBbCc AaBbCc AaBbCc AaBbCc AaBbCc AaBbCc AaBbCc AaBbCc AaBbCc AaBbCc 4-39 Service Manual Samsung Electronics... - Page 114 AaBbCc AaBbCc AaBbCc The paper may not meet specifications Check the paper type and quality. AaBbCc AaBbCc AaBbCc AaBbCc AaBbCc AaBbCc AaBbCc AaBbCc AaBbCc AaBbCc AaBbCc AaBbCc AaBbCc AaBbCc AaBbCc AaBbCc AaBbCc AaBbCc AaBbCc AaBbCc 4-40 Service Manual Samsung Electronics...
- Page 115 3. The paper lot is bad. Try a different kind or brand of paper. See "Vertical repetitive defects" on 4. The toner cartridge may be defective. the next page. 4-41 Service Manual Samsung Electronics...
- Page 116 2. If white vertical replace the imaging unit with a new lines appear on the page one. 3. Foreign matter stuck Clean the LSU window with onto the window of internal lenses recommended cleaner(IPA). of LSU mirror. 4-42 Service Manual Samsung Electronics...
- Page 117 3. No charge voltage in the HVPS board. If the problem persists, replace the AaBbCc AaBbCc HVPS board. AaBbCc AaBbCc AaBbCc AaBbCc AaBbCc AaBbCc AaBbCc AaBbCc AaBbCc AaBbCc AaBbCc AaBbCc AaBbCc AaBbCc AaBbCc AaBbCc AaBbCc AaBbCc 4-43 Service Manual Samsung Electronics...
- Page 118 1. Clean the inside of the printer. 2. Check the paper type and quality. 1. Toner smear 3. Remove the imaging unit and install a new one. AaBbCc AaBbCc AaBbCc AaBbCc AaBbCc AaBbCc AaBbCc AaBbCc AaBbCc AaBbCc 4-44 Service Manual Samsung Electronics...
- Page 119 2. Parts of the printer AaBbCc the page, the problem will likely may have toner on them. correct itself after a few more pages. 3. The fusing assembly Contact a service representative. may be damaged. 4-45 Service Manual Samsung Electronics...
- Page 120 Printing on seams can cause problems. 3. If background Adjust the print resolution through scatter covers the entire surface your software application or via the area of a printed page printer properties window. 4-46 Service Manual Samsung Electronics...
- Page 121 Try a different paper. hollowed images AaBbCc AaBbCc AaBbCc AaBbCc The printer may need service. 2. If characters are AaBbCc Verify that it also occurs on a demo improperly formed and producing page. a wavy effect. 4-47 Service Manual Samsung Electronics...
- Page 122 2. The paper may not meed specifications 3. Ensure that the paper The guides are not too tight or too or other material is loaded correctly AaBbCc loose against the paper stack. AaBbCc AaBbCc AaBbCc AaBbCc 4-48 Service Manual Samsung Electronics...
- Page 123 Both high temperature and high 2. Check the paper type and quality. AaBbCc humidity can cause paper curl. AaBbCc AaBbCc Also try rotating the paper 180¡ in 3. Turn the stack of the tray. paper over in the tray. 4-49 Service Manual Samsung Electronics...
- Page 124 1. Wrinkles or creases properly. Check the paper type and quality. 2. The paper may not meed specifications Also try rotating the paper 180¡ in 3. Turn the stack of paper the tray. over in the paper tray. 4-50 Service Manual Samsung Electronics...
- Page 125 4. Is the movement Clean the bushing part of the (Up and Down) of the transfer transfer roller. roller smooth? If the problem is still not solved, 5. Is the HVPS normal? replace the developer. 4-51 Service Manual Samsung Electronics...
- Page 126 1. The toner cartridge may reinsert. not be installed properly. 2. The toner cartridge may Install a new toner cartridge. be defective and need replacing. Change HVPS. 3. The printer may require repair. AaBbCc AaBbCc AaBbCc AaBbCc AaBbCc 4-52 Service Manual Samsung Electronics...
- Page 127 3. The Toner Cartridge AaBbCc Install a new toner cartridge. may be defective and AaBbCc need replacing. AaBbCc AaBbCc AaBbCc 4. If the problem persists, Contact a service representative. the printer may require repair. 4-53 Service Manual Samsung Electronics...
- Page 128 1. Character voids are surface of the paper. Remove the white areas within characters that should paper and turn it over. be solid black 2. The paper may not meet paper specifications. AaBbCc AaBbCc AaBbCc AaBbCc AaBbCc 4-54 Service Manual Samsung Electronics...
- Page 129 A toner cartridge may be installed 1. If horizontally improperly. aligned color or black streaks or Remove the toner cartridge and smears appear reinsert. Install a new toner cartridge. 2. A toner cartridge may be defective. 4-55 Service Manual Samsung Electronics...
- Page 130 18) Curl Turn the stack of paper over in the 1. If the printed paper is paper tray. Also try rotating the curled or paper does not feed into paper 180¡ in the tray. the printer 4-56 Service Manual Samsung Electronics...
-
Page 131: Common Windows Problems
NOTE: Refer to the Microsoft Windows 98/Me/NT 4.0/2000/2003/XP User’s Guide that came with your PC for further information on Windows error messages. 4-57 Service Manual Samsung Electronics... -
Page 132: Common Macintosh Problems
Print as Image when you print from document from Acrobat Reader. Acrobat Reader. The document has printed, but the print job has not Update your Mac OS to OS 10.3.3 or higher. disappeared from the spooler in Mac OS 10.3.2. 4-58 Service Manual Samsung Electronics... -
Page 133: Common Linux Problems
"No Choice" value. editing the printer You have to choose an option that does not conflict settings. before being able to submit the changes. Continue.. 4-59 Service Manual Samsung Electronics... - Page 134 In that case, you need to make sure Landscape mode, but it prints that you leave the LLPR option set to its default rotated and cropped. Portrait setting, to avoid unwanted rotations of the page that would result in cropped output. Continue.. 4-60 Service Manual Samsung Electronics...
- Page 135 Some documents come out latest version of CUPS (at least 1.1.14). Some RPM as white pages when printing. packages for the most popular distributions are provided as a convenience with this Linux Printing Package. Continue.. 4-61 Service Manual Samsung Electronics...
- Page 136 Postscript uses CIE color space for Color Matching Some color images come out all black. System, you should upgrade Ghostscript on your system to at least GNU Ghostscript version 7.06 or later. You can find recent Ghostscript versions at www.ghostscript.com. 4-62 Service Manual Samsung Electronics...
-
Page 137: Major Problems Trouble Shooting
(the solenoid does not work properly) 2. Pad-Friction is Clean the pad friction with soft clothe contaminated with foreign matter.(oil...) dampened with IPA(Isopropyl Alcohol). Use the smooth paper. 3. The face of paper is blended. 4-63 Service Manual Samsung Electronics... - Page 138 1. Check if the power input Replace the power supply cord or SMPS. and SMPS output are normal. 2. Check the inferiority of OPE Unit if the LCD of Panel does Replace the OPE unit. not appear after normal warmingup. 4-64 Service Manual Samsung Electronics...
- Page 139 AC-Harness Short? AC-Harness Change Replace Thermostat Thermostat Open? 4712-001031 Replace Thermostat Thermostat Pollution, Bend? 1404-001447 Replace Thermostat Thermostat Resistance Defect? 1404-001447 (300~450kohm @ 25℃) Replace Fuser & recheck The SMPS and Main B'd could be suspect 4-65 Service Manual Samsung Electronics...
- Page 140 For 220V : 4.7±1 ohm) Thermostat cannot be Replace Thermistor 1404-001447 cleaned and/or bent? Replace Thermistor Thermostat Resistance Defect? 1404-001447 (300~450kohm @ 25℃) Replace Fuser & recheck The SMPS and Main B'd could be suspect 4-66 Service Manual Samsung Electronics...
-
Page 141: Fax & Phone Problems (Only 4 In 1)
3. Check the connection of Check the Speaker connection, HARNESS between the and try to replace it. LIU and the Main B'd. 4. Check if the SPEAKER Lastly, try to replace the Main B'd. is connected correctly. 4-67 Service Manual Samsung Electronics... - Page 142 The problem still persists, then replace the LIU and the main B'd 3. Check the connection of in sequence. HARNESS between the Notes: Product supports the MF LIU and the Main PBA. DIAL type only. 4-68 Service Manual Samsung Electronics...
- Page 143 OHD. to replace the LIU B'd. 2. Check if you can If the MODEM testing is abnormal, catch a RECEIVE tone while try to replace the Main B'd. MODEM testing in the TECH Mode. 4-69 Service Manual Samsung Electronics...
- Page 144 2. Check the RECEIVE condition by trying to forward a FAX to another fax machine from the forwarding side FAX. 3. Check if the telephone line connected to the Product is contaminated or gets stripped off or down. 4-70 Service Manual Samsung Electronics...
- Page 145 1.Check if there is NOISE If it makes NOISE while when pressing on-hook dial. on-hooking, replace or repair the telephone line. 2.Check the RECEIVE condition by trying to receive a FAX at another fax machine. 4-71 Service Manual Samsung Electronics...
- Page 146 (Refer to 'Defective FAX RECEIVE'.) 2. Ask to the forwarding Check if the FAX status of the side, check the image quality of another forwarding side is also normal. machine receiving a FAX additionally sent to. 4-72 Service Manual Samsung Electronics...
- Page 147 The phone is ringing continuously, but it cannot receive. Even when the RECEIVE Mode is Check if the RECEIVE Mode is changed to FAX MODE, it cannot TEL MODE or FAX MODE. receive, then replace the LIU and the Main B'd in sequence. 4-73 Service Manual Samsung Electronics...
- Page 148 The received data is reduced by more than 50% in the printing. After checking the data of the Check the FAX status of the forwarding side, correct the forwarding side. FAX of the forwarding side. 4-74 Service Manual Samsung Electronics...
- Page 149 1. Check if the RECEIVE Mode is FAX MODE. TEL MODE or FAX MODE. 2. Even after the RECEIVE Mode is changed to the FAX Mode, it cannot receive, then try to replace the LIU and the Main B'd in sequence. 4-75 Service Manual Samsung Electronics...
-
Page 150: Copy Problems
Check the Scanner cover a thin original. is properly closed. Redo shading profile I the tech Cheak shading profile. mode. Check white/black reference Replace FFC if it is defective voltage on Main PBA.e.q Check the FFC 4-76 Service Manual Samsung Electronics... - Page 151 2) Black Copy Description Blank page is printed out when copying Check the CIS harness is Check for CIS problem properly connected. on the Main PBA. Redo shading profile I the tech Cheak shading profile. mode. 4-77 Service Manual Samsung Electronics...
- Page 152 Check the Scanner Motors, objects in the mechanism or gearbox and rollers. scanner path. Replace any wrong parts. Redo shading profile I the tech Check the Motor Drive on Driver PBA. mode. 4-78 Service Manual Samsung Electronics...
- Page 153 The copied image is excessively light or dark. Redo shading profile in the Check the shading profile tech mode. Remove the abnormal gab between Check the gap between original original and scanner glass. and scanner glass. See "Print" troubleshooting Check printing quality. 4-79 Service Manual Samsung Electronics...
-
Page 154: Scanner, Ope Problems
Check if the CIS is placed right side. place it to left side. Move CIS unit to left and right Check the load against the CIS unit. side for several times. Power off and on. Check the abnormal system error. 4-80 Service Manual Samsung Electronics... - Page 155 2. If the problem persists, Main board replace the OPE Assy. 3) Copy image can’t identify. Description Copy image look like ‘haze line’. Retry connect the flat cable CIS's flat cable was not on the CISM. connected well 4-81 Service Manual Samsung Electronics...
- Page 156 Replace Sheet-ADF as new one Check if the Sheet-ADF (Refer to Disassembly chapter) is worn terribley Cleaning the Sheet-ADF without separating. Clean the surface of the Sheet-ADF with soft cloth. Continue... 4-82 Service Manual Samsung Electronics...
- Page 157 1. Open the ADF cover. And remove the ADF sheet by using a sharp tool like tweezers. SHEET-ADF 2. Clean the both faces of the Sheet with 3. Assemble the sheet ADF to the original place. soft cloth. 4-83 Service Manual Samsung Electronics...
- Page 158 Document Jam was occurred. Pull out the jammed document, Check if Pad-ADF is worn. and replace the Pad-Adf. Pull out the jammed document. Check if too thick document is put in. The Maximum document thickness is 0.15mm. 4-84 Service Manual Samsung Electronics...
-
Page 159: System Diagram
System diagram 5. System diagram 5.1 Block Diagram Service Manual Samsung Electronics... -
Page 160: Connection Diagram (4 In 1)
System diagram 5.2 Connection Diagram (4 in 1) Service Manual Samsung Electronics... -
Page 161: Connection Diagram (3 In 1)
System diagram 5.2 Connection Diagram (3 in 1) Service Manual Samsung Electronics... -
Page 162: Reference Information
• Brush • Tweezers Standard : For general home use, small type. • Software (Driver) installation CD ROM Install Driver CD • Cotton Swab Network S/W CD Standard : For general home use, for medical service. Service Manual Samsung Electronics... -
Page 163: Acronyms And Abbreviations
Network Printer Card Tray NVRAM Nonvolatile Random Access Memory FISO Front-In, Side-Out Organic Photo Conductor FPOT First Print out Time Printed Board Assembly Windows Graphic Device Interface Printer Command Language, Printer Graphic Interchange Format Control Language Ground Service Manual Samsung Electronics... - Page 164 Reference Information Peripheral Component Interconnect SMPS Switching Mode Power Supply by Intel 1992/6/22, is a local bus SPGP Samsung Printer Graphic Processor standard developed by Intel and Samsung Printer Language introduced in April, 1993 : A60, B60 SPL-C Samsung Printer Language-Color...
-
Page 165: Select A Location For The Printer
• Provide the proper environment : - A firm, level surface - Away from the direct airflow of air conditioners, heaters, or ventilators - Free of extreme fluctuations of temperature, sunlight, or humidity - Clean, dry, and free of dust Service Manual Samsung Electronics... -
Page 166: A4 Iso 19752 Standard Pattern
Reference Information 6.4 A4 ISO 19752 Standard Pattern These test patterns are reproduced at 70% of the normal A4 size Service Manual Samsung Electronics... - Page 167 Reference Information Service Manual Samsung Electronics...
- Page 168 Reference Information Service Manual Samsung Electronics...
- Page 169 Reference Information Service Manual Samsung Electronics...
- Page 170 Reference Information Service Manual Samsung Electronics...
- Page 171 GSPN (Global Service Partner Network) North America : service.samsungportal.com Latin America : latin.samsungportal.com CIS : cis.samsungportal.com Europe : europe.samsungportal.com ⓒ Samsung Electronics Co.,Ltd. January. 2010 China : china.samsungportal.com Printed in Korea. Asia : asia.samsungportal.com Mideast & Africa : mea.samsungportal.com VERSION NO. : 1.00...