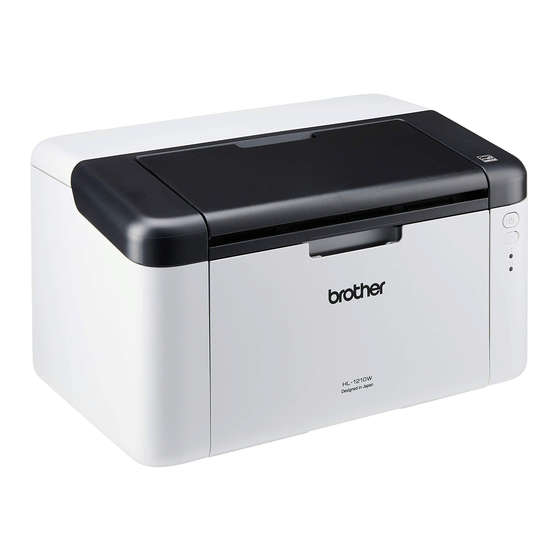
Brother HL-1210W User Manual
Laser printer
Hide thumbs
Also See for HL-1210W:
- Quick setup manual (2 pages) ,
- Technical reference manual (517 pages) ,
- Service manual (91 pages)
Table of Contents
Advertisement
User's Guide
Brother Laser Printer
HL-1200
HL-1201
HL-1210W
HL-1211W
For visually-impaired users
You can read this manual with Screen Reader 'text-to-speech' software.
You must set up the hardware and install the driver before you can use the machine.
Please use the Quick Setup Guide to set up the machine. You can find a printed copy in the box.
Please read this User's Guide thoroughly before you use the machine.
Please visit us at http://support.brother.com where you can get product support, the latest driver updates and utilities,
and answers to frequently asked questions (FAQs) and technical questions.
Note: Not all models are available in all countries.
Version 0
OCE/ASA/SAF/GLF
Advertisement
Table of Contents

Related Manuals for Brother HL-1210W


Summary of Contents for Brother HL-1210W
- Page 1 Please use the Quick Setup Guide to set up the machine. You can find a printed copy in the box. Please read this User’s Guide thoroughly before you use the machine. Please visit us at http://support.brother.com where you can get product support, the latest driver updates and utilities, and answers to frequently asked questions (FAQs) and technical questions.
-
Page 2: Brother Numbers
Frequently asked questions (FAQs) The Brother Solutions Center is our one-stop resource for all your machine needs. You can download the latest drivers, software and utilities, read FAQs and troubleshooting tips to learn how to get the most from your Brother product. - Page 3 Network User’s This Guide provides useful http://support.brother.com Guide information about wireless network settings and (HL-1210W and HL- security settings using the 1211W) Brother machine. You can also find supported http://support.brother.com protocol information for your machine and detailed troubleshooting tips.
-
Page 4: Using The Documentation
Using the documentation Thank you for buying a Brother machine! Reading the documentation will help you make the most of your machine. Symbols and conventions used in the documentation The following symbols and conventions are used throughout the documentation. WARNING indicates a potentially hazardous situation which, if not avoided, WARNING could result in death or serious injuries. -
Page 5: Accessing Brother Utilities (Windows)
® Accessing Brother Utilities (Windows Brother Utilities is an application launcher that offers convenient access to all Brother applications installed on your device. ® ® ® ® ® (Windows XP, Windows Vista , Windows 7, Windows Server 2003, Windows Server 2008 and ®... -
Page 6: Table Of Contents
Status Monitor ...........................35 Software ..............................37 ® Remote Printer Console (Windows HL-1200 and HL-1201 only) ............37 Software for networks (HL-1210W and HL-1211W only) ..............37 General Information Control panel ............................38 LEDs (Light Emitting Diodes) ......................38 Service call indications ........................43 Power On/Off key ..........................44 Print a Printer Settings page........................45... - Page 7 If you are having difficulty with your machine ..................61 Cleaning and Checking the machine .......................63 Machine Information ..........................64 Default settings..........................64 Specifications General ..............................66 Print media...............................69 Important information for choosing your paper ..................70 Printer ..............................71 Network (LAN) (HL-1210W and HL-1211W only)..................72 Index...
-
Page 8: Printing Methods
Printing Methods About this Machine Machine overview 1 Top cover 2 Control panel 3 Face-down output tray support flap (support flap) 4 Paper tray 5 USB port NOTE For details about how the LEDs show the machine’s status, see LEDs (Light Emitting Diodes) on page 38. For the Power On/Off key functions, see Power On/Off key on page 44. -
Page 9: Acceptable Paper
Printing Methods Acceptable paper Print quality may vary according to the type of paper you are using. For best results, follow the instructions below: DO NOT put different types of paper in the paper tray at the same time because it may cause paper jams or misfeeds. -
Page 10: 2-Sided Printing
Printing Methods 2-sided printing The supplied printer drivers all enable 2-sided printing. For more information about how to choose the ® settings, see 2-sided / Booklet on page 12 for Windows and 2-sided Printing on page 34 for Macintosh. Guidelines for printing on both sides of the paper ... -
Page 11: Manual 2-Sided Printing
Printing Methods Manual 2-sided printing If you are using the Macintosh Printer Driver, see Manual 2-sided Printing on page 34. ® Manual 2-sided printing with the Windows printer driver Choose the following settings from each drop-down list of the printer driver. ... -
Page 12: Driver And Software
CUPS printer driver For more information and to download the printer driver for Linux please visit your model page at http://support.brother.com or use the link on the CD-ROM we have supplied. Depending on Linux distributions, the driver may not be available or it may be released after the initial release of your model. -
Page 13: Printing A Document
From your application, choose the Print command. If any other printer drivers are installed on your computer, choose Brother HL-XXXX (Where XXXX is your model name.) as your printer driver from the Print or Print Settings menu in your software application, and then click OK or Print to begin printing. -
Page 14: Printer Driver Settings
You can change the following printer settings when you print from your computer: Paper Size Orientation Copies Media Type Print Quality (For HL-1200 and HL-1201) Resolution (For HL-1210W and HL-1211W) Print Settings Multiple Page 2-sided / Booklet Print Preview Scaling ... -
Page 15: Windows
Control Panel. In the Hardware group, click View devices and printers. Right-click the Brother HL-XXXX icon (where XXXX is your model name) and select Printer properties (Properties), and Brother HL-XXXX if necessary. The printer properties dialog box appears. -
Page 16: Basic Tab
Click OK to apply your chosen settings. To return to the default settings, click Default, then OK. For HL-1200 and HL-1201 For HL-1210W and HL-1211W NOTE If you want to preview your document before printing, check the Print Preview check box (4). - Page 17 Driver and Software Orientation Orientation selects the position of how your document will be printed (Portrait or Landscape). Portrait (Vertical) Landscape (Horizontal) Copies The copies selection sets the number of copies that will be printed. Collate With the Collate check box selected, one complete copy of your document will be printed and then repeated for the number of copies you selected.
-
Page 18: Print Settings
Driver and Software Resolution (For HL-1210W and HL-1211W) You can change the resolution as follows: 300 dpi 600 dpi HQ 1200 Print Settings You can change the print settings as follows: Graphics This is the best mode for printing documents that contain graphics. - Page 19 Driver and Software 2-sided / Booklet When you want to print a booklet or do 2-sided printing, use this function. None This disables 2-sided printing. 2-sided (Manual) When you want to do 2-sided printing, use this option. • 2-sided (Manual) The machine prints all the even numbered pages first.
- Page 20 Driver and Software Booklet (Manual) Use this option to print a document in booklet format using 2-sided printing; it will arrange the document according to the correct page number and allows you to fold at the centre of the print output without having to change the order of the page number.
-
Page 21: Print Preview
Driver and Software Print Preview You can preview a document before it is printed. If you check the Print Preview check box, the Print Preview Viewer window will open before printing starts. 1 Page List Area The Page List Area displays the page numbers for the actual pages that will be printed. If you chose a page in this list, a preview of the print results for the page will be displayed in the Preview Area. -
Page 22: Advanced Tab
Driver and Software Advanced tab Change the tab settings by clicking one of the following selections: Scaling (1) Reverse Print (2) Use Watermark (3) Header-Footer Print (4) Toner Save Mode (5) Administrator (6) Other Print Options (7) ... - Page 23 Driver and Software Watermark Settings Select Watermark Choose a watermark to use. To make an original watermark, click the Add button to add the watermark settings and then choose Use Text or Use Image file in Watermark Style. • Title Enter a suitable title into the field.
- Page 24 • We do not recommend Toner Save Mode for printing photo or Greyscale images. • Toner Save Mode is not available for Fine for Print Quality or HQ 1200 for Resolution is selected. For HL-1200 and HL-1201 For HL-1210W and HL-1211W...
- Page 25 Driver and Software Administrator Administrators have the authority to limit access to functions such as scaling and watermark. Password Enter the password into this box. NOTE Click Set Password... to change the password. Copies Lock Lock the copy pages selection to prevent multiple copy printing. ...
- Page 26 Driver and Software Other Print Options You can set the following in Printer Function: Density Adjustment Improve Print Output Skip Blank Page Print Text in Black Print Archive Density Adjustment Increase or decrease the print density. Improve Print Output This feature allows you to improve a print quality problem.
- Page 27 Driver and Software Improve Toner Fixing If you choose this setting, the toner fixing capabilities may be improved. NOTE This operation will increase the temperature of the machine's fusing process. Skip Blank Page If Skip Blank Page is checked, the printer driver automatically detects blank pages and excludes them from printing.
-
Page 28: Print Profiles Tab
Driver and Software Print Profiles tab Print Profiles are editable presets designed to give you quick access to frequently used printing configurations. Print profile list box (1) Delete Profile (2) Always show Print Profiles tab first (3) ... -
Page 29: Add Profile
Driver and Software Add Profile The Add Profile dialog box appears by clicking Add Profile. You can add 20 new profiles with your preferred settings. Enter the desired title in Name. Choose an icon you want to use from the Icon list, then click OK. The current settings shown on the left side of the printer driver window will be saved. -
Page 30: Device Settings Tab
Driver and Software Device Settings tab NOTE To access the Device Settings tab, see Accessing the printer driver settings on page 8. You can auto detect the serial number in the Device Settings tab as follows. Serial No. (1) By clicking Auto Detect (2), the printer driver will probe the machine and display its serial number. -
Page 31: Support
Click Support... in the Printing Preferences dialog box. Brother Solutions Center (1) The Brother Solutions Center (http://support.brother.com) is a website offering information about your Brother product including FAQs (Frequently Asked Questions), User’s Guides, driver updates and tips for using your machine. -
Page 32: Uninstalling The Printer Driver
Driver and Software Original Supplies Website (2) You can visit our website for original/genuine Brother supplies by clicking this button. Brother CreativeCenter (3) You can visit our website for free and easy online solutions for business and home users by clicking this button. -
Page 33: Status Monitor
XP, Windows Vista and Window Click (Start) > All Programs > Brother > Brother Utilities, and then click the drop-down list and select your model name (if not already selected). Click Tools in the left navigation bar, and then Click Status Monitor. - Page 34 Driver and Software Monitoring the machine’s status The Status Monitor icon will change colour depending on the machine status. A green icon indicates the normal stand-by condition. A yellow icon indicates a warning. A red icon indicates a printing error has occurred. There are two locations where you can display the Status Monitor on your PC - in the tasktray or on the desktop.
-
Page 35: Macintosh
• The screens in this section are from OS X v10.7.5. The screens on your Macintosh will vary depending on your operating system version. • The printer driver for Macintosh is available from the download page for your model on the Brother Solutions Center (http://support.brother.com). - Page 36 Driver and Software From an application such as TextEdit, click File, then Print to start printing. For more page setup options, click the Show Details button. NOTE You can save the current settings as a preset by choosing Save Current Settings as Preset... from the Presets pop-up menu.
-
Page 37: Choosing Printing Options
Driver and Software Choosing printing options To control special printing features, choose Print Settings from the Print dialog box. For the details of available options, see the following descriptions of each option. Cover Page You can choose the following cover page settings: ... - Page 38 Driver and Software Layout Pages per Sheet The Pages per Sheet selection can reduce the image size of a page by allowing multiple pages to be printed on one sheet of paper. Layout Direction When you specify the pages per sheet, you can also specify the direction of the layout. ...
- Page 39 Print Quality (For HL-1200 and HL-1201) You can change the print quality as follows: • Draft • Normal • Fine Resolution (For HL-1210W and HL-1211W) You can change the resolution as follows: • 300 dpi • 600 dpi • HQ 1200...
- Page 40 • Toner Save Mode is not available for Fine for Print Quality or HQ 1200 for Resolution is selected. For HL-1200 and HL-1201 For HL-1210W and HL-1211W Graphics Quality You can change the print quality as follows: • Graphics This is a graphics mode (contrast priority).
- Page 41 Driver and Software NOTE This operation will decrease the temperature of the machine's fusing process. • Improve Toner Fixing If you choose this setting, the toner fixing capabilities may be improved. NOTE This operation will increase the temperature of the machine's fusing process. ...
-
Page 42: Removing The Printer Driver
The Status Monitor utility is a configurable software tool for monitoring the status of the machine, letting you see error messages at pre-set update intervals. You can check the device status by launching Brother Status Monitor following these steps: Run the System Preferences, select Print & Scan or Printers & Scanners , then choose the machine. - Page 43 Brother Status Monitor icon in the dock. Quitting the window Click Brother Status Monitor in the menu bar and then choose Quit Status Monitor from the pop-up menu. Web Based Management (Network Connection only) You can access the Web Based Management System by clicking the machine icon on the Status Monitor screen.
-
Page 44: Software
Double-click the tools folder. Double-click the rpc folder. Refer to the RPC_User’s_Guide.pdf for how to install and use the Remote Printer Console. Software for networks (HL-1210W and HL-1211W only) For the information about network utility software, see Network User’s Guide. -
Page 45: General Information
When the WiFi light is on, your Brother machine is connected to a wireless access point. When the WiFi light blinks, the wireless connection is down, or your machine is in the process of connecting to a wireless access point. - Page 46 General Information The LED indications shown in the table below are used in the illustrations in this chapter. LED is off. LED is on. LED is dimmed. LED is blinking. LEDs Machine Status Sleep The machine is in Sleep Mode (Power Save mode). While the machine is in Sleep Mode, the Ready LED ( ) is dimmed, but the machine can still receive data.
- Page 47 The Ready LED ( ) will blink in 0.5 second intervals. Toner Low The toner cartridge will need to be replaced soon. Buy a new Brother toner cartridge and have it ready for when Replace Toner is indicated. Both the...
- Page 48 Replace the drum with a new one. Reset the drum counter. (See the insertion included with the drum unit.) We recommend you keep a Brother Original drum unit ready for installation. The Error LED ( ) will blink 3 times at 0.5 second intervals and the Ready LED ( ) will light up. Then both LEDs will turn off for 1 second.
- Page 49 General Information LEDs Machine Status Cover is Open Close the top cover of the machine. The Error LED ( ) will blink 4 times and turn off for 1 second. Out of Memory Press and hold for about 2 seconds until all the LEDs light up and then release it. The machine will cancel the print job and clear it from the memory.
-
Page 50: Service Call Indications
If this error occurs, turn off the machine, wait a few seconds, and then turn it on again. Leave the machine for approx. 15 minutes with the power on. If the error occurs again, call Brother customer service or your local Brother dealer. -
Page 51: Power On/Off Key
General Information Power On/Off key Power On/Off key has the following functions: Power Off Make sure that the machine is in the Ready mode, then hold down for about 2 seconds. All the LEDs turn off when you enable the Power Off mode. For details about Power Off mode, see Auto Power Off on page 47. -
Page 52: Print A Printer Settings Page
General Information Print a Printer Settings page You can print the current settings using the control panel button or printer driver. Using the Power On/Off key Make sure that the top cover is closed and the power cord is plugged in. Turn on the machine and wait until the machine is in Ready mode. -
Page 53: Ecology Features
General Information Ecology features Toner Save You can save toner using this feature. When you set Toner Save to on, prints appear lighter. The default setting is off. You can change the toner save mode setting on the printer driver. To change the toner save mode setting, see the following: ®... -
Page 54: Auto Power Off
Remote Printer Console, see Remote Printer Console (Windows HL-1200 and HL-1201 only) on page 37. • (HL-1210W and HL-1211W) You can change the Power Off mode setting through the Web Based Management. For more information, see the Network User’s Guide. -
Page 55: Troubleshooting And Other Information
(For other countries) DR-1000 IMPORTANT • Brother machines are designed to work with toner of a particular specification and will work to a level of optimum performance when used with Brother Original toner cartridges. Brother cannot guarantee this optimum performance if toner or toner cartridges of other specifications are used. The machine may not detect toner or toner cartridges of other specifications correctly but may instead detect such items as standard yield toner cartridges. - Page 56 If you have questions, call your local waste disposal office. Be sure to reseal the consumable items tightly so that the material inside does not spill. • Availability of toner cartridges differs from one country to another. Visit the Brother Solutions Center at http://support.brother.com or contact your local Brother office for further details.
-
Page 57: Toner Setting
Troubleshooting and other information Toner Setting The printing operation varies depending on the machine setting: Default setting (Stop mode) The machine will stop printing until you replace the toner cartridge with a new one when the LEDs indicate Replace Toner. ... -
Page 58: Identifying Your Problem
Troubleshooting and other information Identifying your problem First, check the following. The machine's power cord is connected correctly and the machine is turned on. All of the protective parts have been removed. Paper is inserted correctly in the paper tray. ... -
Page 59: Error Messages In The Status Monitor
Troubleshooting and other information Error messages in the Status Monitor The most common error and maintenance messages are shown below. If you need more help, the Brother Solutions Center offers the latest FAQs and troubleshooting tips: Visit us at http://support.brother.com. Error message... -
Page 60: Improving The Print Quality
Improving the print quality NOTE Brother does not recommend the use of cartridges other than genuine Brother Original cartridges or the refilling of used cartridges with toner from other sources. If you are having problems with print results, check the following: 1 The machine's environment. - Page 61 Troubleshooting and other information 4 Replace the toner cartridge or the drum unit. For more information on how to replace the consumable items, see the instructions included with the drum unit for replacing the drum unit or see the instructions listed on the box of the toner cartridge for replacing the toner cartridge.
- Page 62 Troubleshooting and other information Turn the drum unit gear by hand while looking at the surface of the drum roller (1). Wipe the surface of the drum gently with a dry cotton swab until the dust or glue on the surface comes off.
- Page 63 Troubleshooting and other information 6 Check the printer driver settings. Try changing the Print Settings in Basic tab. If the paper is curled or the toner is not fixed well on the paper, you can adjust these settings in Improve Print Output. Click Other Print Options in the Advanced tab.
-
Page 64: Paper Jams
Troubleshooting and other information Paper jams If a paper jam occurs inside the machine or the paper tray, the Error LED ( ) will blink twice. Leave the machine turned on for 15 minutes for the product to cool down before you touch the internal parts of the product. - Page 65 Troubleshooting and other information Slowly take out the drum unit and toner cartridge assembly. The jammed paper may be pulled out with the drum unit and toner cartridge assembly, or this may release the paper so you can pull it out from inside of the machine.
- Page 66 Troubleshooting and other information Push down the lock lever and take the toner cartridge out of the drum unit. Remove the jammed paper if there is any inside the drum unit. Put the toner cartridge back into the drum unit until you hear it lock into place. If you put the cartridge in correctly, the lock lever on the drum unit will lift automatically.
- Page 67 Troubleshooting and other information Make sure that the paper is below the protruding section of the rear guide. Slide the paper guides to fit the paper size. Make sure that the guides are firmly in the slots. NOTE If you turn the machine off during a paper jam, the machine will print incomplete data from your computer when you turn the machine back on.
-
Page 68: If You Are Having Difficulty With Your Machine
• If you think there is a problem with your machine, check the chart below and follow the troubleshooting tips. Most problems can be easily resolved by yourself. • If you need additional help, the Brother Solutions Center offers the latest FAQs and troubleshooting tips. Visit us at http://support.brother.com. - Page 69 (Windows be installed. If the Security Software warning appears on the PC screen during the installation, change the Security Software settings to permit the Brother product setup program or other program to run. (Macintosh) If you are using a firewall function of anti-spyware or antivirus security software, temporarily disable it and then install the Brother software.
-
Page 70: Cleaning And Checking The Machine
Troubleshooting and other information Cleaning and Checking the machine Clean the outside and inside of the machine regularly with a dry, lint-free cloth. When you replace the toner cartridge or the drum unit, make sure that you clean the inside of the machine. If printed pages are stained with toner, clean the inside of the machine with a dry, lint-free cloth. -
Page 71: Machine Information
Troubleshooting and other information Machine Information Default settings The machine has three levels of default settings; the default settings have been set at the factory before shipment. Network Reset (HL-1210W and HL-1211W only) Factory Reset Settings Reset NOTE •... - Page 72 Troubleshooting and other information Settings Reset This operation will reset all the machine settings back to the settings that were set at the factory: Turn off the machine. Make sure that the top cover is closed and the power cord is plugged in. While holding down , open and close the top cover once.
-
Page 73: B Specifications
Specifications General Model HL-1200 HL-1201 HL-1210W HL-1211W Printer Type Laser Print Method Electrophotographic Laser Printer Memory Capacity Standard 1 MB 32 MB Power Source 220 - 240 V AC 50/60Hz Power Consumption Approx. 1056 W Peak (Average) Approx. 380 W at 25 °C... - Page 74 Specifications Model HL-1200 HL-1201 HL-1210W HL-1211W Humidity Operating 20 to 80% (without condensation) Storage 35 to 85% (without condensation) Interface Full-Speed USB 2.0 Hi-Speed USB 2.0 It is recommended you use a USB It is recommended you use a USB 2.0 cable (Type A/B) that is no more...
- Page 75 The machine can also be connected to a computer that has a USB 1.1 interface. Third-party USB ports are not supported. For detailed network‘specifications, see Network (LAN) (HL-1210W and HL-1211W only) on page 72 and Network User’s Guide. Approx. cartridge yield is declared in accordance with ISO/IEC 19752.
-
Page 76: Print Media
Specifications Print media Model HL-1200 HL-1201 HL-1210W HL-1211W Paper Input Paper Tray Paper Type Plain paper, Recycled paper Paper Size A4, Letter, Legal, Folio, A5, A5(Long Edge), B5, Executive Width: 148 to 216 mm Length: 148 to 355.6 mm Paper Weight 65 to 105 g/m... -
Page 77: Important Information For Choosing Your Paper
Specifications Important information for choosing your paper The information in this section will help you choose paper to use with this machine. NOTE If you use paper that is not recommended, a paper jam or misfeed may occur in the machine. Before you buy a large quantity of paper Make sure that the paper is suitable for the machine. -
Page 78: Printer
Specifications Printer Model HL-1200 HL-1201 HL-1210W HL-1211W Resolution Up to 600 × 600 dpi (2400 × 600 dpi Up to 2400 × 600 dpi (HQ 1200 with Resolution Control) technology) Single side Up to 20 ppm (A4 size) Print Speed... -
Page 79: Network (Lan) (Hl-1210W And Hl-1211W Only)
(For Macintosh users) Brother BRAdmin Light is available as a download from http://support.brother.com. ® (For Windows users) If you require more advanced printer management, use the latest Brother BRAdmin Professional utility version that is available as a download from http://support.brother.com. - Page 80 Administrator ............15 size ................2 Auto Power Off ............47 type ................2 Paper jams ..............57 Password ..............18 Print Brother numbers ............i difficulties ............61 Macintosh Printer driver ............28 ® Windows Cleaning ..............63 2-sided printing ........... 12 Consumable items ............
- Page 81 5.00pm (EST/EDST) Monday to Friday. For New Zealand Only: For technical support for your Brother Product please refer to this user guide and the FAQ’s available on our Brother Solutions website, http://support.brother.com. Drivers, software, user guides and technical references are all available on our Brother Solutions website.