Table of Contents
Advertisement
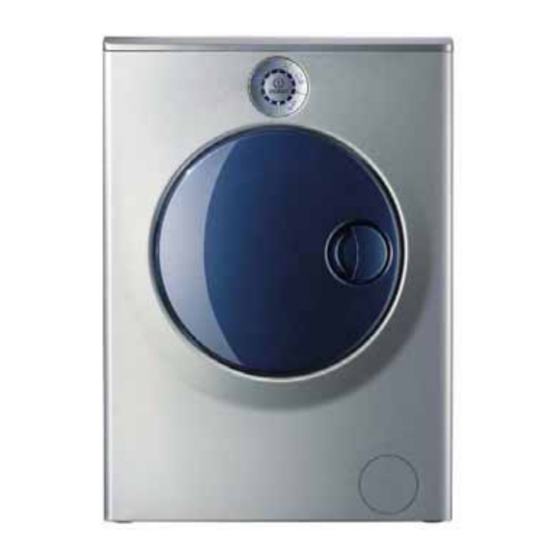
Colours may vary
Service
Information
© 2008 Reg. Office: Peterborough PE2 9JB Registered in London: 106725
Indesit Company UK Ltd
5407359 Issue 6 Nov. 2008
I
NDESIT
MOON
WASHING
MACHINES
Models
Covered
SIXL125SEU
SIXL145UK
SIXL145SUK
SIXL145DUK
SIXL145DUK.1
SIXL145KUK
SIXL145SKUK
Comm.
Code
44033
46406
46401
52171
55589
60185
60189
Advertisement
Table of Contents

Related Manuals for Indesit SIXL125SEU


Summary of Contents for Indesit SIXL125SEU
-
Page 1: Service Information
WASHING MACHINES Models Comm. Covered Code SIXL125SEU 44033 SIXL145UK 46406 SIXL145SUK 46401 SIXL145DUK 52171 Colours may vary SIXL145DUK.1 55589 SIXL145KUK 60185 SIXL145SKUK 60189 Service Information Indesit Company UK Ltd © 2008 Reg. Office: Peterborough PE2 9JB Registered in London: 106725... -
Page 2: Safety Notes & Servicing
Indesit Company SAFETY NOTES & GENERAL SERVICING ADVICE 1. This manual is NOT intended as a comprehensive repair/maintenance guide to the appliance. 2. It should ONLY be used by suitably qualified persons having technical competence applicable product knowledge and suitable tools and test equipment. -
Page 3: Table Of Contents
Indesit Company INDEX Safety Notes & Servicing ......... . 2 Serial Number / Industrial Code Information . -
Page 4: Technical Information
SIXL125SEU - Field Trial Machine SIXL145UK, SIXL145SUK, SIXL145DUK, SIXL145DUK.1, SIXL145KUK, SIXL145SKUK Colours SIXL125SEU - Metallic Grey (Blue Door / Handle) SIXL145UK - White (Metallic Grey Door / Handle) SIXL145SUK - Metallic Grey (Blue Door / Handle) SIXL145DUK - Metallic Grey (Grey Door / Handle) SIXL145DUK.1 - Metallic Grey (Grey Door / Handle) -
Page 5: Introduction
Easy selection of the correct wash programme with new circular programme selector and easily identifiable programme symbols. Available in various colour combinations:- SIXL125SEU - Metallic Grey (Blue Door / Handle) SIXL145UK - White (Metallic Grey Door / Handle) SIXL145SUK - Metallic Grey (Blue Door / Handle) SIXL145DUK - Metallic Grey (Grey Door / Handle) SIXL145DUK.1 - Metallic Grey (Grey Door / Handle) -
Page 6: Installation
Indesit Company INSTALLATION 2. If the floor is not perfectly level, compensate for any Unpacking unevenness by 1. Unpack the washer. tightening or loosening 2. Make sure that the machine has not been the adjustable front feet damaged during transportation. If it has (see figure);... - Page 7 Indesit Company Drainage Connections Location A. Connect the drain hose, without ! The washing machine must not be installed bending it, to a outdoors, even in covered areas. It is draining duct or a extremely dangerous to leave the appliance...
-
Page 8: Controls
Indesit Company CONTROLS Door closure LED On/Off Button Cotton White 60°C Rapid 30 Minute/ Rinse Ring of 12 LEDs Delicate Wool/Silk Mixed coloureds/ Easy Iron THE PROGRAMME SELECTOR Circular in shape and easy to use; each button has at least two functions. -
Page 9: Wash Programmes
Indesit Company PAUSING / RE-STARTING A PROGRAMME To activate the washing machines "Pause" function press the programme button of the programme in progress. The Power On button remains lit, the LED of the programme in progress flashes slowly, and the central ring of LEDs start to flash (depending how far the appliance is into its programme will depend on how many central LEDs are lit). - Page 10 Indesit Company PROGRAMMES There are 4 programme buttons, which can be used to select 6 different wash programmes. Standard 60°C Cotton Wash cycle: Default spin setting 1200 rpm or 1400 rpm depending on model. Mixed Coloureds Easy Iron: Wash cycle suitable for garments of mixed colours in Cotton or Synthetic fabric.
-
Page 11: Demo Mode
Indesit Company DEMO MODE During August 2007 production, DEMO mode was introduced to the MOON Machines SIXL145UK, SIXL145SUK & SIXL145DUK. Models produced before this date do not have the feature. To Activate Demo Mode 1. Apply power to the machine - DO NOT SWITCH ON. -
Page 12: Door / Dispenser / Water Inlet System
Indesit Company DOOR / DISPENSER / WATER INLET SYSTEM The machine is fitted with a self cleaning detergent dispenser which enhances the wash quality. The new door does not allow you to see the wash load inside the washing machine. - Page 13 Indesit Company WATER FILLING SYSTEM The washing machine loads with water with the first solenoid (1) without detergent. Water is drained for 2 seconds (only for the Standard Cotton 60°C). The machine finishes loading water with the second solenoid valve (2) through the detergent compartments, flushing detergent into the drum.
-
Page 14: Conductivity Sensor
Indesit Company THE CONDUCTIVITY SENSOR The appliance is equipped with a conductivity sensor. The sensor is located on the plastic tub next to the OKO sump hose. The sensor manages the 30 minute or daily programme. The appliance does not have a pre-set fixed pH value:... -
Page 15: Wiring Diagram
WIRING DIAGRAM Mains Filter Pressure Switch Continuity Sensor Motor Wash Water Valves Drain Pump Door Lock 5407359wd.pdf... -
Page 16: Wiring Connection Chart
WIRING CONNECTION CHART 1.00 X BROWN MAINS 0.35 X 1390 VALVE 1.00 X white BLUE FILTER 0.35 X 1390 white MAINS FILTER 0.35 X 1390 light blue VALVE 0.50 X 1250 0.35 X 1390 light blue 1.00 X 1250 BLUE PRESSURE 1.00 X 1250 BROWN... -
Page 17: Power Module
Indesit Company POWER MODULE Key: J1 - Mains In (Live & Neutral) J3 - Pressure Switch / Heater J4 - Door Lock J5 - Conductivity Sensor J8 - Wash Valves / NTC J9 - Motor & Pump J11 - Display / Control... -
Page 18: Eeproms
Indesit Company EEPROMS Before programming a blank Eeprom via E-mit identify the correct Eeprom before fitting to the Power Board. Eeproms manufactured by ST are used on current production and for spare part requirements. EVO 2 (Equivalent Types) ST 24C64 6... -
Page 19: Controls Information / Main Board Programming
Types of programming: Handheld Terminal (Not UK) Smart Card Emit / Memwriter (UK Indesit this card holds the Service Engineers) program file and can Smart Reader & Smart Card only be used ONCE. - Page 20 Indesit Company PROGRAMMING (Using Smartcard Reader / Card) If the Main Module has been replaced during a repair the board will require programming using the following method. Do NOT connect the machine to electrical supply. Smart Card Reader Insert the pre-programmed card into the Card and Smart Card in use reader.
-
Page 21: Fault Codes / Led Indications
Indesit Company FAULT CODE LED INDICATIONS NOTE: - Field Trial and post field trial display LEDS indicate at different positions. FIELD TRIAL DISPLAY POST FIELD TRIAL DISPLAY LED 1 LED 2 LED 3 LED 4 LED 5 NOTE: - The coloured markings shown above are to help identify the relative fault indication code and do not appear in colour on the appliance. - Page 22 Indesit Company Fault indication LEDs flash together with programme button LEDs FAULT CAUSE CORRECTIVE ACTIONS Check for continuity of motor (Field coil pins 3-5 and armature pins 1-2); Motor triac short circuit Check efficiency of module connector block J9, motor...
- Page 23 Indesit Company FAULT CAUSE CORRECTIVE ACTIONS Check wiring to heater and continuity of wash element (25Ω); Check pressure switch connections and correct pressure switch operation; Heater relay stuck on or pressure switch stuck on full. Check edge connector J3 has secure connections on LED 4 module;...
-
Page 24: Dismantling Instructions
Indesit Company DISMANTLING INSTRUCTIONS SAFETY NOTES Ensure that the appliance is disconnected from the Electricity supply before commencing any work. Beware of any sharp edges on metal or plastic parts - wear safety gloves. Refer to the Safety Notes at the beginning of this publication. - Page 25 Indesit Company H. Door Open the door. Unscrew the two screws (T15 screws) securing the door to the hinge and take off the drip tray pulling it upwards. Remove the handle by sliding towards hinge. Separate the cover from the rest of the door by inserting a flat blade screwdriver between cover and door body, apply gentle pressure to part the two sections.
- Page 26 Indesit Company Unclip the valve hoses and electrical connections. Unclip the vent tube (G). Insert slide, Part No. C00222704 (5600155) inside the cabinet at the rear of the drum. Using suitable protection lay the appliance on its back. Remove the 2 nuts securing the shock absorbers to the base of the cabinet.
- Page 27 Indesit Company Service Manual UK English 27 of 28...
- Page 28 Indesit Company Service Manual UK English 28 of 28...