Miele KM 2012 Operating Instructions Manual
Gas cooktops
Hide thumbs
Also See for KM 2012:
- Operating and installation instructions (68 pages) ,
- Operating and installation manual (52 pages) ,
- Installation manual (21 pages)

Related Manuals for Miele KM 2012


Summary of Contents for Miele KM 2012
-
Page 1: Operating Instructions
Operating instructions Gas cooktops KM 2012 en - AU, NZ To avoid the risk of accidents or damage to the appliance it is essential to read these instructions before it is installed and used for the first time. M.-Nr. 07 143 630... - Page 2 WO This appliance can be used in countries other than those specified on the appliance. It is, however, set up for connection to the gas and electricity supplies in the countries specified. For use in other countries please contact the Miele spare parts or customer service department in your country.
-
Page 3: Table Of Contents
Contents Guide to the appliance ..........5 Cooktop . - Page 4 Contents Electrical connection ..........34 Gas connection .
-
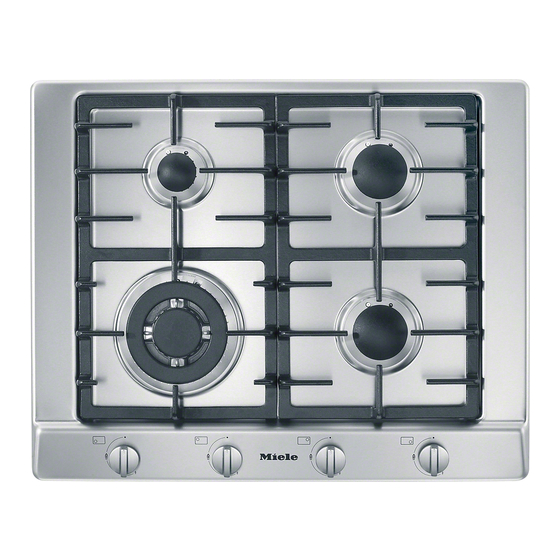
Page 5: Guide To The Appliance
Guide to the appliance Cooktop Wok burner Controls: e Front right Small burner cd Medium burners f Rear right g Rear left h Front left... -
Page 6: Burners
Guide to the appliance Burners Wok burner Small, medium and large burners a Burner ring b Burner cap c Burner head d Burner base e Ignition safety device f Ignitor... -
Page 7: Accessories Supplied
Guide to the appliance Accessories supplied The accessories supplied with your appliance as well as a range of optional ones are available to order from Miele (see "Optional accessories"). Wok ring The wok ring supplied gives additional stability to the wok,... -
Page 8: Warning And Safety Instructions
Warning and Safety instructions Correct application This appliance complies with all This appliance is designed for relevant local and national safety domestic use and for use in similar requirements. Inappropriate use environments by guests in hotel or can, however, lead to personal injury motel rooms, bed &... - Page 9 Warning and Safety instructions Safety with children Packaging, e.g. cling film, polystyrene and plastic wrappings, This appliance is only intended for must be kept out of the reach of babies use by adults who have read these and young children. Danger of instructions.
- Page 10 Miele authorised, suitably qualified and competent person in strict accordance with current national and local safety regulations. Repairs and other work by unauthorised and unqualified persons could be dangerous. Miele cannot be held liable for unauthorised work.
- Page 11 – the screw-out fuse is removed (in disconnect it from the mains electricity countries where this is applicable), and the gas supply, and call Miele. – it is switched off at the wall socket In areas which may be subject to...
- Page 12 Miele will not accept liability for any fire. damage resulting from such incorrect Take care not to let these items get use.
- Page 13 When using an electrical appliance, for safety. e.g. a hand-held mixer, near the gas cooktop, ensure that the connection Miele cannot be held liable for damage caused by non-compliance cable doesn't come into contact with the hot cooktop. The insulation on the...
-
Page 14: Caring For The Environment
Caring for the environment Disposal of the packing Disposal of your old appliance material or machine The transport and protective packing Electrical and electronic appliances / has been selected from materials which machines often contain materials are environmentally friendly for disposal which, if handled or disposed of and can normally be recycled. -
Page 15: Before Using For The First Time
Before using for the first time Please adhere the extra data plate for the appliance supplied with this documentation in the space provided in the "After sales service" section of this booklet. Cleaning for the first time ^ Remove any protective foil and adhesive labels. ^ Clean all removable parts of the burners with a solution of warm water and a small amount of washing-up liquid applied with a soft sponge. -
Page 16: Operation
Operation The control is used to ignite the burner and to regulate the strength of the flame. ßThe gas supply is turned off & Strong flame / Weak flame The burners can only be switched on by pressing in the appropriate control and turning it anti-clockwise, and switched off by turning the control clockwise. -
Page 17: Regulating The Flame
Operation In the event of a power cut If there is an interruption to the electricity supply the gas can be ignited with a match. ^ Press in the relevant control and turn it anti-clockwise to the large gas symbol. ^ Hold the control pressed in and light the gas at the burner with a match. -
Page 18: Suitable Pans
Suitable pans Burner Min. pan base diameter in cm Small burner Medium burner Large burner Wok burner Max. diameter at top of pan in cm Small burner Medium burner Large burner Wok burner – Refer to the chart above and ensure that the pan diameter falls within the minimum and maximum diameters given for the burner you are using. -
Page 19: Wok Ring
Suitable pans – Always place the pan on the pan support supplied with the cooktop. Do not place a pan directly on top of the burner. – Remember when purchasing new pans that manufacturers usually refer to the diameter at the top of the pan in their documentation. -
Page 20: Safety Cut-Out
Safety cut-out This appliance is fitted with a thermoelectric ignition safety device which cuts off the supply of gas to a burner if the flame goes out, for example if food has boiled over, or if there was a sudden draught. ^ To use the burner again, turn the control clockwise to the "ß"... -
Page 21: Cleaning And Care
Cleaning and care Do not use a steam cleaning appliance to clean this appliance. The steam could reach the electrical components and cause a short circuit. – The appliance should be cleaned regularly, preferably after each use. Allow the appliance to cool down to a safe temperature before cleaning. - Page 22 Stainless steel Clean stainless steel surfaces using an Original Printed surfaces surfaces Miele all purpose microfibre cloth or with a (Flame symbols) solution of warm water and a little washing-up liquid applied with a soft sponge. The printing can be damaged If required, clean the appliance with the rough if soiling (e.g.
- Page 23 Cleaning and care To assemble the small, medium and large burners ^ Place the burner head c onto the burner base d so the ignition safety device e, the ignitor f and the retaining pins g fit into their respective holes in the burner head. ^ Position the burner cap b onto the burner head c so that the retaining pins fit into their respective recesses.
- Page 24 Cleaning and care To assemble the wok burner ^ Place burner head c onto burner base d so that the ignition safety device e and the ignitor f extend through their respective holes in the burner head. ^ Replace the burner ring a. ^ Replace the burner cap b.
-
Page 25: Problem Solving Guide
Problem solving guide Repairs to the gas and electrical components of this appliance must only be carried out by a suitably qualified and competent person to ensure safety. Repairs and other work by unqualified persons could be dangerous. The manufacturer cannot be held liable for unauthorised work. What to do if... - Page 26 ... the ignitor on the burner does not spark. Check whether – the mains fuse has blown. If it has, contact a qualified electrician or Miele. – food deposits have lodged themselves between the ignitor and the burner cap, or on the ignition safety device.
-
Page 27: Optional Accessories
Optional accessories Miele offers a range of useful accessories, as well as cleaning and conditioning products for your appliance. These can be ordered via the internet at www.miele-shop.com (depending on country). These products can also be obtained from Miele (see back cover for contact details) or from your Miele Chartered Agent. -
Page 28: Safety Instructions For Installation
Safety instructions for installation Ensure that the gas pipe and Fit the wall units and rangehood electrical cable are installed in such a before fitting the cooktop to avoid way that they do not touch any parts of damaging the surface. the appliance which become hot. -
Page 29: Safety Clearances
Safety clearances Safety clearance above the cooktop Side / rear clearances to the cooktop Ideally the cooktop should be installed with plenty of space on either side. There may be a wall at the rear and a tall unit or wall at one side. On the other side, however, no unit or divider should stand higher than the cooktop (see illustrations). - Page 30 Safety clearances Before installing the appliance check If the clearance between the periphery that the location provides the required of any gas burner and clearances from combustible material - the side wall is less than 300 mm and if necessary provide protection to - the rear wall is less than 200 mm, adjacent surfaces as required by the walls must be protected with a...
-
Page 31: Appliance And Building-In Dimensions
Appliance and building-in dimensions KM 2012 a Front b Building-in depth c Gas connection R 1/2" ISO 7-1 d Mains connection box with mains connection cable, L = 2,000 mm... -
Page 32: Installation
Installation Preparing the worktop Installing the cooktop ^ Make the worktop cut-out following the dimensions applicable. Remember to maintain a minimum safety clearance from the back wall, as well as from any tall unit or side wall to the right or left of the cooktop. See "Safety clearances". -
Page 33: General Installation Tips
General installation tips Sealant Tiled worktop The grouting a and the shaded area underneath the cooktop frame must be Do not use any sealant unless smooth and even so that the frame sits expressly instructed to do so. The evenly and the sealing strip underneath sealing strip under the edge of the top the top part of the cooktop provides a part of the cooktop provides a sufficient... -
Page 34: Electrical Connection
As the colours of the wires in the mains connection cable of type H 05 V V-F lead of this appliance may not (pvc insulated), available from Miele. correspond with the coloured markings For extra safety it is advisable to install... -
Page 35: Gas Connection
If the appropriate jets have not been supplied with the appliance you will need to contact your Chartered Agent The gas connection must be or Miele. installed so that connection can be made either from inside or outside Conversion to another type of gas is the kitchen unit, and the isolating described under the relevant Section. - Page 36 Gas connection Gas pressure must be set by the The gas connection must be in approved gas fitter as shown on the accordance with national and local data plate: regulations. Natural gas 1.0 kPa The relevant building regulations must also be observed. ULPG (Propane/Butane) 2.75 kPa ^ Disconnect gauge and screw in the...
-
Page 37: Burner Ratings
Burner ratings Nominal ratings for all gas types with the burner full on Gas type KM 2012 MJ/h Small burner ULPG Medium burner ULPG Large burner ULPG 14.5 ULPG 12.5 Total 32.6 ULPG 29.1 Nominal rating at low setting Gas type... -
Page 38: Conversion To Another Type Of Gas
Conversion to another type of gas Connection to the gas supply, or conversion from one type of gas to another, should only be undertaken by an approved and registered gas installer in strict accordance with local and national safety and building regulations. -
Page 39: Changing The Jets
Conversion to another type of gas Changing the jets Small, medium and large burners Disconnect the gas cooktop from the electricity supply by switching off at the socket or by disconnecting the mains fuse. To change the main jet ^ Take off the burner cap b, burner ring a (for the wok) and burner head c. -
Page 40: To Change The Small Jet
Conversion to another type of gas To change the small jet (for all burners) The top of the appliance has to be removed before the small jets can be changed. ^ Loosen the fixing screws on the burners. ^ Pull the control knobs off. ^ Lift the top of the appliance off. -
Page 41: After Changing The Jets
Conversion to another type of gas After changing the jets ^ Reassemble the burner parts in the reverse order, ^ Check all gas fittings for leaks by operating the burner without the top section of the cooktop in place (use a match to ignite the flame). -
Page 42: After Sales Service, Data Plate
After sales service, data plate The address and phone number of your nearest Miele office is given on the back page. The voltage and rated load are given on the data plate. Please quote this data, together with the model description and serial number when contacting Miele. - Page 44 Alteration rights reserved/ 2311 M.-Nr. 07 143 630 / 01...