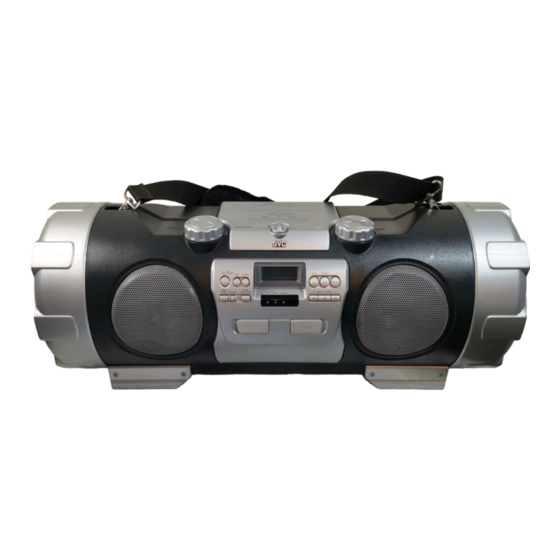
JVC RV-NB20B Instructions Manual
Jvc powered woofer cd system instructions
Hide thumbs
Also See for RV-NB20B:
- Instructions for use manual (44 pages) ,
- Instructions manual (40 pages) ,
- Instructions manual (48 pages)
Table of Contents
Advertisement
Quick Links
Advertisement
Chapters
Table of Contents
Troubleshooting

Related Manuals for JVC RV-NB20B


Summary of Contents for JVC RV-NB20B
- Page 1 POWERED WOOFER CD SYSTEM RV-NB20B/RV-NB20W INSTRUCTIONS For Customer Use: Enter below the Model No. and Serial No. which are located either on the rear, bottom or side of the cabinet. Retain this information for future reference. Model No. Serial No.
- Page 2 Consult the dealer or an experienced radio/TV technician for help. Caution Changes or modifications not approved by JVC could void the user’s authority to operate the equipment. For Canada/pour le Canada THIS DIGITAL APPARATUS DOES NOT EXCEED THE...
- Page 3 IMPORTANT FOR LASER PRODUCTS 1. CLASS 1 LASER PRODUCT 2. CAUTION: Do not open the top cover. There are no user serviceable parts inside the unit; leave all servicing to qualified service personnel. 3. CAUTION: (For U.S.A.) Visible and/or invisible class II laser radiation when open.
-
Page 4: Table Of Contents
General • With JVC’s COMPU PLAY you can turn on the system and start playing the iPod connected to the iPod jack with a single touch, as well as the radio and disc player. (Only when AC power is used.) •... -
Page 5: Index Of Parts And Controls
Index of parts and controls Display window See pages in parentheses for details. ON/STANDBY button (7) 2 Shoulder strap hooks (4) 3 AUX button (3, 14) • Pressing this button also turns on the system. 4 SOUND button (8) 5 SUPER WOOFER VOLUME +/– control knob (8) 6 LOCK/RELEASE knob (for disc) (10) 7 Disc compartment door (10) 8 VOLUME +/–... -
Page 6: Getting Started
Remote control COMPU PLAY — One Touch Operation With One Touch Operation you can play a disc, an iPod, or turn on the radio with a single press of the play button for that function. The system turns on and starts playing the source if it is ready. The COMPU PLAY buttons are: On the system and remote control iPod 6 button CD 6 button... -
Page 7: Ipod
Carrying the system Using the carrying handles Be sure to hold both handles when you carry the system. If you carry the system by only one handle, because of the length of the system, the end may drag on the ground and be damaged as a result. -
Page 8: Power
To car’s cigarette lighter socket (DC12V) CAUTIONS: • Be sure to use the specified car adapter (JVC model CA-R120) to prevent mishaps or damage resulting from different polarity design. • For safety, stop the car before performing operations. • Be sure to start the engine when you use the car adapter; otherwise, the car battery will be exhausted. - Page 9 Connecting the iPod (See page 13.) To dock connector iPod stand (supplied) iPod (not supplied) Disconnecting the iPod • When disconnecting the iPod, make sure the system is turned off. • To remove the iPod cable from the iPod, hold the buttons on the sides and pull. To remove the batteries, remove battery “3”...
-
Page 10: Basic Operations
Basic operations ON/STANDBY DISPLAY SUPER WOOFER VOLUME +/– SOUND MUTING VOLUME +/– Turning the power on and off Note: The lighting condition for the STANDBY lamp and for the display differs depending on the power source. Power source STANDBY lamp/display •... -
Page 11: Sound
Turning off the sound temporarily Using the remote control only Press MUTING. “MUTING” appears on the display. On remote control To restore the sound, press MUTING again or adjust the volume (see page 7). Adjusting the super woofer volume During play, you can adjust the bass level between BASS 1 (minimum) and BASS 6 (maximum). -
Page 12: Listening To The Radio
Listening to the radio Number buttons FM/AM FM MODE You can listen to FM and AM stations. Stations can be tuned in manually, automatically, or from preset memory storage. Before listening to the radio, fully extend the FM telescopic antenna. Tuning in to a station 1. -
Page 13: Presetting Stations
Presetting stations You can preset up to 30 FM stations and 15 AM stations. Note: Preset numbers may have been set to factory test frequencies prior to shipment. This is not a malfunction. You can preset the stations you want into memory as follows: Using the remote control only There is a time limit in doing the following steps. -
Page 14: To Locate A Track Directly
Using the disc player—Normal Play To play a disc 1. Set a disc. 2. Press CD 6. The first track of the disc starts playing. For CDs: Track number For MP3 discs: MP3 indicator • When playing an MP3 disc, the file name (then ID3 Tag if any) is displayed at the beginning of each track. -
Page 15: Play Mode
Programming the playing order of the tracks Using the remote control only You can program up to 50 tracks in any desired order including the same tracks. You can only make a program when the system is stopped. While making a program, you cannot specify a group number to select a track. -
Page 16: Listening To The Ipod
“Flat” is recommended. For information on operating the iPod, see the iPod instruction manual. • JVC is not responsible for any loss of or damage to iPod that might result from the use of this product. • When you connect your iPod to the cable, make sure it connects all the way in. -
Page 17: Listening To Auxiliary Equipment
Listening to auxiliary equipment QP LINK You can listen to auxiliary equipment. First make sure that the auxiliary equipment is properly connected to the system. (See pages 5 and 6.) Note: For operation of the auxiliary equipment, refer to its instructions. Listening to auxiliary equipment 1. -
Page 18: Using The Microphone/Guitar
Using the microphone/guitar Microphone/guitar mixing Using a microphone or a guitar (not supplied), you can mix its sound with a source sound. 1. Make sure the MIC/GUITAR LEVEL control on the rear of the system is properly set. • When using a microphone, make sure the knob is pressed in •... -
Page 19: Setting The Daily Timer
2. Set the length of time you want the source to play before shutting off. Each time you press the button, it changes the number of minutes shown on the display in this sequence: 10 = 20 = 30 = 60 = 90 = 120 = OFF = (back to the beginning) After setting the number of minutes for the sleep timer, the indication will stop flashing and go off. -
Page 20: Care And Maintenance
Care and maintenance Handle your discs carefully, and they will last a long time. Compact discs • This system can play back the following discs: – Audio CD – Finalized CD-R/CD-RW recorded in audio CD format or MP3 format However, continued use of irregular shape discs (heart-shape, octagonal, etc.) can damage the system. -
Page 21: Specifications
Symptom • The track skips. • The disc does not play (“NO PLAY” or “NO DISC” appears). • Specific files (tracks) on an MP3 disc are not played. • iPod is not turned on. • iPod does not play though “CONNECT” appears on the display. - Page 22 For U.S.A.
- Page 23 For U.S.A.
- Page 24 © 2006 Victor Company of Japan, Limited 0806KMMMDWJEIN...
- Page 25 POWERED WOOFER CD SYSTEM CHAIN CD A WOOFER AMPLIFIE RV-NB20B/RV-NB20W INSTRUCTIONS MANUEL D’INSTRUCTIONS LVT1614-002A...
- Page 26 Consult the dealer or an experienced radio/TV technician for help. Caution Changes or modifications not approved by JVC could void the user’s authority to operate the equipment. For Canada/pour le Canada THIS DIGITAL APPARATUS DOES NOT EXCEED THE...
- Page 27 IMPORTANT FOR LASER PRODUCTS 1. CLASS 1 LASER PRODUCT 2. CAUTION: Do not open the top cover. There are no user serviceable parts inside the unit; leave all servicing to qualified service personnel. 3. CAUTION: (For U.S.A.) Visible and/or invisible class II laser radiation when open.
-
Page 28: Features
General • With JVC’s COMPU PLAY you can turn on the system and start playing the iPod connected to the iPod jack with a single touch, as well as the radio and disc player. (Only when AC power is used.) •... -
Page 29: Index Of Parts And Controls
Index of parts and controls Display window How to open the cover See pages in parentheses for details. ON/STANDBY button (7) 2 Shoulder strap hooks (4) 3 AUX button (3, 14) • Pressing this button also turns on the system. 4 SOUND button (8) 5 SUPER WOOFER VOLUME +/–... -
Page 30: Getting Started
Remote control COMPU PLAY — One Touch Operation With One Touch Operation you can play a disc, an iPod, or turn on the radio with a single press of the play button for that function. The system turns on and starts playing the source if it is ready. The COMPU PLAY buttons are: On the system and remote control iPod 6 button CD 6 button... -
Page 31: Installing The Batteries
Carrying the system Using the carrying handles Be sure to hold both handles when you carry the system. If you carry the system by only one handle, because of the length of the system, the end may drag on the ground and be damaged as a result. - Page 32 To car’s cigarette lighter socket (DC12V) CAUTIONS: • Be sure to use the specified car adapter (JVC model CA-R120) to prevent mishaps or damage resulting from different polarity design. • For safety, stop the car before performing operations. • Be sure to start the engine when you use the car adapter; otherwise, the car battery will be exhausted.
- Page 33 Connecting the iPod (See page 13.) To dock connector iPod stand (supplied) iPod (not supplied) Disconnecting the iPod • When disconnecting the iPod, make sure the system is turned off. • To remove the iPod cable from the iPod, hold the buttons on the sides and pull. To remove the batteries, remove battery “3”...
-
Page 34: Basic Operations
Basic operations ON/STANDBY DISPLAY SUPER WOOFER VOLUME +/– SOUND MUTING VOLUME +/– Turning the power on and off Note: The lighting condition for the STANDBY lamp and for the display differs depending on the power source. Power source STANDBY lamp/display •... - Page 35 Turning off the sound temporarily Using the remote control only Press MUTING. “MUTING” appears on the display. On remote control To restore the sound, press MUTING again or adjust the volume (see page 7). Adjusting the super woofer volume During play, you can adjust the bass level between BASS 1 (minimum) and BASS 6 (maximum).
-
Page 36: Listening To The Radio
Listening to the radio Number buttons FM/AM FM MODE You can listen to FM and AM stations. Stations can be tuned in manually, automatically, or from preset memory storage. Before listening to the radio, fully extend the FM telescopic antenna. Tuning in to a station 1. -
Page 37: Playing Back Discs
Presetting stations You can preset up to 30 FM stations and 15 AM stations. Note: Preset numbers may have been set to factory test frequencies prior to shipment. This is not a malfunction. You can preset the stations you want into memory as follows: Using the remote control only There is a time limit in doing the following steps. - Page 38 Using the disc player—Normal Play To play a disc 1. Set a disc. 2. Press CD 6. The first track of the disc starts playing. For CDs: Track number For MP3 discs: MP3 indicator • When playing an MP3 disc, the file name (then ID3 Tag if any) is displayed at the beginning of each track.
-
Page 39: Programming The Playing Order Of The Tracks
Programming the playing order of the tracks Using the remote control only You can program up to 50 tracks in any desired order including the same tracks. You can only make a program when the system is stopped. While making a program, you cannot specify a group number to select a track. -
Page 40: Listening To The Ipod
“Flat” is recommended. For information on operating the iPod, see the iPod instruction manual. • JVC is not responsible for any loss of or damage to iPod that might result from the use of this product. • When you connect your iPod to the cable, make sure it connects all the way in. -
Page 41: Listening To Auxiliary Equipment
Listening to auxiliary equipment QP LINK You can listen to auxiliary equipment. First make sure that the auxiliary equipment is properly connected to the system. (See pages 5 and 6.) Note: For operation of the auxiliary equipment, refer to its instructions. Listening to auxiliary equipment 1. -
Page 42: Using The Microphone/Guitar
Using the microphone/guitar Microphone/guitar mixing Using a microphone or a guitar (not supplied), you can mix its sound with a source sound. 1. Make sure the MIC/GUITAR LEVEL control on the rear of the system is properly set. • When using a microphone, make sure the knob is pressed in •... - Page 43 2. Set the length of time you want the source to play before shutting off. Each time you press the button, it changes the number of minutes shown on the display in this sequence: 10 = 20 = 30 = 60 = 90 = 120 = OFF = (back to the beginning) After setting the number of minutes for the sleep timer, the indication will stop flashing and go off.
-
Page 44: Care And Maintenance
Care and maintenance Handle your discs carefully, and they will last a long time. Compact discs • This system can play back the following discs: – Audio CD – Finalized CD-R/CD-RW recorded in audio CD format or MP3 format However, continued use of irregular shape discs (heart-shape, octagonal, etc.) can damage the system. -
Page 45: Specifications
Symptom • The track skips. • The disc does not play (“NO PLAY” or “NO DISC” appears). • Specific files (tracks) on an MP3 disc are not played. • iPod is not turned on. • iPod does not play though “CONNECT” appears on the display. - Page 46 EN, FR © 2006 Victor Company of Japan, Limited 0806KMMMDWJEIN...
- Page 47 POWERED WOOFER CD SYSTEM RV-NB20B/RV-NB20W INSTRUCTIONS LVT1614-003B...
- Page 48 This apparatus is in conformance with the valid European directives and standards regarding electromagnetic compatibility and electrical safety. ON/STANDBY button in European representative of Victor Company of Japan, Limited is: JVC Technology Centre Europe GmbH Postfach 10 05 52 61145 Friedberg Germany Side View...
- Page 49 Attention: This symbol is (Business users) only valid in the If you wish to dispose of this product, please visit our web page www.jvc-europe.com to obtain information about the take- European back of the product. Union. [Other Countries outside the European Union] If you wish to dispose of this product, please do so in accordance with applicable national legislation or other rules in your country for the treatment of old electrical and electronic equipment.
-
Page 50: Features
General • With JVC’s COMPU PLAY you can turn on the system and start playing the iPod connected to the iPod jack with a single touch, as well as the radio and disc player. (Only when AC power is used.) •... -
Page 51: Index Of Parts And Controls
Index of parts and controls Display window See pages in parentheses for details. ON/STANDBY button (7) 2 Shoulder strap hooks (4) 3 AUX button (3, 14) • Pressing this button also turns on the system. 4 SOUND button (8) 5 SUPER WOOFER VOLUME +/– control knob (8) 6 LOCK/RELEASE knob (10) 7 Disc compartment door (10) 8 VOLUME +/–... -
Page 52: Remote Control
Remote control COMPU PLAY — One Touch Operation With One Touch Operation you can play a disc, an iPod, or turn on the radio with a single press of the play button for that function. The system turns on and starts playing the source if it is ready. The COMPU PLAY buttons are: On the system and remote control iPod 6 button CD 6 button... - Page 53 Carrying the system Using the carrying handles Be sure to hold both handles when you carry the system. If you carry the system by only one handle, because of the length of the system, the end may drag on the ground and be damaged as a result.
- Page 54 Connecting the AC power cord Power cord CAUTIONS: • ONLY USE THE JVC POWER CORD PROVIDED FOR THIS SYSTEM TO AVOID MALFUNCTION OR DAMAGE TO THE SYSTEM. • BE SURE TO UNPLUG THE POWER CORD FROM THE...
- Page 55 Connecting the iPod (See page 13.) To dock connector iPod stand (supplied) iPod (not supplied) Disconnecting the iPod • When disconnecting the iPod, make sure the system is turned off. • To remove the iPod cable from the iPod, hold the buttons on the sides and pull.
-
Page 56: Basic Operations
Basic operations ON/STANDBY DISPLAY SUPER WOOFER VOLUME +/– SOUND MUTING VOLUME +/– Turning the power on and off Note: The lighting condition for the STANDBY lamp and for the display differs depending on the power source. Power source STANDBY lamp/display •... - Page 57 Turning off the sound temporarily Using the remote control only Press MUTING. “MUTING” appears on the display. On remote control To restore the sound, press MUTING again or adjust the volume (see page 7). Adjusting the super woofer volume During play, you can adjust the bass level between BASS 1 (minimum) and BASS 6 (maximum).
-
Page 58: Listening To The Radio
Listening to the radio Number buttons FM/AM FM MODE You can listen to FM and AM stations. Stations can be tuned in manually, automatically, or from preset memory storage. Before listening to the radio, fully extend the FM telescopic antenna. Tuning in to a station 1. -
Page 59: Playing Back Discs
Presetting stations You can preset up to 30 FM stations and 15 AM stations. Note: Preset numbers may have been set to factory test frequencies prior to shipment. This is not a malfunction. You can preset the stations you want into memory as follows: Using the remote control only There is a time limit in doing the following steps. - Page 60 Using the disc player—Normal Play To play a disc 1. Set a disc. 2. Press CD 6. The first track of the disc starts playing. For CDs: Track number For MP3 discs: MP3 indicator • When playing an MP3 disc, the file name (then ID3 Tag if any) is displayed at the beginning of each track.
- Page 61 Programming the playing order of the tracks Using the remote control only You can program up to 50 tracks in any desired order including the same tracks. You can only make a program when the system is stopped. While making a program, you cannot specify a group number to select a track.
-
Page 62: Listening To The Ipod
“Flat” is recommended. For information on operating the iPod, see the iPod instruction manual. • JVC is not responsible for any loss of or damage to iPod that might result from the use of this product. • When you connect your iPod to the cable, make sure it connects all the way in. -
Page 63: Listening To Auxiliary Equipment
Listening to auxiliary equipment QP LINK You can listen to auxiliary equipment. First make sure that the auxiliary equipment is properly connected to the system. (See pages 5 and 6.) Note: For operation of the auxiliary equipment, refer to its instructions. Listening to auxiliary equipment 1. -
Page 64: Using The Microphone/Guitar
Using the microphone/guitar Microphone/guitar mixing Using a microphone or a guitar (not supplied), you can mix its sound with a source sound. 1. Make sure the MIC/GUITAR LEVEL control on the rear of the system is properly set. • When using a microphone, make sure the knob is pressed in •... - Page 65 2. Set the length of time you want the source to play before shutting off. Each time you press the button, it changes the number of minutes shown on the display in this sequence: 10 = 20 = 30 = 60 = 90 = 120 = OFF = (back to the beginning) After setting the number of minutes for the sleep timer, the indication will stop flashing and go off.
-
Page 66: Care And Maintenance
Care and maintenance Handle your discs carefully, and they will last a long time. Compact discs • This system can play back the following discs: – Audio CD – Finalized CD-R/CD-RW recorded in audio CD format or MP3 format However, continued use of irregular shape discs (heart-shape, octagonal, etc.) can damage the system. -
Page 67: Specifications
Symptom • The track skips. • The disc does not play (“NO PLAY” or “NO DISC” appears). • Specific files (tracks) on an MP3 disc are not played. • iPod is not turned on. • iPod does not play though “CONNECT” appears on the display. - Page 68 © 2006 Victor Company of Japan, Limited 0906KMMMDWJEIN...