Table of Contents
Advertisement
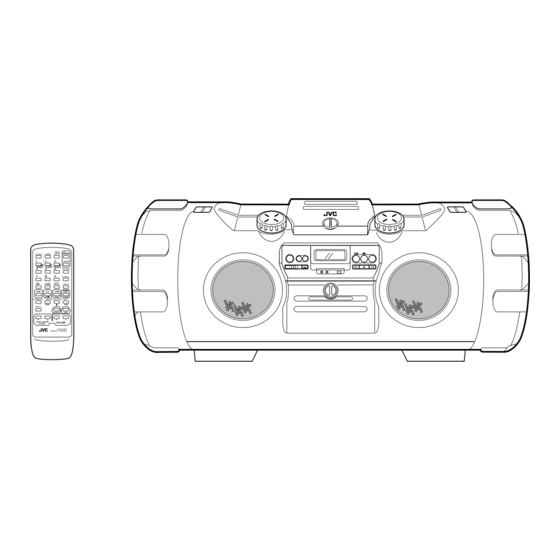
POWERED WOOFER CD SYSTEM
CD CON ALTAVOZ DE GRAVES Y AMPLIFICADOR INCORPORADO
CHAINE CD A WOOFER AMPLIFIE
RV-B99 BK/GY
TIMER
(AC)
ON/OFF
CLOCK
TIMER
POWER
SLEEP
DOWN
UP
SET
PROGRAM
RANDOM
AUTO
PRESET
REPEAT
TUNER
AUX
C D
TAPE
BAND
FM MODE
REVERSE MODE
REW
MULTI CONTROL
FF
DISPLAY
SOUND
ACS
SUPER WOOFER
VOLUME
VOLUME
RM-RXVB99
REMOTE CONTROL
INSTRUCTIONS
INSTRUCCIONES
MANUEL D'INSTRUCTIONS
For Customer Use:
Enter below the Model No. and Serial
No. which are located on the rear of the
cabinet. Retain this information for future
reference.
Model No.
Serial No.
LVT0218-001A
[J]
Advertisement
Table of Contents

Related Manuals for JVC RV-B99


Summary of Contents for JVC RV-B99
- Page 1 POWERED WOOFER CD SYSTEM CD CON ALTAVOZ DE GRAVES Y AMPLIFICADOR INCORPORADO CHAINE CD A WOOFER AMPLIFIE RV-B99 BK/GY TIMER (AC) ON/OFF CLOCK TIMER POWER SLEEP DOWN PROGRAM RANDOM AUTO PRESET REPEAT TUNER TAPE BAND FM MODE REVERSE MODE MULTI CONTROL...
-
Page 2: Table Of Contents
ENGLISH Thank you for purchasing this JVC product. Please read these instructions carefully before starting operation to be sure to obtain optimum performance and a longer service life from the unit. CONTENTS Features ... 3 Safety precautions ... 4 Handling precautions ... 5 Shoulder strap attachment/ detachment ... -
Page 3: Features
INFORMATION (For U.S.A.) This equipment has been tested and found to comply with the limits for a Class B digital device, pursuant to Part 15 of the FCC Rules. These limits are designed to provide reasonable protection against harmful interference in a residential installation. This equipment generates, uses, and can radiate radio frequency energy and, if not installed and used in accordance with the instructions, may cause harmful interference... -
Page 4: Safety Precautions
10 o más cm de altura. 15 cm 15 cm RV-B99 10 cm CONSIGNES DE SECURITE Prévention contre l’électrocution, les incendies et les dommages 1. -
Page 5: Handling Precautions
÷ Where it is excessively humid, such as in a bathroom. ÷ Where it could be magnetized by a magnet or speaker. 2. Pay attention to dust Be sure to close the CD door so that dust does not collect on the lens. -
Page 6: Shoulder Strap Attachment/ Detachment
9. When listening with headphones ÷ Do not listen at high volumes as this could damage your hearing. ÷ For safety, do not drive while listening to this unit. 10.Pay attention to the following ÷ Do not place the unit on an inclination. ÷... -
Page 7: Connections
Refer to the illustration for correct connection. CAUTIONS: 1. ONLY USE WITH JVC POWER CORD PROVIDED WITH THIS UNIT TO AVOID MALFUNCTION OR DAMAGE TO THE UNIT. 2. BE SURE TO UNPLUG THE POWER CORD... - Page 8 B. Batteries for memory back-up system It is recommended that batteries are loaded to prevent the preset station memory and timer, etc. from being erased when there is a power failure, or when the AC power cord is disconnected. ÷ Loading batteries Load three "R6/AA (15F)"...
- Page 9 TIME (MORE THAN TWO WEEKS) OR WHEN ALWAYS USING HOUSEHOLD AC, REMOVE THE BATTERIES TO AVOID A MALFUNCTION OR DAMAGE TO THE UNIT. ÷ WHEN THE JVC POWER CORD PROVIDED WITH THIS UNIT IS CONNECTED, THE POWER IS AUTOMATICALLY SWITCHED FROM BATTERIES HOUSEHOLD AC EVEN WHEN THE BATTERIES ARE LOADED.
- Page 10 PHONES INPUT CAUTION Optional exclusive car adapter (JVC model CA-R120) Adaptador exclusivo para automóvil opcional (JVC modelo CA-R120) Adaptateur automobile exclusif optionnel (modèle JVC CA-R120) ÷ Primero conecte el adaptador al jack DC IN 12V, no al enchufe del encendedor de cigarrillos, porque si pone en cortocircuito una clavija del automóvil, puede quemarse...
-
Page 11: Names Of Parts And Their Functions
NAMES OF PARTS AND THEIR FUNCTIONS CD player/General section Shoulder strap hook POWER button SUPER WOOFER VOLUME control knob SOUND button Display window Function/Track number display Play time display Repeat play indicator ( ALL) Program mode indicator (PROGRAM) Random play indicator (RANDOM) ÷... - Page 12 Tuner/Deck section 1 2 3 6 78 PRESET TUNING/BEAT CUT button AUX button Display window Band display Radio frequency display Mode display during FM broadcast (STEREO/MONO) Tape display Reverse mode indicator ( / Recording indicator (REC) Tape direction indicators (2/3) TAPE 23 button Press to select the tape mode.
-
Page 13: Remote Control Unit
Headphone jack (PHONES) (3.5 mm dia. stereo mini plug) Connect headphones (impedance 16 to 1 k ) to this jack. Speaker sound is automatically switched off when the headphones are connected. MIC/GUITAR INPUT jack (6.3 mm dia. plug) MIC LEVEL (_)/GUITAR LEVEL ( ) control... - Page 14 Using the remote control unit ÷ Point at the remote sensor and operate within about 7 m (approx. 23 ft). ÷ The remote control range is less when the unit is used at an angle. ÷ Do not expose the remote sensor to strong direct sunlight or artificial lighting.
-
Page 15: Switching The Power On/Off
SWITCHING THE POWER ON/OFF CD 3/8 button Botón CD 3/8 Touche de lecture CD/pause ( 3 / 8 ) POWER button Botón POWER Touche d’alimentation (POWER) Switching the power on/off ÷ Switching on: POWER ÷ Switching off: POWER One touch operation (COMPU PLAY) (only when AC power is used) Even when the power is set to standby, pressing the button shown below switches on the power... -
Page 16: Volume, Sound Mode And Other Controls
VOLUME, SOUND MODE AND OTHER CONTROLS VOLUME control + : Use to increase the volume. – : Use to decrease the volume. (Control range from VOL 0 to VOL 50.) ÷ The volume level is displayed in the display window for 2 seconds. Main unit Unidad principal Appareil principal... - Page 17 Sound mode button Sound modes can be selected to enhance the type of music being played. ÷ Press the SOUND button to select the sound mode. ÷ Each time the SOUND button is pressed the sound mode changes as follows: Main unit Remote control unit Unidad principal...
-
Page 18: Handling Cds
HANDLING CDs Since dirty, damaged and warped CDs may damage the unit, take care regarding the following: 1. Usable CDs Use CDs with the mark shown. 2. Notes on handling CDs ÷ Do not touch the reflective recorded surface. ÷ Do not stick or write anything on the label side. -
Page 19: Playing Cds
PLAYING CDs Playing an entire CD The following example of playing an entire CD assumes a CD with 12 tracks and a total playing time of 48 minutes 57 seconds. Operate in the order shown ÷ When AC power is used. (When battery power is used, switch on the POWER button first, then perform operation.) Set to RELEASE to open the CD door. - Page 20 ÷ Do not use the unit at excessively high or low temperatures. The recommended temperature range is from 5°C (41°F) to 35°C (95°F). ÷ After playback, unload CDs and close the CD door. ÷ If mistracking occurs during play, lower the volume.
- Page 21 SLEEP DOWN PROGRAM RANDOM AUTO PRESET REPEAT TUNER TAPE BAND FM MODE REVERSE MODE MULTI CONTROL Press the CD 3 / 8 button to set to the CD mode. Press the 7 button. Designate the required track using the track number buttons.
- Page 22 To confirm the details of a program... Press the PROGRAM button; the tracks making up the program will be displayed in programmed order. To clear the programmed tracks... Press the 7 button before playing a CD. During programmed play, press this button twice. When the CD door is opened, programmed tracks are cleared automatically.
-
Page 23: Handling Cassette Tapes
HANDLING CASSETTE TAPES Cassette tapes 1. Loose tape may cause trouble. Using a pencil or like object, gently tighten the tape as shown. 2. To prevent recordings from being erased accidentally, remove the tab(s) with a screwdriver, etc. Reseal the slots with adhesive tape to erase and re-record after the tabs have been removed. -
Page 24: Cassette Playback
CASSETTE PLAYBACK Operate in the order shown ÷ When AC power is used. (When battery power is used, switch on the power button first, then perform operation.) Load a cassette tape with side A facing out. Press to start playback. (The power is switched on and the TAPE mode is engaged to start tape playback.) Adjust the volume. -
Page 25: Using With Another Audio Unit
USING WITH ANOTHER AUDIO UNIT Operate in the order shown ÷ When AC power is used. (When battery power is used, switch on the power button first, then perform operation.) Connect the audio unit, turntable, MD player, etc. to the AUX IN jack (see page 7). Press the AUX button. - Page 26 Seek tuning (auto tuning) Press the 4 or ¢ button for one second or more. The unit enters the seek tuning mode to tune in the nearest station automatically, so the broadcast can be heard. Manual tuning Each time the 4 or ¢ button is pressed, the unit steps through the current frequency band.
- Page 27 ÷ Repeat the previous procedure for each of the other stations, using a different preset button each time. ÷ Repeat the previous procedure for the other band. ÷ To change preset stations Perform step after tuning to the required station. Notes: ÷...
-
Page 28: Recording
RECORDING ÷ During recording, the ALC (Automatic Level Control) circuit automatically optimizes the recording level, so manual recording level adjustment is unnecessary. ÷ Check that the safety tab on the cassette tape is not broken off. Note: This unit has recording characteristics suitable for normal and CrO tapes. - Page 29 Note: ÷ During CD synchro recording, the CD 3/8 and (4, ¢) buttons do not function. ÷ If a recording is completed in the reverse direction (2 ), it is possible to continue recording without changing the direction to forward (3), until the tape ends. ÷...
- Page 30 Recording from the radio or an external source connected to the AUX IN terminals Operate in the order shown Load a cassette with side A facing out. (Wind past the tape leader before starting recording.) ÷ Make sure the tape direction is set to 3 (forward direction).
-
Page 31: Microphone/Guitar Input
MICROPHONE/GUITAR INPUT A microphone or guitar can be connected, and their sound can be mixed with the source sound. MIC LEVEL GUITAR LEVEL 6.3 mm diameter plug MIC/GUITAR INPUT Clavija de 6,3 mm de diámetro Fiche de 6,3 mm de diamètre ÷... - Page 32 Setting the current time (when this unit is used for the first time) (Example: To set the clock to PM 1:15.) (AC) POWER CLOCK DOWN Set the POWER button to ON. Press the CLOCK button; “ blink in the display. Set to PM 1:15 by pressing the DOWN/UP buttons.
-
Page 33: Timer Operations
TIMER OPERATIONS (USING THE REMOTE CONTROL UNIT) Setting the timer ÷ The current time must be set before the timer can be used. Set the POWER button to ON. Press the TIMER button. TIMER Set the start time. (Example: To set the timer to PM 12:15.) DOWN Set the stop time. - Page 34 Set the volume. DOWN ÷ The unit enters the previously engaged mode when timer setting has been completed. (The ÷ La unidad ingresa en el modo previamente activado cuando el ajuste del temporizador queda completado. (Se enciende el ÷ L’appareil passe dans le mode engagé précédemment et le réglage de la minuterie est terminé. (L’indicateur ÷...
- Page 35 ÷ Timer recording will start at timer start time and the power will be switched off at timer stop time. (The timer mode is then released.) ÷ To repeat timer recording every day Press the TIMER ON/OFF button to display the timer mode indicator (REC ) in the display window.
- Page 36 ÷ Timer playback will start at the timer start time and the power will be switched off at the timer stop time. The unit remains in the same timer mode even after the power is switched off. The same timer function will repeat at the same time on the following day.
-
Page 37: Maintenance
B. To fall asleep while listening to a tape, broadcast or CD and to perform timer playback the following morning Set the timer. (Refer to “Setting the timer” on page 33.) Set to the required source (broadcast, tape or CD). Press the SLEEP button to set the sleep time. -
Page 38: Troubleshooting
Cautions: 1. Keep magnets and metallic objects away from the head. If the head becomes magnetized, noise will increase and the sound will deteriorate. Demagnetize the head every 20-30 hours of use with a head eraser (available from an audio store). (When demagnetizing the head, the POWER button should be set to standby.) 2. -
Page 39: Specifications
(Tuner Section) ÷ Reception is noisy. * Try adjusting the antenna. * Is there a TV set or computer device near the unit? (Timer Section) ÷ Timer operation does not start. * Is the current time set correctly? * Is the timer mode indicator ( ) displayed? (Remote Control) ÷... - Page 40 General Speakers (Impedance) Full range: 8 cm (3-3/16") x 2 (4 ) Super woofer : 16 cm (6-5/16") x 2 (4 ) Power output : 6 watts per channel, min. RMS, at 4 ohms from 150 Hz to 15 kHz with no more than 10% total harmonic distortion and 20 watts per channel woofer, min.