Table of Contents

Related Manuals for PRESIDENT HR2600


Summary of Contents for PRESIDENT HR2600
- Page 1 PRESIDENT HR2600 10 Meter Amateur Mobile Transceiver D o c ’ s E l e c t r o n i c s h t t p : / / h r 2 5 1 0 . h o m e i p . n e t : 2 5 1 0 /...
-
Page 2: Table Of Contents
One Year Limited Warranty Contents WARRANTOR: UNIDEN CORPORATION OF AMERICA (“UNIDEN”.) Welcome! .........2 Unpacking . -
Page 3: Welcome
Welcome! NOTES/MEMOS To the world of 10 Meter amateur radio communications! You have purchased what we feel to be the finest 10 Meter mobile transceiver available. Your HR 2600 has been designed using the latest state of the art electronics to give you years of trouble free service. -
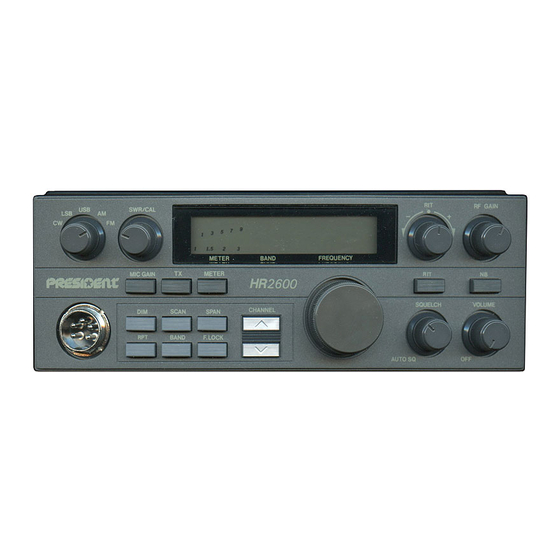
Page 4: Controls And Functions
Controls and Functions NOTES/MEMOS 1. Mode Switch - This control is used to select the desired transmit mode. The modes available are: CW, LSB, USB, AM, and FM. 2. SWR/CAL Control - This control is used to adjust the calibration of the SWR meter while in SWR CAL mode. - Page 5 Amateur Radio Operation - continued Controls and Functions - continued 10. Dim Switch - Pressing the Dim switch dims the display backlighting. Press again Eventually, you’ll probably want to get another, higher class of amateur license, to return backlighting to its normal (high) level. with more privileges.
- Page 6 Controls and Functions - continued Amateur Radio Operation Your new President transceiver is designed to be the perfect “first radio” for anyone 20. Multifunction Meter - This meter can display S/RF, Modulation, SWR Cal, or entering the exciting world of Amateur Radio. From your home, car, or boat, you will SWR.
-
Page 7: Front Panel Connector
Troubleshooting Front Panel Connector If your HR 2600 is not performing up to your expectations, please try these simple steps. If you still cannot get satisfactory results after reading this manual and following the troubleshooting steps, please contact Uniden Customer Service at: (317) 842-2483. Trouble Check Unit will not turn on... -
Page 8: Ctcss Control
Specifications CTCSS Control Setting & Using CTCSS The HR 2600 has a built-in CTCSS encoding (Continuous Tone Coded Squelch System) for accessing repeaters. CTCSS is activated only in FM RPT mode of operation. To set the CTCSS frequency, proceed as follows: 1. -
Page 9: Switch Settings For S301
Operation - continued SWR Meter After you have calibrated the SWR Meter according to the SWR CAL procedure previously shown, you are ready to proceed to check the SWR of your HR 2600 and antenna. Press the Meter button until “SWR” is displayed above the meter (once after completing the SWR CAL procedure). -
Page 10: Rear Panel Connectors
Operation - continued Rear Panel Connectors Multifunction Meter The Multifunction Meter built in to your HR 2600 provides a number of useful functions. These are: S/RF Meter MOD Meter SWR CAL Meter SWR Meter Every time you press the Meter button, the next function will be selected. When you reach the end of the functions, it will start over with the first. -
Page 11: Antenna Connector
Operation - continued Rear Panel Connectors - continued CW Operation Using CW mode with the HR 2600 is easy. Just select your operating frequency, place the mode switch in CW, and you’re ready to transmit CW if you have connected an external key to the accessory plug on the rear of the unit. -
Page 12: Installation
Installation Operation Selecting a frequency Transceiver Mounting Plan the location of the transceiver and microphone bracket before starting the VFO Operation installation. Select a location that is convenient for operation and does not interfere with the driver or passenger in the vehicle. The radio should be secured to a solid Selecting an operating frequency using the HR 2600’s built-in VFO is easy.