
Related Manuals for PRESIDENT PM-1000 WP


Summary of Contents for PRESIDENT PM-1000 WP
- Page 1 PM -1000 WP Manuel d’Utilisation (p. 3) Manual del Usuario (p. 21) Owner’s Manual (p. 39)
-
Page 3: Table Of Contents
Table des matières Commandes et indicateurs ..........4 Afficheur LCD ..............5 Avertissement ! ..............6 Introduction ................. 7 Caractéristiques ............7 Service Technique ............7 Contenu de l’emballage ............8 Mise en route ..............9 Installation du support ........... 9 Fixer l’antenne ............... -
Page 4: Commandes Et Indicateurs
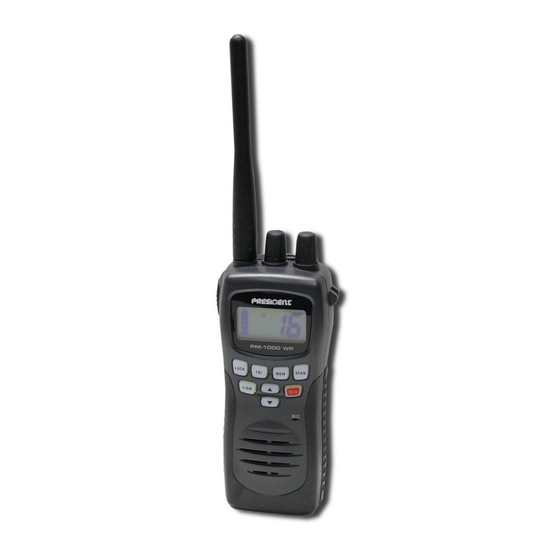
Commandes et indicateurs 1. Antenne 2. Clip ceinture 3. Prise de charge 4. Batterie 5. Clip déclenchement batterie 6. Touche PTT (Push to Talk) 7. Touche Triple Veille - TRI 8. Touche verrouillage - LOCK 9. Touche de sélection de puissance d’émission - 1/5 W 10. -
Page 5: Afficheur Lcd
Afficheur LCD A. Indicateur d’émission B. Indicateur puissance d’émission C. Afficheur numéro de canal D. Indicateur mémoire E. Indicateur Scan F. Indicateur Batterie G. Indicateur triple veille H. Indicateur verrouillage clavier... -
Page 6: Avertissement
Avertissement ! • Le PM-1000 WP est étanche uniquement lorsque l’antenne, les capuchons (jack de charge, jack du micro/HP externe) et la batterie sont correctement installées. • Ne pas utiliser l’émetteur radio sans antenne. • Ne pas utiliser l’émetteur dans une atmosphère explosive. -
Page 7: Introduction
Introduction Le PM-1000 WP est un appareil VHF marine portable étan- che. Il est compact, léger, robuste et s’adapte facilement à votre main. Pour vous assurer d’utiliser les fonctions du PM-1000 WP de façon optimale, veuillez lire ce manuel attentivement avant utilisation. -
Page 8: Contenu De L'emballage
Contenu de l’emballage Si l’un de ces éléments est manquant dans votre emballage, contactez votre fournisseur. -
Page 9: Mise En Route
Mise en route Installation du support Installez le support sur une table ou au mur. Sur une table : 1. Fixez le support en utilisant les vis de montage et rondelles comme suit. Au mur : 1. Appliquez le support au mur et insérez les deux vis de montage dans les trous les plus grands du support. -
Page 10: Utiliser Le Boîtier Piles Alcalines
Utiliser le boîtier piles alcalines Si nécessaire, vous pouvez utiliser le boîtier piles avec des piles alcaline AA (non inclu- ses) à la place du bloc accus. Pour installer les piles : 1. Enlevez le couvercle du boîtier piles en ti- rant sur les deux moitiés . -
Page 11: Charger Le Bloc Accus
Charger le bloc accus Votre radio marine est alimentée par un bloc accus NI-MH spécialement conçu. Avant d’utiliser le PM-1000 WP, chargez le bloc accus Ni- MH pendant 16 heures sans interruption avec le chargeur mural. 1. Placez le PM-1000 WP dans le support. Véri- fiez que la radio soit sur OFF. -
Page 12: Fonctionnement
• Voir « Commandes et Indicateurs » (page 4) pour les posi- tions des boutons et des touches. • Lorsque vous allumez votre PM-1000 WP pour la première fois, il est automatiquement réglé sur canal 16, la fréquence pour détresse, sécurité et appel. -
Page 13: Sélectionner Un Canal
4. Pour éteindre l’appareil, tournez le bouton VOL dans le sens contraire des aiguilles d’une montre jusqu’à ce que vous entendiez un clic. Sélectionner un canal 1. Allumez votre PM-1000 WP. MONTER 2. Pour sélectionner un canal supé- rieur, appuyez sur la touche ▲. -
Page 14: Triple Veille
Triple Veille / Triple Watch Le mode triple veille surveille les canaux 16 et 9 pour un si- gnal pendant que vous écoutez le canal sélectionné en cours. La ra- dio marine vérifie s’il y a une acti- vité sur canal 16 et 9 toutes les 2 secondes. -
Page 15: Balayage (Scanning)
Balayage (scanning) 1. Pour commencer le balayage des canaux programmés, appuyez la tou- che SCAN. SCAN et TRIPLE appa- raissent sur l’afficheur. 2. Pour arrêter le balayage, appuyez encore une fois sur la touche SCAN. SCAN et TRIPLE disparaissent de l’afficheur. •... -
Page 16: Touches Éclairées Et Afficheur
puyée, la radio n’émettra pas et l’icône TX commencera à clignoter. (Voir ci-dessous la description de l’ Indicateur bat- terie ). Touches éclairées et afficheur Pour éclairer l’afficheur, appuyez sur n’importe quelle touche sauf la touche PTT. • Si vous appuyez sur n’importe quelle touche autre que la touche PTT lorsque l’afficheur et le clavier sont éclairés, il reste éclairé... -
Page 17: Verrouillage Du Clavier
Verrouillage du clavier Pour éviter des manipulations accidentelles, vous pouvez verrouiller le clavier. 1. Appuyez et maintenez le bouton LOCK pendant 2 secon- des. Une double tonalité de confirmation retentit. LOCK s’af- fiche. 2. Pour déverrouiller le clavier, appuyez et maintenez le bou- ton LOCK à... -
Page 18: Dépannage
Dépannage • Pas assez de portée Cause : la ligne d’horizon est bloquée. Þ augmenter la hauteur de l’antenne. • N’émet pas en 5 Watt mais en 1 Watt Cause : Faible niveau de batterie. Þ recharger ou remplacer les batteries. •... -
Page 19: Spécifications
Spécifications Généralités Contrôle de fréquence Tolérance de fréquence Emission +/- 1.5 PPM (à 25 °C) Réception +/- 1.5 PPM (à 25 °C) Température de fonctionnement de -15° C à 55 °C Antenne brin flexible Microphone Type électret intégré Afficheur Haut-parleur 8 ohms, 1 Watt Alimentation Accus Ni-MH 7.2 V 1350... - Page 21 Índice del contenido Mandos e Indicadores ............22 Display LCD ..............23 ¡Advertencia! ..............24 Introducción ..............25 Características ............25 Servicio Técnico ............25 Contenido del embalaje ............ 26 Puesta en funcionamiento ..........27 Instalación del soporte ..........27 Fijar la antena .............
-
Page 22: Mandos E Indicadores
Mandos e Indicadores 1. Antena 2. Clip de sujeción en cinturón 3. Toma de carga 4. Batería 5. Clip de desconexión de la batería 6. Tecla PTT (Push to Talk) 7. Tecla triple vigilancia - TRI 8. Tecla bloqueo - LOCK 9. -
Page 23: Display Lcd
Display LCD A. Indicador de emisión B. Indicador de potencia TX C. Display número de canal D. Indicador de memoria E. Indicador de scan F. Indicador de batería G. Indicador de triple WATCH (vigilia) H. Indicador bloqueo del teclado... -
Page 24: Advertencia
¡Advertencia! • El PM-1000 WP será impermeable siempre que la antena, las caperuzas (jack de carga, jack del micro/HP externo) y la batería estén correctamente instalados. • No utilice el emisor de radio sin antena. • No utilice el emisor en una atmósfera explosiva. -
Page 25: Introducción
Introducción El PM-1000 WP es un emisor-receptor VHF portátil estanco. Es compacto, ligero, robusto y ergonómico. Para aprovechar al máximo todas las prestaciones del PM- 1000 WP, lea detenidamente este manual de utilización an- tes de poner en funcionamiento el equipo. -
Page 26: Contenido Del Embalaje
Contenido del embalaje Si uno de estos elementos no está en el envase, contacte con su proveedor. -
Page 27: Puesta En Funcionamiento
Puesta en funcionamento Instalación del soporte Instale el soporte sobre una mesa o en una pared. Sobre una mesa: 1. Fije el soporte utilizando los tornillos de montaje y las arandelas tal como se indica. A una pared: 1. Cuelgue el soporte a la pared e introduz- ca los dos tornillos de montaje en los aguje- ros más grandes del soporte. -
Page 28: Utilice La Caja De Pilas Alcalinas
Utilice la caja de pilas alcalinas Si fuera necesario, puede utilizar la caja de pilas con pilas alcalinas AA (no incluidas) en lugar del bloque de baterías. Para instalar las pilas: 1. Extraiga la tapa de la caja de pilas al tirar de las dos mitades. -
Page 29: Cargar El Bloque De Acumuladores
Cargar el bloque de acumuladores Su radio marina se alimenta por un bloque de acumuladores NiMH especialmente diseñado. Antes de utilizar el PM-1000 WP, cargue el bloque de acumu- ladores NiMH durante 16 horas sin interrupción con el carga- dor de pared. -
Page 30: Operación
• Consulte “Mandos e indicadores” (página 22) para las po- siciones de los botones y de las teclas. • Cuando encienda el PM-1000 WP por primera vez, el ca- nal 16 y la frecuencia para emergencias, seguridad y lla- mada se ajustan automáticamente. -
Page 31: Seleccionar Un Canal
4. Para apagar en aparato, gire el botón VOL en el sentido contrario a las agujas del reloj hasta que oiga un clic. Seleccionar un canal 1. Encienda el PM-1000 WP. SUBIR 2. Para seleccionar un canal superior, pulse la tecla ▲. -
Page 32: Triple Vigilia / Triple Watch
Triple Vigilia / Triple Watch El modo triple vigilia controla los canales 16 y 9 mientras que Vd. escucha el canal seleccionado en curso. La radio marina controla la actividad del canal 16 y 9 cada 2 segundos. 1. Para seleccionar el modo Triple Vigilia, pulse la tecla TRI. -
Page 33: Barrido
Barrido 1. Para iniciar el barrido de los cana- les programados, presione sobre la tecla SCAN. SCAN y TRIPLE apare- cen en el display. 2. Para detener el barrido, presione una vez más sobre el botón SCAN. SCAN y TRIPLE desaparecen del display. •... -
Page 34: Teclas Iluminadas Y Display
• Si el indicador del nivel de batería cae hasta el nivel 1 en el display y si se presiona la tecla PTT, la radio no emitirá y TX parpadeará (véase la descripción del Indicador del ni- vel de batería ). Teclas iluminadas y display Para iluminar el display, presione cualquier tecla salvo la de PTT. -
Page 35: Bloqueo Del Teclado
Bloqueo del teclado Para evitar las manipulaciones accidentales es posible pre- cintar el teclado. 1. Pulse y mantenga la presión sobre la tecla LOCK durante 1.5 segundos. El equipo emitirá dos veces dos bip bip para confirmar que el teclado está bloqueado y LOCK aparece en el display. -
Page 36: Garantía
Garantía Este aparato tiene garantizados 3 años de recambios y mano de obra en el país de compra por cualquier defecto de fabri- cación reconocido por nuestro servicio técnico. Se recomien- da leer atentamente las condiciones a continuación expues- tas y respetarlas, ya que si no podría perder todos los bene- ficios de la garantía. -
Page 37: Especificaciones
Especificaciones Generalidades Control de frecuencia Tolerancia de frecuencia Emisión +/-1.5 PPM (a 25 ºC) Recepción +/- 1.5 PPM (a 25 ºC) Temperatura de funcionamiento De -15 ºC a 55 ºC Antena Cable flexible Micrófono Tipo electret integrado Display Cristal líquido Ω... - Page 39 Contents Controls and Indications ........... 40 LCD Display ..............41 Warning! ................42 Introduction ............... 43 Features ..............43 Technical Support and Service ........43 Included in Your Package ..........44 Getting Started ..............45 Mounting the Cradle ............ 45 Attaching the Antenna ..........
-
Page 40: Controls And Indications
Controls and Indications 1 Antenna 2 Belt Clip 3 Adapter Jack 4 Battery 5 Battery Release Clip 6 PTT (Push to Talk) Key 7 Triple Watch Button - TRI 8 Lock Button - LOCK 9 TX Power Button - 1/5W 10 Microphone 11 Speaker MIC (Optional) Jack 12 Volume/Power Knob - VOL... -
Page 41: Lcd Display
LCD Display A. Transmit Indicator B. TX Power Indicator C. Channel Number Display D. Memory Indicator E. Scan Indicator F. Battery Indicator G. Triple Watch Indicator H. Key Lock Indicator... -
Page 42: Warning
Warning! • The PM-1000 WP is waterproof only when the antenna, rubber caps (adapter jack, speaker mic jack) and the bat- tery are properly attached. • Do not operate the transmitter of any radio equipment un- less all the Radio Frequency (RF) connectors are secure and any open connectors are properly terminated. -
Page 43: Introduction
The PM-1000 WP is a waterproof, portable two-way VHF trans- ceiver. It is compact, lightweight, rugged and fits easily in your hand. To ensure that you get the most from the PM-1000 WP fea- tures, please read this operating guide carefully before using the unit. -
Page 44: Included In Your Package
Included in Your Package If any of these items are missing from the box, contact your Dealer. -
Page 45: Getting Started
Getting Started Mounting the Cradle to either a counter or wall. To counter: 1. Attach the Cradle using the mounting screws and washers as follows. To wall: 1. Apply the Cradle to the wall and insert the two mounting screws into the larger holes of the Cradle. -
Page 46: Using The Alkaline Battery Case
Using the Alkaline Battery Case When needed, you can use the battery case with Alkaline AA batteries (not included) instead of the re- chargeable battery pack. To install the batteries: 1. Remove the battery case cover by pulling the 2 halves apart applying your fingers to the projections. -
Page 47: Charging The Battery Pack
Before operating the PM-1000 WP, charge the Ni-MH battery pack for 16 hours without interruption with the Adapter. 1. Place the PM-1000 WP in the Cradle. Make sure your radio is OFF. 2. Plug one end of the AC adapter into the wall outlet and the other end into the Adapter jack on the back of the PM-1000 WP. -
Page 48: Operation
Operation • See “Controls and Indications” (page 40) for button, knob, and key positions. • When you turn On your PM-1000 WP just after purchasing, it is automatically tuned to channel 16, frequency for dis- tress, safety, and calling. • When you press any button (except PTT and LOCK key), a short tone sounds. -
Page 49: Selecting A Channel
Selecting a Channel 1. Turn On your PM-1000 WP. 2. To select a higher channel, press the ▲ button. 3. To select a lower channel, press the ▼ button. DOWN • To change the channel continuously, press and hold the ▲ or ▼ button for more than 1 second. -
Page 50: Programming A Channel Into Memory
1. To select Triple Watch mode, press the TRI button. TRIPLE ap- pears on the display. 2. To exit from Triple Watch, press TRI button. TRIPLE disappears. • While in Triple Watch mode, you can change the currently selected channel using the ▲ or ▼ button. Programming a Channel into Memory Before using the scanning feature, you have to program chan- nels into memory. -
Page 51: Scanning
Scanning 1. To begin scanning the programmed channels, press the SCAN button. SCAN and TRIPLE appear on the dis- play. 2. To stop scanning, press the SCAN button once more. SCAN and TRIPLE disappear from the display. • Scanning starts from the lowest to highest channel and stops when it finds an active channel. -
Page 52: Lighted Keys And Display
transmit and the TX icon starts blinking. (Refer to the de- scription of the Battery Indicator on this page.) Lighted Keys and Display To light the display, press any key excluding the PTT key. • If you press any button other than the PTT key while the display and keypad are illuminated, it remains illuminated for another 5 seconds. -
Page 53: Key Lock
Key Lock To prevent accidental entries, you can lock the keypad. 1. Press and hold the LOCK button for 2 seconds. A double confirmation tone sounds. LOCK appears on the display. 2. To unlock the keypad, press and hold the LOCK button again for 2 seconds. -
Page 54: Warranty
Warranty This transceiver has a 3 years warranty for materials and workmanship in its country of purchase against any manufac- turing defect recognized by our technical department. It is rec- ommended to read carefully following conditions and to re- spect them in order not to loose it. •... -
Page 55: Specifications
Specifications General Freq. Control Freq. Tol. Transmit ±1.5 PPM (at 25°C) Receive ±1.5 PPM (at 25°C) Oper. Temp. -15°C to 55°C Antenna Flexible Whip Microphone Built-in Electret type Display Liquid Crystal Display Ω, Speaker 1 Watt Power Source Rechargeable Ni-MH Battery Pack 7.2V 1350 mAh Size (without antenna) 5.8 (H) x 2.7 (W) x 1.68 (D) inch... -
Page 56: International Marine Vhf Channel Chart
International Marine VHF Channel Chart Transmitter Receiver Mode Ship Ship Frequency Frequency Ship Shore 1 ......156.050 ....160.650 ....D ....YES ....YES 2 ......156.100 ....160.700 ....D ....YES ....YES 3 ......156.150 ....160.750 ....D ....YES ....YES 4 ...... -
Page 57: Déclaration De Conformité
34540 Balaruc – FRANCE, Nosotros, GROUPE PRESIDENT ELECTRONICS, Route de Sète, BP 100 – 34540 Balaruc – FRANCIA, We, GROUPE PRESIDENT ELECTRONICS, Route de Sète, BP 100 – 34540 Balaruc – FRANCE, Déclarons, sous notre seule responsabilité que l’émetteur-récepteur de radiocommunication VHF Marine, Declaramos bajo nuestra propia responsabilidad que el emisor receptor de VHF para radiocomunicaciones marítimas,... - Page 60 Siège Social / Head Office France – Route de Sète BP 100 – 34540 BALARUC Site internet : http://www.president-electronics.com E-mail : groupe@president-electronics.com UTZZ01606ZZ...