Table of Contents
Advertisement
Advertisement
Table of Contents

Related Manuals for Samsung RJ040F2HX Series


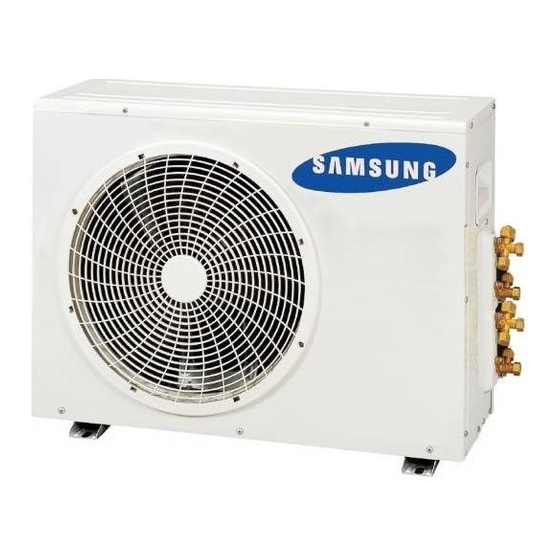
Summary of Contents for Samsung RJ040F2HX Series
-
Page 2: Table Of Contents
This manual explains how to install an indoor unit with a split system with two SAMSUNG units. The use of other types of units with different control systems may damage the units and invalidate the warranty. The manufacturer shall not be responsible for damages arising from the use of non compliant units. - Page 3 In order to prevent electric shocks, fires or injuries, always stop the unit, disable the protection switch and contact SAMSUNG’s technical support if the unit produces smoke, if the power cable is hot or damaged or if the unit is very noisy.
-
Page 4: Deciding On Where To Install The Air Conditioner
Deciding on Where to Install the Air Conditioner When deciding on the location of the air conditioner with the owner, the following restrictions must be taken into account. General Do NOT install the air conditioner in a location where it will come into contact with the following elements: Combustible gases Saline air Machine oil... - Page 5 3/8" 07/09/12 ** RJ040F2HX ** /AJ040FCJ2 ** Outdoor unit cannot be connected to the following indoor unit combination. - ** 052 ** /MH *** FM * A/NJ *** LHXEA/ ** 18 ** / ** 24 ** /AJN ** 200 mm...
- Page 6 Deciding on Where to Install the Air Conditioner RJ050F2HX ** /AJ050FCJ2 ** Piping outside diameter Indoor unit Outdoor unit Power supply Ø, V, Hz Outside diameter Unit Liquid ** 020/023/026/ RJ050F2HX ** 035/052 1,220-240,50/60 ** 020/023/026/ AJ050FCJ2 ** 3/8" 07/09/12/18 ** 030/035/07/09/12 ** 1/4"...
- Page 7 RJ052/060F3HX ** /AJ052/068FCJ3 ** Piping outside diameter Indoor unit Outdoor unit Power supply Ø, V, Hz Outside diameter Unit RJ052F3HX ** Liquid ** 020/023/026/ RJ060F3HX ** ** 020/023/026/ 030/035/052 1,220-240,50/60 3/8" AJ052FCJ3 ** 030/035/07/09/12 ** 1/4" 07/09/12/18 ** AJ068FCJ3 ** ** 052/18 ** 1/2"...
- Page 8 Deciding on Where to Install the Air Conditioner RJ070/080F4HX ** /AJ070/080FCJ4 ** Piping outside diameter Indoor unit Outdoor unit Power supply Ø, V, Hz Outside diameter Unit Liquid RJ070F4HX ** ** 020/023/026/ ** 020/023/026/ RJ080F4HX ** 030/035/052/ 1,220-240,50/60 3/8" AJ070FCJ4 ** 030/035/07/09/12 ** 07/09/12/18/24 ** 1/4"...
- Page 9 Space Requirements for Outdoor Uni When installing 1 outdoor unit (Unit : mm) When the air outlet is opposite the wall When the air outlet is towards the wall 2000 or more 300 or more 600 or more When 3 sides of the outdoor unit are blocked The upper part of the outdoor unit and the air by the wall outlet is towards the wall...
- Page 10 Deciding on Where to Install the Air Conditioner When installing more than 1 outdoor unit (Unit : mm) 300 or more 600 or more 600 or more 600 or more When 3 sides of the outdoor unit are blocked by the wall 600 or more 600 or more When front and rear side of the outdoor unit is towards the wall...
-
Page 11: Air Conditioner And Accessories
A A ir conditioner and accessories The following accessories are supplied with the air conditioner. Accessories in the Outdoor Unit Case RJ040F2HX ** /RJ050F2HX ** /RJ052F3HX ** /RJ060F3HX ** /AJ040FCJ2 ** /AJ050FCJ2 ** /AJ052FCJ3 ** /AJ068FCJ3 ** Flare Bolt Flare Nuts, 9.52mm... -
Page 12: Cutting/Extending The Piping
A C utting/extending the piping 1. Make sure that you have the required tools available (pipe cutter, reamer,flaring tool and pipe holder). 2. If you wish to shorten the piping, cut it using a pipe cutter, taking care toensure that the cut edge remains at a 90° angle with the side of the pipe,and referring to the illustrations below for examples of edges cut correctlyand incorrectly. - Page 13 Connecting the cables to the outdoor unit RJ040F2HX ** /RJ050F2HX ** /AJ040FCJ2 ** /AJ050FCJ2 ** A-unit Indoor unit B-unit 1(L) 2(N) 1(L) 2(N) F1 F2 F1 F2 Assembly cable Earth Earth terminal terminal F1 F2 F1 F2 Earth Earth terminal...
- Page 14 Connecting the cables to the outdoor unit RJ052F3HX ** /RJ060F3HX ** /AJ052FCJ3 ** /AJ068FCJ3 ** B-unit C-unit A-unit Indoor unit 1(L) 2(N) 1(L) 2(N) 1(L) 2(N) Assembly cable Earth Earth Earth terminal terminal terminal Earth Earth Earth terminal terminal terminal Outdoor unit F1 F2 F1 F2 Main Power...
- Page 15 RJ070F4HX ** /RJ080F4HX ** /AJ070FCJ4 ** /AJ080FCJ4 ** A-unit B-unit C-unit D-unit Indoor unit 1(L) 2(N) 1(L) 2(N) 1(L) 2(N) 1(L) 2(N) Assembly cable F1 F2 F1 F2 F1 F2 F1 F2 Earth Earth Earth Earth terminal terminal terminal terminal F1 F2 F1 F2 F1 F2...
-
Page 16: Transmitter Installation (Optional)
A T ransmitter installation(optional) RJ040F2HX ** /RJ050F2HX ** /RJ052F3HX ** /RJ060F3HX ** /RJ070F4HX **/ RJ080F4HX ** AJ040FCJ2 ** /AJ050FCJ2 ** /AJ052FCJ3 ** /AJ068FCJ3 ** /AJ070FCJ4 ** /AJ080FCJ4 ** Accessories (Transmitter: MIM-B13A) DC Power Cable DC Power Cable Communication Transmitter Transmitter SUB... - Page 17 DC 12V (Blue) DC 12V (Blue) DC 12V supply RJ052F3HX **/ RJ060F3HX ** RJ040F2HX ** /RJ050F2HX ** Transmitter MAIN PCB RJ070F4HX ** /RJ080F4HX ** AJ040FCJ2 ** /AJ050FCJ2 ** Outdoor unit PCB AJ052FCJ3 ** /AJ068FCJ3 ** AJ070FCJ4 ** /AJ080FCJ4 ** F1 F2 F1 F2...
-
Page 18: Checking Correct Earthing
The earthing wire for the telephone line cannot be used to earth the air conditioner. Model RJ040F2HX ** /RJ050F2HX ** DIf the outdoor unit is exposed to strong winds, install shield plates AJ040FCJ2 ** /AJ050FCJ2 ** around the outdoor unit, so that the fan can operate correctly. -
Page 19: Connecting Up And Purging The Circuit
1 Check the piping connections. 2 Connect the charging hose of low pressure side of manifold gauge to the packed valve having a service port (RJ040F2HX ** /AJ040FCJ2 ** : 3/8” service valve 2EA; RJ050F2HX ** /AJ050FCJ2 ** : 3/8” service valve 1EA+1/2”... -
Page 20: Adding Refrigerant
Refer to the Service Manual for more details on this operation. Model Total connecting pipe length (L) Adding refrigerant LT 15m Chargeless RJ040F2HX ** AJ040FCJ2 ** LT>15m (LT- 15m)x10g LT 20m Chargeless RJ050F2HX ** AJ050FCJ2 ** LT>20m... -
Page 21: Performing Leak Tests
Adding refrigerant Important information regulation regarding the refrigerant used This product contains fluorinated greenhouse gases covered by the Kyoto Protocol. Do not vent gases into the atmosphere. Refrigerant type GWP value CAUTION : Inform user if system contains 3 kg or more of fluorinated greenhouse gases. R410A 1975 In this case, it has to be checked for leakage at least once every 12 months,... -
Page 22: Pipe Installation With Indoor Units
Performing leak tests PUMP DOWN (before disconnecing t the refrigerant connections for unit repair, removal or disposal) RJ040F2HX ** RJ050F2HX ** Pump-down is an operation intended to collect all the system refrigerant in the outdoor unit. AJ040FCJ2 ** AJ050FCJ2 ** This operation must be carried out before disconnecting the refrigerant pipe in order to avoid refrigerant loss to the atmosphere. -
Page 23: Setting An Indoor Unit Address And Installation Option
A S etting an indoor unit address and installation option RJ040F2HX ** /RJ050F2HX ** AJ040FCJ2 ** /AJ050FCJ2 ** CAUTION This product is prohibited one indoor unit installation. Don't use pipe checking operation and Auto Addressing Mode when one indoor unit is installed. ... - Page 24 Earthing wire connection Step 2 IMPORTANT! Before selecting switch turn off the system power supply RJ040F2HX ** /RJ050F2HX ** AJ040FCJ2 ** /AJ050FCJ2 ** - Select rotary switch “SW01” of outdoor unit display PCB, according to number of indoor unit connected:...
- Page 25 TO SET ADDRESSING MANUALLY BY TYPE PICTURE MODEL ROTARY SWITCH “SW02” Same for: IT'S HERE! SERIE VISION MH020FV(N/A)** MH023FB** MH026FB(V/N/A)** MAIN MH035FB(V/N/A)** MH052FB(V/N/A)** MH026FS** SLIM 1 WAY MH035FS** MH030FM** MINI 4 WAY MH035FM** MH052FM** MH026FE** MH035FE** SLIM DUCT NJ026LHX** MSP-DUCT NJ035LHX** MH052FU** MH026FJ**...
- Page 26 Setting an indoor unit address and installation option ROTARY SWITCH “SW02” POSITION ACCORDING TO REFRIGERANT CIRCUIT CONNECTED ( 0=A; 1=B; 2=C; 3=D ) Indoor Unit Indoor Unit OUTDOOR UNIT OUTDOOR UNIT SW02 SW02 Att. "A" Att. "A" A unit Att. "B" Att.
- Page 27 Setting Option (AQV**/AJN**/AR**) Entering mode for Option setting option setting mode Mode change High Temp Button High Fan Button Low Temp Button Low Fan Button Setting Option 1. Remove batteries from the remote controller 2. Insert batteries and enter the option setting mode while pressing High Temp button and Low Temp button. 3.
- Page 28 Setting an indoor unit address and installation option The procedure of setting option Operation Indication * Step 1 1. Remove the batteries from the remote controller. 2. Insert batteries while pressing High Temp Button and Low Temp Button. * Step 2 1.
- Page 29 Setting an indoor unit address (MAIN/RMC) 1. Check whether power is supplied or not. - When the indoor unit is not plugged in, there should be additional power Indoor Unit supply in the indoor unit. 1(L) 2. The panel(display ) should be connected to an indoor unit to receive option. 2(N) 3.
- Page 30 Setting an indoor unit address and installation option 5. The MAIN address is for commnication between the indoor unit and the outdoor unit. Therefore, you must set it to operate the air conditioner properly. Setting an indoor unit installation option (suitable for the condition of each installation location) 1.
- Page 31 “Ampere Limit Switch” is on the PCB of outdoor unit. Contact the authorized service technician or dealer for setting and changing RJ040F2HX ** /RJ050F2HX ** the “Ampere Limit Switch”. AJ040FCJ2**/AJ050FCJ2** Before changing the “Ampere Limit Switch”, turn off the main power of the system.
- Page 32 Total capacity of the indoor units Fan RPM (H: high, L: low, Blank: off) Safety Control (just For Service Technician) The EEV 2 and EEV 3 of RJ040F2HX**/RJ050F2HX** /AJ040FCJ2**/AJ050FCJ2**are always displayed as blank. The EEV 3 of RJ052F3HX**/RJ060F3HX** /AJ050FCJ3**/AJ068FCJ3** model is always displayed as blank.
-
Page 33: Troubleshooting
A T roubleshooting The table below give indication about self diagnostic routine. Some of error code requires activities exclusively for Authorise Service Center. The error indicated on the PCB display of outdoor unit EXPLANATION (The error indicated on the PCB display of outdoor unit) DISPLAY REMARK Communiaction error(indoor unable to receive data) - Page 34 Troubleshooting The table below give indication about self diagnostic routine. Some of error code requires activities exclusively for Authorise Service Center. The error indicated on the PCB display of outdoor unit DISPLAY EXPLANATION (The error indicated on the PCB display of outdoor unit) REMARK EvaOut2 Sensor Short/Open EvaOut3 Sensor Short/Open...
-
Page 35: Explaining Operations To The Owner
Explaining operations to the owner Before leaving the premises on which you have installed the air conditioner, you should explain the following operations to the owner, making reference to the appropriate pages in the owner’s instruction booklet. 1. How to start and stop the air conditioner. 2. - Page 36 "EEE Yönetmeliğine Uygundur" "This EEE is compliant with RoHS"...
-
Page 37: Air Conditioner
Air Conditioner installation manual This manual is made with 100% recycled paper. imagine the possibilities Thank you for purchasing this Samsung product. To receive more complete service, please register your product at www.samsung.com/register ES FR IT PT DE EL DB98-33017A-5...