Table of Contents
Advertisement
Features
AC Inverter
Auto-restart function
Group control(if with a group controller)
Auto-changeover
The Outdoor unit can match with max. 8 indoor unit
Electronic expansion valve out to MP3(MP2),more silence
Healthy negative ion generation function(optional)
MANUAL CODE: SYJS-026-03 rev.0
Service Manual
Commercial Air Conditioning
Home MRV
Haier Group
2003.12
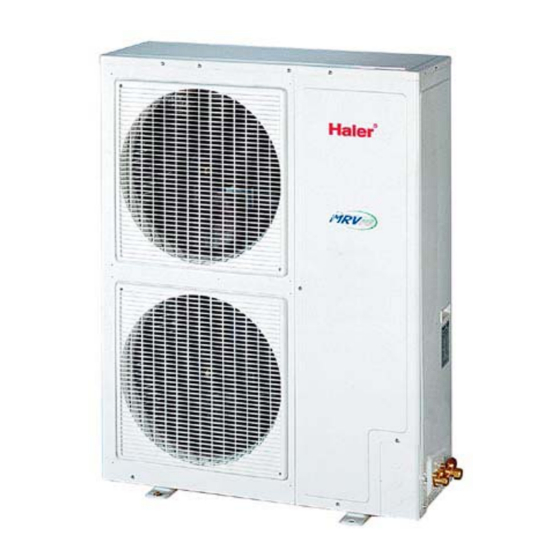
AU482FIBHA
AU48NFIBIA
Advertisement
Table of Contents
Troubleshooting

Related Manuals for Haier AU482FIBHA


Summary of Contents for Haier AU482FIBHA
-
Page 1: Service Manual
Service Manual Commercial Air Conditioning Home MRV AU482FIBHA AU48NFIBIA Features AC Inverter Auto-restart function Group control(if with a group controller) Auto-changeover The Outdoor unit can match with max. 8 indoor unit Electronic expansion valve out to MP3(MP2),more silence Healthy negative ion generation function(optional) Haier Group MANUAL CODE: SYJS-026-03 rev.0... - Page 2 CONTENTS CONTENTS Contents 1. Description of Products & Features 2. Specifications 3. Safety precaution 4. Net dimensions of indoor and outdoor unit 5. Installation instructions 6. Parts and functions 7. Remote controller functions 8. Refrigerant diagram 9. Electrical control functions 10.
-
Page 3: Description Of Products & Features
1 DESCRIPTION OF PRODUCTS & FEATURES 1. Nomenclature l Indoor unit: Model of indoor unit S 09 2 F M B H A 1 2 34 5 6 7 8 9 10 1 Product symbol (A stands for air conditioner) 2 Product mode (S stands for split type air conditioner) 3 , 4 Product specification (09 stands for cooling/heating capacity is 9000BTU/h) 5 Applicable voltage (2 stands for 220-240V/50Hz) - Page 4 Max. indoor connect refrigeran capacity(BTU/h) appearance model units can be capacity(HP) cooling heating Min. Max. connected AU482FIBHA R407C 48000 61000 61000 AU48NFIBIA R407C 48000...
- Page 5 indoor units capacity(BTU/h) capacity(W) type appearance model cooling heating cooling heating 9000 12000 2600 3500 AB092FCBHA Four way cassette 14000 16000 4100 4700 AB142FCBHA AB182FCBHA 18000 20000 5300 5900 14000 16000 4100 4700 AC142FCBHA Convertible AC182FCBHA 18000 21000 5300 6200 7000 9000 2100...
- Page 6 4. Character of Products 1) The length of horizontal refrigerant pipe can reach 70m,the total pipe length can reach 100m, the height difference between indoors unit and outdoor unit can reach 50m, the height difference between indoor units can reach 10m. 2) 1000m super far distance communication between indoor and outdoor units, convenient control and easy to enlarge the scale of units assembly.
-
Page 7: Specifications
Power cable 8mm2 1PH~,220V,50Hz Power source N,V,Hz Running /Max.Running A / A cooling: 34A/42 A heating: 30A/40A Start Current Unit model (color) AU482FIBHA( white) Model / Manufacture EEV48FAL1 MITSUBISHIELECTRIC Compressor Type scroll Type × Number axial flow*2 Speed r/min H:1060±30; M:920±40; L:620±50... - Page 8 AB092FCBHA AB142FCBHA Item model Cooling capacity Btu/h 9000 14000 Heating capacity Btu/h 12000 16000 Cooling capacity 2600 4100 Heating capacity 3500 4700 Dehumidifying capacity 10‐³×m³/h Power source N,V,Hz 1PH 220V-230V 50HZ 1PH 220V-230V 50HZ Power consumption Running current 0.07 0.07 Starting current Refrigerant R407C...
- Page 9 AC182FCBHA AP182FABHA Item model Cooling capacity 18000 18000 Btu/h Heating capacity 21000 21000 Btu/h Cooling capacity 5300 5300 Heating capacity 6200 6200 Dehumidifying capacity 10‐³×m³/h 2.1 Power source N,V,Hz 1PH 220V-230V 50HZ 1PH 220V-230V 50HZ Power consumption Running current Starting current Refrigerant R407C R407C...
- Page 10 Item Model AS072FCBHA AS092FCBHA Function Cooling Heating Cooling Heating —— Capacity 7000 9500 9000 10000 BTU/h Capacity 2000 2800 2600 3200 Dehumidifying capacity 10‐³×m³/h Power cable —— 3 × (1.0~1.5mm Communication cable —— 2x(0.75~1.25mm Power source 1, 220~230, 50 N, V, Hz Running current A / A 0.10...
- Page 11 Item Model AS182FCBHA Function Cooling Heating —— Capacity 18000 20000 BTU/h Capacity 5200 5800 Dehumidifying capacity 10‐³×m³/h Power cable —— 3 × (1.0~1.5mm Communication cable 2x(0.75~1.25mm —— Power source 1, 220~230, 50 N, V, Hz Running current A / A 0.10 0.10 Unit model (color)
-
Page 12: Safety Precautions
SAFETY PRECAUTIONS 3 SAFETY PRECAUTIONS Please read these "Safety Precautions" first then accurately execute the installation work. Though the precautionary points indicated herein are divided under two headings, WARNING those points which are related to the strong possibility of an installation done in error CAUTION resulting in death or serious injury are listed in the section. - Page 13 SAFETY PRECAUTIONS WARNING When setting up or moving the location of the air conditioner, do not mix air etc. or anything other than the designated refrigerant (please see nameplate) within the refrigeration cycle. Rupture and injury caused by abnormal high pressure can result from such mixing. Always use accessory parts and authorized parts for installation construction.
- Page 14 Net dimensions of indoor and outdoor A. model: AU48- Screw Hole (M10) Power wiring Terminal Back Air-flow Hole Installation Servicing Space(at Least) Unit:mm Back Air- flow Hole Installation Outlet Air-flow Hole Repairing Space Dimension Leave space Leave space Note : (1). Fix the parts with screws Leave space (2).Don't intake the strong wind directly to the outlet air-flow hole.
- Page 15 Model: cassette type Model: convertible type...
- Page 16 Model: CONSOLE TYPE Model: WALL MOUNTED TYPE model AS072FCBHA AS092FCBHA AS122FCBHA AS142FCBHA AS182FCBHA...
- Page 17 Model: ceiling concealed OVER 250 unit model AE072FCBKA Model: AP182FABHA AE092FCBKA AE122FCBKA AE142FCBKA AE182FCBKA 1020 AE242FCBKA 1350...
- Page 18 Model: AP182FABHA 1746...
- Page 19 5 INSTALLATION STRUCTION 5.1 Piping dimensions charts liquid pipe gas pipe model inch inch AU48 9.52 3/8" 19.05 3/4" AB09 6.35 1/4" 12.7 1/2" AB14 6.35 1/4" 12.7 1/2" AB18 6.35 1/4" 12.7 1/2" AC14 9.52 3/8" 15.88 5/8" AC18 9.52 3/8"...
- Page 20 FQG-B180 gas pipe heat preservation material liquid pipe heat preservation material Refrigerant pipes between manifold pipes Total refrigerating amount of indoor unit Gas side Liquid side group after the manifold pipe Less than 38220Btu/h 15.9 9.52 38220~61157Btu/h 19.05 9.52 61157~126137Btu/h 25.4 12.7 Note: 1.
- Page 21 In the file, the figure marked with "√" is permitted, and the figure marked with "×" is prohibited. You can confirm the position according to the actual condition. The refrigerant flow direction is always from the collective side to the divided side. horizontal horizontal floor surface...
- Page 22 MP3、MP2 Electronic Expansion Valve Box figure: Connect with indoor liquid pipe Cover Bottom 80mm Fetch out the power line and the connecting line. Pay attention to fix firmly with wiring clamp. Connect with outdoor liquid pipe MP3、MP2 installation dimension: 200mm MP3(MP2)installation procedure:...
- Page 23 Inner Outer diameter Note: Cutoff the pipe of standard diameter 6.35mm accessories according indoor 6.35mm distribute pipe diameter, then connect it with MP3 For example: Outer diameter 6.35mm Inner diameter 9.52mm 9.52 Wax sealed Connect with pipe diameter 9.52mm on liquid side B、MP3(MP2) device installation position a、MP3(MP2) device should be counted on the vertical wall, maintenance cover panel...
- Page 24 ADMISSIBLE COMBINATION EXAMPLES OF MULTIFLEX INVERTER REAL COOLING CAPACITY REAL HEATING CAPACITY TOTAL TOTAL Type of INDOOR UNITS CIRCUIT (×100W) (OF EACH UNIT IN COMBINATION) (OF EACH UNIT IN COMBINATION) COOLING HEATING CAPACITY CAPACITY 14.00 16.00 1.75 1.75 1.75 1.75 1.75 1.75 1.75...
- Page 25 ADMISSIBLE COMBINATION EXAMPLES OF MULTIFLEX INVERTER REAL COOLING CAPACITY REAL HEATING CAPACITY TOTAL TOTAL Type of INDOOR UNITS CIRCUIT (×100W) (OF EACH UNIT IN COMBINATION) (OF EACH UNIT IN COMBINATION) COOLING HEATING CAPACITY CAPACITY 14.00 16.00 1.46 1.46 1.46 1.46 1.46 4.07 2.63...
- Page 26 ADMISSIBLE COMBINATION EXAMPLES OF MULTIFLEX INVERTER REAL COOLING CAPACITY REAL HEATING CAPACITY TOTAL TOTAL Type of INDOOR UNITS CIRCUIT (×100W) (OF EACH UNIT IN COMBINATION) (OF EACH UNIT IN COMBINATION) COOLING HEATING CAPACITY CAPACITY 14.00 16.00 1.51 1.51 1.51 2.68 2.10 4.69 1.72...
- Page 27 ADMISSIBLE COMBINATION EXAMPLES OF MULTIFLEX INVERTER REAL COOLING CAPACITY REAL HEATING CAPACITY TOTAL TOTAL Type of INDOOR UNITS CIRCUIT (×100W) (OF EACH UNIT IN COMBINATION) (OF EACH UNIT IN COMBINATION) COOLING HEATING CAPACITY CAPACITY 14.00 16.00 1.75 1.75 1.75 4.86 3.89 2.00 2.00...
- Page 28 ADMISSIBLE COMBINATION EXAMPLES OF MULTIFLEX INVERTER REAL COOLING CAPACITY REAL HEATING CAPACITY TOTAL TOTAL Type of INDOOR UNITS CIRCUIT (×100W) (OF EACH UNIT IN COMBINATION) (OF EACH UNIT IN COMBINATION) COOLING HEATING CAPACITY CAPACITY 14.00 16.00 1.47 1.47 5.81 2.62 2.62 1.68 1.68...
- Page 29 ADMISSIBLE COMBINATION EXAMPLES OF MULTIFLEX INVERTER REAL COOLING CAPACITY REAL HEATING CAPACITY TOTAL TOTAL Type of INDOOR UNITS CIRCUIT (×100W) (OF EACH UNIT IN COMBINATION) (OF EACH UNIT IN COMBINATION) COOLING HEATING CAPACITY CAPACITY 14.00 16.00 1.85 1.85 5.15 5.15 2.12 2.12 5.88...
- Page 30 ADMISSIBLE COMBINATION EXAMPLES OF MULTIFLEX INVERTER REAL COOLING CAPACITY REAL HEATING CAPACITY TOTAL TOTAL Type of INDOOR UNITS CIRCUIT (×100W) (OF EACH UNIT IN COMBINATION) (OF EACH UNIT IN COMBINATION) COOLING HEATING CAPACITY CAPACITY 14.00 16.00 2.07 2.07 2.07 2.07 2.87 2.87 2.36...
- Page 31 ADMISSIBLE COMBINATION EXAMPLES OF MULTIFLEX INVERTER REAL COOLING CAPACITY REAL HEATING CAPACITY TOTAL TOTAL Type of INDOOR UNITS CIRCUIT (×100W) (OF EACH UNIT IN COMBINATION) (OF EACH UNIT IN COMBINATION) COOLING HEATING CAPACITY CAPACITY 14.00 16.00 2.10 2.10 2.10 5.03 2.68 2.40 2.40...
- Page 32 ADMISSIBLE COMBINATION EXAMPLES OF MULTIFLEX INVERTER REAL COOLING CAPACITY REAL HEATING CAPACITY TOTAL TOTAL Type of INDOOR UNITS CIRCUIT (×100W) (OF EACH UNIT IN COMBINATION) (OF EACH UNIT IN COMBINATION) COOLING HEATING CAPACITY CAPACITY 14.00 16.00 2.52 2.52 2.52 2.52 3.93 2.88 2.88...
- Page 33 ADMISSIBLE COMBINATION EXAMPLES OF MULTIFLEX INVERTER REAL COOLING CAPACITY REAL HEATING CAPACITY TOTAL TOTAL Type of INDOOR UNITS CIRCUIT (×100W) (OF EACH UNIT IN COMBINATION) (OF EACH UNIT IN COMBINATION) COOLING HEATING CAPACITY CAPACITY 14.00 16.00 4.17 4.17 4.17 1.50 4.76 4.76 4.76...
- Page 34 ADMISSIBLE COMBINATION EXAMPLES OF MULTIFLEX INVERTER REAL COOLING CAPACITY REAL HEATING CAPACITY TOTAL TOTAL Type of INDOOR UNITS CIRCUIT (×100W) (OF EACH UNIT IN COMBINATION) (OF EACH UNIT IN COMBINATION) COOLING HEATING CAPACITY CAPACITY 14.00 16.00 5.79 5.79 2.41 6.62 6.62 2.76 14.00...
- Page 35 ADMISSIBLE COMBINATION EXAMPLES OF MULTIFLEX INVERTER REAL COOLING CAPACITY REAL HEATING CAPACITY TOTAL TOTAL Type of INDOOR UNITS CIRCUIT (×100W) (OF EACH UNIT IN COMBINATION) (OF EACH UNIT IN COMBINATION) COOLING HEATING CAPACITY CAPACITY 14.00 16.00 6.58 3.71 3.71 7.52 4.24 4.24 14.00...
- Page 36 8.3 Piping length and drop between units Haier 1) When connected with 8 units,indoor units refer to <admissible combination examples> 2) Total length=l1+l2*2+l3*4+l4*4+l5*4<=100m 3) Max. piping length =(l1+l2+l3+l5)<=70m 4) Max. piping length between the indoor unit and the first branch pipe<=30m 5) Max.
- Page 37 Combination example: 8 by 1: AS06 Haier AS06 electronic expansion valve AS06 AS06 AS06 AS06 AE07 AE07 NOTE: 1.When AU48 unit is connected with 8 indoor units, pay attention that the total capacity of indoor units must not exceed 130% of outdoor cooling capacity.
-
Page 38: Combination Examples
8.4 Combination examples A. 6 by one AS09 (or other 9000BTU units) AS09 (or other 9000BTU units) Haier AS09 (or other 9000BTU units) AU48- AS09 (or other 9000BTU units) AS09 (or other 9000BTU units) Expansion valve AS09 (or other 9000BTU units) B. - Page 39 C. 4 by one AP18(or other 18000BTU,14000BTU units) Haier AB09(or other 9000BTU,12000BTU units) AU48- AS09(or other 9000BTU,12000BTU units) AC18(or other 18000BTU,14000BTU units) D. 3 by one Haier AP18(or other 18000BTU units) AU48- PMV 1 AS09 (or other 9000,12000BTU units) PMV 2...
-
Page 40: The Order Of Installation Work
8.6 The Order of Installation Work Item Work Main points Before installation Work division -to ascertain the person responsible for installation of pipes and wiring Make installation -to ascertain the pipe installation dimension and position of electronic diagram expansion valve, to make control wiring system diagram Work Installation of indoor and -to prevent the ventilation from short circuit and guarantee repair space... - Page 41 work is not met with the requirements, overturn of the unit will occur resulting in accidents. l The wiring work shall be done by a qualified person and referred to the “ technical standard of electric equipment” , “ indoor wiring regulation” and what the manual specified.
-
Page 42: Special Work And Main Points In Installation
8.8 Special Work and Main Points in Installation Warning l After finishing installation, confirm During installation, if refrigerant leakage occurs, take ventilation the refrigerant gas does not leak. l If the refrigerant gas leaks in the measurement immediately. l As soon as the leaked refrigerant room, once it meets heater, burner gas meets fire, poisonous gas will and gas stove etc. - Page 43 (4) Pipe connection of the outdoor unit Referring to the installation diagram in page 4, connect the indoor unit, outdoor unit, branch pipe and electronic expansion valve together by using the pipe connection method and welding method. (5) Test of airtight quality After connection of the refrigerant pipes, carry out airtight quality test.
- Page 44 8.9 Test of leakage after wiring work is finished After connection of the refrigerant pipes, carry out leakage test. In this test, pressurize to the pipes as shown in the below figure by using nitrogen tank. Close the valves of the gas side and liquid side totally. The nitrogen may enter the cycle system of the outdoor unit, so that, before pressurizing, the valve rods must be fastened.
-
Page 45: Charging Of Refrigerant
c. Vacuumize 2~3 hours according to the length of the pipe. When vacuuming, confirm the gas side and liquid side of the 2-way valve and 3-way valve shall be in full close state. d. When it is not lower than 200Pa after 2 hours or more vacuuming, vacuums for another 1 hour. - Page 46 8.11 Refrigerant MRV central air conditioner uses refrigerant “ R22” . This refrigerant itself is innocuous, non-combustible safety refrigerant. But then, when arranging the air conditioner equipment, it is necessary to take some steps to take precautions against in case of the indoors refrigerant leakage. Such as, the room size shall be taken into account to avoid making the concentration of the refrigerant not exceed the concentration limit and other relevant steps.
-
Page 47: Electric Wiring
8.12 Electric wiring Note: l The air conditioner must use special circuit (over 40A), and wiring by the qualified electrician according to the wiring rules specified in national standard. l The grounding wire and the neutral wire shall be strictly separated. Connect the neutral wire with grounding wire is incorrect. - Page 48 Wiring method 1. Wiring method of orbicular terminals For the connection wire with orbicular terminals, its wiring method is as shown in the right figure: remove the connecting screw, put the screw through the ring on the end of the wire, then connect to the terminal block and fasten screw. 2.
- Page 49 2. Do not connect the power line with different dimensions to the same grounding wire end. Improper contact will affect protection. 3. Keep a proper distance between the communication wire and the power line. Otherwise, abnormal communication will occur because of disturbance. 4.
- Page 50 Indoor unit: AE*3 Outdoor unit: AU48- 1PH, 220V, 50Hz outdoor unit C1 C2 C1 C2 indoor 3 C1 C2 indoor 1 indoor 2 L1 N1 C1 8.13 Unit address number setting In order to centrally control MRV air conditioner system, it needs to make unit number setting to indoor units and outdoor unit (control address).
- Page 51 a. Unit number setting of outdoor unit (now it is unuseful) nit number setting switch of outdoor unit and confirming of setting. 4-digit number setting dialing switch and corresponding nixie tube confirming display are equipped on the outdoor unit. Setting mode as follows: Before electrifying, manually set the outdoor unit number according the following table.
- Page 52 appear. l When using special remote controller to do unit number setting, it shall be done at a place 1m away from the infrared receiver window. The specific setting method as follows: press the number button according to the unit number to be set, then press set button to send signal.
-
Page 53: Checks After The Installation
8.14 Checks after the installation After installation, please fill in the following form for easy daily maintenance: Factory No. of unit Site setting No. System belonged Model of indoor unit (A/B) Check for installation and test run Please operate the air conditioner according to the operation manual. √... -
Page 54: Parts And Functions
PARTS AND FUNCTIONS PARTS AND FUNCTIONS 6 PARTS AND FUNCTIONS 6 PARTS AND FUNCTIONS Outdoor unit Air inlet Air outlet Compressor (Inside of unit) Cassette type Indoor unit Swing louver (Air flow direction can be adjusted by using the SWING button on the remote controller) Electrical Components Case Air Inlet Grille Air Filter (Inside of the Inlet Grille) -
Page 55: Convertible Type
PARTS AND FUNCTIONS Convertible type POWER OPER TIMER COMP EMER Fig.2 Fig.1 Indoor Unit 1 Operating Control Panel (Fig.2) 2 Emergency switch 3 Remote Control Signal Receiver 4 Power Indicator Lamp (Red) 5 OPERATION Indicator Lamp (Green) 6 TIMER Indicator Lamp (Yellow) 7 Compressor Run Lamp (Green) 8 Intake Grill (Fig.3) 9 Air Filter... - Page 56 PARTS AND FUNCTIONS wall mounted type Indoor unit signal receiver window air inlet grille air filter(inside) air outlet grille louver Indoor Unit AP182FABHA 1. Outlet 2. Operation Board 3. Inlet 4. Inside 5. Dust Filter Inside Operation Board 1. Health 2.
-
Page 57: Console Type
Console type: /-=A@;8@ 0-7=<@?=; >6<8; 1-:<;8@ 2-9:;@8? + DEFDBC , 3-=A@;8@... -
Page 58: Remote Controller Functions
7.Remote controller functions 4.Operation MODE Remote controller Used to select operation mode. Every time you press MODE button, operation mode changes according to following sequence: AUTO HEAT COOL 5.HEALTH Button Used to set health mode, if the unit has the negative ion function and oxygen bar function. -
Page 59: Battery Loading
18.FAN Button The distance between the remote controller and the receiver should be max 7m and there should be no obstacle between them. Used to select fan speed:LOW,MID,HIGH,AUTO. Do not throw the remote controller; prevent it from being 19.TIMER OFF Display damaged. -
Page 60: Fan Operation
Fan Operation 1.Unit start Press ON/OFF button to start your air conditioner. Previous operation status appears on LCD (except for TIMER, SLEEP, and SWING setting). 2.Select operating mode Press MODE button. At each press, operation mode changes as follows: COOL HEAT AUTO Then select FAN... -
Page 61: Temperature Setting
AUTO, COOL , HEAT and DRY Operation 1. Unit start Press ON/OFF button,unit starts. Previous operation status appears on LCD (except for TIMER, SLEEP and SWING setting) 2.Select operation mode Press MODE button. At each press, operation mode changes as follows: TEMP AUTO COOL... -
Page 62: Adjusting Air Flow Direction
Adjusting air flow direction AUTO SWING AUTO SWING Press SWING button. Up and down airflow varies upwards When the automatic swing louver moves to the proper and downwards. Left and right airflow angle, press SWING button can fix the airflow direction. varies left and right sides. -
Page 63: Sleep Function
Sleep Function Before going to bed you can press down the SLEEP button and the air conditioner will run so as to make you sleep more comfortably. Before using this function, the clock must be set. Use of SLEEP function After the unit's start, set running mode and then press SLEEP button once to make the air conditioner have the previous-set sleep time (first power-on is "1h"). - Page 64 Timer ON/OFF Function Set clock correctly before starting TIMER operation 1.Unit start After unit start, select your desired operation mode (operation mode will be displayed on LCD) 2.TIMER mode selection Press TIMER button on the remote controller to change TIMER mode.
-
Page 65: Timer On-Off Function
Timer ON-OFF Function Set clock correctly before starting TIMER operation 1.Unit start After unit start, select your desired operation mode (operation mode will be displayed on LCD) 2.TIMER mode selection Press TIMER button on the remote controller to change TIMER mode. - Page 66 Filter Up/Down (Only for 600*600 panel of single unit) After the air conditioner has operated for a certain period, dust has accumulated on the filter, and the filter up/down function can be used to clean it. 1.Whether unit starts or stops, continuously press FILTER button for 3 seconds, and enter the filter up/down waiting status (when unit stops, the yellow TIMER indicator flashes, and filter and clock indication are displayed on the remote...
- Page 67 " High mode " Operation Outline of operation in "High Mode" This function is suitable when the set temperature must be reached in the shortest delay. The button "HIGH/SO", referred to this function, is effective in Cooling/Heating mode (not in Auto/Dry/Fan modes). TEMP Press the HIGH/SO button noce The indication...
- Page 68 " Soft mode " Operation Outline of operation in "Soft Mode" Operation in "Soft Mode", more silent, is suitable when noises should be reduced, e.g.. for reading or sleeping. The button "HIGH/SO", referred to this operation, is effective in Cooling/Heating mode (not in Auto/Dry/Fan modes). TEMP SWING MODE...
-
Page 69: Fan Speed
7.1.4 Wired remote controller (new type) MODE CLOCK Used to select AUTO Used to set correct time. RUN, COOL, DRY, HEAT and FAN operation. TIMER Dial switch and Sensor Used to select FAN SPEED TIMER ON, TIMER OFF, TIMER ON/OFF. Used to select fan speed: LO, MED, HI, AUTO... -
Page 70: Timer Off
HEAT FAN OPERATION COOL SLEEP AUTO SWING MODE AUTO TEMP CLOCK TIMER SLEEP ROOM FILTER RESET RESET ON/OFF FAN SPEED OPERATING LAMP TIMER ON Remote control TIMER OFF TEMP. CLOCK Clock set When unit is started for the first time, clock should be adjusted as follows: Press CLOCK button, "AM"or "PM"... - Page 71 Installation of receive display Because of the temperature sensitive device, do not install the receive display at straight sunlight place, either in front of air outlet grill, for it is effected greatly from cool air and heat air, the receive display is at least 20mm distance to the air outlet grill. Since there is light sensitive device which receives wireless remote signal, so do not installed behind the window curtain or other obstacles, in order not to obstruct the signal.
- Page 72 Installation of the wired remote controlller PCB is mounted on lower part of wire a. Remove upper part of wire controller, be careful not to damage Remove upper part of wire controller Upper part of wire controller Lower part of wire controller b.
-
Page 73: Refrigerant Circuit
REFRIGERANT CIRCUIT... -
Page 74: Electrical Control Functions
9 ELECTRICAL CONTROL FUNCTIONS 9.1 Function of special remote controller (Address setting) 1. Read function symbol Press “read” button , “1” flashes 1 time 2. Signal emitting symbol when “2” flashes ,it shows that remote controller is giving signal to indoor unit. 3. - Page 75 Function table for address setting controller After dehumification sign, emission sign, 8 sign, OFF sign, up arrow, down arrow display for 3 minutes, the controller will only display up arrow and down arrow power on partial signs power on display dehumification sign, emission sign, 8 sign, OFF sign, up arrow, down arrow new code selection: press "select"...
- Page 76 Press "No. 6" button, 6 will flash, then press "SET" button at indoor unit. When a sound "du" of set No. 6 indoor unit is heard, unit 6 is set, then press "READ" to confirm if the unit number is right. unit Press button 6 and at the same time in 2 seconds press button 1, then loosen them set No.
- Page 77 9.1.1 Number setting dialing switch using method(wired remoted control type) The dialing switch is on indoor unit PCB. The indoor unit number setting method is as follows: stand for NO.1 indoor unit stand for NO.2 indoor unit Digit 1 Digit 2 Digit 3 Digit 4 Unit number stand for...
- Page 78 9.2 Flow Chart for Operation (1) Unit number setting Start Power on Initialize electronic expansion valve Initialize louver position Read EEPROM contents, initialize program, if resume after power down indicators Having flash, waiting for the group number order of being added with group number indicators flash, waiting for the...
- Page 79 (2) Turn on/off unit Control function treat module Power indicator turn off, operation indicator turn On/off Trouble indication Trouble signal Mode determinatio Buzzer sound twice, Abnormal refuse receive operation n signal Choose mode Fan motor turn off, electronic expansion Cooling Heating Dehumidifying valve close, louver...
- Page 80 (3) Cooling operation Cooling operation Swing flap in the Swing cooling standard position Swing action Adjust fan speed according to temperature set and in Automatic air temperature fan speed Operate speed set Electronic expansion valve: overheat control Swing flap: Test run cooling standard position Fan motor: high speed Electronic...
- Page 81 (4) Dehumidifying operation Dehumidifying operation Swing flap in the cooling Swing standard position Swing action Adjust fan speed according to temperature set and in If enter cooling air temperature operation Determine dehumidify according temperature Electronic expansion valves Electronic expansion valves open, indoor unit fan motor open, indoor unit fan motor weak wind...
- Page 82 (5) Heating operation Heating operation Swing flap in set fan speed Swing position Swing action side: wind off, Defrosting expansion valve steady Off side: Electronic expansion valve totally open Rated operation According temperature Fan motor operate in rated sensor to adjust state and fan speed valve open degree If stop unit...
- Page 83 9.3 Defrost operation Flow Chart 1. The compressor operates heating over 25 minutes, after meeting the defrosting condition, it is permitted to enter defrosting. Defrosting process is unit-stop defrosting mode. Determining condition of defrosting is as follows: Unit-stop defrosting: (1) When outdoor ambient temperature is less than 2 , (outdoor ambient temperature- defrosting sensor) is more than 9 , and keeping over 2 minutes, enter unit-stop defrosting.
- Page 84 2. Compressor control The compressor will start at 10Hz and running between 30Hz to 120Hz. In operation the compressor running frequency is determined by three elements : the number of indoor units in operation , the temperature difference of each indoor units between setting temperature and room temperature , the size of each indoor unit.
-
Page 85: Diagnostic Information (Trouble Shooting)
10 DIAGNOSTIC INFORMATION (TROUBLE SHOOTING) 10.1 Fault Codes In order to make repair and maintenance convenient, we set “Automatic troubleshooting” function in indoor unit and centralized controller. If any abnormal phenomenon occurs in operation, you can determine the trouble part and condition from the display on the LED of outdoor PCB, or the trouble code on the wired controller. -
Page 86: Troubleshooting
Trouble shooting When the malfunction occures, the LED on the outdoor unit PCB will display the failure code directly as follows: Failure code Failure section defrosting temp. sensor TE circuit outdoor ambient temp. sensor TA circuit compressor suction temp. sensor TS circuit compressor discharging temp. - Page 87 10.3 Troubleshooting (1) Indoor unit trouble indication: timer indicator flashes (once, twice, 3 times, 7 times) Abnormal reasons: Heat sensitive resister is short circuit or open circuit The treatment to sensor output part in PC board is improper, such as poor contact of package part, the electrolytic capacitor for filtering is failed, etc.
- Page 88 Treatment: use the DC voltage grade of multimeter to test the plastic sealed motor to find if there is any feedback signal, determine if the plastic sealed motor is abnormal. If normal, change the indoor unit PC board. (6) Indoor unit trouble indication: Timer indicator flashes (12 times) Abnormal reason: Indoor unit PC board is improper Treatment: change the improper indoor unit PC board.
-
Page 89: Example Of Repair
Refrigerant leaks Discharging air temperature heat sensitive resistor is improper Electronic expansion valve or 2-way valve is closed Treatment: check if there is leakage part, test system pressure in rated operation state to determine if there is leakage? Check the state of electronic expansion valve and 2-way valve. Test and measure the numerical value of discharging air temperature heat sensitive resister. -
Page 90: Electrical Data
ELECTRICAL DATA AU482FIBHA filter board CT R W B power module SW06 SW07 compressor SW05 SW04 filter capacitor CN12 SW01 SW02 CN14 weak-electric board SW03 compressor overheat protection CN13 CN16 strong-electric board RL10 CN10 +12V CN15 CN11 CN14 CN09 capacitor... -
Page 91: Indoor Pcb
Model: AB092FCBHA AB142FCBHA AB182FCBHA ELECTRO-EXPANSION VALVE INDOOR PCB TEST CN18 ROOM TEMP.SENSOR CN16 CN17 GAS PIPING TEMP.SENSOR serial LIQUID PIPING TEMP.SENSOR FLOAT SWITCH CN15 CN14 CN13 CN12 CN11 CN10 SIGNAL RECEIVER BOARD CAPACITOR PUMP LOUVER MOTOR FAN MOTOR TO OUTDOOR UNIT Model: AC182FCBHA GAS PIPING TEMP.SENSOR LIQUID PIPING TEMP.SENSOR... -
Page 92: Control Board
Model: AS072~182FCBHA Wall mounted type wiring diagram TRANSFORMER Display Bar FAN MOTOR TO ELECTROMAGNETIC VALVE BOX EMERGENCY SWITCH LIQUID PIPE TEMP. Control SENSOR Board Room temp. sensor GAS PIPE TEMP. SENSOR stepping motor EARTHING R: RED Note: B: BLACK W: WHITE 1.SW01 is the dip switch to set unit BL: BLUE number. - Page 93 MP3 wiring diagram: Electronic expansion valve wiring diagram FUSE T3.15A/250VAC CN1 live wire 1 CN2 neutral wire 1 CN3 COM1 control board electronic live wire 2 CN4 expansion CN7 live wire 3 neutral wire 2 valve 3 CN8 neutral wire 3 COM2 CN6 CN9 COM3 CN15 valve 3...
-
Page 94: Indoor Unit Wiring Diagram
Ceiling concealed type: Indoor unit wiring diagram electronic refresh air fan NOTE:the dashed "---"in indoor controll expansion valve motor board is PCB inner wiring. About control board outer connector: blue blue in the diagram,gas pipe temp. sensor 、liquid pipe temp. sensor、indoor fan motor 1 2 3 、transformer are necessary parts;wired controller、receive display、electronic... - Page 95 Model: expansion valve MRV circuit diagram of control board for electrical expansion valve...
- Page 96 Model: AB092FCBHA AB142FCBHA AB182FCBHA...
- Page 97 Model: AC182FCBHA...
- Page 98 Ceiling concealed type Circuit diagram +12V IC10 7805 D3 1N4007 FUSE1 7812 T3.15A CN18 LX201 +12V live wire 1N4007 1N4007 +12V neutral wire C19 30pF ZEN1 100uF 561K 2200uF 220uF 220uF 1N4007 S9013 +12V L3 102 30pF 4.00MHz +12V electric heater 电...
- Page 99 MP3 circuit diagram:...
- Page 100 25V-2200UF D3 1N4007 TJC3-2DA(JST) S14K350 250V-3.15A B10B-PH-A(RED) CN10 B3B-XH-A +12V 7805 KET6.3 +12V 220V-L 220V-L 7805 50V-1A CN11 D143 0171825-3 250V-104 1N4148 CN12 16V-100UF 220V-N +12V D143 220V-N R14 10K R42 390 R43 100-1W OJE-SS-112DM 250V-103 500V-1.2UF D143 UP_A D143 TSA3100J UP_B B3P5-VH...
- Page 101 Model: AP182FABHA...
- Page 102 1. Function specification of SW01, SW02, SW04, SW05, SW06, SW07 Table 1 SW01 SW02 Display of 7 segments LED (LD1,LD2,LD3) FFF shows capability overloading (if capability overloading function is chose) Outdoor diagnosis code when without diagnosis code, display: - - Outdoor running mode cooling: C heating: H...
- Page 103 Outdoor fan mode :_1(low speed),_2(med speed),_3(high speed) Temperature sensor ON display ON: 1,OFF:-- Four-way valve switched on: ON: 1 Four-way valve not switched on: OFF: _ _ Running mode selection cooling: C, heating: H Dispatch line check cooling : CC --this function is preset Dispatch line check heating :...
- Page 104 temperature, and send it to SW05 outdoor, the other control is similar with normal. Swing trial run Indoor trial swing [set] mode,the control is the same SW01“02”, SW02“05”, press SW04 for more than as swing trial run with remote 2 seconds, after set of trial run success, LD will controller.
- Page 105 Outdoor PMV2 Outdoor PMV2 compelled fully [set] fully open, open or close in 2 minutes SW01“3”, SW02“10”, press SW04 for more than closed function 2 seconds [confirmation] in 2 minutes, 7-segment LED of base board I/F will display “FF” all the time [cancel] the control software will recover PMV to normal open degree after 2 minutes (...
- Page 106 Some information for the colorful screen wall mounted type unit: 1.The unit address setting method has been changed to use dial switch, which is as the same as that of the duct unit and ceiling concealed type unit. The address-setting controller is invalid. When out of factory, the address is set as No.
-
Page 107: Exploded Views & Part Lists
12 EXPLODED VIEWS & PART LISTS 12.1 Model: AU482FIBHA / AU48NFIBIA... -
Page 108: Parts List
English Qty. Model rate part stock Remark 0.00% 0.000% × 1 001A0100122 Front guard assy AU482FIBHA 0.00% 0.000% × 2 001A1301707 Plate for maintain AU482FIBHA 0.00% 0.000% × 3 001A1301640 Front panel(left) AU482FIBHA 0.02% 0.024% *... - Page 109 AU482FIBHA / AU48NFIBIA...
- Page 110 Spare parts Spare parts description in the spare-part number English Qty. Model Failure rate stock Remark 0010150073 Electrical box AU482FIBHA 0.00% 0.000% × 0010450127 Strong electric board AU482FIBHA 0.02% 0.024% 0010450184 power supply Terminal board AU482FIBHA 0.00% 0.000%...
-
Page 112: As072Fcbha
Parts list Spare parts description in the proportion of the No. Spare parts number English Qty. Model Failure rate spare-part stock Remark 1 0010202192 Front grill 1 AS072FCBHA 0.00% 0.000% × 2 0010802130 Front panel 1 AS072FCBHA 0.00% 0.000% × 3 0010202204 Air filter (left) 1 AS072FCBHA... -
Page 113: As092Fcbha
Parts list Spare parts description in the proportion of the No. Spare parts number English Qty. Model Failure rate spare-part stock Remark 1 0010202192 Front grill 1 AS092FCBHA 0.00% 0.000% × 2 0010802130 Front panel 1 AS092FCBHA 0.00% 0.000% × 3 0010202204 Air filter (left) 1 AS092FCBHA... -
Page 114: As122Fcbha
Parts list Spare parts description in the proportion of the No. Spare parts number English Qty. Model Failure rate spare-part stock Remark 1 0010202192 Front grill 1 AS122FCBHA 0.00% 0.000% × 2 0010802130 Front panel 1 AS122FCBHA 0.00% 0.000% × 3 0010202204 Air filter (left) 1 AS122FCBHA... -
Page 115: As142Fcbha
Parts list Spare parts description in the proportion of the No. Spare parts number English Qty. Model Failure rate spare-part stock Remark 1 0010202930 Front grill 1 AS142FCBHA 0.00% 0.000% × 2 0010202929 Front panel 1 AS142FCBHA 0.00% 0.000% × 3 0010202934 Air filter (left) 1 AS142FCBHA... -
Page 116: As182Fcbha
Parts list Spare parts description in the proportion of the No. Spare parts number English Qty. Model Failure rate spare-part stock Remark 1 0010202930 Front grill 1 AS182FCBHA 0.00% 0.000% × 2 0010202929 Front panel 1 AS182FCBHA 0.00% 0.000% × 3 0010202934 Air filter (left) 1 AS182FCBHA...