Table of Contents
Advertisement
Quick Links
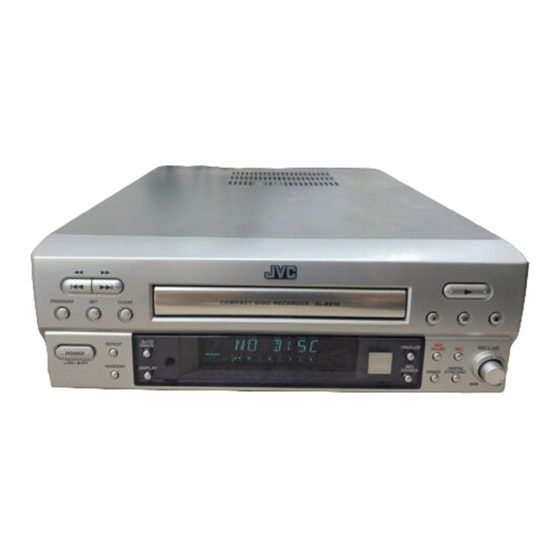
COMPACT DISC RECORDER
ENREGISTREUR DE DISQUES LASER
XL-R910SL
OP E N / C LOS E
0
1
2
3
4
5
6
7
8
9
0
R E C
R E C
P A U S E
R E C
S OU R C E
R AN DOM
R E P E AT
DIS P LAY
P LAY
P AUS E
S TOP
R M -S X LR 9 1 0 A
R E M OTE C ON TR OL
P R OGR AM
S ET
CLEAR
AUTO
R EP EAT
TR ACK
P OW ER
_ ON / Ñ OFF
R AN DOM
DIS P LAY
INSTRUCTIONS
MANUAL DÕINSTRUCTIONS
C OM P AC T DIS C R EC OR DER
X L -R 9 1 0
For Customer Use:
Enter below the Model No. and Serial
No. which are located either on the rear,
bottom or side of the cabinet. Retain this
information for future reference.
Model No.
Serial No.
R EC LEVEL
R EC
FIN ALIZE
P AUS E
R EC
R EC
DIGITAL
S OUR CE
ER AS E
S YN CH R O
M IN
M AX
LVT0728-002A
[C]
Advertisement
Table of Contents

Related Manuals for JVC XL-R910SL


Summary of Contents for JVC XL-R910SL
- Page 1 COMPACT DISC RECORDER ENREGISTREUR DE DISQUES LASER XL-R910SL OP E N / C LOS E R E C R E C P A U S E R E C S OU R C E R AN DOM R E P E AT...
- Page 2 Warnings, Cautions and Others CAUTION: REFER SERVICING TO QUALIFIED SERVICE PERSONNEL. WARNING: TO REDUCE THE RISK OF FIRE OR ELECTRIC SHOCK, DO NOT EXPOSE THIS APPLIANCE TO RAIN OR MOISTURE. CAUTION To reduce the risk of electrical shocks, fire, etc.: 1.
- Page 3 For Canada/pour le Canada CAUTION: TO PREVENT ELECTRIC SHOCK, MATCH WIDE BLADE OF PLUG TO WIDE SLOT, FULLY INSERT ATTENTION: POUR EVITER LES CHOCS ELECTRIQUES, INTRODUIRE LA LAME LA PLUS LARGE DE LA FICHE DANS LA BORNE CORRESPONDANTE DE LA PRISE ET POUSSER JUSQUAU FOND For U.S.A.
-
Page 4: Table Of Contents
Table of Contents Before Operating the Unit ... 2 Before Installation ... 2 About Discs and Their Logos ... 2 Location of the Buttons and Controls ... 3 Getting Started ... 5 Checking the Supplied Accessories ... 5 Putting Batteries in the Remote Control ... 5 Connecting the Unit ... -
Page 5: Before Operating The Unit
Before Operating the Unit Thank you for purchasing this JVC product. Please read these instructions thoroughly and carefully before starting operation to ensure that you will derive the optimum performance and a long service life from your unit. Before Installation General Precautions •... -
Page 6: Location Of The Buttons And Controls
Location of the Buttons and Controls Be familiar with the buttons and controls on your unit. Front Panel PROGRAM CLEAR REPEAT POWER _ ON/ — OFF RANDOM w e r t Remote Control Display Window COMPACT DISC RECORDER XL-R910 AUTO TRACK DISPLAY OPEN/CLOSE... - Page 7 See pages in the parentheses for details. Front Panel 1 PROGRAM button (9) 2 4 / 1 (Reverse Skip/Reverse Search) buttons (8 – 10) ¢ / ¡ (Forward Skip/Forward Search) buttons (8 – 10) 3 CLEAR button (9, 10, 14) 4 SET button (13, 14) 5 AUTO TRACK button (11) 6 Disc tray...
-
Page 8: Getting Started
Getting Started Checking the Supplied Accessories Check to be sure you have all of the following supplied accessories. The number in the parentheses indicates the quantity of the pieces supplied. • Remote Control (1) • Batteries (2) • Audio cord (2) •... - Page 9 Turn the power off to all components before connections. OPTICAL Disconnect the protective plug(s) before inserting the optical cord(s). OPTICAL COAXIAL OPTICAL OUT-TAPE-IN CAUTION: Before plugging the unit into an AC outlet, make sure that all connections have been completed. To a wall outlet XL-R910SL CD Player Amplifier...
-
Page 10: Playing Back A Disc
Playing Back a Disc This manual mainly explains operations using the buttons and controls on the front panel. You can also use the buttons on the remote control if they have the similar names (or marks) as those on the front panel. If operations using the remote control are different from those using the front panel, they are then explained. -
Page 11: Basic Playback Operations
Basic Playback Operations While playing a CD, you can do the following operations. To stop play for a moment Press 8. While pausing, the 8 (Pause) indicator lights up on the display. To resume playback, press 3. To go to another track Press 4 / 1 or ¢... -
Page 12: Selecting Playback Modes
Selecting Playback Modes PROGRAM POWER _ ON/ — OFF POWER = _ ON Programming the Playing Order of the Tracks — Program Play You can arrange the order in which tracks play before you start playing. You can program up to 30 tracks. Load a disc. -
Page 13: Playing At Random - Random Play
To modify the program While confirming, you can change the track numbers in the program. Example: To change the track number (from “18” to “6”) programed in program step 4 Press PROGRAM repeatedly until the contents of program step 4 appears on the display. PROGRAM Press ¢... -
Page 14: Recording On A Cd-R/Cd-Rw
Recording on a CD-R/CD-RW Before You Start Recording • This unit has been designed to record on the following discs — both blank and unfinalized CD Recordable (CD-R) and CD Rewritable (CD-RW). • It should be noted that it may be unlawful to re-record pre-recorded tapes, records, or discs without the consent of the owner of copyright in the sound or video recording, broadcast or cable programme and in any literary, dramatic, musical, or artistic embodied therein. -
Page 15: Load A Recordable Disc And Prepare The Playback Source
This manual mainly explains operations using the buttons and controls on the front panel. You can also use the buttons on the remote control if they have the similar names (or marks) as those on the front panel. PROGRAM POWER _ ON/ —... -
Page 16: Other Recording Functions
Other Recording Functions PROGRAM POWER _ ON/ — OFF POWER _ ON/ — OFF POWER = _ ON Synchronized Digital Recording You can use the synchronized recording method when recording through the Digital Optical Input terminal. With this recording method, recording automatically starts when digital signal comes into this unit, and stops automatically when signal stops coming in. -
Page 17: Finalizing A Disc - Cd-R/Cd-Rw
Finalizing a Disc — CD-R/CD-RW Finalization is the final process in recording on a CD-R or CD-RW. “Finalizing a disc” means to finish writing the TOC (Table of Contents) on the recorded disc. Only after this process is completed, a recorded CD-R or CD-RW can be played back on a CD player compatible with CD-R/CD-RW. -
Page 18: Additional Information
Additional Information Glossary Finalization This is the final process in recording on a CD-R or CD-RW. “Finalizing a disc” means to finish writing the TOC (Table of Contents) on the recorded disc. Only after this process is completed, a recorded CD-R or CD-RW can be played back on a CD player compatible with CD-R/CD-RW. -
Page 19: Maintenance
Maintenance Handling Discs How to handle discs When removing a disc from its case, press down the center holder of the case and lift the disc out, holding it by the edges. • Always hold the disc by the edges. Do not touch its recording surface. -
Page 20: Troubleshooting
Troubleshooting If you are having a problem with your unit, check this list for a possible solution before calling for service. If you cannot solve the problem from the hints given here, or the unit has been physically damaged, call a qualified person, such as your dealer, for service. -
Page 21: Specifications
Specifications CDR section System: Sampling frequency: Signal-to-noise ratio: Dynamic range: Frequency response: Wow and flutter: Total harmonic distortion: 0.01% Input: ANALOG IN: OPTICAL IN: Output: ANALOG OUT: OPTICAL OUT: COAXIAL OUT: General Power requirement: Power consumption: Dimensions (approx.): Mass (approx.): Supplied accessories See page 5. - Page 22 VICTOR COMPANY OF JAPAN, LIMITED 0301KSMMDWSAM EN, FR...