Table of Contents
Advertisement
Quick Links
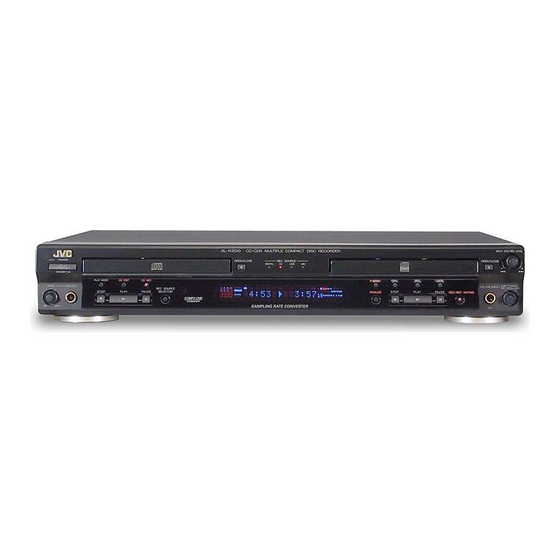
CD/CDR MULTIPLE COMPACT DISC RECORDER
XL-R2010BK
STANDBY/ON
CD REC
CD EDIT
FINALIZE
DISPLAY
1
2
3
4
5
6
7
8
9
+10
10
PLAY
C O N T R O L
MODE
REPEAT
CD
CDR
•
REC
FADE
SYNCHRO
REC MUTING
+
PITCH
SET
PITCH–
RM–SXLR2010A
REMOTE CONTROL
STANDBY
STANDBY/ON
PLAY MODE
CD EDIT
CD REC
LEVEL
PHONES
REC SOURCE
STOP
PLAY
PAUSE
SELECTOR
MIN
MAX
INSTRUCTIONS
OPEN/CLOSE
REC SOURCE
DIGITAL
CD
LINE
MIC
SYNCHRO
FINALIZE
For Customer Use:
Enter below the Model No. and Serial No.
which are located on the rear, bottom or
side of the cabinet. Retain this information
for future reference.
Model No.
Serial No.
MULTI JOG/REC LEVEL
OPEN/CLOSE
–
+
MENU
SET
CANCEL
LINE
CD
MIX BLANCE
MIC
LINE
REC/
STOP
PLAY
PAUSE
REC MUTING
MIC
LET0190-002A
[ J ]
Advertisement
Table of Contents

Related Manuals for JVC XL-R2010BK


Summary of Contents for JVC XL-R2010BK
- Page 1 CD/CDR MULTIPLE COMPACT DISC RECORDER XL-R2010BK STANDBY/ON CD REC CD EDIT FINALIZE DISPLAY PLAY C O N T R O L MODE REPEAT • FADE SYNCHRO REC MUTING STANDBY STANDBY/ON LEVEL PHONES PITCH PITCH– RM–SXLR2010A REMOTE CONTROL OPEN/CLOSE REC SOURCE...
-
Page 2: Warnings, Cautions And Others
- Plug the unit into a wall socket that is on a circuit different from that which the receiver is plugged in to. - Contact your nearest JVC dealership or a professional radio/TV technican for assistance. Wall or other objects... -
Page 3: Table Of Contents
Programming Playback Using the Remote Control ...17 Recording onto CD-R/RW Discs ... 19 Add Finalize Feature ...19 Manual Recording...20 Synchronized Recording of CD player Playback...22 1 Disc Dubbing ...24 Listening Edit Recording ...25 Program Edit Recording...26 CD player to CDR Recording Options...27 Setting the Unit for High-speed Recording...28... -
Page 4: Precautions
9) Unplug the power cord from the wall socket during electrical storms. 10) If water should find its way inside the unit, unplug the power cord from the wall socket and consult the nearest JVC dealership. 11) Do not install the unit in a poorly ventilated location. Installation 1) Do not place the unit on or next to an amplifier. -
Page 5: Connections
• For more details regarding COMPU LINK, see page 38. Note • The COMPU LINK-4 feature is only supported by other JVC products also equipped with the COMPU LINK feature. Please check the manual(s) of your JVC product for compatibility. -
Page 6: Digital Connections
• Do not bend the optical cable at a sharp angle. • The filament in the cable shines red when activated. This beam sends the digital signal. It is not harmful to the eyes. CD player, etc. To OPTICAL OUTPUT terminal... -
Page 7: Components
Press to turn the power on or to put the unit in standby mode. When the unit is in standby, the STANDBY lamp is lit. (see page 9) CD Tray Load a CD in the CD player playback. (see page 10) CD Control OPEN/CLOSE 0 Button Press to open and close the CD tray. -
Page 8: Display Window
CD indicator Lights when the CD player is selected for play. PLAY MODE indicators Light according to which play mode has been selected. -
Page 9: Using The Remote Control
FINALIZE Button Press to start finalization of a CD-R or CD-RW. (see page 34) CD and CDR Deck Selection Buttons Press to select the type of operation you want to use, CD player or CDR. (see page 12) SYNCHRO Button Press to select synchronized recording. -
Page 10: Inserting The Batteries
Inserting the Batteries Press down on the point shown by the arrow at the top of the compartment cover, and lift the cover to open the compartment. Place the two accompanying R6P(SUM-3)/ AA(15F) batteries in the remote control making sure to match the battery polarities with the markings (“+”/“–”) inside the compartment. -
Page 11: Turning The Power On And Standby Mode
(CD player or CDR) does not change. • When the 3 (play) button on the remote control is pressed, the power is turned on, the last selected function (CD player or CDR) is recalled. If a disc is loaded in the tray, playback begins. -
Page 12: Listening To Cds
Stopping CD playback To stop playback at any time • Stop playback of a disc in the CD player by pressing the CD Control STOP 7 button. The total number of tracks and playing time is shown in the information display. -
Page 13: Cdr Playback Operations
CDR Playback Operations The CDR can play general audio CDs, CD-R and CD-RW media. XL-R2010 CD/CDR MULTIPLE COMPACT DISC RECORDER STANDBY OPEN/CLOSE REC SOURCE DIGITAL LINE STANDBY/ON PLAY MODE CD EDIT CD REC LEVEL PHONES REC SOURCE STOP PLAY PAUSE SELECTOR Press the CDR Control OPEN/CLOSE 0 button to open the CDR disc tray. -
Page 14: Using The Remote Control To Control Playback
Using the Remote Control to Control Playback The buttons on the remote control can be used to control CD player playback and CDR recording and playback. When using the remote control, be sure to point it directly at the front lefthand side of the main unit (facing you) when pressing the buttons. -
Page 15: Forward And Reverse Search
Direct Track Selection (selecting another track during playback) Press the number button(s) corresponding to the track to be played (Step 2). The display will change to indicate the corresponding track number, playback of the current track will stop and playback of the newly selected track will begin. -
Page 16: Repeat Playback
• When activated, tracks are chosen randomly for playback from the CD loaded in the CD player. The tracks chosen will be lit in the music calendar and the SKIP lamp turns off. • Selection is made only once, from 1 to 99 tracks, and playback ends after the last track is played. -
Page 17: Cd Playback Pitch Control
The Disc Lock function can be used to make it impossible for chil- dren or anyone else to take CDs out of or load new ones into the CD player and CDR. • When the power is on press the CD Control OPEN/CLOSE 0 button while holding down the CD Control STOP 7 button on the front panel. -
Page 18: Programming Playback Using Main Unit Controls
SELECTOR Load a CD into the tray of the CD player. • Only tracks on the CD loaded in the CD player can be registered into the program (i.e., tracks on a CD loaded in the CDR cannot be selected for playback). -
Page 19: Programming Playback Using The Remote Control
REMOTE CONTROL Load a CD into the tray of the CD player. • Only tracks on the CD loaded in the CD player can be registered into the program (i.e., tracks on a CD loaded in the CDR cannot be selected for playback). - Page 20 Repeat Step 5 to program up to a maximum of 32 steps. • If you try to program over 32 steps, “MEMORY FULL” will be shown in the information display, and the programming func- tion ends automatically. • Pressing the 7 (stop) button ends the programming function. •...
-
Page 21: Recording Onto Cd-R/Rw Discs
(See page 23) Press the CD REC button while the unit is playing or paused to instantly dub the current track on a CD in the CD player to a CD-R or CD-RW disc. Listening Edit recording (see page 25) Select tracks to be recorded from the CD in the CD player while listening to them. -
Page 22: Manual Recording
(refer to SCMS see page 41). Therefore, if a CD-R or CD-RW disc loaded in the CD player is a first-generation digital copy, this recording selection must be used. If you attempt to record the disc using the digital setting, “SCMS PROTECT”... - Page 23 The OVER indicator should not be made to light as this may cause distortion in the recording. • When CD ANALOG recording is selected, the recording level is set automatically to the CD in the CD player. Press the CDR Control PLAY 3 button to start recording.
-
Page 24: Synchronized Recording Of Cd Player Playback
STANDBY STANDBY/ON PLAY MODE CD EDIT LEVEL PHONES STOP Note • It is only possible to record from a CD loaded in the CD player using this feature. XL-R2010 CD/CDR MULTIPLE COMPACT DISC RECORDER OPEN/CLOSE REC SOURCE DIGITAL LINE SYNCHRO... - Page 25 Notes • There is no need to adjust the recording. • If the source CD being recorded from the CD player is itself a first-generation digital copy, digital recording cannot be per- formed. When this occurs, the recording type will switch from digital to analog automatically.
-
Page 26: Disc Dubbing
Notes • There is no need to adjust the recording level. • If the source CD being recorded from the CD player is itself a first-generation digital copy, digital recording cannot be per- formed. When this occurs, the recording type will switch from digital to analog automatically. -
Page 27: Listening Edit Recording
“LISTEN EDIT” is shown in the information display for 3 seconds, the L EDIT edit recording indicator is shown in the display window. • The CD tray of the CD player cannot be opened once the listen- ing edit mode is activated. -
Page 28: Program Edit Recording
CD player are opened. Program Edit Recording This type of recording allows you to make a program of your favor- ite tracks on the CD loaded in the CD player in any order you like. XL-R2010 CD/CDR MULTIPLE COMPACT DISC RECORDER... -
Page 29: Cd Player To Cdr Recording Options
• When a blank disc is in the CDR tray, "UPDATE OPC" is shown following "ADD FINALIZE?". The recording process starts. • Only the tracks selected from the CDs in the CD player are recorded. • Playback starts from the first track seleted. The playing time of the track and the remaining playing time of the CD-R or CD- RW disc are shown in the information display. -
Page 30: Setting The Unit For High-Speed Recording
Notes High-speed recording is only possible for digital recording from the CD player to the CDR. It can be used for 1-track dubbing, 1- disc dubbing, listening edit and program edit modes. • There is no audio output from any of the output terminals (LINE OUT, DIGITAL OUT OPTICAL, DIGITAL OUT, COAXIAL, PHONES) during high-speed recording. -
Page 31: Synchronized Recording From External Sources
Record digital signals from CD player. Record analog signals from CD player. Record via the LINE IN terminal. Record via the MIC jack. Record via CD player and LINE mix. Record via CD player and MIC mix. Record via LINE and MIC mix. -
Page 32: Mixed Input Recording
• This function is very convenient for recording single songs from external digital CD or MD players. • This function is only for use with externally connected digital audio equipment. It cannot be used with the CD player. CAUTION When performing synchronized start recording from an external component, it is possible that part of the signal at the beginning of the first track will not be recorded. - Page 33 • Select “CD + LINE” to mix and record a CD loaded in the CD player with the signals from an external source via the LINE IN terminal. • Select “CD + MIC” to mix and record a CD loaded in the CD player with the signals from a microphone plugged into the MIC jack.
-
Page 34: Special Recording Edit Operations
CD players that support the track skip function. • You cannot use the track skip function when recording to unfi- nalized CD-R discs or CD-RW discs from the CD player. MULTI JOG/REC LEVEL OPEN/CLOSE –... -
Page 35: Erasing All Tracks (Disc Erase Function)
Press the SET button (main unit/remote control). • “ERASE (start track) – (last track)?” is flashed in the informa- tion display. (Initially, the start track and last track are both the last track number recorded on the CD-RW.) • Press the CANCEL button (main unit/remote control) if you do not wish to perform this procedure. -
Page 36: Finalizing A Disc
• During the finalization process, it will not be possible to remove or load discs in the CD player, nor is playback of CD loaded in the CD player possible. Making Recording of a... -
Page 37: Bypassing The Fs Converter (Sampling Frequency Converter) For More Efficient Digital Recording
Digital Theater Systems, Inc. HDCD is a registered trademark of Pacific Microsonic, Inc. Note • When recording from the CD player, the sampling rate con- verter is always turned off. XL-R2010 CD/CDR MULTIPLE COMPACT DISC RECORDER STANDBY... -
Page 38: Setting Up Synchronized Start Recording For External Digital Sources (Cd, Md, And Dat Only)
Setting Up Synchronized Start Recording for External Digital Sources (CD, MD, and DAT only) When performing digital synchronized start recording of an exter- nally connected digital source, synchronized start recording begins when a digital signal is encountered in the record pause mode. However, if the recording source is connected to the DIGITAL IN (DIGITAL IN OPTICAL) terminal, it is also possible to set this unit to start and stop recording when you are recording a single track. -
Page 39: Sleep Timer
SLEEP TIMER Automatically switches the power to standby after the specified time interval. This function operates when playing back a disc on the CD player or CDR deck. XL-R2010 CD/CDR MULTIPLE COMPACT DISC RECORDER STANDBY OPEN/CLOSE REC SOURCE DIGITAL LINE... -
Page 40: Compu Link Function
Accessory connecting cables Amplifier CD player The COMPU LINK functions provided with JVC products come in the form of COMPU LINK-4, COMPU LINK-3 or COMPU LINK-1. They are compatible, and the difference between them is that COMPU LINK-3 has the functions of COMPU LINK-1 with some additional functions as well. -
Page 41: Cd And Cdr Messages
CD and CDR Messages Note: Items with ( ) marks are confirmation displays CD Messages Message CD NO DISC There is no disc in the tray. CD DISC NG Disc related trouble has occurred and the disc in the tray cannot be played. ALL SKIP TR All the tracks on the disc have TRACK SKIP markers. - Page 42 Message NO R/RW DISC DISC FULL TNO FULL CANNOT REC UNLOCK SCMS PROTECT NOT AUDIO IN NOT REC MUTE SHORT REMAIN CANNOT FIN NO RW DISC CANNOT ERASE CANNOT UNFIN DAO DISC SKIP FULL Significance The disc inserted is a CD for computer data. Recording and erase functions are not pos- sible.
-
Page 43: Scms (Serial Copy Management System)
Due to copyright and other considerations, the following restriction is now in place for CD-R and CD-RW discs onto which the digital signals of CDs have been copied. SCMS (Serial Copy Management System) The digital quality of CDs and other digital media can be recorded to CD-R and CD-RW using the CDR function of this unit. -
Page 44: Troubleshooting
Troubleshooting Symptom No sound. Play fails to start Specific parts are not played properly. Recording is not possible No remote control operations. If the unit fails to operate properly even when the remedial action suggested above has been taken: This unit uses a microcomputer to perform a large number of operations. If it fails to operate no matter which button is pressed, disconnect the power cord, and then wait a few moments before re-connecting it. -
Page 45: Main Specifications
Main Specifications The unit’s specifications and exterior are subject to change without notice due to improvements. CD Player Section System Compact disc digital audio system Pitch control ±12% Signal-to-noise ratio 97dB Dynamic range (1 kHz) 93dB Frequency response 20 - 20kHz... - Page 46 MEMO...
- Page 47 VICTOR COMPANY OF JAPAN, LIMITED 0501SKMBWNJEM...