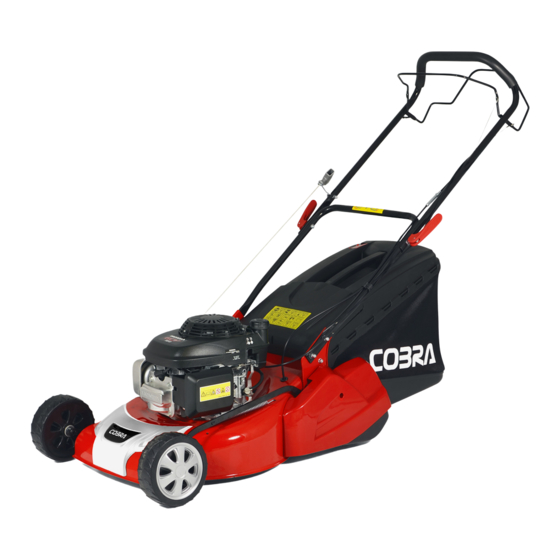
Summary of Contents for Cobra RM46SPH
- Page 1 MODELS: RM46SPH COBRA LAWN MOWER OWNER’S MANUAL Cobra Garden Machinery Henton and Chattell Ltd., London Road, Nottingham NG2 3HW UK www.cobragarden.co.uk - 1 -...
-
Page 2: Table Of Contents
CONTENTS SYMBOLS MARKED ON THE PRODUCT…………………………… 3 SECTION 1 GENERAL SAFETY RULES…………………………………………… 3 SECTION 2 PARTS DESCRIPTION………………………………..…………….…. 6 SECTION 3 TECHNICAL DATA…………………………………………………...…. 7 SECTION 4 ASSEMBLY…………………………………………………………….… 7 SECTION 5 OPERATION INSTRUCTIONS……………………………………..…. 10 SECTION 6 MAINTENANCE INSTRUCTIONS ……………………………..……. 13 SECTION 7 LUBRICATION INSTRUCTIONS …………………………………..…... -
Page 3: Symbols Marked On The Product
WARNING: For your own safety please read this manual before attempting to operate your new mower. Failure to follow instructions can result in serious personal injury. Spend a few moments to familiarise yourself with your mower before each use. 1. SYMBOLS MARKED ON THE PRODUCT Fig. - Page 4 Training 1. Before using the lawnmower read the instructions carefully. Familiarise yourself with the controls and pay particular attention in learning how to stop the machine in an emergency. 2. Never allow children or people unfamiliar with these instructions to use the lawn mower. Local regulations can restrict the age of the operator.
- Page 5 16. Do not start the engine when standing in front of the discharge chute. 17. Never put hands or feet near or under rotating parts. Keep clear of the discharge opening at all times. 18. Always ensure the engine is fully switched off before picking up/carrying the Lawnmower. 19.
-
Page 6: Parts Description
3. PARTS DESCRIPTION Fig. A for RM46SPH 1. Upper handle 2. Self-drive control handle 3. Starter handle 4. Rope Guide 5. Locking lever 6. Grass catcher 7. Height adjusting lever 8. Oil cap 9. Deck 10. Spark Plug 11. Fuel cap 12. -
Page 7: Technical Data
4. TECHNICAL DATA Model RM46SPH Engine type Honda GCV140 Self-Propelled Engine Displacement 160cm³ Blade Width 460mm Rated Speed 2800/min Fuel Tank Capacity 0.91L Grass catcher capacity Net Weight 34.6kg Height adjustment: 17~75mm, 6 adjustment RM46SPH Guaranteed Sound pressure level 82.0dB (A) at operator’s position... - Page 8 Fig.1D Fig.1E Fig.1F ASSEMBLE THE GRASS CATCHER Drop the cloth bag through the metal bracket, open up the reinforced rim on the three sides by hand or using a screwdriver. Wrap and then clench the reinforced material around the metal support brackets on the three sides to secure the bag in position.
- Page 9 1. To fit: raise the rear cover and hitch the grass catcher on the rear of mower. (Fig. 2F, Fig.2G, Fig. 2H) 2. To remove: grasp and lift the rear cover, remove grass catcher. Fig. 2F Fig. 2G Fig.2H 5.3 STARTER HANDLE Engage the Brake control handle then move the starter handle from the engine to the rope guide.
-
Page 10: Operation Instructions
6. OPERATING INSTRUCTIONS 6.1 BEFORE STARTING Service the engine with Petrol and oil as instructed in the separate engine manual packed with your mower. Read instructions carefully. WARNING! Petrol is highly flammable. Store fuel in containers specifically designed for this purpose. Refuel outdoors only, before starting the engine. - Page 11 Start the engine carefully according to the instructions, with your feet well away from the blade. Do not tilt the lawn mower when starting the engine. Start the mower on a level surface, free of high grass and obstacles. Keep hands and feet away from the rotating parts. Do not start the engine when standing in front of the discharge opening.
- Page 12 the first time. Overlapping the cut a little on each pass will also help to clean up any stray clippings left on the lawn. The mower should always be operated at full throttle to get the best cut and allow it to do the most effective job of mowing.
-
Page 13: Maintenance Instructions
6.9 HEIGHT ADJUSTMENT INSTRUCTIONS CAUTION: Do not at any time make any adjustment to lawnmower without first stopping the engine and disconnecting the spark plug wire. CAUTION: before changing the mowing height, stop the mower and disconnect spark plug cable. Your mower is equipped with a central height adjustment lever offering 6 height positions. - Page 14 Cutting efficiently will be reduced and the blade should be replaced. Replace with an approved factory replacement blade only. Possible damage resulting from blade unbalance condition is not the responsibility of the manufacturer. When you change the blade, you must use the original type marked on the blade (Cobra Part number - 14 -...
-
Page 15: Storage Instructions (Off Season)
263001465. Please contact your local dealer to order a replacement) 9.4 ENGINE Refer to the separate engine manual for engine maintenance instructions. Maintain engine oil as instructed in the separate engine manual packed with your unit. Read and follow instructions carefully. Service the air filter cleaner as per the separate engine manual under normal conditions. - Page 16 11. TROUBLES SHOOTING PROBLEM PROBABLE CAUSE CORRECTIVE ACTION Engine does not Throttle choke not in the correct position Move throttle choke to the correct position start. for the prevailing conditions. Fuel tank is empty. Fill the tank with fuel: refer to the ENGINE MANUAL. Air filter element is dirty.
-
Page 17: Warranty
Any damage that occurs from the use of non-genuine Cobra parts will not be covered. We reserve the right to reject any claim where the purchase cannot be verified or when it is clear that the product was not maintained properly. -
Page 18: Ec-Declaration Of Conformity
14. EC-DECLARATION OF CONFORMITY EC Declaration of Conformity We herewith declare, Cobra Garden Machinery Henton & Chattell Ltd, London Road, Nottingham NG2 3HW United Kingdom That the following machine complies with the appropriate basic safety and health requirements of the EC Directive based on its design and type, as brought into circulation by us.


