Table of Contents
Advertisement
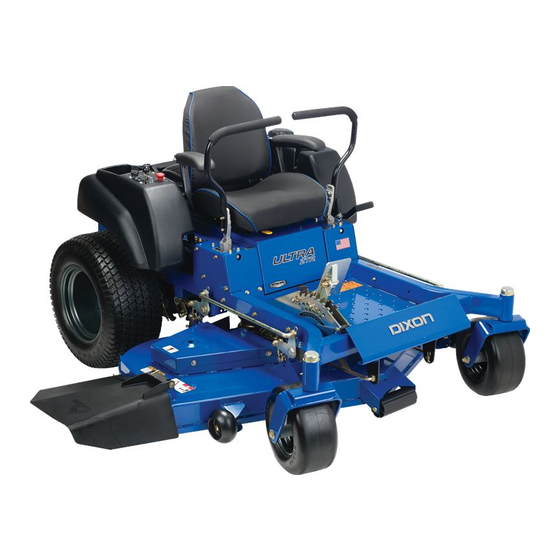
Ram Ultra 52, 25 KOH / 966985301
Ram Ultra 61, 25 KOH / 966985401
Ram Ultra 72, 27 KOH / 968999724
Ram Ultra 52, 25 KOH BF / 966985302
Ram Ultra 61, 25 KOH BF / 966985402
Ram Ultra 72, 27 KOH BF / 968999773
Please read the operator's manual carefully and make sure you
understand the instructions before using the machine.
Operator Manual
Advertisement
Table of Contents

Related Manuals for Dixon Mower


Summary of Contents for Dixon Mower
- Page 1 Operator Manual Ram Ultra 52, 25 KOH / 966985301 Ram Ultra 61, 25 KOH / 966985401 Ram Ultra 72, 27 KOH / 968999724 Ram Ultra 52, 25 KOH BF / 966985302 Ram Ultra 61, 25 KOH BF / 966985402 Ram Ultra 72, 27 KOH BF / 968999773 Please read the operator’s manual carefully and make sure you understand the instructions before using the machine.
- Page 2 In order to implement improvements, specifications and designs can be altered without prior notification. Note that no legal demands can be placed based on the information contained in these instructions. Use only original parts for repairs. The use of other parts voids the warranty. Do not modify or install non-standard equipment to the unit without consent from the manufacturer.
-
Page 3: Table Of Contents
Safe Handling of Gasoline ........13 Cutting Blades ............42 General Maintenance ..........14 Blade Replacement..........43 Transport ..............16 Adjusting the Mower Deck ........44 CONTROlS ..............17 leveling............... 44 Control locations ............17 Cutting Height ............. 44 Steering Control levers ..........18 Anti-Scalp Rollers .......... - Page 4 The owner must understand these instructions, and must allow only trained persons who understand these instructions to operate the mower. Each person operating the mower must be of sound mind and body and must not be under the influence of any mind altering substance.
-
Page 5: Introduction
INTRODUCTION Congratulations Towing Thank you for purchasing a Dixon ride-on mower. This If machine is equipped with a tow hitch, use extreme machine is built for superior efficiency to rapidly mow caution when towing. Never allow children or others in primarily large areas. -
Page 6: Good Service
INTRODUCTION Good Service Dixon’s products are sold only in specialized retail stores with complete service. This ensures that you as a customer receive only the best support and service. Before the product is delivered, the machine has, for example, been inspected and adjusted by your retailer. See the certificate in the Service Journal in this operator’s manual. -
Page 7: Symbols And Decals
SyMBOlS AND DECAlS These symbols are found on the machine and in the operator’s manual. Study them carefully so that you know what they mean. WARNING! Xxxx xxxxxx xxxxx xxxx xxxxxxxxx xxxxxx xxxxxxxxx. xx xxxxxxxx xxxx xxxxxx. Used in this publication to notify the reader of a risk of personal injury or death, particularly if the reader should neglect to follow instructions given in the manual. - Page 8 SyMBOlS AND DECAlS Read Shut off engine and Keep a safe Use on slopes No passengers Operator’s remove key before distance from no greater Manual performing any the machine than 10° maintenance or repair work Whole body Severing of fingers Do not open or Careful backing up, Careful going...
-
Page 9: Safety
SAFETy Safety Instructions These instructions are for your safety. Read them carefully. WARNING! This symbol means that important safety instructions need to be emphasized. It concerns your safety. IMPORTANT: THIS CUTTING MACHINE IS CAPABlE OF AMPUTATING HANDS AND FEET AND THROWING OBJECTS. - Page 10 Keep machine free of grass, leaves or other debris buildup which can touch the hot exhaust or engine WARNING! parts and burn. Do not allow the mower deck to plow leaves or other debris, causing buildup to Engine exhaust and certain vehicle occur.
-
Page 11: Personal Safety Equipment
SAFETy Personal Safety Equipment WARNING! When using the machine, approved personal protective equipment (shown in illustrations) shall be used. Personal protective equipment cannot eliminate the risk of injury but it will reduce the degree of injury if an accident does happen. Ask your retailer for help in choosing the right equipment. - Page 12 SAFETy Children Tragic accidents can occur if the operator is not alert to the presence of children. Children are often attracted to the machine and the mowing activity. Never assume that children will remain where you last saw them. • Keep children out of the mowing area and in the watchful care of a responsible adult other than the operator.
-
Page 13: Safe Handling Of Gasoline
SAFETy WARNING! The engine must not be started when the driver’s floor plate or any protective plate for the mower deck’s drive belt is removed. Safe Handling of Gasoline To avoid personal injury or property damage, use extreme care in handling gasoline. Gasoline is extremely flammable and the vapors are explosive. -
Page 14: General Maintenance
Never drive the machine in an enclosed space manufacturer’s recommended parts, when necessary. • Mower blades are sharp. Wrap the blade or wear gloves, and use extra caution when servicing WARNING! them. Use protective glasses for •... - Page 15 SAFETy • Sparking can occur when working with the battery and the heavy cables of the starter circuit. This can cause battery explosion, fire or eye injury. Sparking in this circuit can not occur after the chassis cable (normally negative, black) is removed from the battery.
-
Page 16: Transport
• Do not tow this machine, it may cause damage to the drive system. • Do not tow any trailers, etc. with this mower. They 8011-514 Regularly clean deck may jackknife or overturn causing damage to the mower and possibly serious injury to the operator. -
Page 17: Controls
CONTROlS This operator’s manual describes the Dixon Zero Transmission from the engine is made via a belt-driven Turn Rider. The rider is fitted with a Kohler four- hydraulic pumps. Using the left and right steering stroke overhead valve engine developing 25-27 horse controls, the flow is regulated and thereby the direction power*. -
Page 18: Steering Control Levers
CONTROlS Steering Control Levers The machine’s speed and direction are continuously variable using the two steering controls. The steering controls can be moved forward or backward about a neutral position. Furthermore, there is a neutral position, which is locked if the steering controls are moved outward. -
Page 19: Parking Brake
USE FUll THROTTlE WHEN MOWING, for best mower performance and battery charging. 8061-017 Throttle control Blade Switch In order to engage the mower deck, pull the knob out; the mower blades are disengaged when the knob is depressed. 8061-017 Blade switch... -
Page 20: Ignition Switch
They are accessed by tilting the seat forward. They are flat pin fuses of the same type used in automobiles. There are two fuses with ratings and functions: • 20 A, Primary fuse. • 7.5 A, Mower deck coupling. 8011-420 Fuses -Dixon... -
Page 21: Fuel Tank
CONTROlS Fuel Tank Read the safety instructions before refueling. The machine has one fuel tank, just behind the seat. The tank capacity is 5.7 gallons (22 liters). Make sure the fuel cap is properly tightened and the cap gasket is not damaged. The engine will run on a minimum of 85-octane unleaded gasoline (no oil mix). -
Page 22: Fuel Shut Off Valve
IMPORTANT INFORMATION 8050-117 The mower deck’s lifting lever In order to obtain an even cutting height, it is important that the air pressure in the front tires is 15 psi and the rear tires is 10 psi. -
Page 23: Hour Meter
CONTROlS Seat Adjustment Lever The seat can be adjusted lengthways. When making adjustments, the lever under the front edge of the seat is moved to the left (as seen by the driver in the seat), after which the seat can be moved backward or forward. -
Page 24: Operation
Zero turn mowers are far more maneuverable than on each side of mower. The left control lever controls typical riding mowers due to their unique steering the left wheel. The right control lever controls the right capabilities. -
Page 25: Before Starting
The following conditions must be fulfilled before the engine can be started: • The driver must be seated on the seat. • The blade switch for engaging the mower blades must be depressed. 8050-117 • The parking brake must be on. - Page 26 OPERATION Move the steering controls outward to the locked (outer) neutral position. 8061-012 Place controls in neutral position Move the throttle to the middle position. WARNING! Engine exhaust and certain vehicle components contain or emit chemicals considered to cause cancer, birth defects or other reproductive system damage.
-
Page 27: Weak Battery
Your mower is equipped with a 12-volt negative grounded system. The other vehicle must also be a 12-volt negative grounded system. Do not use your mower to start other vehicles. If your battery is too weak to start the engine, it should be recharged. -
Page 28: Running
Select the cutting height with the cutting height adjustment pedal. Make sure the work area is free from objects that could be thrown by the rotating blades. Engage the mower deck by pulling out the blade switch. WARNING! Ensure that no one is near mower when engaging blade switch. -
Page 29: Operating On Hills
IMPORTANT INFORMATION Control levers return to neutral when released. This may cause the mower to suddenly stop. • To restart movement, release the parking brake. •... -
Page 30: Mowing Tips
WARNING! be raised into the transport position. Make sure Never drive the rider on terrain that the mower is cooled and the engine is off. slopes more than 10 degrees. Mow • Use compressed air to clean top surface of the slopes up and down, never side deck. -
Page 31: Stopping The Engine
• Disengage the mower deck by depressing the blade switch. 8061-017 Disengage the mower deck and move throttle to minimum • Raise the mower deck by pressing the foot pedal forward to the transport position. • When the machine is standing still, activate the parking brake by pulling the lever upward. -
Page 32: Moving By Hand
OPERATION Moving by Hand IMPORTANT INFORMATION Tighten the valve moderately. Do not overtighten the valve when closing. That can damage the valve seat. Pump Release Valves Pump release valves are located at the front and rear of the pump. They are used to release the system so the machine may be moved by hand when not running. -
Page 33: Maintenance
Check/clean the engine’s cooling air intake ● Check the mower deck ● Check for loose hardware (screws, nuts) ● Clean under the mower deck ♦ Start the engine and blades, listen for unusual sounds ♦ Check for damage ♦ Thoroughly clean around the engine ♦... - Page 34 Replace the air filter (paper filter) ● Check the caster wheels (every 200 hours) ● Replace the air cleaner’s pre-filter (foam) ● ● Check/adjust the mower deck ♦ ♦ Check the engine valve clearance ♦ ♦ Perform the 300-hour service ●...
-
Page 35: Battery
MAINTENANCE Battery STANDARD STATE APPROXIMATE BATTERy CHARGING TIME* TO FUll CHARGE AT 80 F / 27 your mower is equipped with a maintenance free BATTERy Maximum Rate at: battery and does not need servicing. However, CHARGE 50 Amps 30 Amps... -
Page 36: Ignition System
Check that the engine stops if the mower blades are before the steering controls can be moved into engaged and the driver temporarily moves off the the neutral position, otherwise the engine will drivers seat. -
Page 37: Engine Cooling Air Intake
MAINTENANCE Engine Cooling Air Intake Check that the engine’s cooling air intake is free from leaves, grass, and dirt. If the cooling air intake is clogged, engine cooling deteriorates, which can lead to engine damage. The cooling air intakes rotates when the engine is running. -
Page 38: Air Filter
MAINTENANCE Air Filter If the engine seems weak or runs unevenly, the air Servicing Precleaner filter may be clogged. If running with a dirty air filter, Wash and re-oil the precleaner every 25 hours of the spark plugs can become fouled. operation (more often under extremely dusty or dirty For this reason, it is important to replace the air filter conditions). -
Page 39: Fuel Filter
MAINTENANCE Fuel Filter Replace the line-mounted fuel filter every 100 hours (once per season) or more regularly if it is clogged. Replace the filter as follows: 1. Move the hose clamps away from the filter. Use flat-nosed pliers. 2. Pull the filter loose from the hose ends. 3. -
Page 40: Tire Pressures
MAINTENANCE Tire Pressures Rear tires should have a pressure of 10 psi / 69 kPa /.7 bar. Front tires should be at 15 psi / 103 kPa / 1 bar. WARNING! Faulty adjustment will result in 8011-564 Tire pressures reduced braking ability and can cause an accident. -
Page 41: Deck Belt
MAINTENANCE Deck Belt Park on a level surface. Apply parking brake. lower the deck into the lowest cutting position. Remove bolts from belt shields and remove Belt Shields shields. Remove any dirt or grass that may have accumulated around the cutter housings and entire deck surface. -
Page 42: Pump Belt
MAINTENANCE Pump Belt Replacing Pump Belt Park the mower on a level surface. Engage the parking brake. Belt removal Remove the deck belt (see Deck Belt Removal in this section of the manual). Remove clutch stop to access the belt. -
Page 43: Blade Replacement
MAINTENANCE Blade Replacement WARNING! Blades are sharp. Protect your hands with gloves and/or wrap blades with a heavy cloth when handling. • Remove blade bolt by turning counterclockwise. IMPORTANT INFORMATION 8050-844 1. Blade To ensure proper assembly, center hole in 2. -
Page 44: Adjusting The Mower Deck
Leveling Adjust the deck while the mower is on a level surface. Make sure the tires are inflated to the correct pressure. See “Technical Data” under Transmission. If tires are under or over inflated, you cannot properly adjust your deck. -
Page 45: Anti-Scalp Rollers
Anti-scalp rollers then keep the deck in the proper position to help prevent scalping in most terrain conditions. IMPORTANT INFORMATION Adjust anti-scalp rollers with the mower on a flat level surface. The anti-scalp rollers can be set in three positions: Anti-scalp rollers •... -
Page 46: Cleaning
Make it a habit to clean the machine directly after use (after it is cooled), before the dirt sticks. Do not spray water on the top of the mower deck. Use compressed air to clean the top side of mower deck. -
Page 47: Lubrication
lUBRICATION 8011-672-6 12/12 Every year lubricate with grease gun lubricate with oil can 1/52 Every Week Oil change level check 1/365 Every day Filter change *Change transaxles (transmission) filters. General Remove the ignition key to prevent unintentional Wipe away excess grease after lubrication. movements during lubrication. -
Page 48: Cables
lUBRICATION Cables If possible, grease both ends of the cables and move the controls to end stop positions when lubricating. Refit the rubber covers on the cables after lubrication. Cables with sheaths will bind if they are not lubricated regularly. If a cable binds, it can disrupt operation. If a cable binds, remove the cable and hang it vertically. -
Page 49: Engine Oil
lUBRICATION Engine Oil WARNING! Engine oil can be very hot if it is drained directly after stopping the engine. Allow the engine to cool to a safe temperature first. Engine Oil Filter • Drain the engine oil in accordance with the work description under the heading Engine Oil/Change Engine Oil. -
Page 50: Changing The Engine Oil
lUBRICATION WARNING! Engine oil can be very hot if it is drained directly after stopping the engine. Allow the engine to cool to a safe temperature first. Changing the Engine Oil The engine oil should be changed for the first time after 5-8 hours of operation. -
Page 51: Hydraulic Pump
lUBRICATION Hydraulic Pump Fluid Change This transaxle is designed with an external filter for ease of maintenance. To ensure constant fluid quality levels and longer life an oil filter change interval of every 200 hours is recommended. The following procedure can be performed with the pump installed in the vehicle, and the vehicle on level ground. -
Page 52: Troubleshooting
TROUBlESHOOTING Problem Cause Engine will not start • Blade switch is engaged. • Steering controls are not locked in the neutral position • Parking brake is not activated • Battery is dead • Contamination in the carburetor or fuel line. •... - Page 53 • Air trapped in hydraulic system Mower deck not engaging • Drive belt for the mower deck has come loose • Contact for the electromagnetic coupling has loosened • Blade switch is faulty or has come loose from cable contact •...
-
Page 54: Storage
Thoroughly clean the machine, especially under At the end of the mowing season, the machine should the mower deck. Touch up damage to the paint be readied for storage (or if it will not be in use for and spray a thin layer of oil on the underside of the longer than 30 days). -
Page 55: Schematics
SCHEMATIC Dixon-... -
Page 56: Technical Data
TECHNICAl DATA 966985301 966985401 966985302 966985402 Engine Manufacturer Kohler Kohler Type Courage Courage Power 25 hp* 25 hp* lubrication Pressure with oil filter Pressure with oil filter Oil capacity excluding filter 1.6 qts/ 1.5 liters 1.6 qts/ 1.5 liters Oil capacity including filter 1.7 qts / 1.6 liters 1.7 qts / 1.6 liters Engine oil (See viscosity diagram) - Page 57 TECHNICAl DATA 966985301 966985401 966985302 966985402 Frame Cutting Width 52" / 127cm 61" / 155cm Cutting Height 1.5 - 4.5" / 3.8 - 11.4 cm 1.5 - 4.5" / 3.8 - 11.4 cm Uncut Circle Number of Blades Blade length 17"...
- Page 58 TECHNICAl DATA 968999724 968999773 Engine Manufacturer Kohler Type Courage Por Power 27 hp* lubrication Pressure with oil filter Oil capacity excluding filter 1.6 qts/ 1.5 liters Oil capacity including filter 1.7 qts / 1.6 liters Engine oil (See viscosity diagram) SAE 10W30, 5W30 SG, SH, SJ Fuel...
- Page 59 TECHNICAl DATA 968999724 968999773 Frame Cutting Width 72" / 183cm Cutting Height 1.5 - 4.5" / 3.8 - 11.4 cm Uncut Circle Number of Blades Blade length 25" / 43 cm Nose Rollers Sprung Seat Standard Hinged Arm Rests Hour Meter Standard Blade Engagement Electromagnetic clutch...
-
Page 60: Accessories
TECHNICAl DATA Accessories Collection system Torque Specifications Engine crankshaft bolt 50 ft/lb (67 Nm) Standard ¼" fasteners 9 ft/lb (12 Nm) Deck pulley bolts 150 ft/lb (203 Nm) Standard " fasteners 18 ft/lb (25 Nm) lug nuts 75 ft/lb (100 Nm) Standard "... -
Page 61: Conformity Certificates
CONFORMITy CERTIFICATES USA requirements Labels are placed on the engine and/or in the engine compartment stating that the machine will fulfill the requirements. This is also applicable to special requirements for any of the states, (California emission rules etc.). Do not remove any of these labels. Certificates can also be supplied with the machine at delivery or written in the Engine manual. -
Page 62: Warranty
Routine maintenance or adjustments to include any oils, filters or other fluids used. Belts, blades, tires and cosmetic appearance (paint, seat fade, etc.) Pick up and delivery charges for transportation of mower to and from an authorized Dixon dealer’s place of business. -
Page 63: Service Journal
9. Check that there is drive to both wheels. 10. Check the mower deck adjustment. 11. Check: The safety switch for the parking brake. The safety switch for the mower deck. The safety switch in the seat. The safety switch in the steering controls. Parking brake functionality. - Page 64 SERVICE JOURNAl Action Date, mtr reading, stamp, sign After the First 5-8 Hours 1. Change engine oil. -Dixon...
- Page 65 Action Date, mtr reading, stamp, sign 25-Hour Service 1. Check the engine air filter. 2. Sharpen/Replace mower blades if required. 3. Check the tire pressures. 4. Check battery with cables. 5. lubricate according to lubrication chart. 6. Check/clean the engine’s cooling air intake.
- Page 66 SERVICE JOURNAl Action Date, mtr reading, stamp, sign 50-Hour Service 1. Perform the 25-hour service. 2. Clean/replace the air cleaner’s filter cartridge (paper filter) (shorter intervals for dusty operating conditions). 3. Change engine oil. 4. lubricate according to lubrication chart. 5.
- Page 67 SERVICE JOURNAl Action Date, mtr reading, stamp, sign 100-Hour Service 1. Perform the 25-hour service. 2. Perform the 50-hour service. 3. Change the engine oil filter. 4. Clean/replace the spark plugs. 5. Replace the fuel filter. 6. Check V-belts. 7. Check tighten caster wheel axle bolts (every 200 hours). 8.
- Page 68 1. Perform the 25-hour service. 2. Perform the 50-hour service. 3. Perform the 100-hour service. 4. Check/adjust the mower deck. 5. Clean the combustion chamber and grind the valve seats. 6. Check the engine valve clearance. 7. Replace the air cleaner’s prefilter (foam).
- Page 69 SERVICE JOURNAl Action Date, mtr reading, stamp, sign At Least Once Each Year 1. Clean the engine’s cooling air intake (25 hours). 2. Replace the air cleaner’s pre-filter (foam) (300 hours). 3. Replace the air filter’s paper cartridge. 4. Change the engine oil (50 hours). 5.
- Page 70 SERVICE JOURNAl Action Date, mtr reading, stamp, sign -Dixon...
- Page 72 P/N 115 145027 IR 01/16/09...