Table of Contents
Advertisement
Advertisement
Table of Contents

Related Manuals for PIAGGIO Vespa P125X


Summary of Contents for PIAGGIO Vespa P125X
- Page 2 PIAGGIO is one of the bigger producer of two - wheeler vehicles in the world The head office is in Genoa. Its works of Pontedera, Pisa, Arcore are provided with very modern equipments operating on the basis of the most advanced technique of...
- Page 3 Introduction PIAGGIO Co. takes this opportunity of thanking you for your preference for a Vespa <<new line>>. We feel sure that this scooter will give you complete satisfaction. In this vehicle there have been transfused solutions of great success that have always been Piaggio' a patrimony: - Integral chassis, direct transmission, interchangeable wheels.
-
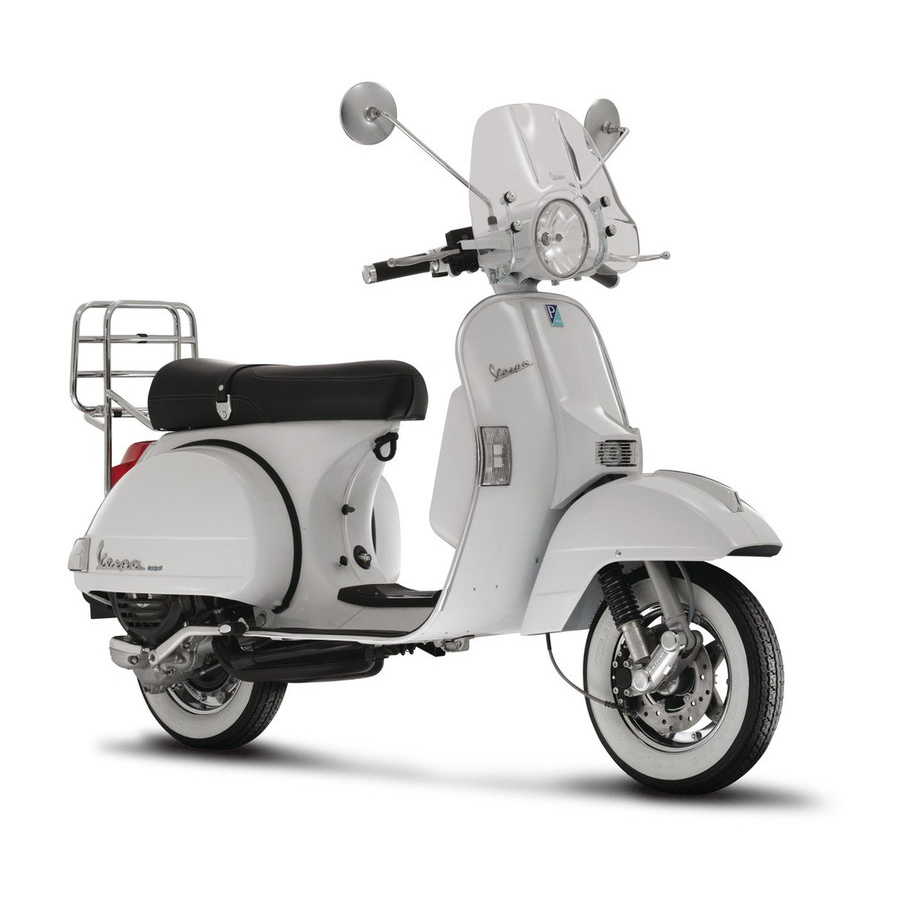
Page 4: General Specification
Vespa P-series Note: For specific information concerning Vespa P200E see pages 93-121 General specification Engine: (see performances at page 20 and section fig. 1) is pivoted to the vehicle chassis through the crankcase swinging arm, clutch side. The rear wheel (drive -wheel) is fitted on the outer side of the drive shaft. - Page 5 Gear box: four speed drive with mesh gears. Operated by the twist grip on L. H. handlebars which functions in conjunction with the clutch control lever . For transmission ratio engine to driving wheels see page. 24. Integral chassis: pressed sheet steel, streamlined monocoque type structure. On the shield, inner side, there is located a glove compartment with flap equipped with a key controlled security lock.
- Page 6 1. Group carburettor-air cleaner - 2. Piston - 3. Crankshaft - 4. Clutch - 5. Mainshaft and gear pinion assy - 6. Gear shifter - 7. Flywheel magneto - 8. Kick-starter - 9. Crankcase swinging arm clutch side (pivoted to the frame). Fig.
- Page 7 1. Clutch control (lever) and gear change (twist grip.) - 2. Front brake lever - 3. Throttle twist grip. - 4. Switch (for the positions see fig. 6) - 5. Front brake shoes - 6. Rear brake pedal - 7. Kickstarter - 8.
- Page 8 Performances, specifications Note: The vehicle runs with gasoline – oil mixture i. e. 2% oil (mineral oil SAE 40) Consumption: (according to CUNA Standards): ~ 2,1 It./100 Km. (111 mls/U. S. gal.. 134 mls/imp. gal.). Max. fuel capacity: 8 It. (2.116 U. S. gal. or 1.762 imp. gal.) includes 2.1 It. of reserve (0.55 U.
-
Page 9: Identification Data
Fig. 3 - Serial number stamped on frame. Transmission ratio engine to driving wheels: Bottom gear 1:14.47 3rd gear 1:7.31 2nd gear 1:10.28 Top gear 1:5.36 Identification data: the identification data are composed by a prefix VNX1T on chassis, VNL3M on engine and by a serial number. Accessories: The vehicle can be equipped with accessories which can be fitted by your dealer. -
Page 10: Fuel Supply
Operating instructions Before putting the vehicle into service, act as follows: 1) - Check that the fuel tank is filled up. 2) - Unscrew the plug on the gear box marked « OLIO » (Fig. 11) and check that the oil is on a level with the hole when the vehicle is standing upright. - Page 11 Fig. 5: Tipping up the saddle for accessing to fuel cap. Security lock on the steering column, glove compartment lock and saddle lock are actioned by a single key.
- Page 12 Running in Distance covered Speed limit to be not exceeded during the period of running in (Km/h) – (Mls/h) Gear Gear Gear Gear First 2000 Km. Kms Mls Kms Mls Kms Mls Kms Mls (1250mls) 15.5 23.5 Notice - After first 1000 Km. (620 mls): - Check that all nuts and bolts are not loose: in particular the nut for securing wheels.
-
Page 13: Electrical Equipment
Fig. 6 – Positions of the switch <<C>> <<C>> - 0 = Lights off - 1 = Pilot lights, tail lamp, lighting system tell tale lamp and speedometer on. - 2 = Headlamp lights, front parking light and tail lamp,- lighting system indicator light and speedometer on. - Page 14 SETTING THE VEHICLE IN MOTION With engine running at idling speed declutch and rotate the gear change twist grip to 1st gear position (fig. 8). To set the vehicle in motion slowly let - out the clutch and contemporaneously rotate the throttle. GEAR CHANGE Close the throttle, declutch and rotate the gear change grip to a higher or lower gear as the case may be (fig.
-
Page 15: Maintenance
Maintenance ADJUSTMENT ON CARBURETTOR For adjusting the idling act on the slow running adjuster screw (fig. 9 No. 5) coming out on air cleaner. On the carburettor body a set screw is applied for adjusting the throttle cable play; this screw is to be reset only if necessary or on dismantling and reassembly operations. - Page 16 Fig. 9 – Fuel supply and distribution diagram 1. Fuel tap: R) Reserve; A) Open C) Closed; - 2. Float - 3. Air cleaner with carburettor 3/1. Air filter - 4. Choke device calibrator - 5. Throttle slide set screw - 6. Throttle slide - 7. Main jet air calibrator - 8.
- Page 17 Fig. 10 - Removing engine cowl. 1. Lever for locking cowl - 2. Front locating pin - 3. Clasp securing cowl to chassis - 4. Rear hooked pivot pin. SPARK PLUG REMOVAL For removing the spark plug disconnect the H. T. lead and extract the spark plug using the box wrench (fig.
- Page 18 Fig. 11 Oil filler hole (1); oil draining hole (2). DISMANTLING AIR FILTER For extracting the air filter «A» (fig. 12) remove the engine cowl (fig. 10) and air cleaner case cap. Unscrew the two screws « B » and extract the filter. Note: When the air cleaner case is taken off, the carburettor is accessible.
- Page 19 Fig. 12 - Dismantling the air cleaner DISMANTLING THE SPARE WHEEL (Accessory) For dismantling the spare wheel, remove the spare wheel cowl, following the instructions given for engine cowl (page 17). For removing the spare wheel unscrew the bolt securing the lower part of the plastic protection, then the two nuts «...
- Page 20 BRAKE ADJUSTMENT Act on the adjusting screws as indicated with arrow in fig. 16, keeping in mind that when the brake lever or pedal are in their resting position the wheels should rotate freely. Notice - The braking action should begin immediately on operating the respective controls.
- Page 21 Fig. 15 - Removing wheel REPLACING BULBS In order to approach to the headlamp bulbs, remove the upper cover «C» of the handlebars (fig. 19) acting as follows: - Take off the four screws «V», placed on the lower part of the handlebars. - Lift the cover «C»...
- Page 22 Fig. 17 – Tyre removal Fig. 18. Operations for checking magnetic timing...
- Page 23 SETTING THE HEADLAMP Place the unloaded vehicle on a level floor at 10 m. (32.8 feet) about from a twilight white screen (see fig. 20) and take care that the vehicle axis is perpendicular to then screen. Draw a horizontal line « b - b » whose height «B» from the ground correspond to 0.9xC (see fig.
- Page 24 B = C x 0.9 - C = Height from the ground of headlamp center - B = C x 0.95 when the setting of the headlamp is carried out with the vehicle at 5 m. (16.4 feets) from the screen. Notice - A correct setting of headlamp, can be obtained by acting on the set screw placed under it.
-
Page 25: Laying Up
Maintenance When difficulties of ignition occur, check the spark plug: clean in neat gasoline (petrol) and wire brush (or emery cloth) the electrodes; adjust the gap 0.6 mm. (0".023). Check porcelain insulation: if cracked or broken change plug. It is advisable not to change the type of spark plug as recommended by the manufacturer. - Page 26 CLEANING THE VEHICLE The painted surfaces of the vehicle should be sponged down with water as noted in the following section and dried off with chamois leather. BODY WASHING Painted parts should be first washed down using a low pressure hose so that the dirt and grime become soft.
- Page 27 summary of instructions for maintenance and lubrication PRINCIPAL OPERATIONS TO CARRY OUT EVERY 4000 Km.(2400 mls). Cleaning silencer, Esso 2-T Motor Oil 40 – Shell cylinder head and piston, sparking plug Golden Motor Oil - Shell X - 100 (and adjusting sparking plug electrodes). E T -Total 2T.
- Page 28 4000km Greasing speedo Decoking silencer, Checking oil level in drive housing, brake cylinder head, piston the gear box levers, gear sector and spark plug Cleaning air filter Greasing flexible Gear box oil change cables 8000km Fig. 21...
-
Page 29: Fault Finding
Fault finding When the vehicle does not run properly, inspect and rectify as explained below: HARD STARTING Fuel system - carburation - ignition. Lack of fuel: Turn to reserve and refill as soon as possible. Filter, jets, carburettor body clogged or dirty: Remove, wash in petrol and blow dry. Starter control in «closed»... - Page 31 General specification Ignition: by means of an electronic device with a built in H. T. coil fed by a specific flywheel magneto. This system offers many advantages, i. e., allowing to produce a higher tension peak reached in a very short time and with a very limited length of the discharge. It follows: 1) - Engine regular running also with spark-plugs very dirty.
- Page 32 Gear box: four speed operated by the twist grip on the L. H. handlebars with functions in conjunction with the clutch control lever. Electrical equipment: A six pole flywheel magneto - nominal voltage 6V - supplies alternating current to the electrical equipment. Identification data: Analogously to what we have carried out at page 24 for Vespa P125X, the identification data are composed by a prefix VSX 1 T on chassis, VSE 1 M on engine and by a serial number.
- Page 33 performances, specifications The vehicle runs with gasoline - oil mixture i. e. 2°%° oil (mineral oil SAE 40). Consumption: ccording to CUNA Standards) : " 3 It/100 Km. (79 mls/ U. S. gal.; 95 mls/imp. gal.). Max. fuel capacity: 8 It. (2.1 U. S. gal. or 1.76 imp. gal.) includes 2.1 It. of reserve (0.55 U.
- Page 34 Running in Distance covered Speed limit to be not exceeded during the period of running in (Km/h) – (Mls/h) Gear Gear Gear Gear First 2000 Km. Kms Mls Kms Mls Kms Mls Kms Mls (1250mls) B - 0 = Engine cut – out 0 = Lights off - (extractable key) 1 = Pilot lights and tail lamp on on.
- Page 35 LIGHTING AND SIGNALLING DEVICES The vehicle is equipped with: - Main switch « B », key operated, for engine ignition (position 1) and for engine cut - out (position 0 extractabe key) placed on the handlebars, central part, (see fig. 23). - Switch «C »...
- Page 36 SETTING THE VEHICLE IN MOTION With the engine running at idling speed declutch and rotate the gear change twist grip to the position of 1st gear (fig. 26). For setting the vehicle in motion slowly let in the clutch and contemporaneously rotate the throttle. STOPPING THE ENGINE Before stopping the engine change to «...
- Page 37 the timing remains during the time practically unalterable. if the backplate should be removed (for possible replacements) when reassembling it is important in order to get a correct mechanical timing, that the notch on the backplate is perfectly lined up with the corresponding notch on crankcase (as indicated with arrow on fig.
- Page 38 A. Open the fuel cock - B. Selector neutral - C. Pull out the starter control rod (with cold engine) - D. Bring throttle twist grip to idling position – E. Insert the key in the switch and rotate it in the position 1 (circuit on).
- Page 39 vehicles with « LS » device SPECIFIC PARTICULARITIES The Vespa endowed by request with separate lubrication of the engine, LS » device, are equipped with two separated tanks: one for petrol (gasoline) tank capacity 8 I. (2.11 U. S. gals; 1.76 imp gals) included reserve of about 2.1 I. (0.55 U. S. gals;...
- Page 40 Manufacturer. The essential features of the model described and illustrated herein remaining Unaltered, the PIAGGIO Firm reserves therefore the right to carry out at any moment, without being obliged to bring this booklet up - to - date in due...