Table of Contents
Advertisement
Quick Links
Advertisement
Chapters
Table of Contents

Related Manuals for Clarion N.I.C.E. P200


Summary of Contents for Clarion N.I.C.E. P200
- Page 2 User’s Guide...
- Page 3 Solitaire and Freecell games of audio and video products, please visit us at our Website: www.clarion.com • Utilities that include contacts, calculator, calendar, stop watch and a text reader The N.I.C.E. P200 has 10 gigabytes of storage for music, video and photos.
- Page 4 To get started quickly, see “Quick Start” on page 9. To If the N.I.C.E. P200 is not installed in accordance learn more about how to navigate using the GPS, see with these instructions, it could cause harmful “Navigation”...
-
Page 5: Table Of Contents
Parts list ............9 Entertainment questions ......27 Front view ..........10 Application questions......28 Back view of the cradle and N.I.C.E. P200 11 Installation ........29 Mounting bracket and cradle ....12 Vehicle installation ........29 Optional accessories ........ 13 Precautions.......... - Page 6 Reviewing where you’ve been ....61 Pointing to your destination....47 Entertainment modes ......63 Traveling to your destination ..... 49 Undocking a N.I.C.E. P200 ....... 63 Visually tracking your route....50 Saving battery charge ....... 64 Recovering from a wrong turn....50 Supported audio and video formats ..
- Page 7 Text document quick view ..... 88 Using the calculator ........89 Care and updating ......103 Using the stop watch ........ 89 Cleaning the N.I.C.E. P200 ....103 Using the calendar ........90 Battery maintenance ....... 103 Maintaining your schedule ..... 90 Removing the battery......
- Page 8 User’s Guide Verifying satellite signal ......111 MEDIA icons ........... 130 Troubleshooting ........113 Music and video buttons ...... 131 Resetting the N.I.C.E. P200 ....118 Music and video mode icons....131 Equalizer icons........132 Reference ........119 Stereo/mono icons ....... 132 Buttons ............
-
Page 9: Quick Start
N.I.C.E. P200 Parts list 1. Quick Start If anything is missing, contact your dealer immediately. Li (lithium) polymer rechargeable battery NAVBATTERY N.I.C.E. P200 Windshield mounting bracket and cradle NAVMOUNT2 110v power cord and Vehicle power cord AC/DC adapter NAVCIG NAVDAPT2 Also included, this guide. -
Page 10: Front View
Crystal Display (LCD), displays maps and entertainment 3.5mm headphone jack, Lanyard loop, for carrying for private listening the N.I.C.E. P200 Infrared sensor, communicates USB 2.0 (5-pin mini port), for with optional remote control updating maps, downloading media, and updating firmware... -
Page 11: Back View Of The Cradle And N.i.c.e. P200
N.I.C.E. P200 Back view of the cradle and N.I.C.E. P200 GPS antenna port, connects to the optional Battery cover 16-foot GPS antenna (NAVGPS) Li polymer battery, powers audio/ L=8.0Max video and utilities for up to three N.I.C.E. P200 hours when the... -
Page 12: Mounting Bracket And Cradle
Chapter 1: Quick Start Mounting bracket and cradle Swivel adjustment knobs, adjust position of the N.I.C.E. P200 when mounted on the windshield Suction cup, secures the mounting bracket to the windshield Suction tab at base of cup Cradle, holds the N.I.C.E. P200 Windshield mounting bracket, attaches to your car’s windshield... -
Page 13: Optional Accessories
N.I.C.E. P200 displays the main menu. satellite reception in the car RCB200 Remote control to control the After you’ve used the N.I.C.E. P200, and if you N.I.C.E. P200 in the car or at turn it off in sleep mode, it starts by displaying home the last screen that was active before you NAVBATTERY Additional battery packs. -
Page 14: Main Menu Features
Chapter 1: Quick Start Main Menu features GAME icon, provides access to the games, see “Playing games” on page 99. CLOSE button closes main menu. NAVIGATION icon, launches USB button, connects a navigation mode, see computer for down-loading “Navigation” on page 34. media and updating firmware. -
Page 15: Navigation Quick Start
Note Tap touch-screen icons and buttons slowly for best performance. The N.I.C.E. P200 displays the navigation declaration. Current location Navigation options button (F3) Current location You’re ready to use the N.I.C.E. P200 as a navigation aid. Navigation declaration... -
Page 16: Navigation Features
Chapter 1: Quick Start Navigation features Tap Start Route Guidance. These steps demonstrate the general procedure. The N.I.C.E. P200 displays several ways to define your destination. Tap the navigation options button (F3). The N.I.C.E. P200 displays navigation options. Exit (F1): Returns to navigation... - Page 17 N.I.C.E. P200 Tap Address/Intersection. The N.I.C.E. P200 displays the list of states and provinces. The N.I.C.E. P200 displays the address Page up (F2) and Page down (F4) buttons: options. Used to view the next or previous page of options Address options Scroll arrows Tap State/Province Name.
- Page 18 Tap the first few letters of the name (or number). The N.I.C.E. P200 displays the touch-screen keyboard. The N.I.C.E. P200 displays a list with one or more options. Character display field If you don’t see a list, tap the OK-to-accept checkmark on the keyboard.
- Page 19 N.I.C.E. P200 The N.I.C.E. P200 calculates the route and tells If the destination is a long way from your current you to proceed to the highlighted route. location, route calculation may take several minutes. If the destination involves travel by air or boat (for example, you are in San Diego, California and want to travel to Honolulu Hawaii), the N.I.C.E.
-
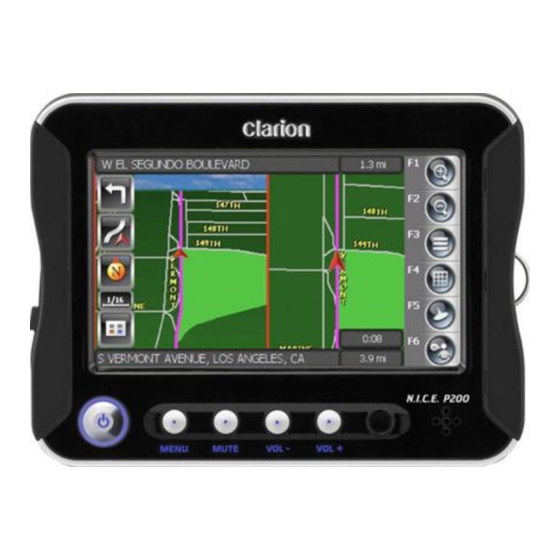
Page 20: Main Navigation Screen
Chapter 1: Quick Start Main navigation screen Next location, indicates where you’ll be after you make the next maneuver Destination direction (line of sight) Zoom in (F1) and zoom out (F2) Next maneuver Distance to next maneuver Time to next maneuver Simulation Navigation options (F3), Compass... -
Page 21: Music Player Controls
N.I.C.E. P200 Music player controls Main music Alternates among playback options: normal, repeat, repeat folder and random controls Accesses music folders Stereo/monaural icon Current music mode Current folder Current track Current volume Pauses and plays music Current battery charge Total... -
Page 22: Photo Viewer Controls
Chapter 1: Quick Start Photo viewer controls Screen size button, enlarges photo to fill screen; Slide show icon, displays Current battery Pause and Tap the screen to return to photo default size when slide show is on charge icon play buttons File folder button, provides access to additional folders Current photo folder... -
Page 23: Video Player Controls
N.I.C.E. P200 Video player controls The N.I.C.E. P200 disables video playback when the vehicle is in motion. Main video Current folder Currently playing Current video mode video controls Current volume Current battery charge Pause and play buttons File folder button,... -
Page 24: Using The Optional Remote
MAIN MAIN MUTE MUTE 4 5/16” their equivalents do on the N.I.C.E. P200. Arrows move Increases map arrow; volume For optimal operation, always aim the remote ENTER ENTER CAT select control toward the infrared sensor on the N.I.C.E. -
Page 25: Turning The Power On And Off
• The LEDs (tiny blue lights in the middle of the If you are not going to use the N.I.C.E. P200 for a MENU, MUTE and volume buttons) remain on. period of time, turn it fully off to conserve battery charge. -
Page 26: Frequently-Asked Questions
Avoid Freeway No to change it to Avoid Free- The questions in this section are often asked by way Yes. people who are learning to use N.I.C.E. P200. For I don’t like toll roads. Can the N.I.C.E. P200 troubleshooting help, see “Troubleshooting” on calculate a route that avoids toll roads? page 113. -
Page 27: Entertainment Questions
N.I.C.E. P200 button turns the display of the touch-screen Does the N.I.C.E. P200 show me how many miles icons and buttons on and off. To find this but- are left to the destination? ton, see “Main navigation screen” on page 20. -
Page 28: Application Questions
Is there a way to copy all contacts and calendar • The internal disk drive holds 10 GB of data. appointments at once? When I remove the N.I.C.E. P200 from the cradle • No, you copy one at a time. -
Page 29: Installation
P200 in a vehicle and use it at home. of a safety device, such as air bags, etc. Vehicle installation Dock the N.I.C.E. P200 in the cradle Precautions The cradle contains the Global Positioning System The installation process involves mounting the (GPS). - Page 30 Locked DC IN Back of the cradle Set the lock switch to the unlock position. Slide the N.I.C.E. P200 into the cradle making N.I.C.E. P200 connector sure that the flanges securely hold it. Front of the cradle Move the lock switch to the locked position.
-
Page 31: Attach The Mounting Bracket To The Glass
Connect the vehicle power cord Adjustment knob: (two more on other side) In a vehicle, the N.I.C.E. P200’s is powered by the vehicle power cord connected from the DC IN N.I.C.E. P200 mounted on the glass socket on the cradle to the car’s cigarette lighter. -
Page 32: Removing The Mounting Bracket
Mounting bracket mounted on windshield Briefly press the power button. If the mounting bracket and cradle do not drop You are ready to use the N.I.C.E. P200 for away from the windshield, gently pull the navigation. suction tab away from the glass. -
Page 33: Home Installation
N.I.C.E. P200 Home installation Improving audio At home, the N.I.C.E. P200 is powered by the As the N.I.C.E. P200 is a portable device and battery or the 110v power cord and adapter. designed to travel with you, it comes with its own internal speaker. -
Page 34: Navigation
The Global Positioning System (GPS) provides navigation within the United States and Canada. Obstructions inhibit communications Note As the GPS is located in the cradle. The N.I.C.E. P200 must be installed in the cradle to communicate with the Unobstructed communication GPS satellite. -
Page 35: Starting Navigation
The navigation declaration screen appears. Caution If your car has been sitting in the sun, the N.I.C.E. P200 may be hot to the touch and sunlight may make it difficult to read the screen. Press the MENU button below the LCD. -
Page 36: Defining Your Destination
Do not attempt to define a destination while driving. Tap the navigation options button (F3). Current location Current location on the map Main navigation screen If the N.I.C.E. P200 is within site of a satellite, the GPS automatically locates you on the map. - Page 37 N.I.C.E. P200 The Navigation menu appears. The N.I.C.E. P200 displays several ways to select a destination. Navigation menu Scroll buttons (two sets) Tap Start Route Guidance. Destination options There are two basic ways to define a destination: • Use lists to define the address.
-
Page 38: Defining A Specific Address
“Pointing to your destination” on page 47. This option lists your last 40 destinations. If you chose any of the other options, the N.I.C.E. P200 displays additional option lists. Use this method, when traveling, to quickly recall temporarily important addresses, such as •... -
Page 39: Navigating In An Unfamiliar City
The N.I.C.E. P200 database maintains a list of two million points of interest organized by categories, such as city center, airport, restaurant, and tourist information. - Page 40 Chapter 3: Navigation After selecting Point of Interest, the N.I.C.E. P200 Scroll down to view the fifth point of interest offers five options. option. Four of the point of interest options Fifth point of interest option visible • State/Province Name limits all other lists (postal code, phone, and first few letters).
- Page 41 N.I.C.E. P200 • By Postal Code and Phone go directly to the The following screen displays when you choose touch-screen keyboard. By Category. • By Name is especially useful if you know only the state or province in which a famous place is located, but you don’t know how it might be...
-
Page 42: Scrolling Through Lists
Chapter 3: Navigation The N.I.C.E. P200 prompts you to choose how The N.I.C.E. P200 prompts you to confirm the to display the locations. destination. Continue with “Traveling to your destination” on page 49. Scrolling through lists There are two ways to scroll through a long list, such as the list of city names. -
Page 43: Using The Touch-Screen Keyboard
(F5). • Page through options up to four at a time, using the touch-screen scroll buttons (F2 and F4). The N.I.C.E. P200 displays the touch-screen keyboard. Using the touch-screen keyboard Some options display the keyboard automatically. Lists let you scroll or use the keyboard to save time. - Page 44 If are entering a postal code, the N.I.C.E. P200 fills in the beginning digit based on the valid Tap the first few letters of the name or postal codes for your state or province.
- Page 45 The following is an example of a short list of cities. Short list of streets with sample address range Above this list the N.I.C.E. P200 displays the address range for the streets in the list. A quick check with the address you’re seeking should confirm if you are in the right area.
- Page 46 Chapter 3: Navigation When you select the street, the N.I.C.E. P200 If you choose Address, the N.I.C.E. P200 gives you the option of specifying a specific displays the valid range of addresses at the top house/building number or an intersection.
-
Page 47: Pointing To Your Destination
N.I.C.E. P200 Continue with “Traveling to your destination” on Crosshairs appear at your current location. page 49. Pointing to your destination Rather than enter an address, you can use your finger to define a destination on the map. Tap the navigation options button (F3), Start Route Guidance, then scroll down and tap Map. - Page 48 Chapter 3: Navigation Continue tapping the map until you pinpoint the If you just pointed to the destination, the location. N.I.C.E. P200 prompts you to select how to use the location. Tap the select button (F5). The N.I.C.E. P200 displays the selected destination as a list option.
-
Page 49: Traveling To Your Destination
Once you select a destination, the N.I.C.E. Start driving. P200 calculates your route, based on any While driving, the N.I.C.E. P200 provides verbal preferences you set (See “Customizing” on instructions. To hear them again, tap the voice page 92). Route calculation progress appears guidance button (F6). -
Page 50: Visually Tracking Your Route
Don’t worry if you miss a turn or intentionally stray off course to avoid roadwork or an accident, With Map scale Current location Remaining time automatic recalculation on, N.I.C.E. P200 remaps Compass Total remaining distance your journey as soon as you turn away from its Repeat voice guidance calculated route. -
Page 51: Detouring
• Avoid Current road calculates a new route to your destination that guides you off the current Once the N.I.C.E. P200 has calculated the route it road as quickly as possible. assumes all is clear ahead. To deliberately detour around an accident, or for any other reason, follow •... -
Page 52: Changing Which Way Is Up
Changing which way is up Changing map perspective The top of the screen can always point north or it The N.I.C.E. P200 offers three different map views. can point in the direction you are traveling. • North Up displays a map with north always toward the top of the screen. -
Page 53: Zooming In And Out
Taping the zoom buttons (F1 and F2) changes the When you are within one mile of the next scale of the map. intersection, N.I.C.E. P200 displays an enlarged view of the intersection on the right side of the Zoom buttons screen. -
Page 54: Monitoring Signal Strength
Chapter 3: Navigation Monitoring signal strength The N.I.C.E. P200 displays these options. The GPS icon shows the strength of the GPS signal: Strong signal (globe) Weak signal (globe with lightening bolt) No signal (gray) Canceling route guidance Route guidance simulation icon... -
Page 55: Previewing Your Journey
This feature lets you preview (simulate) a route without actually going anywhere. If you have the Crosshairs appear and the N.I.C.E. P200 time, it’s a good idea to preview any trip. Scouting centers the point you touched on the screen. -
Page 56: Define Your Destination
• A beep sounds when the N.I.C.E. P200 turns Tap the address location on the map. onto a new street. Note After you’ve previewed your journey,... - Page 57 The N.I.C.E. P200 displays the selected location as a list option. Tap the name to confirm the location. The N.I.C.E. P200 displays the street name in the Name-the-Entry box. Tap Add to Address Book. Crosshairs mark the location you touched The N.I.C.E.
-
Page 58: Adding/Editing/Deleting Addresses
Tap the navigation options button (F3). The N.I.C.E. P200 asks for confirmation. Tap Edit Address Book. The N.I.C.E. P200 gives you four options. Sample confirmation message Tap Yes to save the name or No to return to the Edit address book options screen previous menu. - Page 59 • Add Current Location lets you enter your If you chose to edit an existing name, the current location. N.I.C.E. P200 displays a list of the addresses currently stored. • Edit lets you change the name associated with an address.
- Page 60 Chapter 3: Navigation The touch-screen keyboard appears, with the Tap the accept button (check mark) to save the address name displayed near the top. address using the displayed name. Tap the backspace button to erase the existing name, then tap a name. For example, rather than use the address of our local school as the name, you could change it to “SCHOOL.”...
-
Page 61: Recording Your Route
Recording your route Use the backspace to remove the default trail name and tap a name. Rather than use the N.I.C.E. P200 as a guide, you Start driving. can use it to record where you’ve been. The N.I.C.E. P200 can drop virtual bread crumbs along your As you drive, the N.I.C.E. - Page 62 Tap Beginning to view the trail from where you started (origin). Tap End to view the trail from your destination. The N.I.C.E. P200 prompts you to confirm that you want to start simulated route guidance. Tap Yes. The N.I.C.E. P200 simulates your journey...
-
Page 63: Entertainment Modes
N.I.C.E. P200 for entertainment. For navigation, the N.I.C.E. P200 must be mounted L=8.0Max in the GPS cradle. For entertainment, or to use the utilities, you can remove the N.I.C.E. P200 from the Lock switch cradle and take it with you. DC IN When undocked from the cradle, the N.I.C.E. -
Page 64: Saving Battery Charge
Saving battery charge If you don’t see the power options, tap the Power button on the touch screen (not the Although the battery can power the N.I.C.E. P200 physical power button). for approximately three hours, the actual duration of The N.I.C.E. P200 displays the POWER menu. -
Page 65: Supported Audio And Video Formats
Supported audio and video formats P200 is using battery power, the LCD turns off Make sure the N.I.C.E. P200 supports the audio and automatically if you don’t tap the touch screen video files you wish to play back and view. -
Page 66: Playing Music
To delete a music file, see “Deleting files” on combination, but only with this list of codecs. If a file page 107. you transfer to the N.I.C.E. P200 uses a different codec, the file will not work. On the main menu, tap the MEDIA icon, then the MUSIC button. - Page 67 N.I.C.E. P200 The music default screen appears and the last When finished with one track, the N.I.C.E. P200 track you were listening to begins to play. plays the next track based on the music mode. Folder button Current folder name •...
-
Page 68: Locking Front Panel Buttons
Once you’ve started playing music, you can lock the To keep the N.I.C.E. P200 handy, attach a wrist keys on the front of the N.I.C.E. P200 and slip it into cloth or lanyard to the loop (on the right side of your pocket. - Page 69 N.I.C.E. P200 Tap the music button on the right side of the The music controls overlay appears at the top screen. of the navigation screen. Music controls Music button Main menu Music controls overlay and the navigation screen Note For a detailed explanation of the music controls, see “Music player controls”...
-
Page 70: Equalizing Audio
For more information about playing music, see “Supported audio formats” on page 65. Equalizing audio The N.I.C.E. P200’s built-in equalizer can be configured to produce smooth sound based on the style of music you listen to most. AUDIO/VIDEO options On the main menu, tap the SETUP icon. -
Page 71: Viewing A Video
Equalizer setting icon detects motion, it disables video viewing. Connect the N.I.C.E. P200 to your computer and copy one or more supported video files from your computer to the N.I.C.E. P200. To view a list of supported files, see “Supported video formats”... - Page 72 Chapter 4: Entertainment modes The N.I.C.E. P200 displays the list of videos Tap the play button to begin the video. stored in the Movie folder. The N.I.C.E. P200 loads and plays the video. Current folder name Play button • To view all subfolders, tap the folder button.
-
Page 73: Play It Again
• To delete a video file, see “Deleting files” on button. page 107. Play it again As with music, you can set up the N.I.C.E. P200 to play another video clip once the current clip is finished. Tap the screen to display the video controls overlay. -
Page 74: Viewing Video On A Larger Monitor
Viewing video on a larger monitor options. With the optional NAVCK cable connected, the N.I.C.E. P200 can output video to a larger screen for more satisfying use. The audio/video output cable connects to the serial port on the back of the cradle. - Page 75 N.I.C.E. P200 Connect the N.I.C.E. P200 to your computer The N.I.C.E. P200 locates all photos and and copy one or more photos from your displays either the last photo you viewed or the computer to the N.I.C.E. P200. first photo in the folder.
-
Page 76: Starting A Slide Show
Chapter 4: Entertainment modes • To view another video subfolder, tap the folder Tapping the SLIDE button again stops the slide button. show. • To delete a photo, see “Deleting files” on To remove the photo controls and enlarge each page 107. -
Page 77: Changing Slide Speed
Tap the configuration button. To return to the slide show, tap the configuration button. The N.I.C.E. P200 displays the AUDIO/VIDEO configuration options. Adding music to a slide show As the slides change, you can listen to music. -
Page 78: Changing The Music Track
The music begins either form the beginning of last track you were playing or from the Playing games beginning of first track in the folder. The N.I.C.E. P200 has two pre-loaded games: If the music does not start playing, tap the play Solitaire and Freecell button. -
Page 79: P200
N.I.C.E. • TEXT READER converts the N.I.C.E. P200 into P200. an electronic book. Copying from your computer to the N.I.C.E. P200 • CALCULATOR provides a standard numeric requires a USB 2.0 to 5-pin mini cable, which is not calculator. -
Page 80: Connect To The Computer
Chapter 5: Using the utilities Connect to the computer Tap the USB button. If it’s not already on, turn your computer on. The N.I.C.E. P200 displays the MASS Storage screen. Press the MENU button. The N.I.C.E. P200 displays the main menu. -
Page 81: Copy The Files
Contacts Contact information Music Music files Locating the USB port Movie Video files Your computer mounts the N.I.C.E. P200 as a data drive. The exact steps to follow depend on Photo Digital photographs your system and software. Text Text files If a name does not exist, create the folder and name it exactly as you see it above. -
Page 82: Disconnecting From The Computer
(at the bottom of your PC screen). Drag and drop or save the files from the computer to the folder on the N.I.C.E. P200. When you’re finished copying files, close the Safely-remove-hardware icon N.I.C.E. -
Page 83: Using Contact Information
N.I.C.E. P200 Using contact information The N.I.C.E. P200 pauses to load the contact information and displays the first contact. You manage contact information using your computer’s contact management software. Create a contact on your computer. For specific steps, see your computer software. - Page 84 Chapter 5: Using the utilities Detail contact information. Postal/ZIP code 1: personal information 2: company information Return to contacts list Go back to previous page 3: additional information Page scroll Contact detail • Tap the “i” button to return to the contacts list. •...
-
Page 85: Reading Text Files
N.I.C.E. P200 Reading text files The N.I.C.E. P200 displays the list of text files. The text reader supports files stored in the .txt format. Copy your .txt files from the computer to the Text folder on the N.I.C.E. P200. See “Copying files from your computer”... - Page 86 Small text reader screen and buttons then tap OK, otherwise, tap the folder button to select a different folder. Tap the screen size button to enlarge the small screen to full size. The N.I.C.E. P200 displays the list of text files.
-
Page 87: Changing The Size Of The Font
N.I.C.E. P200 The N.I.C.E. P200 removes the buttons and Changing the size of the font uses the full screen to display the text. Tap the Configuration button. The N.I.C.E. P200 displays the configuration options. Full screen viewing • To return to small screen, tap the screen. -
Page 88: Text Document Quick View
Using the text setup options you can set the number of seconds between each “page turn.” With a text open, tap the configuration button. The N.I.C.E. P200 displays the text options. To change the time between page turns, tap Text file set up for quick view SLIDE TIME. -
Page 89: Using The Calculator
Tap the UTILITY icon, followed by the CALCULATOR icon. Tap the UTILITY icon, followed by the STOP WATCH icon. The N.I.C.E. P200 displays the calculator. The N.I.C.E. P200 displays the stop watch. Calculator screen Start button This screen functions like a normal hand-held calculator. -
Page 90: Using The Calendar
Copy all the .vcs files you saved (one per appointment) from the computer to the The calendar application works together with the Calendar folder on the N.I.C.E. P200. See calendar software running on your computer. “Copying files from your computer” on page 79. - Page 91 N.I.C.E. P200 The N.I.C.E. P200 pauses to load the The N.I.C.E. P200 displays detail information appointment information and displays the about the appointment. current month. Appointments scheduled on Next month these days Previous month Calendar showing current month Return to calendar...
-
Page 92: Customizing
Customizing navigation options button (F3), followed by the Setup bar accesses navigation configuration options. The N.I.C.E. P200 combines separate applications or programs. You can configure each application. See “Customizing navigation” on page 95. The SETUP icon on the main menu accesses hardware configuration. -
Page 93: Hardware Configuration
N.I.C.E. P200 Hardware configuration The first time you access the N.I.C.E. P200, it displays the SYSTEM INFORMATION screen. Turn the N.I.C.E. P200 on and press the MENU button. The N.I.C.E. P200 displays the main menu. Accesses language and upgrade features... -
Page 94: Changing Screen Brightness
Chapter 6: Customizing Once you display the other configuration options, The N.I.C.E. P200 displays the AUDIO/VIDEO the N.I.C.E. P200 always displays the last option menu. you selected when you tap the SETUP icon on the main menu. To display system information again: Tap the Etc. -
Page 95: Customizing Navigation
N.I.C.E. P200 The N.I.C.E. P200 displays the brightness bar. Customizing navigation These general instructions work for all options. If you’re not already on the main navigation screen, tap the navigation options button (F3). The navigation menu appears. Screen brightness for daytime views... -
Page 96: Maximizing Space For The Map
Chapter 6: Customizing The Setup menu appears. Tap the option name to turn the feature on/off. Multi-option scroll buttons (F2 & F4) Scroll down to display additional options. Tap the return button (F6) to go back to the Setup menu. When you’re finished, tap the exit button (F1). -
Page 97: Shortest Time Or Shortest Distance
The options menu or settings appear. When you’re finished, tap the exit button (F1). Shortest time or shortest distance You can configure the N.I.C.E. P200 to calculate a route based on the shortest distance or the shortest time. On the Setup menu, tap Navigation Preferences. -
Page 98: Avoiding Interstates And Toll Roads
• Tap the Avoid Freeway Yes/No option to display the desired setting. If you don’t like to drive on freeways or wish to avoid toll roads, the N.I.C.E. P200 will calculate a route • Tap the Toll Yes/No button to display the that avoids these roads. - Page 99 N.I.C.E. P200 The Languages menu appears. The navigation declaration screen appears in the selected language. Languages menu Accept button Tap the desired language: English, Spanish or Navigation declaration in Spanish French. Tap the accept button. The map database and verbal guidance are...
-
Page 100: Changing Distance Units
Tap the desired distance unit. The main navigation screen appears. The distance to the next maneuver appears in the upper right of the screen. The N.I.C.E. P200 can The new units setting appears next time you report distances in miles, kilometers and meters, or navigate. -
Page 101: Defining Origin By Pointing
Tap Save as HOME. On the Setup menu, tap User Preferences. The N.I.C.E. P200 displays, “Home Location Saved,” and returns to the use options list. The N.I.C.E. P200 displays the user preference options. Tap Color Scheme. -
Page 102: Returning To Factory Defaults
• Auto. changes from daytime to nighttime color Tap the FACTORY DEFAULT option. scheme automatically based on the current The N.I.C.E. P200 prompts you to confirm that time. this is what you want to do. • Day sets color scheme to tan background. -
Page 103: Care And Updating
Tap the battery button. Do not spray any cleaning agent directly on the LCD. If you accidently drop the N.I.C.E. P200 in water, do not turn the power on until it has fully dried out. -
Page 104: Removing The Battery
Chapter 7: Care and updating The N.I.C.E. P200 displays the battery Remaining Capacity The battery’s capacity to information. hold a charge. This decreases over time with BATTERY INFORMATION repeated recharges. Battery Voltage Measured in millivolts. * Manufacturing Year(Month) : 2007 (02) - Page 105 P200, make sure there is no external power source connected to it. If docked, remove the N.I.C.E. P200 from the cradle. Locked For how to remove the N.I.C.E. P200 from the cradle, see “Undocking a N.I.C.E. P200” on page 63. Unlocked Turn the N.I.C.E. P200 over.
- Page 106 Chapter 7: Care and updating Using the grip ridges, slide the battery cover Remove the battery cover. down. Grip ridges Battery cover lock Back of the N.I.C.E. P200 Battery cover removed Pull up on the tab to remove the battery.
-
Page 107: Installing The Battery
When you receive the DVD, follow the instructions that come with the DVD. Deleting files You delete files from the N.I.C.E. P200 using your Battery terminals in this end computer. Battery slot ready to receive new battery To connect to the computer, follow the steps in “Connect to the computer”... -
Page 108: Checking Navigation Software Versions
Scroll down and tap System Diagnostics. Caution Tap System Information. The N.I.C.E. P200 does not maintain The N.I.C.E. P200 displays the versions of all a Trash or Recycle bin from which navigation-related software. you can retrieve files you may have deleted by mistake. -
Page 109: Connect To The Computer
N.I.C.E. P200 The N.I.C.E. P200 displays the main menu. Definition Firmware is the operating system (OS) or software stored in the N.I.C.E. P200 that controls system features and displays screens and messages. Connect to the computer Using a computer, download the firmware upgrade file from the clarion.com into a folder... -
Page 110: Upgrade The Firmware
Tap the SETUP icon on the main menu. Tap the Etc. button. Mass storage screen Connect the N.I.C.E. P200 to a computer using a USB 2.0 to 5-pin mini cable (not included). When the computer detects the connection, open the N.I.C.E. P200 drive for file viewing. -
Page 111: Verifying Satellite Signal
N.I.C.E. P200 The N.I.C.E. P200 displays the Etcetera screen. Verifying satellite signal This procedure verifies that the N.I.C.E. P200 is receiving the best possible GPS satellite signal. Press MENU, then tap the NAVIGATION icon, and tap the Press-to-accept prompt to enter navigation mode. - Page 112 Chapter 7: Care and updating The N.I.C.E. P200 displays the GPS • GPS diagnostics range should be from 800- Diagnostics screen. 1000. • Local time, latitude, longitude and elevation depend on your current location. • The other parameters, such as satellites visible and used, should be as indicated in the illustration.
-
Page 113: Troubleshooting
Chapter 7: Care and updating Troubleshooting Description Probable Cause Remedy N.I.C.E. P200 does not turn on. The power cord may not be Check power cable. properly connected. Check the fuse in the cigarette lighter adapter. If you’re using the N.I.C.E. P200 away from the cradle, the battery may require charging. - Page 114 N.I.C.E. P200 Description Probable Cause Remedy The N.I.C.E. P200 indicates a You need to reset the GPS. While in navigation mode: different location from my actual Tap the navigation options location. button (F3), then tap Setup. Tap the page down button (F4) twice to scroll down, then tap System Diagnostics.
- Page 115 GPS antenna. Consult your dealer for further assistance. The GPS signal was lost while en The N.I.C.E. P200’s line of sight to Check the signal strength meter. If route. the GPS satellite has been the signal does not return, you can obstructed, such as by entering a manually set the vehicle position.
- Page 116 No sound from the N.I.C.E. P200’s The speaker may be turned off or Press the MENU button; tap internal speaker. redirected to the stereo speakers in Setup, Navigation your car or home.
- Page 117 If powering working. off and back on again fails, press the reset button. See “Resetting the N.I.C.E. P200” on page 118. When trying to update firmware, See “Upgrading the firmware” on the N.I.C.E. P200 displays, “OS page 108.
-
Page 118: Resetting The N.i.c.e. P200
Resetting the N.I.C.E. P200 If the system stops working, insert the end of a bent paper clip into the reset button hole on the left side of the N.I.C.E. P200 as you face it from the front. Reset button hole N.I.C.E. -
Page 119: Reference
N.I.C.E. P200 Main menu reference 8. Reference Main menu icons. Buttons Enters navigation mode. For navigation options, see “Setup” on These buttons are located below the LCD. page 134. Press and release the power button briefly Accesses audio and video options. For to turn the power on and off in sleep mode. -
Page 120: Main Menu Buttons
Navigation reference Close the main menu. Touch-screen buttons Exit button (F1), returns immediately to the navigation map. Connect the N.I.C.E. P200 to your computer. Zoom in button (F1), expands map detail. Turn the N.I.C.E. P200’s internal speaker Multi-option scroll button (F2), for on and off. - Page 121 N.I.C.E. P200 Multi-option scroll down (forward) Keyboard button (F5), accesses the button (F4), displays next four options. touch-screen keyboard. Start typing the first one or two letters on the touch- Map button (F4), changes map screen keyboard, then tap the accept perspective.
-
Page 122: Start Route Guidance
Chapter 8: Reference Start Route Guidance Compass, indicates which direction on the map is north. To configure the To access these options, press the MENU button, compass, see “Changing which way is tap the Press-to-accept button, tap the navigation up” on page 52. options button (F3), then tap Start Route Guidance. - Page 123 Code, the system displays a street list When you’ve defined the state, city and street, the automatically. N.I.C.E. P200 prompts you to narrow your destination by defining a specific address or City Name: displays a list of all cities in the intersection.
-
Page 124: Edit Address Book
“DMV.” When you select a category, postal code or phone number, the N.I.C.E. P200 prompts you to define To access these options from the navigation screen how to view the points of interest: by distance tap the navigation options button F3. -
Page 125: Trail Book
Lets you create a name for a new journey (trail) using the touch-screen keyboard. As you travel, the N.I.C.E. P200 drops virtual bread crumbs along your Delete route. Displays the list of addresses and removes the Stop Trail: turns the recording of the current trail off. -
Page 126: Current Location Uses
Deletes a trail. tap the navigation options button (F3), then tap Setup. Current location uses When you tap the map, the N.I.C.E. P200 marks the spot with crosshairs. Tapping the current location Navigation Preferences button (F5) displays four possible uses for the Simulation currently-marked location. - Page 127 N.I.C.E. P200 Distance: calculates route based on Display Options shortest distance. Avoid Freeway Heading Up: sets the top of the map display to the Yes: calculates route without taking you on direction in which you are traveling. This is a freeway (interstate).
-
Page 128: User Preferences
Selects the default scale for the map. Choices are: 1/32. 1/16/, 1/8, 1/4, 1/2, 1, and 4. Set Vehicle Position Although the N.I.C.E. P200 updates the scale icon Address/Intersection: moves the red arrow to a immediately, the new scale takes effect the next... -
Page 129: Detour Management
N.I.C.E. P200 As you enter the address, N.I.C.E. P200 GPS VP Reset: resets the GPS signal. prompts with possibilities to speed entry. System Information: displays the current software Point of Interest: moves the red arrow to a special version. public place, such as an airport, grocery Detour management store, hospital, etc. -
Page 130: Cancel Route
For example, if the current route requires you to drive for 30 miles on the interstate, and you specify Enters music mode. For music a 10-mile detour, the N.I.C.E. P200 calculates a buttons, see below. For music icons, route that brings you back to the interstate after see “Music and video mode icons”... -
Page 131: Music And Video Buttons
N.I.C.E. P200 Music and video buttons Previous button, selects the previous track or video in the folder. Folder button, displays the music or video folders. Next button, selects the next track or video in the folder. Music and video mode button, alternates... -
Page 132: Equalizer Icons
Chapter 8: Reference Stereo/mono icons Play all tracks in the folder in random order. Stereo sound production. Equalizer icons Monaural (mono) sound production. Default equalizer sound field configuration (no sound enhancement). Stereo/mono undetected; appears Equalizer sound field configured for rock momentarily before a music track begins to music. -
Page 133: Utility Icons
N.I.C.E. P200 Calculator: for more information, see Music controls button, overlays the right “Using the calculator” on page 89. side of the screen with music controls so you can listen to music as you view the slide show. Stop watch: for more information, see Configuration button, accesses audio/ “Using the stop watch”... -
Page 134: Text Reader Buttons
Chapter 8: Reference Next page, displays the next page of five Next button, displays the next page of contacts text. Text reader buttons Calendar buttons Folder button, displays the text file Information button, returns you to the folders. calendar view. Previous button, displays the previous Screen size button, removes the control month. -
Page 135: Power Options
Power options Number of seconds of inactivity before LCD Automatically on when turns off. Values are: 10, N.I.C.E. P200 is 15, 20 or 30 seconds. undocked and off when it is docked. You cannot Audio/video (A/V) options change these options Controls video out. -
Page 136: Etcetera Options
Chapter 8: Reference Etcetera options Defines how images appear on the screen. Upgrades the firmware. FULL The stretches the image to fill the entire screen. Returns all setup values 16:9 Wide screen. to their factory settings. 4:3 Normal screen. Automatically controls tiny LEDs embedded in Controls the length of the MENU, MUTE, VOL-... -
Page 137: Text Reader Options
N.I.C.E. P200 Text reader options You must have a text file open to access these options. Press the MENU button, tap UTILITY. tap TEXT READER icon, then tap configuration button. Selects the font size for reading. Options are: 14, 20, and 26 points. -
Page 138: Specifications
Chapter 8: Reference Specifications Dimensions (W x H x D): 4.72” (120mm) x 3.58” (91mm) x 1.02” (26mm) Operating system Windows® CE version 5.0 Embedded processor High Performance Embedded 32-bit RISC (ARM 9 Core) Memory 64MB SDRAM, 32MB Flash Memory, 20GB Hard Disk Drive Power source 12v ~24v DC (using cigarette jack), 5v DC (using AC/DC adapter) Map database... - Page 139 N.I.C.E. P200 Address book 38 Index editing name 125 updating 56 Address/Intersection 38 Antenna, external GPS 13 AC3, supported audio format 65 Applications Accept button (keyboard) 43 calculator 89 Accessories calendar 90 audio/video output cable (NAVCK) 13 contact management 83...
- Page 140 Avoid Current Road 129 music/video 131 Avoid Freeway 127 MUTE 10 Avoid Next Road 130 navigation 20 Avoid Specific Road 130 on the N.I.C.E. P200 119 photo 22 power 10 reset 10 Battery 9 text 134 charge icon 23 video 23...
- Page 141 11 Compression lever 31 compression lever 31 Computer connector at bottom front 30 copying files from 79 docking N.I.C.E. P200 into the 29 disconnecting from 82 GPS antenna (optional) 31 Connectors lock switch 30 headphone jack 10 suction cup 31 on cradle 30 undocking the N.I.C.E.
- Page 142 User’s Guide Crosshairs 47 Destination Current location defining 17 defining 55 finding in an unfamiliar city 39 options 126 pointing to 47 Customizing travel to 49 navigation 95 Detour screen brightness 94 Distance 130 viewing options 101 options 51 taking 51 DEVICE LED 136 Diagnostics Database of maps, updating 107...
- Page 143 N.I.C.E. P200 Freecell 78 Freeways, avoiding 26 Edit Address Book 58 Embedded processor 138 Enlarged Intersection 53 Games, playing 78 Entertainment Global positioning 34 features and options 63 setup options 92 antenna on cradle 31 EQ MODE 70 antenna port 11 Equalizer icons 132 can’t find satellite 116...
- Page 144 User’s Guide Headphone jack 10 Intersection HOLD switch 10 enlarged 53 Home installation 33 selecting 46 Interstates, avoiding 26 Icons equalizer 132 JAZZ equalizer icon 70 GPS signal strength 54 Journey main menu 119 canceling 54 MEDIA 130 previewing 55 music mode 21 recording where you’ve been 61 navigation 20...
- Page 145 N.I.C.E. P200 Language, setting 98 Main menu icons 119 Lanyard loop 10 Maneuver, distance to next 27 LCD 10 Map 129 adjusting brightness 94 change perspective 52 LCD BRIGHTNESS 135 colors 101 LCD OFF TIME 135 database 138 destination option 38...
- Page 146 32 MUTE button 10 MP2, supported audio format 65 MP3, supported audio format 65 MPEG-1, supported video format 66 N.I.C.E. P200 9 Music back view 11 adding to a slide show 77 carrying with lanyard 10 and video icons 131...
- Page 147 N.I.C.E. P200 undocking 63 reference 120 upgrading firmware 108 route calculation 19 NAVBATTERY 9 screen 50 NAVCK (audio/video output cable) 13 scrolling 42 NAVDAPT2 (power cord) 9 setup 126 NAVGPS (external antenna) 13 SETUP options 92 Navigation Setup reference 126...
- Page 148 User’s Guide serial 11 USB 2.0 10 Parts list 9 Postal Code 122 Power connecting to 79 button 10 disconnecting from 82 configuration options 64 Perspective, changing map 52 connecting in vehicle 31 Photo cord for home (110v) 9 button reference 132 cord for vehicle 9 controls 75 DC IN, connecting 32...
- Page 149 N.I.C.E. P200 Preferences, navigation 95 Route Previous Destination 38 calculating 26 Previous origin 125 canceling 54 Problem solving 113 changing 50 guidance, reference 122 guidance, starting 37 planning 26 Quick start 9 previewing 55 recording where you’ve been 61 Random order to play tracks 132...
- Page 150 User’s Guide Scroll Signal arrows 17 remedy for weak signal 49 single-option scrolling 42 strength 115 Sensor, infrared for remote 10 Simulation 26 Serial port 11 Sleep mode 25 Set Distance Units 128 Slide show Set Origin 128 adding music 77 Set Vehicle Position (current location) 126 changing speed 77 Set Vehicle Position (setup option) 128...
- Page 151 N.I.C.E. P200 Specifications 138 Standby state 25 Temperature 138 Start Route Guidance 122 Text State/Province Name 40 buttons 134 Status Bar Display 127 reader options 137 Stereo/monaural icons 132 reading mode 85 Stop watch application 89 reading on the screen 28...
- Page 152 Typeface, changing for reading text 87 button reference 131 changing volume 67 controls 23 Units (distance), changing 100 controls overlay 23 Upgrading N.I.C.E. P200 firmware 108 deleting files 107 USB 2.0 formats 66 button 69 main screen 23 button on main menu 14...
- Page 153 N.I.C.E. P200 modes defined 67 output 74 WAVE (PCM), supported audio format 65 playing 71 Windshield mounting bracket 9 repeat options 73 WMA, supported audio format 65 VIDEO OUT 135 WMV, supported video format 66 Voice guidance 10 Wrong turn, recovering from 50...
-
Page 154: Limited Warranty Information
REQUIRED FOR WARRANTY SERVICE OF THIS For USA and Canada only PRODUCT. IN THE CASE OF THE TWO (2) YEAR Except as noted, Clarion products purchased from an LIMITED WARRANTY FOR THE CLARION authorized Clarion Dealer are warranted against all defects... - Page 155 TO THE EXTENT ALLOWED BY APPLICABLE LAW. Clarion or visit our web site for a listing of Authorized IN THE EVENT AND TO THE EXTENT APPLICABLE Warranty Service Centers in your area. You may also...
- Page 156 User’s Guide...
- Page 157 N.I.C.E. P200 Guide d’utilisateur...
- Page 158 Caractéristiques du menu principal ..... 6 Déconnexion du N.I.C.E. P200 ......26 Démarrage rapide de la navigation .
- Page 159 7. Entretien et mise à jour ....44 Nettoyage du N.I.C.E. P200 ......44 Entretien de la pile .
-
Page 160: Démarrage Rapide
ACL à transistor en couches minces (TFT), affi che les cartes et les divertissements Bouton de retenue Loupe de Cordon Verrouille/déverrouille l’écran tactile et Pour transporter le N.I.C.E. P200 les boutons Sortie de 3,5 mm pour casque Pour écoute privée Capteur infrarouge USB 2.0 (miniport à... -
Page 161: Vue Arrière Du Socle Et Du N.i.c.e. P200
Ensembles de piles additionnelles Comment démarrer 1. Appuyez brièvement sur la touche d’alimentation. Si vous utilisez le N.I.C.E. P200 pour la première fois ou si Verrouillage du couvercle de pile vous avez coupé l’alimentation en appuyant sur la touche Ici en position verrouillé... -
Page 162: Caractéristiques Du Menu Principal
2. Lisez les directives de navigation et appuyez sur le Emplacement actuel bouton « Appuyer pour accepter ». Vous voilà prêt à utiliser le N.I.C.E. P200 comme outil de navigation. Caractéristiques de navigation Ces étapes démontrent la procédure générale à suivre. - Page 163 N.I.C.E. P200 Sortie (F1): Retour à la navigation Le N.I.C.E. P200 affi che la liste des états et des provinces. Boutons Page suivante (F2) et Page précédente (F4) : Servent à voir la page d’option suivante ou précédente Retour (F6): Retour au menu précédent Principales options de navigation Flèches de défi...
-
Page 164: Écran Principal De Navigation
(par exemple, vous êtes à San Diego, en Californie postal, le nom de la ville ou de la rue, puis servez- et désirez aller à Honolulu, à Hawaii), le N.I.C.E. P200 affi che vous du clavier pour défi nir l’adresse. -
Page 165: Commandes Du Lecteur De Musique
Commandes du lecteur de musique Principales commandes musicales Mode musical actuel Icône stéréo/monaural Piste actuelle Volume actuel Répertoire actuel État actuel de la pile Arrête et joue la musique Durée totale Réglages d’égalisateur Temps écoulé Arrête la sélection Accès aux répertoires Choisit la chanson précédente musicaux dans le répertoire... -
Page 166: Commandes Du Lecteur Vidéo
Chapitre 1: Démarrage rapide Commandes du lecteur vidéo Le N.I.C.E. P200 empêche la lecture de vidéos lorsque le véhicule est en mouvement. Commandes vidéo principales Vidéo en cours de lecture Mode vidéo actuel Dossier actuel Volume actuel Charge actuelle de la pile Bouton fi... -
Page 167: Mettre Le N.i.c.e P200 En Marche Et L'éteindre
N.I.C.E. P200 simule la route • L’écran affi che « Entrée en mode veille ». indépendamment du GPS. • Le N.I.C.E. P200 se souvient de votre mode actuel d’utilisation tel que le mode navigation. Je n’aime pas les autoroutes. Est-ce que le N.I.C.E. P200 •... -
Page 168: Questions De Divertissement
• Le disque interne peut stocker 10 Go de données. guidage par la voix (F6). Lorsque j’enlève le N.I.C.E. P200 de son socle et que je Comment savoir sur quelle route je me trouve le transporte dans ma poche de chemise, les chansons actuellement? alternent sans que je le veuille lorsque je touche l’écran. -
Page 169: Installation
Ne pas suivre ces précautions pourrait causer un Avant du socle accident ou des blessures corporelles. Ne pas installer le N.I.C.E. P200 de façon à ce qu’il 6. Déplacez le bouton de verrouillage en position bloque votre vue à travers le pare-brise ou votre verrouillé. -
Page 170: Brancher Le Cordon D'alimentation Du Véhicule
Installation à domicile Brancher le cordon d’alimentation du véhicule À domicile, le N.I.C.E. P200 est alimenté par la pile ou par À bord d’un véhicule, le N.I.C.E. P200 est alimenté par le un cordon d’alimentation de 110 V et un adaptateur. -
Page 171: Navigation
Appuyez pour accepter ». Écran de déclaration de navigation NOTE Puisque le GPS est situé dans le support, le N.I.C.E. P200 doit être installé dans le support NOTE pour communiquer avec le satellite GPS. Appuyez lentement sur les icônes et boutons de l’écran tactiles. -
Page 172: Comment Déterminer Sa Destination
à la AVERTISSEMENT page 20 à « Comment pointer une destination ». Si vous avez choisi une des autres options, le N.I.C.E. P200 Déterminez toujours votre destination quand votre affi che une liste d’options supplémentaires. -
Page 173: Comment Déterminer Une Adresse Spécifi Que
N.I.C.E. P200 • Destinations précédentes La base de données du N.I.C.E. P200 contient une liste de Cette option énumère vos 40 dernières destinations. deux millions de points d’intérêts, classés par catégories, tel que centre-ville, aéroport, restaurant, et information En voyage, utilisez cette méthode pour obtenir rapidement touristique. -
Page 174: Pour Défi Ler Dans Les Listes
Le N.I.C.E. P200 vous demande de choisir la méthode d’affi chage des destinations. • Visionner jusqu’à 4 options à la fois, en utilisant les boutons de défi... - Page 175 Courte liste de rues pour le rayon d’une adresse Bouton de caractères Bouton de caractères En haut de cette liste, le N.I.C.E. P200 affi che un rayon pour spéciaux réguliers les rues dans la liste. Une vérifi cation rapide de l’adresse que vous recherchez devrait confi...
-
Page 176: Comment Pointer Une Destination
Chapitre 3: Navigation 3. Appuyez sur le bouton Sélectionner (F5). Le N.I.C.E. P200 affi che la destination choisie dans une liste d’options. 4. Appuyez sur le nom pour confi rmer la destination. Si vous avez commencé en appuyant sur le bouton Clavier avec un exemple de rayon d’une adresse... -
Page 177: Planifi Er Son Trajet Visuellement
Pour effectuer un détour du support et N.I.C.E. P200 » à la page 5. Une fois que le N.I.C.E. P200 a calculé la route, le chemin Planifi er son trajet visuellement est présumé libre. Pour faire un détour volontairement afi n d’éviter un accident, ou pour toute autre raison, suivez les... -
Page 178: Modifi Er L'orientation De La Carte
Quand vous êtes à un mille ou moins de la prochaine toujours vers le haut de l’écran. intersection, le N.I.C.E. P200 affi che sur le côté droit de Ce réglage fait que la carte se déplace davantage pendant l’écran une vue agrandie de l’intersection. -
Page 179: Pour Visionner Un Trajet
L’ajout d’adresses dans le carnet d’adresses implique de sélectionner une adresse dans la base de données du 1. Si nécessaire, appuyez sur votre emplacement sur N.I.C.E. P200 et de lui assigner un nom, par exemple « la carte. Aéroport », « Musée ». -
Page 180: Comment Ajouter Une Adresse
3. Appuyez sur le nom pour confi rmer l’emplacement. • Ajouter l’emplacement actuel vous permet d’entrer Le N.I.C.E. P200 affi che le nom de la rue dans la boîte votre emplacement actuel. Nommer l’entrée. • Éditer vous permet de changer le nom associé à... -
Page 181: Pour Commencer Un Trajet
L’écran de navigation principal apparaît. en mémoire. Comment enregistrer un trajet En plus d’utiliser le N.I.C.E. P200 comme guide, vous pouvez l’utiliser pour enregistrer les endroits que vous avez visités. Le N.I.C.E. P200 peut laisser des miettes de pain virtuelles sur votre trajet. -
Page 182: Mode De Divertissement
Pour les étapes, consultez « Pour visionner un trajet» à à des fi ns de divertissement. la page 23. Pour la navigation, le N.I.C.E. P200 doit être installé dans le support du GPS. Pour le divertissement ou pour utiliser les 2. Appuyez sur le bouton d’options de navigation (F3), options, vous pouvez retirer le N.I.C.E. -
Page 183: Formats Audio Et Vidéo Pris En Charge
4 durées en toutes les combinaisons, mais seulement avec cette liste secondes. de codecs. Si vous transférez au N.I.C.E. P200 un fi chier utilisant un autre codec, le fi chier ne fonctionnera pas. 5. Appuyez sur le bouton d’alimentation encore une fois pour valider votre sélection. -
Page 184: Verrouillage Des Boutons Du Panneau Avant
Pour décider du mode de lecture de vos pistes, appuyez sur le bouton Mode musical. La lecture 2. Pour que le N.I.C.E. P200 demeure à portée de la audio et vidéo alterne parmi ces modes. main, attachez un bracelet ou une corde à l’anneau (sur le côté... -
Page 185: Pour Écouter De La Musique En Se Déplaçant À Voiture
Pour écouter de la musique en se déplaçant à Égalisation de l’audio voiture L’égaliseur intégré du N.I.C.E. P200 peut être confi guré pour obtenir un son doux basé sur le type de musique que 1. Dans le menu principal, appuyez sur l’icône de vous écoutez le plus souvent. -
Page 186: Pour Visionner Un Fi Chier Vidéo
3. Appuyez sur l’icône FILM. • Appuyez sur le X dans le coin droit pour fermer Le N.I.C.E. P200 affi che une liste des fi chiers vidéo les commandes de recouvrement vidéo. emmagasinés dans le dossier Film. Pour supprimer un fi chier vidéo, consultez « Supprimer... -
Page 187: Pour Changer Les Dimensions De L'image Vidéo
DVD Ripper • DivX 6,1 Converter Les autres programmes de conversion créent un fi chier .vob qui ne peut être lu par le N.I.C.E. P200. Utilisez toujours un Bouton de confi guration des programmes énumérés ci-haut. Liste des vidéos 2. Convertissez le fi chier.vob en un des formats vidéo/ audio pris en charge par le N.I.C.E. -
Page 188: Comment Commencer Un Diaporama
Chapitre 4: Mode de divertissement 2. Dans le menu principal, appuyez sur l’icône MÉDIA. 1. Appuyez sur le bouton de confi guration. Le N.I.C.E. P200 affi che les options de confi guration AUDIO/ Le N.I.C.E. P200 affi che les icônes MÉDIA. VIDÉO. -
Page 189: Comment Changer La Piste Musicale
La copie de fi chiers depuis l’ordinateur personnel vers le Utilisez l’écran tactile pour interagir dans le jeu. N.I.C.E. P200 s’effectue à l’aide d’un port USB 2.0 et d’un minicâble à 5 broches (non fourni). Ce câble est disponible dans toute boutique de matériel électronique, dans la section des articles pour la photographie numérique. -
Page 190: Copie De Fi Chiers
3. Appuyez sur le bouton USB. 3. Créez des sous-répertoires pour chaque répertoire principal afi n d’organiser vos fi chiers. Le N.I.C.E. P200 affi che la fenêtre de la mémoire auxiliaire. 4. Glissez-déplacez ou sauvegardez les fi chiers de l’ordinateur au répertoire du N.I.C.E. P200. -
Page 191: Visualisation Des Informations De Contacts
TEXTE. au format .txt . Le N.I.C.E. P200 affi che la liste des fi chiers textes. Copier les fi chiers .txt de l’ordinateur au répertoire Texte du N.I.C.E. P200. Voir « Copier des fi chiers » à la page 34. -
Page 192: Modifi Cation De La Taille De La Police
2. Si la liste des fi chiers textes n’apparaît pas immédiatement, appuyez sur la touche RÉPERTOIRE. Visualisation plein écran Le N.I.C.E. P200 affi che le répertoire des fi chiers textes. • Appuyez sur l’écran pour retourner au petit écran. •... -
Page 193: Aperçu Rapide Du Document Texte
(secondes) de feuilletage. 1. Lorsque le texte s’affi che, appuyez sur la touche CONFIGURATION. Le N.I.C.E. P200 affi che les options de texte. Écran de la calculatrice 2. Appuyez sur MINUTAGE - DIAPO pour modifi er la Effectuez les opérations de calcul traditionnelles à... -
Page 194: Utilisation De L'agenda
Visualisation de l’horaire Depuis le menu principal, appuyez sur l’icône UTILITAIRES et appuyez ensuite sur l’icône AGENDA. Le N.I.C.E. P200 fait une pause pour télécharger et affi cher l’information des rendez-vous du mois courant. Mois prochain Horaire des rendez-vous pour les prochains jours. -
Page 195: Confi Guration Du Périphérique
Dès que vous affi chez les autres options de confi guration, le N.I.C.E. P200 affi che toujours la dernière option que vous Confi guration du périphérique avez choisie lorsque vous appuyez sur l’icône RÉGLAGE du menu principal. -
Page 196: Modifi Cation De La Luminosité De L'écran
Options audio/vidéo Menu de navigation 3. Appuyez sur LUMINOSITÉ DE L’ÉCRAN. Le N.I.C.E. P200 affi che la barre de luminosité. 2. Appuyez sur RÉGLAGE. Le menu de réglage s’affi che. Boutons de défi lement pour les options multiples (F2 et F4) Luminosité... -
Page 197: Maximisation De L'espace Cartographique
à péage pour affi cher le réglage désiré. La confi guration du N.I.C.E. P200 permet le calcul d’un itinéraire selon la distance la plus courte à parcourir ou le 3. Appuyez sur la touche QUITTER (F1) lorsque vous temps de parcours plus rapide. -
Page 198: Choix De La Langue
D’ORIGINE lorsque la position de départ du véhicule se situe dans un immeuble de grande hauteur ou sur un site d’une grande usine de fabrication et que le N.I.C.E. P200 n’a pas accès au signal satellite. 1. Appuyez sur POSITION DU VÉHICULE dans le menu RÉGLAGE. -
Page 199: Activer Ou Désactiver Le Guidage Vocal
3. Confi rmez la localisation en appuyant sur le nom. 4. Appuyez sur SAUVEGARDER le POINT DE DÉPART. Le N.I.C.E. P200 affi che « Point de départ sauvegardé » et retourne à l’écran d’utilisation de l’option Listage. Options de schémas de couleurs Activer ou désactiver le guidage vocal 3. -
Page 200: Entretien Et Mise À Jour
Le N.I.C.E. P200 affi che l’information de la pile 2. Retirez le N.I.C.E. P200 de son socle s’il y est installé. Voir la section « Déconnexion du socle du N.I.C.E. P200 « à la page 26 pour plus d’informations. 3. Retournez le N.I.C.E. P200. -
Page 201: Installation De La Pile
Arrière du N.I.C.E. P200 données cartographiques au format DVD. Procurez-vous 6. Retirez le couvercle de la pile. les mises à jour des cartes sur le site web de Clarion : www.clarion.com Onglet Suivez les instructions contenues sur le DVD dès sa réception. -
Page 202: Vérifi Cation Des Versions Du Logiciel De Navigation
Suivez les étapes suivantes, à la demande du service à la clientèle, pour affi cher les numéros de versions de mises à Le N.I.C.E. P200 affi che l’écran de la mémoire auxiliaire. jour du logiciel exploité. 1. Appuyez sur la touche des OPTIONS DE NAVIGATION (F3) à... -
Page 203: Mise À Jour Du Micrologiciel
N.I.C.E. P200 Le N.I.C.E. P200 affi che la fenêtre de diagnostics du GPS Mise à jour du micrologiciel 1. Appuyez sur la touche FERMER du N.I.C.E. P200. 2. Appuyez sur l’icône RÉGLAGE du menu principal. 3. Appuyez sur la touche ETC. -
Page 204: Dépannage
Vérifi er le fusible de l’adaptateur de l’allume-cigare. La charge de la pile est insuffi sante pendant l’utilisation du N.I.C.E. P200 hors de son socle de fi xation. Recharger la pile. Retirer le N.I.C.E. P200 de son support de fi xation et réinstallez-le. - Page 205 Voir la section « Mise à jour du micrologiciel » à la page 111. Réinitialisation du N.I.C.E. P200 Lorsque le système cesse de fonctionner, placez le N.I.C.E. P200 face à vous et insérez la pointe d’un trombone déplié dans l’orifi ce du bouton de réinitialisation situé à gauche.
-
Page 206: Référence
Boutons du menu principal 8. Référence Icône Close : Ferme le menu principal. Boutons Icône USB : Branche le N.I.C.E. P200 à votre ordinateur. Ces boutons sont situés sous l’ACL. Icône Speaker : Met le haut parleur interne du Icône bouton d’alimentation : Appuyez brièvement N.I.C.E. -
Page 207: Commencer Le Guidage Par La Voix
Lorsque vous avez boutons de fonction (F1-F6) ou les désactive. défi ni l’état ou la province, la ville et la rue, le N.I.C.E. P200 vous indique de limiter votre destination en défi nissant une Désactiver les boutons donne plus de place... -
Page 208: Modifi Er Le Carnet D'adresses
Quand vous choisissez une catégorie, un code postal ou Affi che les noms d’emplacement pour les éditer. Vous un numéro de téléphone, le N.I.C.E. P200 vous indique de pouvez éditer seulement les noms associés à l’adresse. défi nir la façon dont vous désirez voir les points d’intérêts : Pour changer tout autre composante, supprimez l’adresse... -
Page 209: Utilisation De L'emplacement Actuel
Enregistrer comme DOMICILE Marche Règle l’emplacement marqué en tant que votre domicile. Calcule une nouvelle route lorsque vous désactivez votre Ceci est le point de départ que le N.I.C.E. P200 utilise route actuelle. lorsqu’il ne peut localiser le satellite. Arrêt... -
Page 210: Préférences De L'utilisateur
Sélectionne l’échelle de la carte par défaut. Les choix sont : 1/32, 1/16/, 1/8, 1/4, 1/2, 1, et 4. Options d’affi chage Même si le N.I.C.E. P200 met à jour immédiatement l’icône d’échelle, la nouvelle échelle prend effet la prochaine fois Vers le haut que vous entrez en mode navigation à... -
Page 211: Gestion Du Détour
Par exemple, si la route actuelle demande que vous Bouton pause, arrête temporairement la conduisiez sur l’autoroute durant 30 kilomètres, et que sélection actuelle. vous spécifi ez un détour de 10 kilomètres, le N.I.C.E. P200... -
Page 212: Icônes Du Mode Musical Et Vidéo
Chapitre 8: Référence Bouton arrêt, arrête la sélection en cours de Icônes stéréo/mono lecture. Production d’un son stéréo. Bouton précédent, sélectionne la piste ou la vidéo précédentes dans le répertoire. Production d’un son monaural (mono). Bouton suivant, sélectionne la prochaine piste ou la prochaine vidéo dans le répertoire. -
Page 213: Boutons De Contacts
Page suivante, affi che la page suivante, Gestion d’énergie (marche): En comprenant cinq contacts. marche, automatiquement quand le N.I.C.E. P200 n’est pas dans Boutons du lecteur de texte son berceau, et arrêté lorsqu’il est dans son berceau. Vous ne pou- Bouton répertoire, affi... - Page 214 Chapitre 8: Référence MINUTERIE D’ARRÊT DE L’ACL Autres options (15 secondes) : Nombre de secon- des d’inactivité avant que l’ACL MISE À JOUR DU LOGICIEL : Met ne s’éteigne. Les valeurs sont : à jour le logiciel. 10, 15, 20 ou 30 secondes. RÉGLAGES PAR DÉFAUT DE LA Options audio/vidéo (A/V) COMPAGNIE: Retourne toutes les...
- Page 215 à un appareil numérique de catégorie B, en vigueur sous le paragraphe 15 des règles du FCC sur l’installation dans un environnement Le N.I.C.E. P200 possède une mémoire de 10 Go pour la musique, résidentiel. Si le N.I.C.E. P200 n’est pas installé conformément à ces les vidéos et les photos.
- Page 216 Clarion. 6. Le produit doit être envoyé à Clarion dans son emballage original ou dans un emballage équivalent. Le colis doit être entièrement assuré et tous les frais de transport doivent être prépayés. Clarion n’assumera aucune responsabilité en cas de perte ou de dommages encourus lors du transport.