
Related Manuals for Eton FIELD RADIO 550


Summary of Contents for Eton FIELD RADIO 550
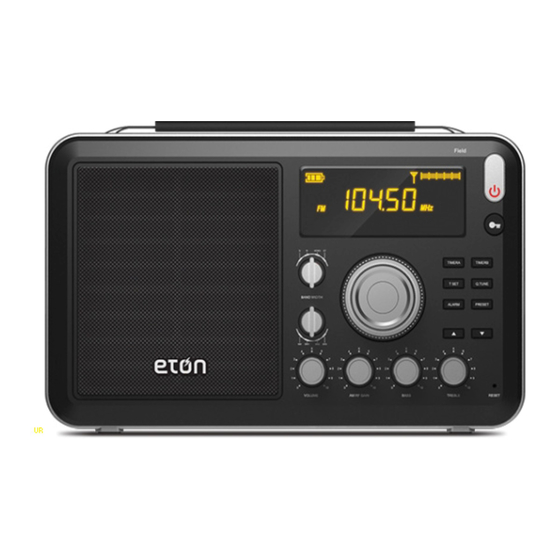
- Page 1 FIELD RADIO 550 The AM/FM/Shortwave radio that’s outstanding in its field OWNER’S MANUAL...
-
Page 2: Installing Batteries
FIELD OWNER’S MANUAL MEET THE FIELD Thank you for purchasing the Etón FIELD AM/FM/SW Radio. We want you to thoroughly enjoy the use of this product. To take advantage of its many excellent and unique features, we urge you to carefully read the user’s manual. -
Page 3: Using Ac Power
FIELD OWNER’S MANUAL LCD; if flashes, it indicates that batteries are low and the radio will soon turn off automatically. USING AC POWER Plug AC adapter into the socket on the right side of the radio. Use only the AC adapter supplied. When the AC adapter is plugged in, the will show in the upper left corner of the display. -
Page 4: Tuning In Fm Stations
FIELD OWNER’S MANUAL • Long press the UP or DOWN button to seek the next station up or down in frequency • Press the PRESET button to tune to the next preset station Short press the Q. T UNE button to increment quickly up the frequency range. - Page 5 FIELD OWNER’S MANUAL DATA: Clock/Date/program call information, if no information, just display “NO DATA”. If the information is available, the display format is: Station call Weekly Month-Day-Year Hour:Minute Weekly format: “MON”, “TUE”, “WED” “THU”, “FRI” “SAT”, “SUN”, For example, the LCD will roll to display as WGSS, TUE 03- 25-2014 02: 1 5, TUNING INTO MW (AM) STATIONS Place the top BANDWIDTH switch into the W or N position...
- Page 6 FIELD OWNER’S MANUAL Long press to switch 9K or 10K, the LCD displays 9K or 10K. USING THE SW RF GAIN KNOB When listening to SW broadcast stations, this control knob should be dialed to or near position 5. If you are listening to a weak station, increase the gain, when listening to extremely strong stations, decrease the gain.
-
Page 7: Antenna Dx/Local Switch
FIELD OWNER’S MANUAL ANTENNA DX/LOCAL SWITCH If the station you’re listening to is so strong that it sounds distorted, turn this switch to the LOCAL position. Otherwise, leave it on DX, which stands for maximum distance. TUNING IN SW (shortwave) STATIONS Turn on radio. -
Page 8: Optimizing Shortwave Reception
FIELD OWNER’S MANUAL Meter Band (m) Frequency Best Time of Day 3,200-3,400 kHz 3,900-4,000 kHz 4,750-5,050 kHz night 5,800-6,200 kHz night 7,100-7,500 kHz night 9,500-10,000 kHz night 11,650-12,200 kHz 15,100-15,800 kHz 17,550-17,900 kHz 18,900-19,020 kHz 21,450-21,850 kHz 25,600-26,100 kHz OPTIMIZING SHORTWAVE RECEPTION Shortwave enables listening to broadcasts over vast distances including other countries and continents. - Page 9 FIELD OWNER’S MANUAL To learn about shortwave we recommend the publication below, published yearly and available from major booksellers. Additionally, the Internet is a great resource for learning about shortwave. Type ‘shortwave reception’ into your favorite search engine. WORLD RADIO TV HANDBOOK Published in the USA by Watson-Guptill Publications, 770 Broadway, 7th Floor, New York, NY 10003-9595.
-
Page 10: Setting The Clock
FIELD OWNER’S MANUAL RETRIEVING STATIONS FROM PRESETS With the radio on, press the PRESET button continuously to retrieve the stations that have been stored. Notice that the frequency in the display changes and the ‘Preset’ number shows on the right side of the display. A station cannot be erased from memory. - Page 11 FIELD OWNER’S MANUAL Display Timer A/Timer B Short press TIMER A or TIMER B button, “ ” or “ ” icon will flash indicating which timer’s time is currently being displayed. SETTING TIMER A / TIMER B values Long press TIMER A or TIMER B until the timer is flashing. Press ▲...
- Page 12 FIELD OWNER’S MANUAL Pressing any button other than the power button will activate the Snooze function. The icons will continue to flash but the buzzer or radio will be off during the Snooze time. After 5 minutes, the buzzer or radio will come on again.
-
Page 13: Setting Default Backlight Brightness
FIELD OWNER’S MANUAL “ ”icon, which indicates the unit will turn off automatically after 60 seconds. If you want to change sleep timer, press Power & Sleep button continuously when the “60” and “ ” icon is displayed, the digit will be changed to your desired time. The “ON”... -
Page 14: Enabling And Disabling Button Feedback
FIELD OWNER’S MANUAL ENABLING AND DISABLING BUTTON FEEDBACK With the Radio off, Press and hold the ALARM button, the text BUZZER ON will be displayed. In this mode, a button press feedback beep will be played each time, the user presses a button. -
Page 15: External Antennas
FIELD OWNER’S MANUAL is connected to the Line-in socket the word “AUX” will be displayed on the screen. The Line-Out socket can be used to feed audio from the FIELD to amplified external speakers. The internal speaker will still be functional when a device is connected to the Line-Out socket. - Page 16 FIELD OWNER’S MANUAL to achieve maximum performance. This antenna can be purchased by contacting Eton or one of our distributors. Call us for details. TO RESET THE FIELD If the radio malfunctions or doesn’t work properly, insert a paper clip into the hole on the front lower right side. Make sure the paper clip is inserted until the display reappears.
- Page 17 FIELD OWNER’S MANUAL WARNING • Do not expose this appliance to rain or moisture. • Do not submerge or expose for extended period to water. • Protect from high humidity and rain. • Only operate within specified temperature range (0 °C to 40 °C).
-
Page 18: Warranty Registration
FIELD OWNER’S MANUAL ENVIRONMENT Disposal According to the European Directive 2002/96/EC all electrical and electronic products must be collected separately by a local collection system. Please act according to your local rules and do not dispose of your old products with your normal household waste. Please dispose of all types of batteries per your Government, State or Local rules and/or regulations. -
Page 19: Service For Your Product
FIELD OWNER’S MANUAL SERVICE FOR YOUR PRODUCT To obtain service for your product, we recommend first contacting an Etón service representative at 800- 872-2228 US, 800-637-1648 Canada or (650) 903-3866 for problem determination and trouble-shooting. If further service is required, the technical staff will instruct how to proceed based on whether the radio is still under warranty or needs non-warranty service. -
Page 20: Installation Des Piles
FIELD MANUEL D’UTILISATION DÉCOUVREZ LA FIELD Nous vous remercions d’avoir acheté la radio FIELD AM/ FM/OC Etón. Nous voulons que vous profitiez pleinement de l’utilisation de ce produit. Afin de profiter de ses nombreuses fonctionnalités uniques et excellentes, nous vous encourageons à lire attentivement le mode d’emploi. INSTALLATION DES PILES Le compartiment de la batterie est situé... -
Page 21: Indicateur Du Niveau De Batterie
FIELD MANUEL D’UTILISATION INDICATEUR DU NIVEAU DE BATTERIE L’indicateur du niveau de batterie est situé dans le coin supérieur gauche de l’écran. Lorsque les piles sont pleines, s’affiche sur l’écran LCD ; Si clignote, cela indique que les piles sont faibles et que la radio va bientôt s’éteindre automatiquement. - Page 22 FIELD MANUEL D’UTILISATION SYNTONISATION Il existe plusieurs façons de régler la radio à la station de votre choix : • Tournez la molette de syntonisation pour sélectionner la fréquence • Appuyez de façon brève sur la touche Up ou DOWN (haut ou bas) pour un changement étape par étape à...
- Page 23 FIELD MANUEL D’UTILISATION RDS/INFO : La radio FIELD prend en charge le Streaming de données RDS pendant la syntonisation sur la bande FM. Une brève pression sur la touche RDS permet l’affichage des informations RDS comme PS/PTY/RT/DATA en cycle. L’icône s’affiche dans le coin inférieur gauche de l’écran en mode RDS.
- Page 24 FIELD MANUEL D’UTILISATION Syntonisez la station avec le bouton TUNING ou en appuyant sur le bouton UP/DOWN ou en maintenant le bouton UP/DOWN pendant une seconde pour engager l’autoréglage. Utilisez WIDE si aucune interférence n’est présente. Utilisez NARROW si une interférence est présente. MODIFIER LE PAS DE SYNTONISATION (9 kHz ou 10 kHz) MW, ou stations à...
- Page 25 FIELD MANUEL D’UTILISATION CHANGER LA VITESSE DE SYNTONISATION À L’AIDE DU BOUTON DE PAS DE SYNTONISATION « MINUTERIE A » Avec la radio allumée, appuyez de façon brève sur le bouton de pas de syntonisation TIMER A, l’écran LCD s’affiche : Pour le mode «...
- Page 26 FIELD MANUEL D’UTILISATION SYNTONISATION DES STATIONS OC (ondes courtes) Allumez la radio. Placez le commutateur à la bande passante supérieure en position W ou N. Mettez le commutateur inférieur sur SW1, SW2 ou SW3. Positionnez au départ le cadran SW RF Gain à...
- Page 27 FIELD MANUEL D’UTILISATION Bande de mètres (m) Fréquence Meilleur moment de la journée 90 m 3 200 à 3 400 kHz 75 m 3 900 à 4 000 kHz 60 m 4 750 à 5 050 kHz nuit 49 m 5 800 à...
- Page 28 FIELD MANUEL D’UTILISATION Mettre la radio très près d’une fenêtre et la tenir améliorent la réception des ondes courtes. Pour en savoir plus sur les ondes courtes, nous vous recommandons la publication ci-dessous, publiée chaque année et disponible en grandes librairies. De plus, l’Internet est une excellente ressource pour en savoir plus sur les ondes courtes.
-
Page 29: Réglage De L'horloge
FIELD MANUEL D’UTILISATION Lorsque vous écoutez la radio, tournez la molette de syntonisation ou appuyez sur la flèche UP/DOWN ou sur les boutons Q. T UN pour sélectionner la station de votre choix. Appuyez sur le bouton ALARM, l’icône “ ”... - Page 30 FIELD MANUEL D’UTILISATION Pour régler l’horloge : 1. Éteignez la radio. 2. Appuyez et maintenez le bouton T.SET jusqu’à ce que l’heure commence à clignoter. 3. Tournez le bouton de syntonisation dans n’importe quel sens, ou appuyez sur la touche UP pour régler l’heure. 4.
- Page 31 FIELD MANUEL D’UTILISATION Appuyez sur le bouton ▼ pour modifier l’heure, puis tournez le bouton de syntonisation pour régler l’heure ; Enfin, appuyez sur TIMER A ou TIMER B pour confirmer le réglage de la minuterie. Sélectionnez Alarme Radio ou vibreur sonore d’alarme Lorsque vous êtes dans le TIMER A ou TIMER B de la minuterie, réglez le mode, appuyez sur pour...
- Page 32 FIELD MANUEL D’UTILISATION Pour désactiver immédiatement l’alarme de minuterie, appuyez sur le bouton d’alimentation. RÉGLER ET DÉSACTIVER LA MINUTERIE DE SOMMEIL Appuyez sur le bouton rouge POWER & SLEEP sur le coin avant droit de la radio. Lorsque la radio s’allume, vous voyez brièvement le mot «...
- Page 33 FIELD MANUEL D’UTILISATION passe à l’heure de votre choix. L’icône « ON » indique que l’appareil est sous tension. Avec la radio allumée, appuyez sur bouton Power & Sleep pour éteindre la radio et afficher l’état de l’horloge. Lorsque l’icône « ON » s’affiche, la radio reste allumée jusqu’à...
- Page 34 FIELD MANUEL D’UTILISATION Appuyez sur le même bouton pendant 2 secondes pour le déverrouiller. ACTIVER ET DÉSACTIVER LE BOUTON RETOUR (FEEDBACK) Avec la Radio éteinte, appuyez et maintenez le bouton ALARM, le texte BUZZER ON s’affiche. Dans ce mode, un bip sonore de retour sera émis à chaque fois que l’utilisateur appuie sur un bouton.
- Page 35 FIELD MANUEL D’UTILISATION UTILISER LES PRISES DE LA LIGNE ENTRÉE/ SORTIE Ces prises se trouvent sur le côté droit de la radio FIELD, type stéréo 1/8 pouce (3,5 mm). Un périphérique audio externe (tel qu’un lecteur MP3) peut être joué en connectant une ligne AUX du périphérique dans la prise d’entrée audio.
- Page 36 FIELD MANUEL D’UTILISATION UTILSEZ UNE ANTENNE AN200 GRUNDIG POUR UNE PERFORMANCE AM(MW) AMELIOREE (NON FOUNIE) L’antenne en boucle AN200 à bande de radiodiffusion AM (MW) ou tout autre modèle similaire ne doit pas être branchée, mettez-la simplement à côté de la radio et syntonisez-la sur la même fréquence que celle sur laquelle la radio est réglée.
- Page 37 FIELD MANUEL D’UTILISATION MISE EN GARDE • N’exposez pas cet appareil à la pluie ou à l’humidité. • Ne l’immergez ou ne l’exposez pas pendant une période prolongée à l’eau. • Protégez-le de la pluie et de l’humidité élevée. • Faites-le seulement fonctionner au sein de la plage de températures spécifiée (0°C à...
-
Page 38: Enregistrement De Garantie
FIELD MANUEL D’UTILISATION éliminer en toute sécurité et contribuer à protéger l’environnement. ENREGISTREMENT DE GARANTIE Pour assurer une garantie complète ou des mises à jour du produit, l’enregistrement de votre produit doit être effectué dès que possible après l’achat ou réception. Veuillez aller à... -
Page 39: Hors Garantie
FIELD MANUEL D’UTILISATION GARANTIE Si votre produit est toujours sous garantie et que le représentant du service Etón détermine qu’une réparation sous garantie est nécessaire, une autorisation de retour sera délivrée ainsi que des instructions pour l’expédition à un centre de réparation agréé. N’expédiez pas votre radio sans avoir reçu le numéro d’autorisation de retour. -
Page 40: Instalación De Baterías
FIELD MANUAL DE USUARIO CONOZCA LA FIELD Gracias por adquirir la radio Etón FIELD AM/FM/ OC. Queremos que disfrute del uso de este producto en su totalidad. Para aprovechar todas sus magníficas y exclusivas funciones, le recomendamos que lea cuidadosamente el manual del usuario. INSTALACIÓN DE BATERÍAS El compartimento de la batería está... - Page 41 FIELD MANUAL DE USUARIO UTILIZACIÓN DE ENERGÍA AC Enchufe el adaptador AC en el tomacorriente en el lateral derecho de la radio. Utilice solo el adaptador AC que se le suministró. Cuando el adaptador AC está enchufado, aparecerá en la esquina superior izquierda de la pantalla. Si pierde el adaptador AC que venía juntamente con la radio, utilice uno con una salida de CC de 6 voltios, polaridad negativa, 500 miliamperios y un tomacorriente...
- Page 42 FIELD MANUAL DE USUARIO • Presione prolongadamente el botón UP o DOWN para buscar la siguiente estación para ir más adelante o más atrás en la frecuencia • Presione el botón PRESET para sintonizar la siguiente estación preconfigurada Presione rápidamente el botón Q. T UNE para incrementar velozmente hacia adelante el rango de frecuencia.
- Page 43 FIELD MANUAL DE USUARIO PS (nombre de la estación): cuando no hay información sobre la estación, se verá “NO PS” (Sin nombre de estación); PTY (tipo de programa): si no hay programa, dirá “NO PTY” RT (radio texto): si no hay texto, dirá: “NO RT” DATA (información de indicativo de programa/reloj/fecha): si no aparece información, dirá...
- Page 44 FIELD MANUAL DE USUARIO CÓMO CAMBIAR LA SINTONIZACIÓN (9 kHz o 10 kHz) Las estaciones de OM, u onda corta, conocidas como estaciones AM en Norteamérica, comprenden desde 520 a 1710 KHz en Norteamérica y desde 522 a 1620 KHz en otras partes del mundo.
- Page 45 FIELD MANUAL DE USUARIO CÓMO CAMBIAR LA VELOCIDAD DE SINTONIZACIÓN CON EL TEMPORIZADOR A/ BOTÓN DE SINTONIZACIÓN Con la radio encendida, presione rápidamente TIMER A/ botón TUNING STEP, en la pantalla LCD aparecerá: Para el modo “SLOW” (LENTO), gire la perilla de sintonización para aumentar o disminuir la frecuencia para FM en 10 kHz, OM en 1 kHz, OC en 1 kHz;...
- Page 46 FIELD MANUAL DE USUARIO ANTENNA DX/INTERRUPTOR LOCAL Si la estación que está escuchando tiene tanta recepción que suena distorsionada, ubique el interruptor en la posición LOCAL. De lo contrario, déjelo en DX, que significa distancia máxima. SINTONIZACIÓN DE ESTACIONES DE OC (onda corta) Encienda la radio.
- Page 47 FIELD MANUAL DE USUARIO SINTONIZACIÓN EN RANGOS DE FRECUENCIA DE OC (BANDAS) Sintonice estos rangos de frecuencia para mejores resultados. La radio puede, además, sintonizar entre estos rangos. Banda en metros (m) Frecuencia Mejor momento del día 90 m 3,200-3,400 kHz 75 m 3,900-4,000 kHz 60 m...
- Page 48 FIELD MANUAL DE USUARIO Durante el día, las frecuencias mayores a 13 MHz son, por lo general, mejores. Por la noche, las frecuencias menores a 13 MHz son, generalmente, mejores. Sobre el atardecer y el amanecer, es probable que el rango de onda corta, en su totalidad, sea bueno.
-
Page 49: Configuración Del Reloj
FIELD MANUAL DE USUARIO Con la radio prendida, presione el botón ALARM (ALARMA) para preestablecer estaciones en la memoria. Cuando esté escuchando la radio, gire la perilla o presione la flecha UP/DOWN o los botones Q. T UN para seleccionar la estación deseada. - Page 50 FIELD MANUAL DE USUARIO Para configurar el reloj: 1. Apague la radio. 2. Presione y mantenga el botón T.SET hasta que la hora comience a destellar. 3. Gire la perilla de sintonización en cualquier dirección o presione el botón UP para configurar la hora. 4.
- Page 51 FIELD MANUAL DE USUARIO Presione el botón ▼ para cambiar la hora, luego gire la perilla para ajustar la hora; Finalmente, presione TIMER A o TIMER B para confirmar el ajuste del temporizador. Selección de alarma con radio o timbre Mientras en TIMER A o TIMER B, en el modo de ajuste presione para seleccionar entre alarma con timbre o...
- Page 52 FIELD MANUAL DE USUARIO se desactivará la alarma del temporizador al presionar cualquier botón. Para desactivar la alarma del temporizador de inmediato, presione el botón de Encendido. CONFIGURACIÓN Y DESACTIVACIÓN DEL TEMPORIZADOR DE DESCANSO Presione el botón rojo POWER & SLEEP en la esquina superior derecha del frente.
- Page 53 FIELD MANUAL DE USUARIO Si desea cambiar el temporizador de descanso, presione el botón Power & Sleep de continuo cuando aparezca “60” y el ícono “ ”, el dígito cambiará al horario deseado. El ícono “ON” indica que está encendido. Con la radio encendida, presione el botón Power &...
- Page 54 FIELD MANUAL DE USUARIO la parte superior, centro de la pantalla. Presione el mismo botón por 2 segundos para desbloquearlo. ACTIVACIÓN Y DESACTIVACIÓN DE DEVOLUCIÓN DE BOTONES Con la radio apagada, presione y mantenga el botón ALARM, aparecerá el texto BUZZER ON (TIMBRE ENCENDIDO) en la pantalla.
- Page 55 FIELD MANUAL DE USUARIO UTILIZACIÓN DE LOS TOMACORRIENTES DE ENTRADA/SALIDA DE LÍNEA Estos tomacorrientes están en el lateral derecho de la FIELD, un tipo de estéreo de 1/8 pulgadas (3.5 mm). Se puede reproducir un dispositivo de audio externo (como un reproductor MP3) al conectar una línea AUXILIAR del dispositivo al tomacorriente de entrada de línea.
- Page 56 FIELD MANUAL DE USUARIO UTILIZACIÓN DE LA ANTENA GRUDIG AN200 PARA UN RENDIMIENTO MEJORADO DE LA FRECUENCIA AM (OM) (NO INCLUIDA) No es necesario que conecte la antena de bucle de banda AN200 AM (OM) o cualquier modelo similar, solo colóquela al lado de la radio y sintonícela en la misma frecuencia que la radio.
-
Page 57: Medio Ambiente
FIELD MANUAL DE USUARIO ADVERTENCIA • No exponga este dispositivo a la lluvia o humedad. • No lo sumerja o exponga al agua por periodos prolongados. • Protéjalo de los altos niveles de humedad y lluvia. • Debe funcionar solo dentro del rango de temperaturas especificado (0 °C a 40 °C). -
Page 58: Garantía Limitada
FIELD MANUAL DE USUARIO REGISTRO DE GARANTÍA Para asegurar la cobertura completa en la garantía o actualizaciones de productos, debe completar la registración de su producto lo antes posible luego de la compra o de obtener la factura. Diríjase a http://www.etoncorp.com/productregistration para registrar el producto. - Page 59 FIELD MANUAL DE USUARIO GARANTÍA Si el producto continúa bajo la cobertura de la garantía y el representante de atención de Etón determina que se precisa del servicio de garantía, se emitirá una autorización de devolución e instrucciones para el envío a un taller de reparación autorizado por la garantía.
- Page 60 Etón Corporation Corporate Headquarters 1015 Corporation Way Palo Alto, California 94303 USA tel +1 650-903-3866 tel +1 800-872-2228 fax +1 650-903-3867 Etón Canada 5580 Explorer Drive, Suite 503 Mississauga, Ontario L4W 4Y1 Canada tel +1 416-214-6885 1 800-637-1648 tel + fax +1 416-214-6886 www.etoncorp.com Designed by Etón Corporation and assembled in China.