
Related Manuals for Contex AA51A


Summary of Contents for Contex AA51A
- Page 1 Operator’s Guide MODELS: 18” - AA51A 36” - KA67E Wide Format Copy Scanners with iJET Panel February 2006...
-
Page 2: Table Of Contents
Table of Contents 1. About This Guide 2. Using the iJET Panel 2.1 To make a simple copy 2.2 To perform a simple Scan-to-File 2.3 Operations on the iJET Panel 2.4 Power ON/OFF 2.5 The iJET Panel Buttons - Overview 2.6 How do I Navigate the iJET Panel Menus? 3. - Page 3 7. Maintenance 7.1 Preliminary Maintenance – scanner setup 7.2 Regular Scanner Maintenance 7.3 Cleaning the Scan Area 7.4 Running the Scanner Maintenance Program 7.4.1 Starting Scanner Maintenance from the iJET Panel 7.4.2 Starting Scanner Maintenance from a PC on the LAN 7.4.3 Starting Scanner Maintenance from a Local PC 7.4.4...
-
Page 4: About This Guide
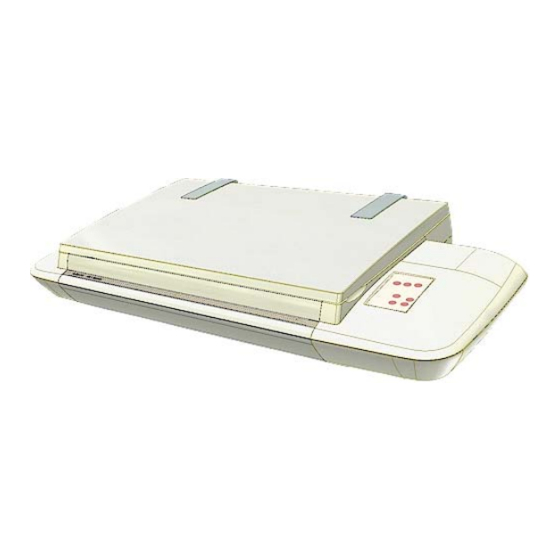
Models not listed in the table below are not within the scope of this guide. Model IDs Icon in Guide Applies for scanners… Main Characteristics • 18” (A2) wide format AA51A Top fed - Flatbed • copy scanners iJET Panel • Sheet fed - Insertion slot •... - Page 5 About This Guide Additional Guide Icons: • Reference additional Details within this guide – Look for the “Manual” icon The Manual Icon: marks a reference to another section in this guide where you can find more instructions on a certain function just named. •...
-
Page 6: Using The Ijet Panel
The iJET Panel 2. Using the iJET Panel Before setting up your copy/scan configuration, you will need to familiarize yourself with the iJET Panel. A number of setup tasks are performed through the iJET Panel and will require that you know how to navigate the iJET Panel’s menus. Instructions on making specific settings will be described under each configuration type in the chapter “Copy Scanner Configuration and Setup”. -
Page 7: To Make A Simple Copy
The iJET Panel 2.1 To make a simple copy The following procedure for making a copy presumes the following: • The scanner and printer(s) are setup correctly as described in this Operator’s guide. • The Size button option is set to Auto. •... -
Page 8: Power On/Off
The iJET Panel 2.4 Power ON/OFF These power on/off instructions apply only after you have setup and configured your system as described in the relevant sections under “Scanner Configuration and setup”. First time during setup (hard power ON) Connect the scanner to the power outlet and turn on the outlet switch (scanner’s back). The scanner runs a self-test and init procedure and after warming up it is ready to scan. -
Page 9: The Ijet Panel Buttons - Overview
The iJET Panel 2.5 The iJET Panel Buttons - Overview The Menu button Menu Menu button - The Menu button leads to the total range of options for copying and also the Advanced menu with all the system setup and configuration functions. A complete description on how to navigate the menu and select options follows below. - Page 10 The iJET Panel (…Copies button) Settings (quick) button - For setting the number of (how many) copies you want output. Press the button to activate option setting. You then change the value each time you again press the button or with the arrow up/down buttons. The Scale button Scale Option button - For setting a value that defines the output size in relation to the input size.
-
Page 11: How Do I Navigate The Ijet Panel Menus
The iJET Panel How do I Navigate the iJET Panel Menus? This section explains how you find and set the many options behind the Menu button and the Scan to button. You will learn here how menu options and values are shown in the display window and how you use the control buttons Back, Enter an d arrows up/down to reach them for setting and changing their values. - Page 12 The iJET Panel From the display window shown a bove to the display window below: The user pressed the arrow down button until the value “Line” was displayed and then pressed to accept Enter that value as the new setting for the “Org. type B&W” option. The “>” marker moved back to the menu option item level enabling the user to continue navigating the menu with the arrow up/down buttons.
-
Page 13: Scanner Configuration And Setup Instructions
Configuration and Setup 3. Scanner Configuration and Setup Instructions Your Copy scanner supports iJET technology for copy and scan-to-file functionality. The iJET panel enables you to set options on the scanner so you can copy straight from the device without a controller-PC and software. Furthermore, your scanner can be connected directly to the LAN enabling it to function with other devices such as printers and PCs that are on the same network. -
Page 14: Connect The Scanner Directly To Printer(S) - Stand Alone Copier
Configuration and Setup 3.1 Connect the scanner directly to printer(s) - Stand Alone Copier Components: Wide format copy scanner and one or two large format printers. The Scanner is connected directly (no PC or network) to one or two printers. Usage: For copying large format documents. - Page 15 Configuration and Setup Connection - printer end Connect the other end of the USB interface cable or LAN cable to the large format printer. See the section “Locating the Interface Cable Connector Panel” for detailed instructions for your specific scanner model. Connect scanner power cable At back of the scanner, you will find the scanner-end power cable socket, just below an Outlet switch.
- Page 16 Configuration and Setup Set localization Preferences Menu On the iJET Panel - Select Menu > Advanced > Options >… to set preferences for language, paper series and media handling (loading). See the section on options for ”Personalizing and localizing the system” for details. Make Printer Setup settings on the scanner You can setup for two printer types –...
-
Page 17: Connect The Scanner To Lan - Network Scan/Copy Device
Configuration and Setup 3.2 Connect the Scanner to LAN – Network Scan/Copy Device Components: Wide format copy scanner and Local network. Peripheral devices such as PCs and printers are setup and active on the network. The scanner will be setup to recognize PCs on the network as scan-to-file targets. - Page 18 Configuration and Setup LAN port See the section “Locating the Interface Cable Connector Panel” for instructions regarding your specific scanner model. Connection – network end. Connect the other end of the LAN cable to the network or switch. Connect scanner power cable At back of the scanner, you will find the scanner-end power cable socket, just below an Outlet switch.
- Page 19 Configuration and Setup Perform Preliminary Maintenance – Calibration Some scanner models support calibration from the iJET panel. For other models you will have to use a PC with WIDEsystem and Scanner Maintenance software installed To run scanner maintenance: Menu On the iJET Panel Select Menu >...
- Page 20 Configuration and Setup On the iJET Panel Select Menu > Advanced > Options > Closed Loop Cal. Press Enter and then use the arrows up/down buttons to reach the right media type and Enter to select. On “Print Sheet” select Enter. The system will print a color patch sheet. Feed the sheet into the scanner On “Scan Sheet”...
-
Page 21: Connect The Scanner To A Pc - Scan/Copy Workstation
Configuration and Setup 3.3 Connect the Scanner to a PC - Scan/Copy workstation Components: Wide format copy scanner and PC. For scanning to file and saving on local PC. If this configuration is to be used for copying purposes, it must include a printer that is either connected directly to the PC (local printer) or the PC can be connected to the network and have access to network printers. - Page 22 Configuration and Setup 3-10 newer version. Out-of-date versions of WIDEsystem software may not detect your scanner model. Install WIDEsystem Software Click on the option Install WIDEsystem Software from CD main menu or run the setup.exe program directly from the WIDEsystem (ws) folder on the CD-ROM. Follow the installation instructions that appear on your screen.
- Page 23 Configuration and Setup 3-11 Turn on the Scanner To turn on the scanner - at back of the scanner, plug in the power cable and flip the Outlet Switch to ON. The scanner starts the init and self test sequence. Power outlet and switch is found at the back of the scanner Turn on the PC Make sure the PC connected to the scanner is likewise power-connected to a grounding-type power...
-
Page 24: Combining Configuration Types For Multiple Functionality
Configuration and Setup 3-12 3.4 Combining Configuration Types for Multiple Functionality Although they were described separately, the three configurations: Stand alone copier, Scan/ Copy device on a network, Scan/ Copy station on local PC can be combined to provide multiple functionality. -
Page 25: Physical Placement Of The Scanner
Configuration and Setup 3-13 3.5 Physical Placement of the Scanner Please follow the guidelines below for optimal safety, scanner functionality, and scanning results. Physical placement of the scan station: On Scanners: Your wide format flatbed scanner should be placed on a stabile, level and completely flat (plane) surface such as a sturdy table. - Page 26 Configuration and Setup 3-14 5. If the scanner is moved, the 2 adjustable feet must be retightened to their original (shortest) position and the steps above must be repeated. 3 fixed feet 2 adjustable feet Original position must be all the way up (shortest feet) Physical placement of the scan station: On Scanners: Your wide format scanner should be placed either on the specially designed stand-alone floor...
- Page 27 Configuration and Setup 3-15 never be blocked or covered by placing the unit on a bed, sofa, rug, or other similar soft surface. Your scanner should never be placed near or over a radiator or heat register. You should not place the scanner in a built-in installation unless proper ventilation is provided.
-
Page 28: Locating The Interface Cable Connector-Panel
Configuration and Setup 3-16 3.6 Locating the Interface Cable Connector-Panel Your scanner’s interface cable connectors are grouped in a cable connector panel. You will need to locate the cable connector panel in order to insert interface cables when setting up the system. - Page 29 Configuration and Setup 3-17 Be sure to reattach the cover after you connect the interface. The cover must always be closed before you turn the scanner ON. Remove the scanner’s right side cover Interface connectors (cable-connector-panel) Feed the interface cable through the hole in the back until it emerges in interface area. Interface area is behind the cover...
-
Page 30: Personalizing And Localizing Your System
Configuration and Setup 3-18 3.7 Personalizing and Localizing Your System The iJET Panel options can be configured to match your local standards regarding the language displayed in the menus, paper size series (preferred standard size systems such as “ARCH” and ISO A) and media handling (original’s loading method). NOTE: The number of languages available for the panel is limited. -
Page 31: Setting The Paper Series Preference
Configuration and Setup 3-19 3.7.2 Setting the Paper Series Preference Depending on your location and business, you may usually work with a specific standard paper series. This option lets you tell the system which paper series you want displayed when you set the Size (input size) option. -
Page 32: Setting The Media Handling (Load) Method Preference
Configuration and Setup 3-20 3.7.3 Setting the Media Handling (load) Method Preference This option lets you tell the system how you want to load originals into the scanner. On scanners: (not relevant on flatbed models) On the iJET Panel Menu 1. -
Page 33: Printer Setup On The Scanner
Configuration and Setup 3-21 > Load Delay Use arrow down to reach the Enter Load Delay option. Press Load Delay > Use arrows to change the Load Delay value and confirm with Enter 3.8 Printer Setup on the Scanner In order to be operated from the iJET Panel, your copy scanner needs to recognize a printer. The setup procedure depends on whether you connect a printer through the USB host (output) port or through a LAN port (either directly or indirectly). - Page 34 Configuration and Setup 3-22 If you are using LAN interfacing, either with a printer directly c onne c d to the scanner’s LAN port or to a remote printer on the network, you will need to set the printer’s IP address. Enter Press arrow down to display the IP setting dialog and then...
- Page 35 Configuration and Setup 3-23 rinter List Printer Model > Printer List you select Printer List and confirm with enter, you will be able to select an actual printer odel by its name. The model names that appear in the Printer List indicate printers that have been fu lly tested for compatibility with your copy scanner and their setup parameters are ready in...
-
Page 36: Creating Media Profiles - For Color Printer Setup
Configuration and Setup 3-24 Resolution 300,360,600,720 This is the printer’s fixed resolution A0,A1,A2….paper siz The printer is defined to be of a certain max standard size - A0, A2 Printer Size list etcetera. Default/N o Simple/ Ctx Render Type Scan to print data protocol. See the lists fro right selection. format Yes –... - Page 37 Configuration and Setup 3-25 4. Closed Loop Cal should be displayed as the first option. If not use the arrow down Enter button to reach it. Press to confirm. > Closed Loop Cal … 5. Your display should now look like this (the actual text on the 2. line will show the current setting for the option and may be different than the one shown below).
-
Page 38: Scanner On Network Setup
Configuration and Setup 3-26 3.10 Scanner on Network Setup order to be recognized on the network, your copy scanner needs to identify itself. Some etworks support DHCP which will enable the scanner to extract its network setup information automatically from the network. On other netwo rks, you will have to enter the network ID formation manually. - Page 39 Configuration and Setup 3-27 If your network does not support DHCP: Get the values IP Address, Subnet Mask and Gateway Address fro m your network administrator. 2. Use the arrow button up or down until the display window shows DHCP Setup and Enter confirm with to move the “>”...
-
Page 40: Setup To Share The Scanner (Use From Pcs On The Lan)
Configuration and Setup 3-28 1 Setup to Share the Scanner (Use from PCs on the LAN) r scanner can be setup to be used for scanning from PC stations on the network. This quires that you first have setup the scanner to be recognized on the network as described in e previous section “Scanner on Network Setup”. -
Page 41: Loading Originals For Copying And Scanning
Using the scanner, how do I …? 4. Loading Originals for Copying and Scanning How do I Load Originals into the Scanner? n Scanners: o load an original into the scanner: . Open the lid backwards. . Place your document, face down, on the glass plate. Align the document edges against the alignment guide bar at the scanner’s left side for a straight scan. -
Page 42: Loading And Scanning Thick Media
Using the scanner, how do I …? 4. Use arrows down/up to select the load method – Auto Load or Manual Load. Confirm with 5. With Auto Load you can select a delay factor if the document is grabbed too fast. Press arrow right to reach Load Delay and arrow down/up to set a delay factor between 0-1000. - Page 43 Using the scanner, how do I …? Paper Forward Paper Reverse ATAC Key Paper Ready Indicator Adjusting the insertion slot for thick media with ATAC: 1. Press the ATAC key on your iJET Panel to set the scanner in ATAC mode. 2.
- Page 44 Using the scanner, how do I …? 7. Once the thick original is loaded, the scanner will automatically leave the ATAC mo which means that the Paper Forward an d Paper Reverse keys will return to their normal functionality for moving the original forwards and backwards. 8.
-
Page 45: How Do I Make A Copy
Using the scanner, how do I …? 5. How do I Make a Copy? .1 Copy Using the iJET Panel – The Basic Steps Once the scanner is set up and configured to the needs and standards of your business, it becomes as simple to use as a conventional office copy machine. - Page 46 Using the scanner, how do I …? Press the appropriate copy button. B&W Copy • Press the B&W Copy button for B&W copy jobs. Color Copy • Press the Color Copy button fo r color jobs.
-
Page 47: Main Copy Options - Quick Buttons
Using the scanner, how do I …? 5.2 Main Copy Options - Quick buttons his section describes the main copy options you can set with the iJET Panel’s quick buttons. The buttons are: Lightness Quality Copies Scale Lightness Quality Copies Scale The buttons Lightness, Copies, Quality and Scale are shortcuts into the iJET Panel Menu system to options you can reach through the Menu button. -
Page 48: How Do I
Using the scanner, how do I …? 5.2.1 How do I… Set Copy Lightness? You can change the Lightness value to make the copy lighter or darker and compensate for dull or faded originals. The default Lightness value is set to zero which works well with most documents. -
Page 49: How Do I
Using the scanner, how do I …? 5.2. 2 How do I… Set a Scale factor? – Ou tput size In the beginning of this section (How to… make a copy) we described how to set the input size with the Size button. You can enlarge or reduce this size in your output copy through the Sc option. - Page 50 Using the scanner, how do I …? needed. The new Scale value will be appli ed every time you press the B&W Copy or Color opy button until you repeat the steps above to change it. The ”>” marker is on the Menu level. You can continue >...
- Page 51 Using the scanner, how do I …? The LEDs above th lity button will show the active sett ing. Fast Normal Best Fast Normal Best Quality Or…press the arrow up/down buttons to change the Lightness value. With these you can step both forward and backward in the Fast, Normal, Best quality list. Enter Press the button to accept the selected value.
- Page 52 Using the scanner, how do I …? 5.2.4 How do I… Set number of Copies? ou can tell the system to make multiple copies of the original in the scanner. You can set the s ystem to output between 1 and 50 copies. The default value is 1. o set the copy Copies value: On the iJET Panel –...
-
Page 53: How Do I
Using the scanner, how do I …? 5.3 Other Copy Options – Menu Button As described in the previous sections, the copy quick buttons Lightness, Scale, Quality and Menu Copies are shortcuts into the options accessible through the Menu button . - Page 54 Using the scanner, how do I …? 5-10 To set the copy Original Type for Color:: On the iJET Panel – Menu 1. Press the button to enter the main Menu. 2. The Org. Type-Color option should be the first option to appear. If it is not, use the arrow up/down buttons to move through the Menu options until the display shows Org.
-
Page 55: How Do I
Using the scanner, how do I …? 5-11 5.3. 2 How do I… Set Original Type B&W? The original type setting – Org. Type-BW is your central input param eter for B&W or graytone copying and relates to controlling image capture. The Org. Type-B&W setting tells the system to use specific internal image enhancement processes that are optimal for the original in question. - Page 56 Using the scanner, how do I …? 5-12 5.3. 3 How do I… apply the Sharpen filter? You can give your copy sharper lines with the Sharpen option. The Sharpen filter identifies edges in the image and intensifies them. You can use the Sharpen option with both Color Copying and B&W Copying and with all original types.
-
Page 57: How Do I
Using the scanner, how do I …? 5-13 5.3.4 How do I… apply the Background (Backg.) Clean filter? ackground clean is used if you have an original with a background that is not as completely hite as you would like it. If you want the background to appear pure white in the copy, then u can increase the background clean value. -
Page 58: How Do I... Set The Media Type?
Using the scanner, how do I …? 5-14 5.3.5 How do I… Set the Media Type? en making color copies, it is important to tell the system what kind of paper you have in the prin ter. Already during scanning, your system will optimize processing for optimal color ching in relation to the media type the image will be printed on. - Page 59 Using the scanner, how do I …? 5-15 To Create a Ne edia Profile e instructions below are repeated from the section – “Creating Media Profiles - Color Printer up): If your system does not already have a Media Profile for the Media Type that matches the media in your printer, then you must create a new Media Profile.
-
Page 60: How Do I
Using the scanner, how do I …? 5-16 Enter 9. The display will now show “Scan Sheet”. Select to start. The system will scan the color patch sheet and calculate color matching values for future jobs with the current media type. - Page 61 Using the scanner, how do I …? 5-17 5.3.7 How do I … Re set Copy defaults? Copy default values that came with your system are those that will work well with the mos mon copy jobs. The Copy default values are those accessed from the Menu button’s top leve l - Lightness, Sharpen, Scale and etcetera.
-
Page 62: The Advanced Option
Using the scanner, how do I …? 5-18 5.3.8 The Advanced option The Advanced option The Advanced option leads to submenus containing options related to the scanner device and not to actual copy or scan ttings. Most of the Advnaced options are for ystem administrators who are configuring t he system to match the company’s business. -
Page 63: Using Copy Software With The Scanner (Local Or Network Pc)
Using the scanner, how do I …? 5-19 5.4 Using Copy Software with the scanner (local or network PC) our scanner can also be used with compatible copy software from a locally connected or etwork PC. If the scanner is connected to the LAN, network PCs will be able to “share” the canner and control it with compatible copy software and use it with network printers. -
Page 64: How Do I Scan To File
Using the scanner, how do I …? 6. How do I Scan to File? can-to-file means that you save the image in a file format on a PC’s hard disk rather than utputting directly to a printer (copy). Scans cannot be saved in the scanner itself. In order to can and save the image in a file, your system must recognize a PC. -
Page 65: Scan To Local Or Network Pc With The Ijet Panel
Using the scanner, how do I …? 6.1 Scan to Local or Network PC with the iJET Panel 1. Load your original. See the section “How do I load originals?” for information regarding your specific scanner model. On the iJET Panel –Select the Scan to button. The first of the recognized scan targets (PCs) will be displayed. - Page 66 Using the scanner, how do I …? Enter 6. If you want to change the scan-to-file settings - Confirm the scan target with ve into the Scan-to-File Menu The first Scan-to-File Menu option Scan Mode will be shown in the display. Entry into the Scan-to-File Menu >...
-
Page 67: Scan-To-File Menu Options - Ijet Panel
Using the scanner, how do I …? 6.2 Scan-to-File Menu Options – iJET Panel 6.2.1 Enter the iJET Panel Scan-to-File Menu On the iJET Panel – Scan to . Select the Scan to button . Select the scan target. Network PC named “PC_nrX” set as scan target Scan to PC_nrX Enter... -
Page 68: Set The Scan Mode
Using the scanner, how do I …? 6.2.2 Set the Scan Mode On the iJET Panel – If you are not already in the Scan-to-File menu, start/enter the menu with the Scan to button as described in the beginning of this section. Scan to 2. -
Page 69: Set The Scan Mode Parameters - Level Or Gamma
Using the scanner, how do I …? 6.2.3 Se t the Scan Mode Parameters – Level or Gamma On the iJET Panel – Enter When you pressed to accept the Scan Mode, the “>” marker moved back up to the option text “Scan Mode”.. -
Page 70: Set The Scan-To-File Resolution
Using the scanner, how do I …? 6.2.4 Set the Scan-to-File Resolution This is where you determine image quality. Note that high resolutions create large files. 300 dpi or more is adequate for printing. Certain maps and CAD drawings with high levels of detail quire high resolutions. -
Page 71: Set The Scan-To-File Size (Input Size)
Using the scanner, how do I …? 6.2.5 Set the Scan-to-File Size (input size) This same Scan-to-File Menu option can also be reached by pressing the function Size button. Size The value you set here determines the scan area. Usually this would be the size of the original ss you wish only to input a portion. -
Page 72: Set The File Format ( Tiff, Jpeg, Pdf )
Using the scanner, how do I …? 6.2.6 Set the File Format ( TIFF, JPEG, PDF ) On the iJET Panel – 1. If you are not already in the Scan-to-File menu, start/enter the menu with the Scan to button as described in the beginning of this section. -
Page 73: Set The File Format Quality
Using the scanner, how do I …? 6-10 6.2.7 Set the File Format Quality On the iJET Panel – 1. If you are not already in the Scan-to-File menu, and want to change the Quality value for the current file format setting - start/enter the menu with the Scan to button as described in the beginning of this section. -
Page 74: Using Scan Software - From Local Pc Or Network Pc
Using the scanner, how do I …? 6-11 6.2.8 Using Scan Software – From Local PC or Network PC “Scan/Copy station on Local PC” configuration was desc ribed in the section on “Setup and Configuration”. Scanning to file with this configuration can take place through scan software installed on the PC. -
Page 75: Maintenance
Maintenance 7. Maintenance .1 Preliminary Maintenance – scanner setup On scanners: When you have setup your new scanner and verified your installation, it is important that you your first maintenance session before working with the scanner. Shipping and transportation an affect the cameras and it is therefore highly recommended to calibrate. But before you do o, you must thoroughly clean the scanner. -
Page 76: Cleaning The Scan Area
Maintenance 7.3 Cleaning the Scan Area A clean scan area is vital for optimal results. Cleaning instructions for each scanner type follow below: Caution: do not use abrasives, acetone, benzene or fluids that contain these chemicals. Do not spray liquids directly onto the scanner glass-plate or anywhere else in the scanner. Caution: Before cleaning the scan ar ea, be sure to turn the scanner power off and disconnect the power plug. - Page 77 Maintenance Open the scanner lid The glass plate is exposed for cleaning. leaning the Scan Area On scanners: Turn the scanner power off and disconnect the power plug. Push down on the two lever buttons found near the insertion slot on each side of the scanning area lid.
- Page 78 Maintenance Clean also the scanner surface so dirt and dust are not dragged into the scan area with the original. Cover your scanner with the plastic dust cover when not in use. Caution: Make sure the scanner power is OFF when using the scanner dust cover. Push down lever (on both sides) to While holding down the levers, insert fingers in the slot and flip unlo...
-
Page 79: Running The Scanner Maintenance Program
Maintenance 7.4 Running the Scanner Maintenance Program he way you start and run the Scanner Maintenance Program depends on your scanner odel and configuration. .4.1 Starting Scanner Maintenance from the iJET Panel n some scanner models you can activate the Scanner Maintenance program from the iJET anel. -
Page 80: Running Scanner Maintenance - Steps
Maintenance 7.4.4 Running Scanner Maintenance - Steps The steps for running Scanner Maintenance described below are the same regardless of which of the solutions for starting and running the program yo u use. To run Scanner maintenance Program: On Scanners 1. - Page 81 Maintenance 5. The program analyses alignment and stitching status of the cameras. If the cameras are unaligned, the program and scanner will automatically make the necessary corrections. . After Camera Alignment, the Scanner Maintenance program automatically moves on to Calibration. 7.
-
Page 82: Replacing Scanner Parts
Maintenance 7.5 Replacing Scanner Parts his section describes how to replace those scanner parts that are liable to wear down over ng-term use. Changing parts will renew your scanner and ensure optimal results. Your canner monitors usage of parts and will warn you when it is time for a replacement through a message in the iJET Panel display window. -
Page 83: Replacing The Glass-Plate
Maintenance 7.5.1 Replacing the Glass-plate Some scanner mod els are designed so users can detach the glass-pla te from the scanner in order to replace scr tched glass-plates with new ones. On other scann er models, such as the flat bed models, a service technician must perform this process. Your scanner monitors usage of the glass platen and will warn you when it is time for a replacement through a message in the iJET Panel display window. - Page 84 Maintenance 7-10 Remove the glass-plate: Step 1 : Open the lid. Locate the lever’s finger handle on Step 2 : Flip back. Lift the lever’s hooks and glass-plate h side. Shown below: Right side finger-handle. free of the scanner. Finger handle Finger handle Hook...
-
Page 85: Replacing The White-Background
Maintenance 7-11 7.5.2 Replacing the White-Background white-background platen can become damaged, worn or discolored after long periods of use nd replacement with a fresh white-background-platen is recommended. Your scanner monitors sage of parts and will warn you when it is time for a replacement through a message in the ET Panel display window. - Page 86 Maintenance 7-12 Replacing the White-background-platen: On Scanners: Turn the scanner power off and disconnect the power plug. 2. Push down on the two lever buttons found near the insertion slot on each side of the scanning area lid. 3. The lid’s locking mechanism should now be disengaged. 4.
-
Page 87: Replacing The Scanner Lamp-Unit
Maintenance 7-13 7.5.3 Replacing the Scanner Lamp-Unit Your scanner comes with a high quality and durable lamp. Even so, its effectiveness will gradually weaken over time. A new lamp-unit can be obtained through your dealer. Your scanner monitors usage of the lamp and will warn you when it is time for a replacement through a message in the iJET Panel display window. - Page 88 Maintenance 7-14 11. Insert the lamp-unit all the way so the internal power connections engage with the connections on the lamp-unit. Close the lamp cover – Slide the cover to the left until it CLICKS shut. The cover must always be closed before turning scanner power ON. 13.
- Page 89 Maintenance 7-15 Pull the lamp unit out of the scanner. Lamp Unit power connectors...
- Page 90 Maintenance 7-16 Replacing the Scanner Lamp-unit: On Scanners: Turn the scanner power off and disconnect the power plug. 2. The lamp cover is on the top right edge of the scanner. 3. Grasp the cover on each side with both hands and pull back to detach. 4.
-
Page 91: Replacing The Dust-Filters
Maintenance 7-17 .4 R eplacing the Dust-Filters Fresh dust filters can reduce the amount of time spent on cleaning and calibration. The dust filters protect your scanner’s air-cooling vents. Some scanner models are designe d so users can replace the dust filters. On other models, a service technician must perform this proce your scanner’s model specificat ions to see if the dust filters are user-replaceable on your scanner. - Page 92 Maintenance 7-18 Replacing the Dust-filters: On Scanners: Turn the scanner power off and disconnect the power plug. 2. Locate the 2 square-shaped dust filter bins on the underside of the scanner. 3. Pull down on the edge of a dust filter bin to detach it from its frame. 4.
-
Page 93: Locate / Change The Smart Card
Maintenance 7-19 7.6 Locate / Change the Smart Card Check that the Smart Card is correctly installed (contact side downwards) and corresponds to your scanner model. The scanner will function correctly only with a Smart Card inserted. Be sure that the scanner is turned off when removing/inserting a Smart Card or accessing the Smart Card area. - Page 94 Maintenance 7-20 Remove the scanner’s right side cover Smart Card slot above interface connectors...
-
Page 95: Downloading New Firmware
Maintenance 7-21 7.7 Downloading New Firmware On All Scanners Like a computer, your scanner employs processors that require software in order to work. This software is called "Firmware”. Firmware is the software that runs inside the scanner. When to use new firmware? Your scanner is shipped with the latest firmware available. - Page 96 Maintenance 7-22 How to install new firmware? New firmware is installed by opening a firmware .exe file. The firmware .exe file must first reside on your machine. Select the Save target (or Save Link) option if downloading from the web. To install the firmware file on your scanner: 1.
-
Page 97: Appendix A: Important Safety Instructions
A: Safety Instructions 8. Appendix A: Important Safety Instructions Read all of these instructions and save them for later use. Follow all warnings and instructions marked on the scanner. o not place the scanner on an unstable surface, stand, cart or table. Serious dam age can be caused if the unit falls. -
Page 98: Appendix B: Regulations
B: Regulations 9. Appendix B: Regulations C Regulations NOTE: This equipment has been tested and found to comply with the limits for a Class A digital device, pursuant to Part 15 of the FCC Rules. These limits are signed to provide reasonable protection against harmful interference when the equipment is operated in a commercial environment. -
Page 99: Appendix C: Ijet Panel Quick Reference Guide
iJET Panel Quick Reference Guide 10-1 10. Appendix C: iJET Panel Quick Reference Guide Quick Reference Guide to the iJET Panel Wide Format Copy Scanners with iJET Technology... -
Page 100: About The Quick Reference Guide
– to guide you on how to use the panel options. This Quick Reference Guide covers the following scanners: Model ID: 18” (A2) flatbed wide AA51A format copy scanners with iJET panel Model ID: 36” wide format copy... -
Page 101: Ijet Panel Buttons Overview
iJET Panel Quick Reference Guide 10-3 iJET Panel Buttons Overview Button Description OF ORIGINAL – for both Copy and Scan-to-File jobs Settings button - For setting the size of the original. The Size button is used for both copy and scan-to- file operation. - Page 102 iJET Panel Quick Reference Guide 10-4 first time, this will be the default value. Back Navigation Button: for moving one level up when in a menu or for returning to an option’s current Back (active) setting while in the process of editing the option’s value. Stop Control Button: For turning the scanner ON and OFF in soft power mode and for interrupting and terminating a scan or copy job before it is finished.
-
Page 103: Ijet Panel Menu Diagrams
iJET Panel Quick Reference Guide 10-5 iJET Panel Menu diagrams About The menu diagrams: The value displayed first is the current value. In the diagrams the factory Default value is shown as the first value as this will be the case until you change it. The quick butto ns ( Lightness, Scale, Quality, Copies ) are shown as buttons that bypass the option entry point. - Page 104 iJET Panel Quick Reference Guide 10-6 Menu Button – Copy Settings > Org. Type-Color Menu Enter Photo Org. Type-Color >Photo Org. Type-Color >Photo (Ink) Org. Type-Color >Brochure Org. Type-Color >Brochure (Ink) Org. Type-Color >CAD/Map Org. Type-Color >CAD/Map (Ink) > Org. Type-B&W Enter Photo Org.
- Page 105 iJET Panel Quick Reference Guide 10-7 From Lightness (previous page) > Sharpen Enter Sharpen >OFF Sharpen >ON > Backg. Clean Enter Backg. Clean >0 Backg. Clean >1 Backg. Clean >12 > Medai Type Enter Coated Media Type >Coated Media Type >Semi Glossy Media Type >Glossy...
- Page 106 iJET Panel Quick Reference Guide 10-8 From ’Size’ (previous page) > Scale % Enter Scale Scale >100 Scale >25 Scale >50 Scale >70 Scale >125 Scale >141 Scale >200 Scale >400 Scale >800 > Mirror Enter Mirror >NO Mirror >YES >...
- Page 107 iJET Panel Quick Reference Guide 10-9 From ’Quality’ (previous page) > Copies Enter Copies Copies >1 Scale >2 Copies >3 Copies >50 > Reset Enter ’Enter’ to go... Reset Enter >’Enter’ to go... Reset >Done Continue to ’Advanced’ (next page)
- Page 108 iJET Panel Quick Reference Guide 10-10 Copy Button – Advanced Menu Settings – System setup Options From ’Reset’ (previous page) > Advanced Enter Printer Setup Enter Color Printer Enter >Interface Enter Interface >USB If Interface Wrap around Interface = ’LAN’ - to >LAN Org.
- Page 109 iJET Panel Quick Reference Guide 10-11 From Color Printer (previous page) B&W Printer Enter From Printer Setup’ (previous page) >Interface Enter Interface >USB Interface If Interface = ’LAN’ >LAN >IP Address Enter xxx.xxx.xxx.xxx IP Address >xxx.xxx.xxx.xxx Active if Interface = ’LAN’ >Printer Model Enter Auto Configure...
- Page 110 iJET Panel Quick Reference Guide 10-12 From ’Printer Setup’ (previous page) Network Setup Enter >DHCP Setup Enter DHCP Setup >YES DHCP Setup >NO >IP Address Enter xxx.xxx.xxx.xxx Active (value editable) only if DHCP = ’NO’ IP Address >xxx.xxx.xxx.xxx >Subnet Mask Enter xxx.xxx.xxx.xxx Active (value editable)
- Page 111 iJET Panel Quick Reference Guide 10-13 From ’Network Setup’ (previous page) Options Enter Closed Loop Cal Enter >Media Profile Enter Coated Media Profile >Coated Media Profile >Semi Glossy Media Profile >Glossy >Print Sheet Enter ’Enter’ to go Print Sheet Enter >’Enter’...
- Page 112 iJET Panel Quick Reference Guide 10-14 From ’Paper Series’ (previous page) From ’Options’ (previous page) >Language Enter English Language >English ’Media Handling’ and ’Load Delay’ options are not available on flatbed scanners >Media Handling Enter Auto Load Media Handling >Auto Load Media Handling >Manual Load >Load Delay...
- Page 113 iJET Panel Quick Reference Guide 10-15 ‘S can to’ button – Scan-to-file Settings Scan to > Scan Mode Enter Enter PC-office-8 24 – bit Color Scan to Scan Mode Repeat pressing >24-bit Color ’Scan to’ button until Scan Mode the right ’Scan to’ >B&W threshold target is displayed.
- Page 114 iJET Panel Quick Reference Guide 10-16 From ’Level’ or ’Gamma’ (Previous Page) >Resolution Enter Resolution >50 Resolution >100 Resolution >9600 > Size Enter Auto Size >Auto <Standard Sizes from selected paper size list> See all the paper size options in diagram showing the Size button (next page) >File Format Enter...
- Page 115 iJET Panel Quick Reference Guide 10-17 The Size Button Size Size >Auto ANSI Size >ANSI A This dialgram shows the complete list of available Paper Size sets. Which of the Paper Size sets that are actually displayed from the Size Size button and menus, depend on your selection in: >ANSI E Menu button –...
- Page 116 iJET Panel Quick Reference Guide 10-18 Diagram - Custom Setup (Printer Model) From Printer Setup > Color Printer > Printer Model > Custom Setup or Printer Setup > B&W Printer > Printer Model > Custom Setup (previous digram showing ”Printer Setup) >...
-
Page 117: Option Description Tables
iJET Panel Quick Reference Guide 10-19 Option Description Tables Menu Button - Copy Settings This menu entry contains options related to image capture when copying. These are the most common settings when making copies. To reach the Copy Settings : Press the Menu panel button. - Page 118 iJET Panel Quick Reference Guide 10-20 types. Backg. Clean Used for copying originals 0 to 12 The setting is a "cutoff" point. Pixels with a with backgrounds that are lightness under the point are affected. The higher not as completely white as Default: 0 the Backg.
- Page 119 iJET Panel Quick Reference Guide 10-21 Reset To rese t to the copy default Enter to Go Press Enter to reset the system to the copy default values that came with your values. system. These will work well with the most common copy Copy settings that return to their default values are: jobs.
- Page 120 iJET Panel Quick Reference Guide 10-22 Menu Button – Ad vanced Menu Settings – S ystem Set up O ptions his m enu entry contain s options related to the system. Normally you w ill o nly make these settings once when setting up and nfiguring the system.
- Page 121 iJET Panel Quick Reference Guide 10-23 • Printer Setup -> To set the printer parameters for Command Set, Command Set - This is the printer’s format Ctrl. Language, Color Printer -> your printer model. language – choose RTL or PCL3GUI •...
- Page 122 iJET Panel Quick Reference Guide 10-24 Options -> Coated This is step nr. 1 in the Media Se ct the name that matches the media in th Semi Glossy Closed Loop Cal. -> Profile creation process. Her printer and press Enter to confirm. Glossy Media Profile you select the name/type of...
- Page 123 iJET Panel Quick Reference Guide 10-25 • Options -> Set a delay factor for Auto Load. 0-1000 Set a delay factor value - the scanner will Load Delay use the value to determine how long it waits Default: (not available before it pulls the original into t he scanner.
- Page 124 iJET Panel Quick Reference Guide 10-26 Scan to Button – S can-to-file Settings This menu en try contains options related to image capture wh en scann ing to a file To reach the Scan-to-file Settings : Repeat p resses to the Scan to panel button until the right scan target is displ ayed.
- Page 125 iJET Panel Quick Reference Guide 10-27 Resolution Setting image quality in 50 to 9600 Select a value from the list of values available. (dots per inch) gh resolutions create large files. 300 dpi or more is adequate for printing. Certain maps and CAD drawin gs with high levels of detail require high resolu...