Table of Contents
Advertisement
XLT 2500
INSTRUCTION MANUAL
IMPORTANT INFORMATION
: Please read these instructions carefully and make
GB
sure you understand them before using this unit. Retain these instructions for future
reference.
MANUEL D'INSTRUCTIONS
RENSEIGNEMENTS IMPORTANTS:
Avant d'utiliser cet appareil, veuillez lire
FR
atentivement les instructions et assurez- -vous de les avoir comprises. Conservez
les instructions pour référence ultérieure.
BETRIEBSANWEISUNG
WICHTIGE INFORMATION:
Lesen Sie diese Hinweise zur Handhabung des
DE
Geräts aufmerksam durch. Verwenden Sie es erst, wenn Sie sicher sind, daß Sie
alle Anweisungen verstanden haben und gut aufbewahren.
MANUAL DE INSTRUCCIONES
INFORMACIÓN IMPORTANTE:
ES
Lea atentamente las instrucciones y
asegúrese de entenderlas antes de utilizar esta aparato. Conserve las instruc-
ciones para la referencia en el futuro.
Advertisement
Table of Contents

Related Manuals for Flymo XLT 2500


Summary of Contents for Flymo XLT 2500
- Page 1 XLT 2500 INSTRUCTION MANUAL IMPORTANT INFORMATION : Please read these instructions carefully and make sure you understand them before using this unit. Retain these instructions for future reference. MANUEL D’INSTRUCTIONS RENSEIGNEMENTS IMPORTANTS: Avant d’utiliser cet appareil, veuillez lire atentivement les instructions et assurez- -vous de les avoir comprises. Conservez les instructions pour référence ultérieure.
-
Page 2: Identification Of Symbols
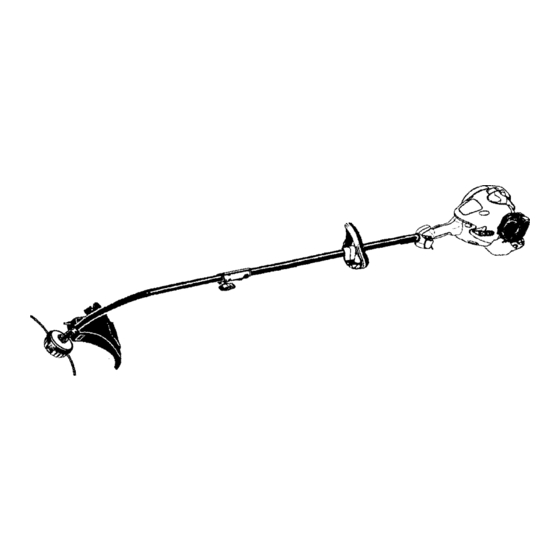
IDENTIFICATION (WHAT IS WHAT?) Muffler Manual Assist Handle Coupler Shaft Trimmer Throttle Trigger Spark Head Plug Primer Bulb Shield Throttle lock- -out Start Lever ON/STOP Wrench Switch Starter handle IDENTIFICATION OF SYMBOLS WARNING! This trimmer can be dangerous! Careless or improper use can cause serious or even fatal injury. -
Page 3: Safety Rules
SAFETY RULES S Dress properly. Always wear safety WARNING: glasses or similar eye protection when op- When using gardening erating, or performing maintenance, on appliances, basic safety precautions should al- your unit (safety glasses are available). ways be followed to reduce the risk of fire and Eye protection should be marked Z87. -
Page 4: Fuel Safety
S Use only 2 mm diameter Flymo brand line. LINE TRIMMER SAFETY Never use wire, rope, string, etc. WARNING: S Install required shield properly before using Inspect the area to be the unit. Use only specified trimmer head; trimmed before each use. Remove objects make sure it is properly installed and se- (rocks, broken glass, nails, wire, etc.) which... - Page 5 S Do not attempt to remove cut material nor WARNING: hold material to be cut when the engine is Do not use trimmer head running or when cutting blade is moving. as a fastening device for the blade. S Always keep the wheel and depth adjusting skid in contact with the ground.
-
Page 6: Hedge Trimmer Safety
S Do not use a cutting blade that is bent, warped, cracked, broken or damaged in any other way. Have worn or damaged parts re- placed by your authorized service dealer. S Always keep unit in front of your body. Keep all parts of your body away from the cutting blade. - Page 7 S Always stop the unit when work is delayed WARNING: or when walking from one cutting location to Inspect the area where another. the unit is to be used. Remove objects that S If you strike or become entangled with a for- could be thrown or damage the unit.
-
Page 8: Operation
6. Before using the unit, tighten the knob se- ATTACHING THE SHIELD curely by turning clockwise. WARNING: The shield must be prop- Coupler Primary Hole erly installed. The shield provides partial Guide Recess protection from the risk of thrown objects to the operator and others and is equipped with a line limiter which cuts excess line. -
Page 9: Starting A Cold Engine
6. Allow unit to run for 10- -15 seconds, then fully squeeze the throttle trigger to disen- gage the starting system. STARTING A WARM ENGINE ON/STOP Switch 1. Move ON/STOP switch to the ON position. 2. Squeeze and hold the throttle trigger. HOW TO START YOUR UNIT Keep throttle trigger fully squeezed until engine runs smoothly. -
Page 10: Trimmer Line Advance
3. While securely holding the engine and up- WARNING: per shaft, pull the attachment straight out Always wear eye protec- of the coupler. tion and hearing protection. Never lean over the trimmer head. Rocks or debris can rico- INSTALLING OPTIONAL ATTACH- chet or be thrown into eyes and face and MENTS cause blindness or other serious injury. -
Page 11: Maintenance
at an angle. Allow the tip of the line to strike the Tip of the Line Line Crowded Into ground around trees, posts, monuments, etc. Work Area Does The Cutting This technique increases line wear. Scalping Right Wrong S The line will easily remove grass and weeds from around walls, fences, trees and MOWING - - Your trimmer is ideal for mowing flower beds, but it also can cut the tender... -
Page 12: Service And Adjustments
4. Replace with a pre-wound spool, or re- place line using a 8 meters length of 2 mm diameter Flymo brand line. 5. When installing new line on an existing Spool spool, hold the spool as shown in the il- lustration below. -
Page 13: Seasonal Storage
Make adjustments with the unit supported so Idle Speed Screw the cutting attachment is off the ground and will not make contact with any object. Hold the unit by hand while running and making ad- justments. Keep all parts of your body away from the cutting attachment and muffler. - Page 14 TROUBLESHOOTING TABLE WARNING: Always stop unit and disconnect spark plug before performing all of the recommended remedies below except remedies that require operation of the unit. TROUBLE CAUSE REMEDY Engine will not 1. ON/OFF switch in OFF 1. Move ON/OFF switch to ON position. start.
-
Page 15: Declaration Of Conformity
We, Husqvarna AB, SE-561 82 Huskvarna, Sweden, tel: +46- -36- -146500, as authorised representative in the Community, declare that the grass trimmer model Flymo XLT 2500 with serial numbers dating from 2009 and onwards (the year is clearly stated on the rating plate, followed by the serial number), comply with the requirements of the COUNCIL’S... -
Page 16: Technical Data Sheet
(standard deviation) of 1 dB(A). Note 3: Reported data for equivalent vibration level has a typical statistical dispersion (standard deviation) of 1 m/s Model XLT 2500 (5/16 RH arbor shaft thread) Approved accessories Type Cutting attachment / guard, part. no.