Table of Contents
Advertisement
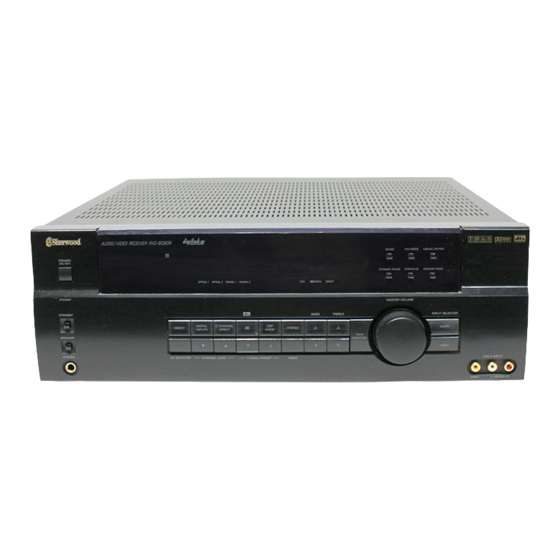
O P E R A T I N G I N S T R U C T I O N S
POWER
ON/OFF
STANDBY
STANDBY
SPEAKER
PHONES
AUDIO/VIDEO RECEIVER RVD-8090R
ST TUNED AUTO
R
Pro Logic
OPTICAL 1
OPTICAL 2
COAXIAL 1
COAXIAL 2
DIGITAL
6 CHANNEL
DIRECT
INPUTS
DIRECT
CH SELECTOR
CHANNEL LEVEL
TUNING/PRESET
RVD-8090R
AUDIO/VIDEO RECEIVER
BAND
FM MODE
TAPE
2
M PRESET
MEM
dB
kHz
MHz
DYNAMIC RANGE
CINEMA EQ
ms
THEATER HALL
SLEEP
DTS
DIGITAL
DIRECT
MASTER VOLUME
BASS
TREBLE
DSP
STEREO
MODE
TAPE
MONITOR
MODE
T D A S
T0TALLY DISCRETE AMPLIFIER STAGE
MEMO/ENTER
SPEAKER MODE
INPUT SELECTOR
AUDIO
VIDEO
VCR 2 INPUT
VIDEO
L
AUDIO
R
Advertisement
Table of Contents

Related Manuals for Sherwood RVD-8090R


Summary of Contents for Sherwood RVD-8090R
- Page 1 O P E R A T I N G I N S T R U C T I O N S T D A S AUDIO/VIDEO RECEIVER RVD-8090R T0TALLY DISCRETE AMPLIFIER STAGE BAND FM MODE MEMO/ENTER ST TUNED AUTO TAPE...
-
Page 2: Introduction
Introduction UNPACKING AND INSTALLATION Congratulations on Your Purchase! FOR U.S.A. Your new high fidelity receiver is designed to deliver Note to CATV System Installer: This reminder is maximum enjoyment and years of trouble free service. provided to call the CATV system installer's attention Please take a few moments to read this manual to Article 820-40 of the NEC that provides guidelines thoroughly. -
Page 3: Read This Before Operating Your Unit
READ THIS BEFORE OPERATING YOUR UNIT FOR U.S.A. AND CANADA 120 V FOR OTHER COUNTRIES 110 V/220 V FOR YOUR SAFETY FOR YOUR SAFETY Units shipped to the U.S.A. and Canada are designed Units shipped to countries other than the above for operation on 120 V AC only. -
Page 4: Table Of Contents
CONTENTS Introduction UNPACKING AND INSTALLATION ....................... 2 READ THIS BEFORE OPERATING YOUR UNIT................... 3 System Connections ............................5 Front Panel Controls ............................7 Speaker Placement ............................8 DIGI LINK III System Remote Controls ....................9 REMOTE CONTROL OPERATION RANGE..................10 LOADING BATTERIES.......................... -
Page 5: System Connections
3.5A MODEL NO. RVD-8090R T h i s d e v i c e c o m p l i e s w i t h P a r t 1 5 o f t h e F C C R u l e s . -
Page 6: Pre Out Connections
Graphic equalizer Center speaker DIGI-LINK Connect this jack to the DIGI LINK jack of the external Sherwood component that uses the DIGI LINK II or III remote control system. Powered subwoofer Use these jacks when adding additional amplifiers. Connect the PRE OUT jacks to the powered speakers or the I AC INPUT CORD power amplifiers connected to speakers respectively. -
Page 7: Front Panel Controls
MEMORY/ENTER BUTTON TONE DIRECT INDICATOR STANDBY BUTTON/ INDICATOR SPEAKER MODE BUTTON DOLBY DIGITAL INDICATOR POWER SWTICH REMOTE SENSOR T D A S AUDIO/VIDEO RECEIVER RVD-8090R T0TALLY DISCRETE AMPLIFIER STAGE BAND FM MODE MEMO/ENTER ST TUNED AUTO TAPE M PRESET POWER ON/OFF... -
Page 8: Speaker Placement
Speaker Placement FRONT TV set FRONT LEFT RIGHT CENTER WOOFER SPEAKER To obtain the best surround sound effect in your home, place the speakers as follows; Front speakers: Place each front speaker about 1m (40 ) from the TV set. Center speaker: Place the center speaker either above or below the TV set to assure good visualization of center channel program. -
Page 9: Digi Link Iii System Remote Controls
REMOTE CONTROL RM-RVD-98H MUTE BUTTON With the Sherwood Digi Link III system, pressing a transport control key such as PLAY, on a Sherwood CD player or tape deck will automatically engage that input on the receiver and then PLAY will start. -
Page 10: Remote Control Operation Range
REMOTE CONTROL OPERATION RANGE T D A S AUDIO/VIDEO RECEIVER RVD-8090R T0TALLY DISCRETE AMPLIFIER STAGE ST TUNED AUTO TAPE M PRESET BAND FM MODE MEMO/ENTER POWER ON/OFF DYNAMIC RANGE CINEMA EQ SPEAKER MODE Pro Logic THEATER HALL SLEEP OPTICAL 1... -
Page 11: Operations
Operations ADJUSTING SPEAKER SETTINGS SPEAKER MODE Select the desired speaker Adjusting the speaker settings setting. This receiver is equipped with circuitry that allows the use of a wide range of speaker systems. This circuitry works by redirecting the bass frequencies or the entire channel to speakers that are Each time this button is pressed, one of 11 different capable of reproducing them. -
Page 12: Adjusting Each Channel Level
Adjust the level of the selected Adjusting each channel level channel as desired. Select the channel to adjust. POWER P.SCAN DISC REPEAT INTRO SCAN TUNER DECK SEL TAPE MON. POWER P.SCAN DVD/TV VCR1 VCR2 CHANNEL LEVEL 6 CH DIRECT DECK PRESET USER FILE... -
Page 13: Adjusting Delay Times
ADJUSTING DELAY TIMES Check the current delay Adjusting delay times of the POWER P.SCAN time. Press the D.Time speakers in Dolby Digital(AC-3), DISC REPEAT INTRO SCAN DECK SEL TUNER button on the remote TAPE MON. DVD/TV VCR1 VCR2 Dolby Pro Logic and the DSP modes 6 CH DIRECT DECK PRESET... -
Page 14: Listening To A Program Source
LISTENING TO A PROGRAM SOURCE Select the desired input source. Before operation Enter the standby mode. POWER ON/OFF INPUT SELECTOR POWER P.SCAN DISC AUDIO REPEAT INTRO SCAN TUNER DECK SEL TUNER TAPE MON. TAPE DVD/TV MONITOR VCR1 VCR2 6 CH DIRECT DECK PRESET USER... - Page 15 Adjust the (overall) volume. When CD, VCR2 or DVD is selected as input source Select the digital or the analog input connected as desired. MASTER VOLUME POWER P.SCAN DISC REPEAT INTRO SCAN TUNER DECK SEL DIGITAL TAPE MON. DVD/TV INPUTS VCR1 VCR2 6 CH DIRECT...
- Page 16 To compensate for edgy or shrill movie To mute the sound. sound tracks. CINEMA EQ POWER P.SCAN DISC REPEAT INTRO SCAN TUNER DECK SEL TAPE MON. DVD/TV VCR1 VCR2 6 CH DIRECT DECK PRESET USER FILE DISPLAY T.MON STEREO MODE MUTE CHANNEL T.TONE...
-
Page 17: Surround Sound
SURROUND SOUND This unit incorporates a sophisticated Digital Signal Processor that allows you to create optimum sound quality and sound atmosphere in your personal Home Theater. Surround modes This unit has 6 different surround modes to allow you to enjoy surround sound with various program sources: DTS, DOLBY DIGITAL(AC-3), DOLBY PRO LOGIC, THEATER, HALL 1, HALL 2. -
Page 18: Enjoying Surround Sound
ENJOYING SURROUND SOUND Surround sound will not work properly if the signal passes through a graphic equalizer. Please refer to your equalizer operating instructions for guidance on switching off (or defeating) the equalizer. Select the desired surround mode. When selecting the Dolby Surround mode. When selecting a surround mode between THEATER, HALL 1 and HALL 2 modes. -
Page 19: Listening To Radio Broadcasts
LISTENING TO RADIO BROADCASTS Select the desired band. Auto tuning Select the tuner. BAND INPUT SELECTOR POWER P.SCAN BAND FREQUENCY TUNER DISC REPEAT INTRO AUDIO SCAN TUNER DECK SEL TAPE MON. DVD/TV VCR1 VCR2 6 CH DIRECT DECK PRESET USER FILE DISPLAY T.MON... - Page 20 Repeat the above steps 1 to 3 to memorize Select the desired preset number (1~30) and other stations. press the MEMORY button. MEMO/ENTER TUNING/PRESET MEMORY BACKUP FUNCTION When using the NUMERIC buttons on the remote The following items, set before the receiver is turned control.
-
Page 21: Recording
RECORDING The analog signals from the 6 CH DIRECT inputs and the digital signals from the coaxial or optical digital input can be heard but cannot be recorded. The volume and tone (bass, treble) settings, etc. have no effect on the recording signals. Recording with TAPE MONITOR Start recording on the component connected to the TAPE MONITOR. -
Page 22: Other Functions
Unit : minutes In the display OFF mode, pressing any button will restore the display ON mode. When the sleep time is selected, all display panels of Sherwood components connected by the DIGI LINK III will dim. -
Page 23: Troubleshooting Guide
Troubleshooting Guide If a fault occurs, run through the table below before taking your receiver for repair. If the fault persists, attempt to solve it by switching the receiver off and on again. If this fails to resolve the situation, consult your dealer. -
Page 24: Specifications
Specifications AMPLIFIER SECTION Power output, stereo mode, 8 Ω, THD 0.2%, 40 Hz~20 kHz ................. 2 100 W Total harmonic distortion, 8 Ω, 100 W, 1 kHz ....................... 0.03% Intermodulation distortion 60 Hz : 7 kHz= 4 : 1 SMPTE, 8 Ω, 100 W ........................0.07% Input sensitivity, 47 kΩ... - Page 25 O P E R A T I N G I N S T R U C T I O N S RVD-8090R AUDIO/VIDEO RECEIVER 5707-04705-003-0...