Table of Contents
Advertisement
Advertisement
Table of Contents

Related Manuals for Baumatic BS65MS


Summary of Contents for Baumatic BS65MS
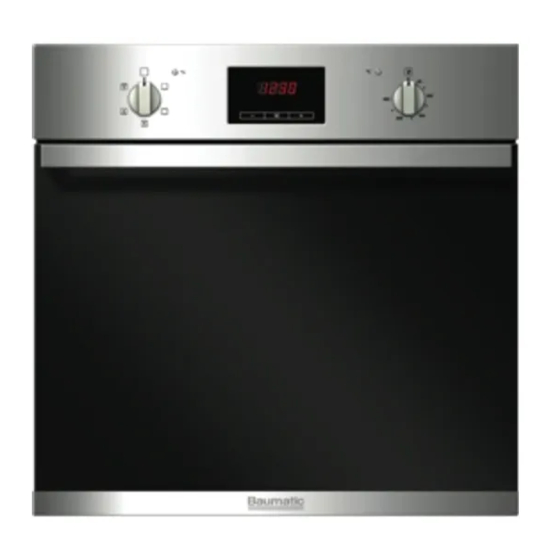
- Page 1 BS65MS 60 cm Multifunction Oven...
- Page 2 User Manual for your Baumatic BS65MS 60 cm Multifunction oven NOTE This User Instruction Manual contains important information, including safety & installation points, which will enable you to get the most out of your appliance. Please keep it in a safe place so that it is easily available for future reference; for you or any person not familiar with the operation of the appliance.
-
Page 3: Table Of Contents
Replacing the oven bulb Removing the oven door for cleaning Removing the inner door glass for cleaning Installation 24-27 Electrical connection Installing the oven into the kitchen cabinet Positioning the appliance Ventilation requirements My appliance isn’t working correctly 27-29 Baumatic consumables Contact details... -
Page 4: Environmental Note
Environmental note o The packaging materials that Baumatic uses are environmentally friendly and can be recycled. o Please discard all packaging material with due regard for the environment. -
Page 5: Important Safety Information
IMPORTANT SAFETY INFORMATION Your safety is of the utmost importance to Baumatic. Please make sure that you read this instruction booklet before attempting to install or use the appliance. If you are unsure of any of the information contained in this... - Page 6 Child Safety o Baumatic strongly recommend that babies and young children are prevented from being near to the appliance and not allowed to touch the appliance at any time. o If it is nece ssary for younger family members to be in the kitchen, please ensure that they are kept under close supervision at all times.
- Page 7 Baumatic Ltd declines any respon sibility for injury or damage, to person or property, as a result of improper use or installation of this appliance.
-
Page 8: Specifications
peci fications Product Dimensions Aperture Dimensio Height: 590 mm 580 mm – 583 mm Width: 595 mm 560 mm Depth: 550 mm 550 mm (min) Product specifications o 5 oven functions o Energy efficiency class: A o Oven gross capacity: 59 litres o Oven net capacity: 50 litres LED full programmer... -
Page 9: Electrical Details
Electrical details Rated Voltage: 220-240 Vac 50 Hz Supply Connection: 15 A (dou ble pole switched fused outlet with 3m m contact gap) Max Rated Inputs 2.30 kW ains Supply Lead: 3 x 1.5mm² ven Light Bulb: 25 W/300°C screw type pygmy For future reference please record the following information which can be found on the rating plate and the date of purchase which can be found on your sa... -
Page 10: Control Panel
Control Panel Control Panel 1) Oven function selector knob 2) Thermostat control kn 3) Power indica tor light 4) Oven operating light ) LED display 6) Oven programmer/timer Oven programmer/timer 7) Automatic cooking sym 8) Oven in use symbol 9) Decimal point symbol 10) Minute minder symb 11) Plus button... -
Page 11: Setting And Using The Oven Programmer/Timer
Initial set-up of your oven Selecting manual operation mode After your appliance is connected to your mains supply for the first time, the numbers on the timer display will flash. Before you can select a cooking function or set a temperature, you must set the appliance into “manual operation”... -
Page 12: Setting The Minute Minder Function
o You should leave the oven on maximum setting for 30 – 40 minutes. o After the oven cavity has cooled, it should then be cleaned with warm soapy water, using either a sponge or soft cloth. No abrasive cleaners should be used. o Outer parts of the oven should be cleaned with warm soapy water, using either a sponge or soft cloth. -
Page 13: Setting The Semi-Automatic Cooking Function
of the countdown time. YOU MUST turn the oven function selector knob and the thermos tat control knob to their OFF positions. The semi-automatic cooking function his function will allow you to set a countdown time similar to the minute minder function, however the oven will switch off at the end of the cooking time. -
Page 14: Setting The End Cook Function
The end of cooking function This function is similar to the s emi-automatic function, however stead of setting a countdown time, you select the time of day that you want the oven to switch off at. o Place the food that you want to cook inside of the oven and close the door. -
Page 15: Setting The Auto-Cooking Function
The automatic cooking function his function will allow you to set the time of day that you want the oven to switch off at and how long you want the oven to cook for. o Place the food that you want to cook inside of the oven and close the door. -
Page 16: Cancelling A Cooking Function
o To reset the oven and cancel the audible alarm, press the programme button until the oven in use symbol appears on the LED display and the automatic cooking symbol goes out. o IMPORTANT: If you have not turned the oven function selector knob and thermostat control knob to their OFF positio ns, when you reset the oven it will continue to heat. -
Page 17: Changing The Time Of Day
Changing the time of day o IMPOR TANT: The oven timer/programmer must not be in any form of countdown mode and the oven in use symbol (8) must be lit. o Press and hold down the minus (13) and plus (11) buttons simultaneously until the decimal point starts to flash. -
Page 18: Thermostat Control Knob
FAN AND LOWER ELEMENT: This method of cooking utilises the lower element in conjunction with the fan, which helps to circulate the heat. This function is suitable for sterilizing and preserving jars. CONVENTIONAL OVEN AND FAN: This method of cooking is a conventional cooking method, the oven heat comes from the top element and the bottom element, and the fan helps to... -
Page 19: Warnings
o You should pre-heat the oven and not place food inside of it until the oven operating light has gone off. o IMPORTANT: You should ALWAYS pre-heat the oven if you are baking. o Make sure that frozen foods are thoroughly thawed before cooking, unless the instructions on the food packaging advise that you can “cook from froze n”. -
Page 20: Shelf Positions
Shelf levels o Safety shelf (A) o Removable side racks, which allow you to cook on six different levels (B) o Enamelled baking tray (C) o The nu bers 1 – 6, indicate the different shelf positions that you can utili within the oven. -
Page 21: Replacing The Oven Bulb
o Outer parts of the oven should only be cleaned with warm soapy water, usin g either a sponge or soft cloth. No abrasive cleaners should be used. o We would recommend that an appropriate stainless steel cleaner and polish is regularly used on the s tainless steel surfaces of this appliance. -
Page 22: Removing The Oven Door For Cleaning
Removing the ov en door for cleaning To facilitate the cle aning of the inside of the oven and the outer frame of the oven, the do or can be removed as follows o Open the door fully o The hinges (A) have tw o movable bolts on them (B). -
Page 23: Removing The Inner Door Glass For Cleaning
Removing the inner door glass for cleaning o Do not use any abrasive cleaner that could cause damage. o Remember that if the surface of the glass panel becomes scratched, this could lead to a dangerous failure. To facilitate cleaning, the inner door glass can be lifted out. o Unscrew the bracket latch that is in the corner of the top of t door. -
Page 24: Installation
INSTALLATION The installation must be carried out by a suitably qualified person, in accordance with the current version of the following. o AS/NZS 3000: 2007 Wiring Regula tions o 2010 Electricity Safety Regulations Electrical connection Before co nnecting the appliance, make sure that the supply voltage marked on the rating plate corresponds with your mains supply voltage. -
Page 25: Installing The Oven Into The Kitchen Cabinet
Installing the oven into the kitchen cabinet Positioning the appliance o Ensure that the aperture that you will be fitting the oven into is of the size given in the above diagram. o The oven must be fitted into an oven housing with the ventilation cut-outs shown in the “Ventilation requirements”... -
Page 26: Ventilation Requirements
Ventilation requirements igure shows the ventilation and cut-out requirements for the llation of the appliance into a standard kitchen unit). igure shows the ventilation and cut-out requirements for the stallation of the appliance into a tall housing unit). -
Page 27: My Appliance Isn't Working Correctly
o Ensure that the oven has been securely fixed into the housing unit. The fixing of the oven into the housing is made by using four screws. These should be screwed through oven cabinet and into the housing unit. My appliance isn’t working correctly o The oven isn’t coming on. - Page 28 o My food is not cooking properly * Ensure that you are selecting the correct temperature and the correct cooking function for the food that you are cooking. It may be appropriate to adjust your cooking temperature by plus or minus 10°C, to achieve the best cooking results. o My food is not cooking evenly * Check that the oven has been installed correctly and is level.
- Page 29 Or any installation other than the one specified by Baumatic Ltd has been completed. Please refer to the conditions of guarantee that appear on the warranty card that you receive with the appliance.
-
Page 30: Baumatic Consumables
Service Telephone 1800 444 357 Website www.thinkappliances.com Applico Ltd. Private Bag 92900 Onehunga, Auckland 1061, New Zealand Website www.baumatic.co.nz United Kingdom Baumatic Ltd., Baumatic Buildings, 6 Bennet Road, Reading, Berkshire RG2 0QX United Kingdom Sales Telephone (0118) 933 6900 Website: www.baumatic.co.uk...