Harman Kardon AVR 140 Owner's Manual
Audio/videoreceiver
Hide thumbs
Also See for AVR 140:
- Service manual (160 pages) ,
- Owner's manual (60 pages) ,
- Brochure & specs (22 pages)
Table of Contents
Advertisement
Advertisement
Table of Contents

Related Manuals for Harman Kardon AVR 140


Summary of Contents for Harman Kardon AVR 140
- Page 1 AVR 140 Audio/VideoReceiver OWNER’S MANUAL Power for the Digital Revolution ®...
-
Page 2: Table Of Contents
Table of Contents Introduction Safety Information Unpacking Front Panel Controls Rear Panel Connections Main Remote Control Functions Installation and Connections Audio Connections Video Connections SCART A/V Connections System and Power Connections Speaker Selection Speaker Placement System Configuration First Turn On Using the On-Screen Display System Setup Input Setup... -
Page 3: Introduction
Introduction Thank you for choosing Harman Kardon! With the purchase of a Harman Kardon AVR 140 you are about to begin many years of listening enjoyment. Designed to provide all the excitement and detail of movie soundtracks and every nuance of musical selections, the AVR 140 is truly a multichannel receiver for the new millennium. -
Page 4: Safety Information
I Do not obstruct the ventilation slots on the top of the unit, or place objects directly over them. I Due to the weight of the AVR 140 and the heat generated by the amplifiers, there is the remote possibility that the rubber padding on the bottom of the unit’s feet may leave marks... -
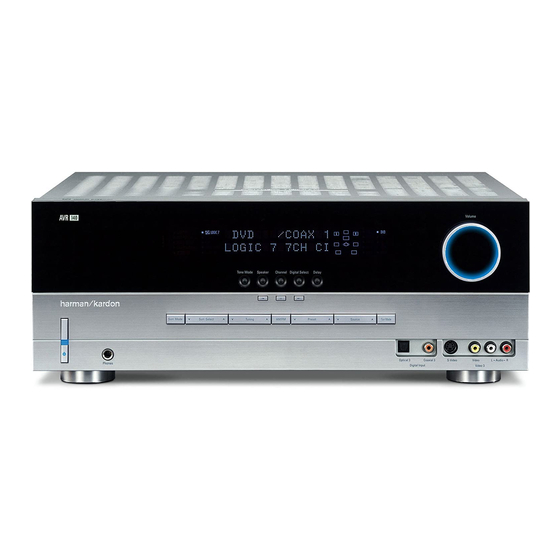
Page 5: Front Panel Controls
Front Panel Controls Main Power Switch System Power Control Power Indicator Headphone Jack Surround Mode Group Selector Speaker Select Button Selector Buttons Tone Mode Surround Mode Selector Tuning 1 Main Power Switch: Press this button to apply power to the AVR. When the switch is pressed in, the unit is placed in a Standby mode, as indicated by the orange LED 3. - Page 6 Front Panel Controls 7 Selector Buttons: When you are establishing the AVR’s configuration settings, use these buttons to select from the choices available, as shown in the Main Information Display Ò. 8 Tone Mode: Pressing this button enables or disables the Balance, Bass and Treble tone controls.
-
Page 7: Rear Panel Connections
Video 1 Audio Inputs Video 2 Video Inputs Digital Media Player (DMP) Connector: With the AVR 140 turned off, con- nect one end of the optional Harman Kardon to this proprietary connector, and the other to your compatible Apple iPod. When the Digital Media Player source is selected, you may view your iPod’s control and navigation mes-... - Page 8 NOTE ON VIDEO CONNECTIONS: When con- necting a video source product such as a VCR, DVD player, satellite receiver, cable set-top box, personal video recorder or video game to the AVR 140, you may use either a composite or S-video connection, but not both.
-
Page 9: Main Remote Control Functions
Main Remote Control Functions Power Off Button IR Transmitter Window Program Indicator Power On Button Input Selectors AVR Selector AM/FM Tuner Select 6-Channel/8-Channel Direct Input Test Button Sleep Button Surround Mode Selector Night Mode Channel Select Button Buttons ⁄ ¤ Button ‹... - Page 10 Main Remote Control Functions IMPORTANT NOTE: The AVR 140’s remote may be programmed to control up to seven devices, including the AVR. Before using the remote, it is important to remember to press the Input Selector button that corresponds to the unit you wish to operate.
- Page 11 ® is docked in pressing this selector will select the iPod as the audio source input device for the AVR 140. In addition, if a video display is connected to one of the Video Monitor Outputs , the iPod’s messages will appear on screen, and in the Upper and Lower Display Lines Ò.
-
Page 12: Video Connections
AVR. Note that it is not possible to use the AVR 140 in a 7.1-channel configuration. Any source informa- tion that the AVR receives or derives for the sur- round back left and right channels, e.g. -
Page 13: Scart A/V Connections
Installation and Connections IMPORTANT: If you are only using the television as a display device (i.e., if you receive your tele- vision programs through a cable box or satellite receiver), do not connect the TV’s outputs to the Video 3 Audio/Video and S-Video Input Jacks Ô, or to any other inputs on the AVR. -
Page 14: System And Power Connections
For that reason, it is important that only the cord supplied with the unit (or a direct replacement of identical capaci- ty) be used. Once the power cord is connected, you are almost ready to enjoy the AVR 140’s incredible power and fidelity! -
Page 15: Speaker Selection
Installation and Connections Speaker Selection No matter which type or brand of speakers is used, the same model or brand of speaker should be used for the front-left, center and front-right speakers. This creates a seamless front soundstage and eliminates the possibility of distracting sonic disturbances that occur when a sound moves across mismatched front-channel speakers. -
Page 16: System Configuration
Subwoofer. Once these settings are made, they will automatically be recalled whenever you select that input. The factory default settings for the AVR 140 have all inputs configured for an analog audio input except for the DVD input, where the Coaxial... -
Page 17: Input Setup
The default setting is , in which the docked iPod will not continue to charge when the AVR 140 is turned off, even though remains connected to the AVR. When all needed adjustments have been made, ©... -
Page 18: Night Mode Settings
7.1 will appear. In addition, the modes DTS ES (Discrete) and DTS+NEO:6 (DTS ES Matrix) avail- able in the AVR 140 will not appear unless a digi- tal source is playing the correct bitstream. In addition, some of the modes available in the AVR will not appear unless a digital source is selected and is playing the correct bitstream. -
Page 19: Configuring The Surround Off
DTS + NEO:6 mode to create a full eight-speaker surround mode. When a DTS 96/24 signal is detected, the AVR 140 defaults to the DTS surround mode, but reproduces the higher- resolution materials that are present due to the higher sampling rate automatically. -
Page 20: Speaker Setup
System Configuration going to the front left/right speakers, or you may configure it so that the subwoofer feed is activated. The factory default setting is to have the sub- woofer turned off for this mode, but you may change that setting by following these steps: 1. - Page 21 System Configuration line in this menu (see below), the front left and right bass information may also be directed to the subwoofer. NOTE: When the front speakers are set to the option and the surround mode is set to "Surround Off", or pure two-channel stereo, when an analog signal source is present it will be routed directly from the input to the volume control without being digitized or processed.
-
Page 22: Delay Settings
System Configuration option is selected, a full-range signal will be sent to the front left/right “main” speakers. The subwoofer will receive the front left and right bass frequencies under the crossover fre- quency selected in another setting on this menu, as described below, and also the LFE soundtrack. -
Page 23: Output Level Adjustment
System Configuration pensate for this difference through the use of the delay settings to adjust the timing for the specific speaker placement and acoustic conditions in your listening room or home theater. To re-synchronize the front, center and surround channels at first measure and note the distance from the listening/viewing position to the front, center, surround and surround back (if any) speakers in meters. - Page 24 System Configuration Before beginning the output level adjustment process, make certain that all speaker connec- tions have been properly made. The system volume should be turned down at first. For the easiest set-up, follow these steps while seated in the listening position that will be used most often: 1.
- Page 25 System Configuration various sources, as opposed to the test tone. See page 31 for more information on trimming the output levels to external source material. NOTE: The subwoofer output level is not adjustable using the test tone. To change the subwoofer level, follow the steps for Output Level Trim Adjustment on page 32.
-
Page 26: Operation
Operation Surround Mode Chart MODE FEATURES DOLBY DIGITAL Available only with digital input sources encoded with Dolby Digital data. It provides up to five separate main audio channels and a special dedicated Low Frequency Effects channel. DOLBY DIGITAL EX Available when the receiver is configured for 6.1/7.1 channel operation, Dolby Digital EX is the latest version of Dolby Digital. - Page 27 Operation Surround Mode Chart MODE FEATURES DTS Neo:6 Cinema These two modes are available when any analog source is playing to create a six-channel DTS Neo:6 Music surround presentation from conventional Matrix-encoded and traditional Stereo sources. Select the Cinema version of Neo:6 when a program with any type of analog Matrix surround encoding is present.
-
Page 28: Basic Operation
Operation Basic Operation Once you have completed the setup and configu- ration of the AVR, it is simple to operate and enjoy. The following instructions should be followed for you to maximize your enjoyment of your new receiver: Turning the AVR On or Off •... -
Page 29: Surround Mode Selection
Surround Mode Selection One of the most important features of the AVR 140 is its ability to reproduce a full multi- channel surround sound field from digital sources, analog matrix surround encoded programs and standard stereo or even mono programs. -
Page 30: Pcm Audio Playback
Operation DTS-encoded sound tracks are available on select DVD and LD discs, as well as on special audio- only DTS CDs. You may use any LD, DVD or CD player equipped with a digital output to play DTS- encoded special audio-only CDs with the AVR, but DTS-LDs can be played on LD players and DTS-DVDs on DVD players only. -
Page 31: Pcm Playback Indications
Speaker/Channel Input Indicators $ in the front panel Main Information Display Ò. Remember that the AVR 140 is capable of pro- cessing a 7.1-channel signal, although you may only connect one surround back speaker to it. It... -
Page 32: Night Mode
Operation Important Note: When a digital surround source (Dolby Digital, DTS) is played, the letters SBL/SBR for the Surround Back channels will appear only when a DTS ES DISCRETE 6.1 source is played. Then this surround mode will be indi- cated in the front display and on-screen display. -
Page 33: Memory Backup
Advanced Features The AVR 140 is equipped with a number of ad- vanced features that add extra flexibility to the unit’s operation. While it is not necessary to use these features to operate the unit, they provide additional options that you may wish to use. -
Page 34: Turn-On Volume Level
Advanced Features Turn On Volume Level As is the case with most audio/video receivers, when the AVR is turned on, it will always return to the volume setting in effect when the unit was turned off. However, you may prefer to always have the AVR turn on at a specific set- ting, regardless of what was last in use when the unit was turned off. -
Page 35: Default Surround Mode
Basic Tuner Operation The AVR 140’s tuner is capable of tuning AM, FM and FM Stereo broadcast stations and receiving RDS data. Stations may be tuned manually, or they may be stored as favorite station presets and recalled from a 30 position memory. -
Page 36: Rds Operation
Tuner Operation RDS Operation The AVR 140 is equipped with RDS (Radio Data System), which brings a wide range of informa- tion to FM radio. Now in use in many countries, RDS is a system for transmitting station call signs... -
Page 37: Programming The Remote
Programming the Remote The AVR 140 is equipped with a powerful remote control that will control not only the receiver’s functions, but also most popular brands of audio and video equipment, including CD players, TV sets, cable boxes, VCRs, satellite receivers and other home-theater equipment. - Page 38 Programming the Remote For future reference enter the Setup Codes for the equipment in your system here: DVD ____________ CD ________________ VID1/VCR ________ VID3/TV __________ VID2/CBL/SAT ______________________ TAPE ______________________________ Macro Programming Macros enable you to easily repeat frequently used combinations of commands with the press of a single button on the AVR’s remote control.
- Page 39 Programming the Remote 3. Press either the AVR Selector or the Input Selector , depending on which system’s volume control you wish to have attached for the punch-through mode. The Program Indicator will blink green three times and then go out to confirm the data entry. Example: To have the AVR’s volume control acti- vated even though the remote is set to control the TV, first press the Video/TV Input Selector...
- Page 40 Function List 40 FUNCTION LIST Button Name AVR Function Power On Power On Power Off Power Off Mute Mute AVR Select DVD Input Select CD Input Select Tape Tape Input Select VID 1 Video 1 Select VID 2 Video 2 Select VID 3 Video 3 Select AM/FM...
- Page 41 Function List Button Name Tape Power On Power On Power Off Power Off Mute Tape Tape Select VID 1 VID 2 VID 3 AM/FM 6/8 Ch. Select Sleep Test T/V select Volume Up Surround Select Night Spare Button Volume Down Channel/Guide ⁄...
-
Page 42: Processor Reset
Troubleshooting Guide SYMPTOM CAUSE Unit does not function when Main • No AC Power Power Switch 1 is pushed Display lights, but no sound • Intermittent input connections or picture • Mute is on • Volume control is down No sound from any speaker; •... - Page 43 Technical Specifications Audio Section Stereo Mode Continuous Average Power (FTC) 50 Watts per channel, 20Hz–20kHz, @ < 0.07% THD, both channels driven into 8 ohms 6 Channel Surround Modes Power Per Individual Channel Front L&R channels: 40 Watts per channel, @ <...
- Page 44 APPENDIX – SETTINGS WORKSHEET Table 1: Input Settings FEATURE VIDEO 1 Input Title Component Video Input Component Component Video 1 (Y/N) Video2 (Y/N) Digital Audio Input Auto Poll (On/Off) Surround Mode Night Mode Front L/R Speaker Size* Center Speaker Size* Surround L/R Speaker Size* Surround Back Speaekr Size* Subwoofer...
- Page 45 INTRODUCTION 45...
- Page 46 250 Crossways Park Drive, Woodbury, New York 11797 www.harmankardon.com Harman Consumer Group International: 2, route de Tours, 72500 Château-du-Loir, France © 2005 Harman Kardon, Incorporated Part No.: OM P/N CQX1A1055Z...