Table of Contents
Advertisement
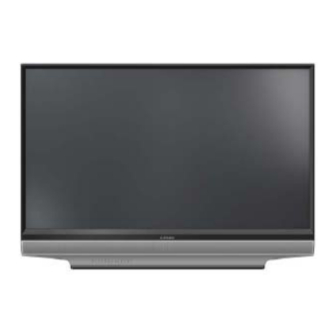
MITSUBISHI ELECTRIC
WD-52327
WD-52531
CAUTION:
Before servicing this chassis, it is important that the service person read the "SAFETY PRECAUTIONS" and
"PRODUCT SAFETY NOTICE" contained in this manual.
• Power Input
• Power Usage
• Light Engine
• Light Source
• Antenna Input
• Tuning
• Cabinet Dimensions
• Weight
• Speakers (4 Ohms 10W)
• Design specifications are subject to change without notice.
MITSUBISHI DIGITAL ELECTRONICS AMERICA, INC.
SPECIFICATIONS
: AC 120V, 60Hz
: 225W
: 3 LCD (1280 x 720 pixels)
: 132 Watts
: 2 RF 75Ω unbalanced
: 1 NTSC/ATSC/QAM
:
[WD-52531]
33.1"(H) x 47.1"(W) x 16.9"(D)
: [WD-62530]
39.1"(H) x 55.9"(W) x 19.2"(D)
: [WD-62531]
39.1"(H) x 55.9"(W) x
19.2"(D))
: [WD-52531]
82.5 lbs
: [WD-62530] [WD-62531]
99.3 lbs
: 2-5 ½ x 2 ¼ inch
9351 Jeronimo Road, Irvine, CA 92618-1904
Copyright © 2006 Mitsubishi Digital Electronics America, Inc.
All Rights Reserved
Ser
Ser
Ser vice
Ser
Ser
Manual
Manual
Manual
Manual
Manual
LCD PROJECTION HDTV
V32/V32L CHASSIS
V32 Chassis
WD-52531
WD-62531
Pb Solder
• Input Level
: VIDEO IN JACK (RCA Type)
: AUDIO IN JACK (RCA Type)
: S-VIDEO IN JACK
: COMP / Y, Cr, Cb (RCA Type)
• Output Level
: VIDEO OUT JACK (RCA Type)
: AUDIO OUT JACK (RCA Type)
W
• Digital
: AC-3 Digital Audio Output
: HDMI
: Lead-Free solder PWBs
Pb Solder
.
vice
vice
vice
vice
V32L Chassis
WD-62530
1.0Vp-p 75Ω unbalanced
-4.7dBm 43kΩ unbalanced
(Y/C separate type)
Y:1.0 Vp-p C:0.286Vp-p(BURST)
75Ω unbalanced
Y: 1.0 Vp-p Cr, Cb: 700mVp-p
1.0Vp-p 75Ω unbalanced
-4.7dBm 4.7kΩ unbalanced
(RCA Type)
TM
2006
2006
2006
2006
2006
Advertisement
Table of Contents

Related Manuals for Mitsubishi Electric WD-52531


Summary of Contents for Mitsubishi Electric WD-52531
- Page 1 : AUDIO OUT JACK (RCA Type) -4.7dBm 4.7kΩ unbalanced 39.1"(H) x 55.9"(W) x 19.2"(D)) • Digital : AC-3 Digital Audio Output • Weight : [WD-52531] (RCA Type) 82.5 lbs : HDMI : [WD-62530] [WD-62531] 99.3 lbs : Lead-Free solder PWBs Pb Solder •...
-
Page 3: Table Of Contents
MODEL: WD-52531 / WD-62531 / WD-62530 CONTENTS INTRODUCTION ..........................5 Dimensions, weight, power usage, etc.................... 5 PRODUCT SAFETY NOTICE ......................5 SAFETY PRECAUTIONS ......................... 6 DISASSEMBLY ..........................7 Rear Cover Removal ........................7 Chassis Removal and Disassembly ....................7 LCD Engine Removal ........................ - Page 4 MODEL: WD-52531 / WD-62531 / WD-62530 Digital Video Signal Path ......................41 Sound Signal Path ........................42 Overall Control Circuitry ........................ 43 Command Input Circuitry ....................... 44 Lamp Control Circuitry ........................44 LCD Engine Protect Circuitry ......................45 Short Protect Circuit ........................45 Auto Input Detection ........................
-
Page 5: Model: Wd-52531 / Wd-62531 / Wd
MODEL: WD-52531 / WD-62531 / WD-62530 INTRODUCTION This service manual provides service instructions for LCD Projection TV Models WD-52531 and WD-62531 using the V32 chassis, and WD-62530 using the V32L chassis. This service manual includes: 1. Assembly and disassembly instructions for the front and rear cabinet components. -
Page 6: Safety Precautions
MODEL: WD-52531 / WD-62531 / WD-62530 SAFETY PRECAUTIONS NOTICE: Observe all cautions and safety related notes located inside the receiver cabinet and on the receiver chassis. WARNING: Operation of this receiver outside the cabinet or with the cover removed presents a shock hazard from the receiver's power supplies. -
Page 7: Disassembly
MODEL: WD-52531 / WD-62531 / WD-62530 BACK-COVER Removal 1) Remove 2 screws (A) to remove the Lamp Cover 2) Remove 12 screws (B). 3) Pull the COVER-BACK from the cabinet. NOTE: To operate the TV the Lamp Cover must be reinstalled after the back cover is removed. - Page 8 MODEL: WD-52531 / WD-62531 / WD-62530 Rear Plate & PWB-INTERFACE Removal 1) Remove 4 screws (a) and pull off the rear plate. 2) Remove 3 screws (b) to remove the PWB-INTERFACE PWB-POWER & Power Bracket Removal 1) Remove 4 screws (A) and lift PWB- POWER from the chassis.
- Page 9 MODEL: WD-52531 / WD-62531 / WD-62530 PWB-DM Removal PWB-SIGNAL Removal 1) Remove 6 screws (D). 1) Remove 6 screws (c). 2) Unplug all connecting cables. 2) Unplug all connecting cables. 3) Lift PWB-DM from the chassis. 3) Remove PWB-SIGNAL If PWB-SIGNAL is replaced, see page 22 to If PWB-DM is replaced, see page 22 to perform "Download WB Data to FMT"...
-
Page 10: Lcd Engine Removal
MODEL: WD-52531 / WD-62531 / WD-62530 Light Engine Replacement Light Engine and Associated Components The picture below shows the LCD Engine without added components, and the bottom picture shows the added components and the Engine mounted on the Engine Plate. - Page 11 MODEL: WD-52531 / WD-62531 / WD-62530 Light Engine & Engine Plate removal from the Cabinet Preliminary Refer to the chassis removal procedure and remove the BACK-COVER. Removal Procedure 1) Remove the 2 locking screwss (A). 2) Loosen one (B) adjustment screw.
- Page 12 MODEL: WD-52531 / WD-62531 / WD-62530 Light Engine removal from the Bottom Plate (continued) 2) To remove the Engine from the bottom plate, remove 3 screws (a), and carefully lift the Engine from the bottom plate. 3) To remove the COVER- INDUCTION from the Engine 5 screws (b).
-
Page 13: Front Disassembly
MODEL: WD-52531 / WD-62531 / WD-62530 Front Disassembly Screen Frame Removal 1) Pull off the Speaker Grill. 2) Remove all screws (B) from the upper rear cover (except one screw at a upper corner). The remaining screw supports the screen frame while removing the front screws. -
Page 14: Lenticular Screen And Fresnel Lens Removal And Replacement
MODEL: WD-52531 / WD-62531 / WD-62530 Screen Replacement CAUTION: Wear gloves when handling the Lenticular Screen and Fresnel Lens. This prevents cuts and finger prints. Do not place Fresnel Lens in the sun. This may cause fire and heat related injuries. -
Page 15: Adjustments
MODEL: WD-52531 / WD-62531 / WD-62530 V32/V32L REMOTE CONTROL OPTION MENU 1. Press the “MENU” button on the remote hand unit. 2. Press the buttons “2”, “4”, “7” and “0” in order. (The screen will change to the option menu.) -
Page 16: Front Panel Initialization
MODEL: WD-52531 / WD-62531 / WD-62530 Front Panel Initialization While the unit is ON, pressing the FORMAT and INPUT buttons simultaneously will immediately start the Initialization sequence. The TV will reboot once the initialization sequence is completed. Front Panel Initialization will reset ALL user settings to the factory setting. -
Page 17: Defaults
MODEL: WD-52531 / WD-62531 / WD-62530 DEFAULTS AFTER INITIALIZATION Setup Menu TV Rating :TV-PG Language :English FV-Fantasy/Violence Memorize Channels D-Sexual Dialog Ant1 Air L-Adult Language Ant1 Cable S-Sexual Situations Ant2 Air V-Violence Ant2 Cable Programs not rated Clock Movie Rating... -
Page 18: A/V Defaults
MODEL: WD-52531 / WD-62531 / WD-62530 AV RESET DEFAULTS Component A/V Memory Antenna 1&2 Input 1/2/3 HDMI 1/*2 Brillant/Bright/Natural Bright Bright Bright Bright Bright Contrast Maximum Maximum Maximum Maximum Bright Brightness Center Center Center Center Color Center Center Center Center... -
Page 19: Error Codes Operational Check
MODEL: WD-52531 / WD-62531 / WD-62530 ABNORMAL LED INDICATIONS Power/Timer Status Indicator Lamp Indicator Condition Indicator Yellow Temperature high – room temperature too hot. Temperature sensor is disconnected. Yellow Lamp usage warning (over 5000 hours) Blinking yellow Lamp cover is open. -
Page 20: Lamp Troubleshooting
MODEL: WD-52531 / WD-62531 / WD-62530 Lamp Control Block Diagram Lamp Lights Replace then goes out Lamp Code 34 Code 34 Lamp Troubleshooting Lamp does Flow Chart not Light • Install Lamp Cover with no Lamp Check Cable Check • Monitor Ballast spark gap. - Page 21 MODEL: WD-52531 / WD-62531 / WD-62530 SERVICE ADJUSTMENTS There are only 5 Service Adjustments required in these models: Two Electrical Adjustments • Horizontal Centering • Vertical Centering Three Mechanical Adjustment • Picture Rotation • Horizontal Keystone Distortion • Vertical Keystone Distortion Measuring equipment and Jigs •...
-
Page 22: Service Adjustment Mode
MODEL: WD-52531 / WD-62531 / WD-62530 4. Adjustment Selection Use the “VIDEO” button to select a specific electrical adjustment, “1 HPOS” or “2 VPOS”. 5. Adjusting Data After selecting an adjustment item, use the “UP” and “DN” buttons to change adjustment data. -
Page 23: Service Adjustment Mode Operation
MODEL: WD-52531 / WD-62531 / WD-62530 Light Engine Adjustments Test Signal Activation 1) Press “MENU-2-4-5-7” (Service Mode) 2) Press “FF/FWD” (Test Pattern). Red = 4% overscan White = 5% overscan Green = 6% overscan Cyan = 7% overscan Yellow = 10% overscan... -
Page 24: Rotation And Keystone Distortion Adjustment
MODEL: WD-52531 / WD-62531 / WD-62530 Trapezoid Distortion Adjustment 1) For Distortion at the top of the picture, rotate [A-5] counter clockwise (the picture will move upward). 3) For distortion at the bottom of the picture, rotate [A-5] clockwise (the picture will move upward). -
Page 25: Horizontal & Vertical Position
MODEL: WD-52531 / WD-62531 / WD-62530 Purpose: To center the picture on the screen. [Format Circuit] Horizont/Vertical Position Adjust- Symptom: Picture is off center. ment Measuring Instrument 1. Press “MENU-2-4-5-7”, activates the Service Mode.. 2. Press “ff/fwd”, activates the Overscan Test Pattern... -
Page 26: Using Lead Free Solder
MODEL: WD-52531 / WD-62531 / WD-62530 Using Lead Free Solder Pb Solder • The time required for a good solder connection may take longer. • Poor wet-ability can cause solder balls. The above symbol indicates Lead (Pb) Free solder was used during the construction of PWBs. -
Page 27: Chip Parts Replacement
MODEL: WD-52531 / WD-62531 / WD-62530 CHIP PARTS REPLACEMENT Some resistors, shorting jumpers (0 Ohm resistors), Chip Parts Removal (Transistors) ceramic capacitors, transistors and diodes are chip parts. Melt the solder of one lead and lift the side of The following precautions should be taken when replacing that lead upward. -
Page 28: Replacement Parts
MODEL: WD-52531 / WD-62531 / WD-62530 REPLACEMENT PARTS Parts Ordering To expedite delivery of replacement parts orders, specify the following: Model Number/Serial Number Part Number and description Quantity Note: Unless complete information is supplied, delay in processing of orders will result. -
Page 29: Quick Reference List
MODEL: WD-52531 / WD-62531 / WD-62530 QUICK REFERENCE FOR COMMON PARTS CUSTOMER REPLACEABLE PARTS COMPONENT PART NUMBER MODELS 915P043010 LAMP CARTRIDGE REMOTE 290P137010 MAJOR PWB ASSEMBLIES PW B PART NUMBER MODELS PW B-POW ER 930B943001 PW B-SIGNAL 934C216001 W D-52531 / W D-62531 "... -
Page 30: Service Parts List
MODEL: WD-52531 / WD-62531 / WD-62530 [#] Model Legend: (a) WD-52531, (b) WD-62530, (c) WD-62531 Ref # Part # Part Name & Description Ref # Part # Part Name & Description INTEGRATED CIRCUITS IC8301 276P399010 IC-C-MOS - 74LVC573APW-T IC8302 276P323010... - Page 31 MODEL: WD-52531 / WD-62531 / WD-62530 [#] Model Legend: (a) WD-52531, (b) WD-62530, (c) WD-62531 Ref # Part # Part Name & Description Ref # Part # Part Name & Description Part No. Description D9J02 262P828010 D-CHIP - MC2838-T112-1 261P842030...
- Page 32 MODEL: WD-52531 / WD-62531 / WD-62530 [#] Model Legend: (a) WD-52531, (b) WD-62530, (c) WD-62531 Ref # Part # Part Name & Description Ref # Part # Part Name & Description L8011 409P865080 EMI-F-CHIP - BLM18PG6 L2KG0 325C411030 COIL-CHIP - 10MH-J...
- Page 33 MODEL: WD-52531 / WD-62531 / WD-62530 [#] Model Legend: (a) WD-52531, (b) WD-62530, (c) WD-62531 Ref # Part # Part Name & Description Ref # Part # Part Name & Description L8G25 409P865060 EMI-F-CHIP - BLM11B141S VARISTORS L8G27 409P865060 EMI-F-CHIP - BLM11B141S...
- Page 34 MODEL: WD-52531 / WD-62531 / WD-62530 [#] Model Legend: (a) WD-52531, (b) WD-62530, (c) WD-62531 Ref # Part # Part Name & Description Ref # Part # Part Name & Description RESISTORS 141P141080 B50V 5600P-K 181P826050 50V 10M-M 105C 141P142000...
- Page 35 MODEL: WD-52531 / WD-62531 / WD-62530 [#] Model Legend: (a) WD-52531, (b) WD-62530, (c) WD-62531 Ref # Part # Part Name & Description Ref # Part # Part Name & Description 750A575010 BOX-MIRROR C9H28 181P354040 C-ELEC - 50V 10M-M 750A576010...
- Page 36 MODEL: WD-52531 / WD-62531 / WD-62530 [#] Model Legend: (a) WD-52531, (b) WD-62530, (c) WD-62531 Ref # Part # Part Name & Description Ref # Part # Part Name & Description PRINTED CIRCUIT BOARDS COSMETIC PARTS 930B943001 ASSY-PWB-POWER 716C044010 BADGE - BRAND...
-
Page 37: Screen Assembly Parts List
MODEL: WD-52531 / WD-62531 / WD-62530 [#] Model Legend: (a) WD-52531, (b) WD-62530, (c) WD-62531 Ref # Part # Part Name & Description Ref # Part # Part Name & Description SCREEN ASSEMBLY PARTS WD-62530 / WD-62531 WD-52531 491P199060 SCREEN-LENTICULAR... -
Page 38: Circuitry Block Diagrams
MODEL: WD-52531 / WD-62531 WD-62530 MAIN POWER SUPPLY Page 38... -
Page 39: Lcd Light Engine & Fan Power Supplies
MODEL: WD-52531 / WD-62531 WD-62530 LCD Engine & Fan Supplies DC to DC Suppies Page 39... -
Page 40: Analog Video Signal Path
MODEL: WD-52531 / WD-62531 WD-62530 Analog Video Signal Path Page 40... -
Page 41: Digital Video Signal Path
MODEL: WD-52531 / WD-62531 WD-62530 Page 41... -
Page 42: Sound Signal Path
MODEL: WD-52531 / WD-62531 WD-62530 Page 42... -
Page 43: Overall Control Circuitry
MODEL: WD-52531 / WD-62531 WD-62530 Page 43... -
Page 44: Command Input Circuitry
MODEL: WD-52531 / WD-62531 WD-62530 Command Input Circuitry Lamp Control Circuitry Page 44... -
Page 45: Lcd Engine Protect Circuitry
MODEL: WD-52531 / WD-62531 WD-62530 LCD Engine Protect Circuitry Short Protect Circuitry Page 45... -
Page 46: Auto Input Detection
MODEL: WD-52531 / WD-62531 WD-62530 Auto Input Detection Page 46... - Page 47 3.3VE COVER-DET SENSOR CN2000 CN100 TEMP ENGINE STOP PBS+LCD(R,G) FAN SHUTTER STOP WD-52531 V32 CONTENTS LCD(B) FAN WD-62531 V32 PG 1..BLOCK PG 15..DM7 [DMPM8] WD-62530 V32L PG 2..POWER / INTERFACE PG 16..DM8 [DM-HDMI] PG 3..SIGNAL1 [TV MICRO] PG 17..DM9 [DM-AUDIO] PG 4..SIGNAL2 [AUDIO / DC-DC]...
- Page 48 RV9D00 AG9D00 F9D00 DSS-302M PWB-POWER TO SIGNAL S10A 125V PWB-INTERFACE 1 2 3 ET9A01 WD-52531 V32 CONTENTS WD-62531 V32 PG 1..BLOCK PG 15..DM7 [DMPM8] WD-62530 V32L PG 2..POWER / INTERFACE PG 16..DM8 [DM-HDMI] PG 3..SIGNAL1 [TV MICRO] PG 17..DM9 [DM-AUDIO] PG 4..SIGNAL2 [AUDIO / DC-DC]...
- Page 49 18 19 20 21 22 23 24 25 26 27 28 29 30 31 32 33 34 35 36 37 38 39 40 41 42 43 44 45 46 47 48 49 WD-52531 V32 3.3VS CONTENTS WD-62531 V32 PG 1..BLOCK PG 15..DM7 [DMPM8]...
- Page 50 R3E50 R3E30 Q3E03 1/16W 2SC3052-T112-1E,F R3E51 1/16W R3E31 1/16W 1/16W WD-52531 V32 CONTENTS WD-62531 V32 PG 1..BLOCK PG 15..DM7 [DMPM8] WD-62530 V32L PG 2..POWER / INTERFACE PG 16..DM8 [DM-HDMI] PG 3..SIGNAL1 [TV MICRO] PG 17..DM9 [DM-AUDIO] PG 4..SIGNAL2 [AUDIO / DC-DC] PG 5..SIGNAL3 [VID-AUDIO-SW]...
- Page 51 1/16W 1/16W SIGNAL_6 SIGNAL_2 SIGNAL_1 C2L52 0.047 16V/25V/50V C2L51 0.047 16V/25V/50V WD-52531 V32 CONTENTS WD-62531 V32 PG 1..BLOCK PG 15..DM7 [DMPM8] WD-62530 V32L PG 2..POWER / INTERFACE PG 16..DM8 [DM-HDMI] PG 3..SIGNAL1 [TV MICRO] PG 17..DM9 [DM-AUDIO] SIGNAL_2 PG 4..SIGNAL2 [AUDIO / DC-DC]...
- Page 52 0.01 25V/50V SHT002 10 11 12 13 14 15 16 17 18 19 20 21 22 23 24 TO POWER TO INTERFACE WD-52531 V32 CONTENTS WD-62531 V32 PG 1..BLOCK PG 15..DM7 [DMPM8] WD-62530 V32L PG 2..POWER / INTERFACE PG 16..DM8 [DM-HDMI] PG 3..SIGNAL1 [TV MICRO]...
- Page 53 C1562 R1550 R1566 1/16W 1/10W R1567 1/10W I2CCLK I2CDATA T314_RESET WD-52531 V32 CONTENTS WD-62531 V32 PG 1..BLOCK PG 15..DM7 [DMPM8] WD-62530 V32L PG 2..POWER / INTERFACE PG 16..DM8 [DM-HDMI] PG 3..SIGNAL1 [TV MICRO] PG 17..DM9 [DM-AUDIO] PG 4..SIGNAL2 [AUDIO / DC-DC] PG 5..SIGNAL3 [VID-AUDIO-SW]...
- Page 54 UNIT R7K01 1/16W TO PWB-INTERFACE R7K02 3.3K 1/16W L7K01 221 OHM C7K01 WD-52531 V32 CONTENTS WD-62531 V32 PG 1..BLOCK PG 15..DM7 [DMPM8] WD-62530 V32L PG 2..POWER / INTERFACE PG 16..DM8 [DM-HDMI] PG 3..SIGNAL1 [TV MICRO] PG 17..DM9 [DM-AUDIO] PG 4..SIGNAL2 [AUDIO / DC-DC] PG 5..SIGNAL3 [VID-AUDIO-SW]...
- Page 55 TV-RXD R87B0 1/16W TV-TXD R87A8 1/16W TV-RTS R87A9 1/16W TV-CTS WD-52531 V32 CONTENTS WD-62531 V32 PG 1..BLOCK PG 15..DM7 [DMPM8] WD-62530 V32L PG 2..POWER / INTERFACE PG 16..DM8 [DM-HDMI] PG 3..SIGNAL1 [TV MICRO] PG 17..DM9 [DM-AUDIO] PG 4..SIGNAL2 [AUDIO / DC-DC] PG 5..SIGNAL3 [VID-AUDIO-SW]...
- Page 56 R8031 BLM18PG600SN1 331/16W 2.2K I2CDATA 1/16W 500mA R8039 L8006 I2CCLKA 2.2K 1/16W BLM18PG600SN1 L8080 BLM18PG600SN1 C8034 C8074 R8049 WD-52531 V32 2.2K C8080 R80E1 1/16W 6.3V CONTENTS 25V/16V 1/16W 25V/16V C8037 WD-62531 V32 C8035 C8073 C8038 IC80E2 IC80E1 DGND PG 1..BLOCK PG 15..DM7 [DMPM8]...
- Page 57 C8107 25V/16V MDQA[22] RANK0 MDQA[23] R8116 1/16W 56-JX4 MDQA[27] MDQA[26] C8108 25V/16V MDQA[25] MDQA[24] WD-52531 V32 DGND CONTENTS R8117 WD-62531 V32 1/16W 56-JX4 PG 1..BLOCK PG 15..DM7 [DMPM8] MDQA[31] WD-62530 V32L PG 2..POWER / INTERFACE PG 16..DM8 [DM-HDMI] MDQA[30] PG 3..SIGNAL1 [TV MICRO] PG 17..DM9 [DM-AUDIO]...
- Page 58 C8220 RANK0 25V/16V MDQB[22] MDQB[23] R8230 1/16W 56-JX4 MDQB[27] MDQB[26] C8221 25V/16V MDQB[25] MDQB[24] WD-52531 V32 DGND CONTENTS R8231 WD-62531 V32 1/16W 56-JX4 PG 1..BLOCK PG 15..DM7 [DMPM8] MDQB[31] WD-62530 V32L PG 2..POWER / INTERFACE PG 16..DM8 [DM-HDMI] MDQB[30] PG 3..SIGNAL1 [TV MICRO] PG 17..DM9 [DM-AUDIO]...
- Page 59 FALE[1] R8346 FBE[1] R8388 1/16W 2.2K 1/16W C8378 25V/16V FCEN[0] C8328 C8330 FCEN[1] DGND WD-52531 V32 FALE[0-1],FBE[0-1],FRD,FWE CONTENTS DGND WD-62531 V32 PG 1..BLOCK PG 15..DM7 [DMPM8] FCEN[0-1] WD-62530 V32L PG 2..POWER / INTERFACE PG 16..DM8 [DM-HDMI] Q8302 Q8303 Q8304 PG 3..SIGNAL1 [TV MICRO] PG 17..DM9 [DM-AUDIO]...
- Page 60 1/16W 1/16W 1/16W D3.3V R7E03 C7E34 C7E33 1/16W 10V/6.3V 10V/6.3V DGND WD-52531 V32 CONTENTS WD-62531 V32 PG 1..BLOCK PG 15..DM7 [DMPM8] WD-62530 V32L PG 2..POWER / INTERFACE PG 16..DM8 [DM-HDMI] DM5,7 PG 3..SIGNAL1 [TV MICRO] PG 17..DM9 [DM-AUDIO] PG 4..SIGNAL2 [AUDIO / DC-DC] PG 5..SIGNAL3 [VID-AUDIO-SW]...
- Page 61 R7G55 R7G66 1/16W 1/16W 1/16W 1/16W 1/16W 1/16W 1/16W 1/16W WD-52531 V32 CONTENTS WD-62531 V32 PG 1..BLOCK PG 15..DM7 [DMPM8] WD-62530 V32L PG 2..POWER / INTERFACE PG 16..DM8 [DM-HDMI] PG 3..SIGNAL1 [TV MICRO] PG 17..DM9 [DM-AUDIO] PG 4..SIGNAL2 [AUDIO / DC-DC] PG 5..SIGNAL3 [VID-AUDIO-SW]...
- Page 62 6.3V TO DMDCDC R9C73 1/16W ILIM VBIAS TO DMROM/AV C9C71 25V/16V DM1,2,5 WD-52531 V32 CONTENTS WD-62531 V32 PG 1..BLOCK PG 15..DM7 [DMPM8] WD-62530 V32L PG 2..POWER / INTERFACE PG 16..DM8 [DM-HDMI] PG 3..SIGNAL1 [TV MICRO] PG 17..DM9 [DM-AUDIO] PG 4..SIGNAL2 [AUDIO / DC-DC] PG 5..SIGNAL3 [VID-AUDIO-SW]...
- Page 63 R8A70 1/16W R8A71 1/16W R8A72 1/16W R8A73 1/16W DGND AUD-GND WD-52531 V32 CONTENTS WD-62531 V32 PG 1..BLOCK PG 15..DM7 [DMPM8] WD-62530 V32L PG 2..POWER / INTERFACE PG 16..DM8 [DM-HDMI] PG 3..SIGNAL1 [TV MICRO] PG 17..DM9 [DM-AUDIO] PG 4..SIGNAL2 [AUDIO / DC-DC] PG 5..SIGNAL3 [VID-AUDIO-SW]...