Table of Contents
Advertisement
Advertisement
Chapters
Table of Contents

Related Manuals for Kodak i2900


Summary of Contents for Kodak i2900
-
Page 2: User Precautions
Remove the power cord from the wall outlet before moving or relocating the scanner. • Follow the Kodak recommended cleaning procedures. Do not use air, liquid or gas spray cleaners. These cleaners displace dust, dirt and debris to other locations within the scanner, which may cause the scanner to malfunction. - Page 3 Kodak locally for more information. • The product packaging is recyclable. • Kodak i2900 Series Scanners are Energy Star compliant and shipped from the factory with the default time set to 15 minutes. European Union This symbol indicates that when the last user wishes to discard this product, it must be sent to appropriate facilities for recovery and recycling.
- Page 4 OVERVIEW INSTALLATION/FIRST SCAN SCANNER ADJUSTMENTS DOCUMENT PRINTING MAINTENANCE TROUBLESHOOTING APPENDICIES...
-
Page 5: Supporting Documentation
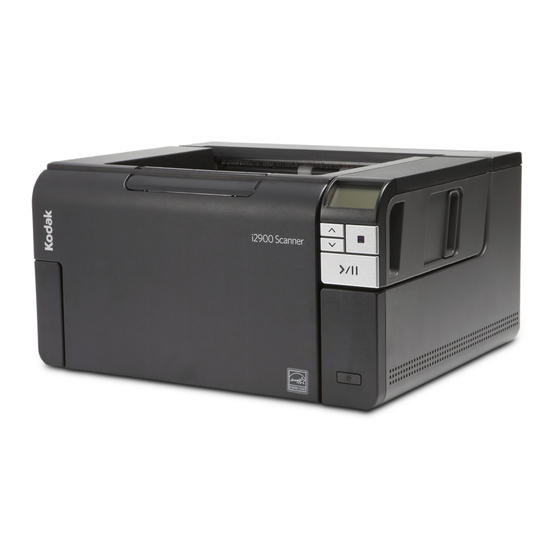
What’s in the box..................1-2 Scanner components ................. 1-3 The Kodak i2900 Scanner is a desktop duplex color scanner that scans up to 60 pages per minute (300 dpi, black and white) lettersize documents. The i2900 Scanner also includes a built-in flatbed which allows you to scan exception documents up to A4 / 210 x 297 mm. -
Page 6: Accessories
Accessories Kodak Printer Accessory for the i2900/i3000 Series Scanners — the Printer Accessory provides an effective way to apply information to the rear side of the scanned document. It operates at full scanner speed. The printer can add a date, time, document sequential counter and custom messages. All printer controls and functions are accessible through the TWAIN Datasource or ISIS Driver. -
Page 7: Scanner Components
Scanner components Front view Output tray extender — can be opened to accommodate documents up to 17 inches / 43.2 cm. Flatbed handle — provides access to the flatbed, which allows you to scan exception documents, books, magazines, file folders, etc. Gap release —... - Page 8 If your scanner is connected to an optional Kodak A3 Flatbed Accessory, the flatbed within the i2900 Scanner will be disabled.
-
Page 9: Printer Access View
Optional Printer The illustration below shows the operating components of the printer. For Accessory: Printer access installation instructions, see the instructions that were packed with your Kodak Printer Accessory for the i2900/i3000 Series Scanners. view Printer cable — this cable connects directly to the scanner to allow communication to the printer. -
Page 10: Setup
Feed module — provides smooth document feeding and separation of various sizes, thicknesses and textures of documents. Sensor — used to detect multifeeds and transport errors. Kodak's Intelligent Document Protection feature helps protect your documents from being damaged. Refer to the Scanning Setup Guides for more information about this feature. - Page 11 USB port — connects the scanner to the PC. Power port— connects the adapter power cord to the scanner. Back panel — removable to allow you to attach the Kodak Printer Accessory. Rear document exit — allows you to exit exception documents from the rear of the scanner.
- Page 12 Scan, skip this section. • When positioning the scanner, be sure to provide adequate clearance at the back of the scanner if you will be using the rear document exit or the Kodak Printer Accessory. 1. Insert the Kodak i2900 Scanner Installation CD in the CD-ROM drive. The Install software installation program starts automatically.
-
Page 13: Connect Scanner
• If the message Portions of this application are already installed is displayed, click Yes to continue the installation process. Any previously installed Kodak Scanner software that is shared with this scanner will be updated. 3. Click Next when the Welcome screen is displayed. -
Page 14: Scanning
2. Adjust the side guides on the input tray to meet your scanning needs. See the section entitled, “Adjusting the input/output tray” in Chapter 3. 3. Select your scanning application. The scanner comes with Smart Touch functionality and Kodak Capture Desktop Software. For more information, see Chapter 3. A-61778 December 2013... - Page 15 Getting your documents ready to scan • Standard paper size documents feed easily through the scanner. When organizing your documents for scanning, stack the documents so the lead edges are aligned and centered in the input tray. This allows the feeder to introduce documents into the scanner one at a time.
-
Page 16: Power Saver Mode And Turning The Scanner Off
When the document has finished scanning, the Save As dialog box will be displayed. 6. Enter a file name (i.e., My First Scan.pdf) and select a location where you want to save the file (i.e., on the Desktop) and click Save. After clicking Save, the document will be displayed for viewing. -
Page 17: Contents Adjusting The Input/Output Tray
3 Scanner Adjustments Contents Adjusting the input/output tray ..............3-1 Flatbed scanning..................3-3 Using the rear document exit ..............3-5 Selecting your scanning application ............3-6 Adjusting the input/ You can adjust the input and output trays to accommodate your scanning needs. - Page 18 • Adjusting the output tray for document length — if you are scanning documents longer than 11 inches / 27.94 cm, open the document extender. • Document weights — the input tray is capable of holding the approximate weight of 250 sheets of plain 20# bond paper. A-61778 December 2013...
-
Page 19: Flatbed Scanning
Flatbed scanning The flatbed can be used to scan exception documents, file folders, books, magazines, passports and more. 1. Open the flatbed cover. 2. Place the document face down on the glass platen. 3. Align the document in the lower right-hand corner at the corner arrows. 4. - Page 20 NOTES: • When scanning from the flatbed, be sure there are no documents in the input tray of the scanner. • If there is a document in the input tray and a document on the flatbed and the Scan button is pressed, the scanner will only scan from the input tray. To scan from the flatbed, the Scan button will need to be pressed again.
-
Page 21: Using The Rear Document Exit
Using the rear Documents that require special handling (i.e., shipping envelopes, etc.) can be output using the rear document exit. This exit provides the straight-through document exit paper path option that allows an exception document to pass through the transport, thus reducing the possibility of a document jam. To use the rear document exit, lift the rear document exit lever up. - Page 22 PDFs or integrate your information into a common location - such as Microsoft SharePoint. Kodak Capture Pro Software is also available for use with the Kodak i2900 Scanner. Go to www.Kodak.com/go/capturepro for more information. Many other companies have included support for the Kodak i2900 Scanner in their scanning applications.
-
Page 23: Document Printing
Problem solving ..................4-6 This chapter provides information for using the Kodak Printer Accessory for the i2900/i3000 Series Scanners. In order to use the printing option you must have purchased and installed the Kodak Printer Accessory. NOTE: See the instructions that came with the Printer Accessory for procedures on how to install this accessory. -
Page 24: Printer Specifications
Printer specifications More information about the following specifications can be found in the TWAIN Datasource or ISIS Driver Scanning Setup Guide. Characteristic Description Maximum lines Maximum characters 40 (including spaces) Print locations (horizontal) 9 manually set Print locations (vertical) Set by the scanning application Print orientation 0 and 90 degrees Font size... - Page 25 Installing/replacing CAUTION: Do not adjust or service the printer during scanning. the ink cartridge You must install the ink cartridge before using the printer. Refer to the section entitled, “Supplies and consumables” in Chapter 5 for ordering information. After initial installation, replace the ink cartridge when: •...
- Page 26 4. Insert the ink cartridge into the printer carrier as shown. 5. Press the green release tab and rotate the printer carrier to the “printing” position. 6. Slide the printer carrier into the desired print position. See the section entitled, “Changing print positions” later in this chapter. 7.
- Page 27 Changing print The horizontal print position must be changed manually. positions 1. Open the printer door. 2. Slide the printer carrier to the desired printing position. IMPORTANT: When changing print positions, it is important to verify that the printer carrier is securely in a printing (detent) position. When you slide the printer carrier into a printing position, you will be able to feel the printer carrier click into place.
- Page 28 Problem solving Use the list below as a guide to check possible solutions to problems you may encounter when using the printer. Problem Possible Solution Print quality is poor or inconsistent • Be sure the ink cartridge is not empty. •...
-
Page 29: Table Of Contents
Supplies and consumables ..............5-14 This chapter describes the required cleaning and maintenance procedures for the Kodak i2900 Scanner. The frequency of these procedures will vary with different scanning environments, paper types and image processing requirements. High volumes of scanning will demand more frequent cleaning of the scanner and more frequent replacement of consumables. -
Page 30: Cleaning Tools And Materials
Use only these cleaning tools and materials when performing routine maintenance on your scanner. Use of any other cleaning materials could materials damage your scanner. • Kodak Digital Science Transport Cleaning Sheets • Kodak Digital Science Roller Cleaning Pads • Staticide wipes for Kodak Scanners •... -
Page 31: Cleaning Procedures
Staticide wipes contain isopropanol which can cause eye irritation and dry skin. Wash your hands with soap and water after performing maintenance procedures. Refer to the Material Safety Data Sheet (MSDS) for more information. The MSDS is available on the Kodak website at www.kodak.com/go/MSDS. NOTE: To access the MSDS, you will need to provide the catalog number of the supply. -
Page 32: Cleaning The Rollers
Cleaning the rollers Cleaning the rollers includes all of the rollers in the transport area, the separation roller tires and the feed module tires. 1. Turn off the scanner and open the scanner cover. 2. Manually rotate and wipe the rollers with a roller cleaning pad. 3. -
Page 33: Cleaning The Feed Module Tires
Cleaning the feed module 10. Clean the feed module tires by manually rotating and wiping the feed tires module tires with a roller cleaning pad. For best results wipe parallel to the ribs in order to remove any residue between the ribs. You do not need to remove the feed module to clean the tires. -
Page 34: Cleaning The Flatbed Glass
Cleaning the flatbed glass The flatbed’s glass platen can collect fingerprints and dust. Use Staticide Wipes for Kodak Scanners to clean the glass platen. 1. Open the flatbed cover. 2. Wipe the glass platen with a Staticide wipe. 3. Dry the glass platen with an almost dry Staticide wipe. -
Page 35: Running A Transport Cleaning Sheet
Running a transport The transport should be cleaned with a Transport Cleaning Sheet fed several cleaning sheet times. 1. Remove the wrapping from the Transport Cleaning Sheet. 2. Adjust the side guides to the widest position. 3. Place the transport cleaning sheet in the center of the input tray with the adhesive side up. -
Page 36: Replacement Procedures
Replacement This section provides procedures for replacing the following parts. Use the list below as a guideline for frequency of replacement. procedures • Feed module tires — tire life will vary depending upon paper types, environment and cleanliness. Nominal tire life is approximately 500,000 documents;... - Page 37 5. Remove both core assemblies. 6. Replace each tire by sliding the tire off the core. Longer shaft Shorter shaft 7. Install each new tire by gently pulling it over the core. The tires do not need to be installed in any specific orientation. NOTE: When changing tires, be sure to put the larger tires on the longer shaft and the smaller tires on the shorter shaft.
-
Page 38: Replacing The Separation Roller
Replacing the separation 1. Open the scanner cover. roller 2. Remove the pre-separation pad by lifting the pad up and out of position; then remove the separation roller. 3. Insert the new separation roller. Be sure to line up the slots on the separation roller with the holders. -
Page 39: Replacing The Pre-Separation Pad
Replacing the pre- Change the pre-separation pad when the frequency of multi-fed documents separation pad increases. 1. Open the scanner cover. 2. Remove the pre-separation pad by lifting the pad up and out of position. 3. Install the new pre-separation pad. Be sure it snaps into place. 4. -
Page 40: Replacing The Background Strip(S)
3. Insert the new front transport roller, aligning the slot on the front transport roller with the holder. 4. Reinstall the front transport roller cover. Gently tighten the screw. Replacing the background In the rare case that you may need to replace the background strip(s), follow strip(s) the procedures below. -
Page 41: Replacing The Flatbed Background
Replacing the flatbed Replace the flatbed background when it is damaged or very dirty. If you are background experiencing cropping issues, inspect the background and replace it if necessary. NOTE: Handle the flatbed background with care during replacement. 1. Open the flatbed cover. 2. -
Page 42: Supplies And Consumables
Contact your scanner supplier to order supplies or go to: www.scannerstore.kodak.com. consumables Supplies/Consumables CAT No. Feeder Consumables Kit for the i2900 and i3000 Series 129 9676 Scanners Black Background for the i2900 and i3000 Series Scanners 136 4421 Kodak Digital Science Transport Cleaning Sheets (qty 50) -
Page 43: Problem Solving
Upgrading software ..................6-4 Contacting Service ..................6-4 Problem solving Use the chart below as a guide to check possible solutions to problems you may encounter when using the Kodak i2900 Scanner. Problem Possible Solution Documents are jamming or multiple... - Page 44 Click Start>Settings>Control Panel>Administrative Tools>Computer Management to display the Computer Management window. Select Device Manager and select your PC. The Kodak i2900 Scanner should be displayed under Imaging Devices. Click Action>Scan for hardware changes. “False” paper jams or multifeeds Make sure that the transport area is clean.
- Page 45 Problem Possible Solution Scanner pauses excessively during Make sure that: scanning • the host computer meets minimum requirements for scanning. • there is enough free space on the hard disk drive. • all other applications are closed. • you are using a USB 2.0 (or higher) connection. You can also try changing the scanning options (compression, etc.) in your scanning application.
-
Page 46: Indicator Lights And Error Codes
Indicator lights and Steady green: the scanner is scanning. error codes Fast flashing green: waiting for operator action. Slow flashing green: the scanner is in power saver mode. Steady red: indicates a scanner error, such as the scanner cover is open. Steady red then flashing green: scanner is powering up. -
Page 47: Upgrading Software
Upgrading software Kodak frequently updates drivers and firmware to correct issues and add new features. If you are having error codes (Ex), you should upgrade to the latest driver before contacting Service. Go to: www.Kodak.com/go/disupport, access i2900 Software and Drivers and download the most recent upgrade. -
Page 48: Appendix A Specifications
Appendix A Specifications Scanner Type/Speed uplex color scanner with an automatic document feeder and built-in flatbed. 60 pages per minute (portrait) at 200 and 300 dpi; black and white. Scanning Technology Dual CCD Output Resolutions 100, 150, 200, 240, 250, 300, 400, 500, 600 and 1200 dpi File Format Output Single- and Multi-page TIFF, JPEG, RTF, BMP and PDF Max. - Page 49 System requirements Recommended system configuration • PC: Intel Core i7 2600, 3.4 GHz/each core or higher • USB 2.0 Hi-Speed • 4 GB RAM or more • Supported operating systems: - Microsoft Windows XP (Home and Professional); SP2 and higher - Microsoft Windows XP Professional x64 Edition;...
- Page 50 (including breakage of a connector, cover, glass, pins, or seal); (c) from service, modification or repair not performed by Kodak or a service provider authorized by Kodak or by tampering, use of counterfeit or other non-Kodak components, assemblies, accessories, or modules;...
-
Page 51: How To Obtain Limited Warranty Service
(800) 822-1414. Kodak also provides a variety of service programs that may be purchased to assist with the use and care of the Kodak Scanner. Kodak is committed to providing its customers with quality, performance, reliability and service under the Limited Warranty. -
Page 52: Depot Service
Scanners must obtain a Return Material Authorization number (“RMA”) by calling (800) 822-1414, and within ten (10) business days from the date of issuance of the RMA must return the Kodak Scanner to the address designated in the RMA at the end user’s own expense and risk. - Page 53 Contacting Kodak For Information on Kodak Scanners: Website: www.Kodak.com/go/docimaging For U.S. Service, Repair and Technical Assistance by Telephone: Telephone technical support is available Monday-Friday between the hours of 8 a.m. to 5 p.m.(customer local time) excluding Kodak holidays (800) 822-1414 For Technical Documentation, Service Program information and FAQ’s available 24 hours a day see the website:...