Table of Contents
Advertisement
Quick Links
Advertisement
Table of Contents

Related Manuals for IOGear GWU513


Summary of Contents for IOGear GWU513
- Page 1 Wireless-G USB2.0 Flex Adapter User Manual (GWU513) ® ®...
- Page 3 Rest assured, your IOGEAR for you to stay up-and-running. If for any reason you have a problem, we stand behind our products with an industry-leading 3 year factory warranty, so you can have peace-of-mind with your current and future IOGEAR purchases.
-
Page 4: Table Of Contents
Table of Contents Package Contents Introduction Features Requirements Pictorial Introduction Installation - Installtion Procedures - Installation Notes – Windows XP - Verifying a Successful Installtion Configuration for Windows XP - To Connect an Available Network via Wireless Zero configuration - To Configure the Wireless Networks Properties - To Access to Certain Wireless Network Type Wireless-G Configuration Tool Basics - Tray Icon... - Page 5 - Wireless Radio On - Wireless Radio Off - Remove Status Icon - Wireless Network Status - Advanced Configuration - WEP Encryption - IBSS Channel - Country/Domain - Version Information Configuration Program Controls - The Status Tab - The Configuration Tab - The Encryption Tab - The Site Survey Tab - The IBSS Tab...
- Page 6 - The About Tab The Advanced Properties Control - Configuration Profile - Fragmentation Threshold - Niro Mode - Power Save Mode - RTS Threshold - The LongShort Retry Limit Appendix and Troubleshooting Specification Glossary Technical Support Radio and TV Interference Statement Limited Warranty...
-
Page 7: Package Contents
Package Contents The package you have received should contain the following items: • IOGEAR ® Wireless-G USB 2.0 Flex Adapter • Installation/Manual CD • Quick Start Guide • Warranty/Registration Card... -
Page 8: Introduction
Introduction Being five times faster than the speed of 802.11b network standard devices, the innovative 802.11g standard lets the wireless network become incredibly easier and faster (up to 54Mbps) than ever. Your Wireless-G USB 2.0 Flex Adaptor surely will bring you into such a high-speed network sphere. -
Page 9: Features
Features Features • Establish a wireless connection without the hassles and cost of cabling • Operate Ad-Hoc or Infrastructure mode • Utilize up to 128-bit WEP encryption • Enjoy high-speed data transfer rate up to 54 Mbps • Employ automatic data rate switching which offers maximum reliability, throughput and connectivity •... -
Page 10: Requirements
Requirements System Requirement: • Pentium ® class PC with 200MHz or faster CPU • Microsoft Windows 98/ME/2000/XP • Available USB 2.0 port • CD-ROM drive... -
Page 11: Pictorial Introduction
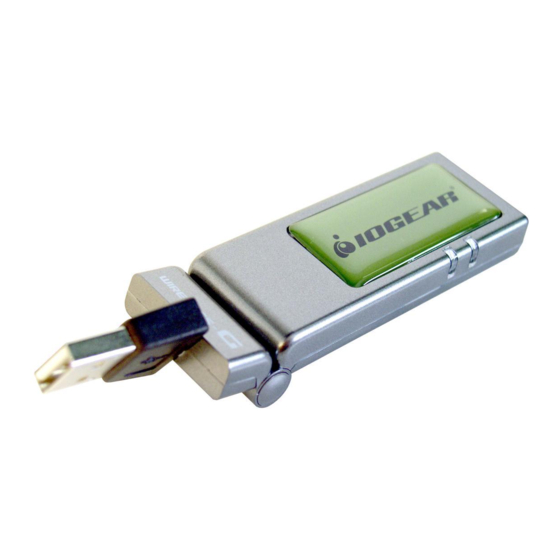
Pictorial Introduction Your Wireless-G USB 2.0 Flex Adaptor should be located in the USB port of your computer, and it looks like the following picture: Concerning to the issue of orientation-controlling, Wireless-G USB 2.0 Flex Adaptor allows you to twist and rotate the USB connector to meet your needs. -
Page 12: Installation
Installation Installation Procedures It’s free and easy for you to install your Wireless-G USB 2.0 Flex Adaptor and the attached software – Wireless-G Configura- tion Tool. Simply with a few clicks of the mouse, you will succeed the completion of installation. - Page 13 e) Click Next in the WLAN 802.11G USB window to proceed. The system will start to copy the drivers found. Windows will notify you that the driver has not passed the Windows Logo testing. Because the Wireless-G USB Adapter has been tested to work with Windows XP, please choose Continue Anyway in the Hardware Installation dialog box.
- Page 14 Installation On the Reboot screen, you may choose either Yes, I want to restart my computer now or No, I will restart my computer later. Then click Finish to complete the installation. Now you shall find the Wireless-G Configu- ration Tool tray icon, system tray.
-
Page 15: Installation Notes - Windows Xp
Installation Installation Notes - Windows XP If your system is running Windows XP, you shall find that four tabs are contained in the Wireless Settings dialog box after you’ve followed the instructions above and success- fully installed the drivers. However, normally, the dialog box should be consisted of seven tabs. - Page 16 Installation Right-click the Network Connections icon at the task bar to open the Wireless Network Connection Status dialog box, and then select Properties. Choose the Wireless Networks tab in the Wireless Network Connection Properties dialog box, and remove the check from the Use Windows to configure my wireless network settings checkbox.
-
Page 17: Verifying A Successful Installtion
the chapter: Wireless-G Configuration Tool Basics below. Note: If you wish to use Windows XP’s built-in configuration tools – Windows XP Zero Configuration, please refer to the next chapter: Configuration for Windows XP to configure the WLAN USB Stick. Verifying a Successful Installation To confirm that the Wireless-G USB 2.0 Flex Adaptor is properly installed, please follow the procedures below. - Page 18 Installation the Device Status pane to learn if the USB Adapter is working properly. However, if there’s an error message shown, please choose Uninstall from the opened menu while right-clicking the USB Adapter item, to which a red or yellow icon is attached beside, in the Device Manager dialog box.
-
Page 19: Configuration For Windows Xp
Configuration for Windows XP As you have already known, Windows XP has its built-in configuration tools – Windows XP Zero Configuration, to assist you in some basic configurations of wireless network connection. The service starts right after the completion of the installation of Wireless-G USB 2.0 Flex Adaptor, and you will find the icon automatically appears in your system tray like the following picture... -
Page 20: To Configure The Wireless Networks Properties
Configuration for Win XP 4. If the connection is established, there will be a pop-up message shown beside the Wireless Network Connection icon on the system tray. You could obtain the information on the status of connection from the message. To Configure the Wireless Networks Properties If you cannot establish a connection with the... - Page 21 in which three other tabs are found, including General, Authentication, and Advanced. The Wireless Networks tab includes almost the main settings for the networking connection. Thus, please check the descriptions below to learn more about the tab. Note: For more detailed information about each tab, please refer to the Windows XP Online-Help.
- Page 22 Configuration for Win XP the Add button. After clicking Add, the Wireless Network Properties dialog box will appear as Figure 3.2-3 displays. Note that to delete any item under the Preferred networks area, simply click on it and then select the Remove button. Additionally, you may adjust the items in the list by clicking the desired item and then choosing the Move up or Move down button.
- Page 23 • If there’s a need, go to the Wireless network key (WEP) area to set the keys as the associated access point or Wireless LAN PC Card equipped computer requests. To set WEP, select Data encryption (WEP enabled) and Network Authentication. Then enter the encryption key for the network you intend to connect in the Network key filed.
-
Page 24: To Access To Certain Wireless Network Type
Configuration for Win XP To Access to Certain Wireless Network Type The default network type of Windows XP Zero Configuration is any available access points (Access Point mode) or WLAN Card equipped computers (Ad-Hoc mode) within the range at the given time. However, you may wish to connect to a certain network type sometimes. -
Page 25: Wireless-G Configuration Tool Basics
After successfully installing the driver for your Wireless-G USB 2.0 Flex Adaptor on your computer, you may now access Wireless-G Configuration Tool for better control your wireless network. In this chapter, four topics are covered: Tray Icon, Right-Click Menu of the Tray Icon, Program Controls, and The Advanced Properties Tab. -
Page 26: Right-Click Menu Of The Tray Icon
Wireless-G Configuration Tool Basics Right Click Menu of the Tray Icon Right-clicking the Wireless-G Configuration Tool icon in the system tray will open a menu as the following picture: Wireless Radio On Choose the Wireless Radio On command to receive the radio frequency signal. Wireless Radio Off Choosing the Wireless Radio Off command will stop receiving the radio frequency signal. -
Page 27: Wireless Network Status
Wireless Network Status Choose this command to launch the Status tab of the Wireless Settings dialog box. Advanced Configuration Choose this command to launch the Configu- ration tab of the Wireless Settings dialog box. WEP Encryption Choose this command to launch the Encryp- tion tab of the Wireless Settings dialog box. -
Page 28: Configuration Program Controls
Configuration Program Controls When you double-click the Wireless-G Configuration Tool tray icon, the Wireless Settings dialog box will be prompted as the picture shows below. You may also launch this dialog box via clicking Start on the taskbar, choosing Program from the menu, and then pointing to Wireless-G Configuration Tool from the submenu of WLAN-G TOOLS. - Page 29 Note: The texts before “Wireless Settings” in the caption bar of the dialog box are the profile name of the current connection. Thus, the caption contexts vary according to the connectivity at the given time. From the left picture, the associated profile is named “Default”.
- Page 30 Configuration Program Controls...
- Page 31 Current Tx Rate: This feature indicates the transmission rate of the current connection. Current Channel: Here reveals the current channel operated in the wireless network. Note that the channel number differs as the radio scans any available channels in the Infrastructure mode.
-
Page 32: The Configuration Tab
Configuration Program Controls The Configuration Tab Click this tab to edit different profiles for different network configurations. When finish changing the settings, please click Apply to perform the new configuration at last. Note: Choosing the Advanced Configuration command from the right-click menu of Wireless-G Configuration Tool tray icon will launch this tab too. - Page 33 To identify a new profile, enter texts in the Profile Name field. After defining the configurations below, click the Apply button to establish a new profile. To switch between any existing profiles, click the arrow button at the right of the Profile Name field to open the pull-down menu and then select an intended one from it.
- Page 34 Configuration Program Controls Peer-to-Peer Channel: This command is only available while you are operating the Peer-to-Peer mode, the so- called Ad-Hoc mode. Specify the operating radio frequency channel from the pull-down menu if you are the creator of the wireless network.
-
Page 35: The Encryption Tab
The Encryption Tab Click the Encryption tab to define the encryption settings for a specific profile. It offers you various options concerning the so-called WEP (Wired Equivalent Privacy) to maintain the secure management in a wireless LAN environment. See the explanations below for more details, and before making any activation of the new settings, click Apply. - Page 36 Configuration Program Controls Create Keys Manually: Once you set the Encryption type as 64 bit or 128 bit, you may choose to edit WEP keys manually or create them via the passphrase of your wireless network. If you choose the Create Keys Manually option, you may directly enter up to 4 WEP keys for use in WEP encryption.
-
Page 37: The Site Survey Tab
string in the Passphrase field to generate four encryption keys in the Key fields above. Note that only letters A-Z are valid for the Passphrase feature. After finish configuring the Encryption features, remember to click Apply to initiate the new settings. Note: When entering the passphrase here, ensure that you have specified an accurate type of the Encryption (WEP security) above according to the associated agent’s... -
Page 38: The Ibss Tab
Configuration Program Controls The IBSS Tab If you, as a creator of the wireless network, are communicating with other stations via the IBSS (802.11 Ad-hoc) mode to form peer-to-peer networks, click the IBSS (Independent Basic Service Set) tab to specify an operating radio frequency channel from the pull-down list under the IBSS Channel Selection section. -
Page 39: The Domain Tab
The Domain Tab While in the 2.4GHz range, the network operation may differ from country to country, or domain to domain. This is because the 802.11d protocol was established. To have the operation normally processed, choose the Domain tab to change relevant settings. Note that if you specify Peer-to-Peer as the network type, you must specify None in the 802.11d support field. - Page 40 Configuration Program Controls Adapter scans all communications channels for an access point which provides informa- tion about the channels, frequencies, and power levels permitted in your location. Once it finds such an access point, the Wireless-G USB Adapter conforms its operations to these standards.
-
Page 41: The About Tab
The About Tab This tab provides general information on your Wireless-G USB Adapter, including the following items. Note: Choosing the Version Information command from the right-click menu of Wireless-G Configuration Tool tray icon will launch this tab too. Configuration Program Controls Network Driver: Displays the current version and released date of the Wireless-G USB 2.0 Flex... -
Page 42: The Advanced Properties Control
Advanced Properties Control The Advanced Properties tab provides access to operating parameters for the network adaptor, which are not controlled by the configuration utility. These properties are accessed through the Windows hardware device manager. The following steps describe how to access these properties under Windows XP. - Page 43 When you click on the Advanced tab in the opened dialog box, a display similar to the following appears. Advanced Properties Control You shall see the value for any of these properties by clicking on an item displayed in the Property field. If a value has been set for the property, it appears in the Value field to the right of the list.
-
Page 44: Configuration Profile
Advanced Properties Control Configuration Profile Specify a pre-defined profile with standard parameters from here. The provided profiles include: • B only – for operation in 802.11b environments only • B WIFI – for operation in 802.11b environments conforming to Wi-Fi standards •... -
Page 45: Power Save Mode
Power Save Mode This property turns the Station Power Save feature on or off, or sets it to Auto. When in Auto mode, the station enters Power Save based on the battery condition (XP only) on the host. Power Save Mode decreases the amount of power consumed by the adapter by powering off the radio for short periods. -
Page 46: The Longshort Retry Limit
Advanced Properties Control The Long/Short Retry Limit The Long Retry Limit or Short Retry Limit is the maximum number of retransmission of a data packet because of the failure of receiving CTS or ACK. -
Page 47: Appendix And Troubleshooting
This section provides solutions to problems that you might encounter during the installation and operation of your Wireless-G USB 2.0 Flex Adaptor. Please refer to the desired topics below and read the description to solve your problems. Uninstall Wireless-G Configuration Tool and the Stick’s Driver Prior to starting the uninstalling, please make sure that Wireless-G Configuration Tool is... - Page 48 Appendix and TroubleShooting In the Confirm Device Removal message box, click OK to proceed with the removal of the hardware. Click Start on the taskbar and choose Control Panel from the Settings menu. Select Add or Remove Programs to open the dialog box showed as below.
- Page 49 The Wireless-G USB 2.0 Flex Adaptor Does Not Work Properly If this happens, follow the guidelines below. Right-click the My Computer desktop icon and choose Properties to open the System Properties dialog box. Click the Hardware tab and then choose the Device Manager button.
-
Page 50: Specification
Specification... - Page 51 Specification...
- Page 52 Specification...
-
Page 53: Glossary
Glossary 802.11b – 802.11b is one of the IEEE standards for wireless LANs and specifies a data transfer rate of 5.5 and up to 11 megabit per second in the 2.4 gigahertz radio band. 802.11b is recently given other widespread names as Wi-Fi or Wireless Fidelity. 802.11g –... - Page 54 Glossary IEEE – IEEE, the Institute of Electrical and Electronics Engineers, is the world’s largest technical professional society and is consisted of more than 366,000 members in approxi- mately 150 countries. As a leading authority on areas ranging from for computer engineering, biomedical technology and telecommunications, IEEE endeavours to set more than 800 active consensus standards till now and publish 30 percent of the world’s literature in electrical engineering, computers and control technology.
- Page 55 Glossary Roaming – Roaming is an ability to allow users from one cell (or BSS) to another without losing connection via a wireless device. SSID – SSID, Service Set Identifier, is a 32-character unique identifier for a workgroup of the wireless network.
- Page 56 Glossary WEP – Wired Equivalent Privacy (WEP) is a security mechanism for wireless local area networks. It is designed for 802.11 standard to offer an equal level of security as that of a wired LAN. Through the configurations of encryption, WEP aims to provide security while the nodes with wireless devices are transferring or receiving data packets over radio waves.
-
Page 57: Technical Support
If you are still experiencing problems after reading Product User Manual and the Trouble- shooting section, you may either contact our technical support at: 1-949-453-8782 OR, simply click our URL address www.iogear.com to go to our company website and check the latest version and other information about the product and/or software. -
Page 58: Radio And Tv Interference Statement
Radio & TV Interference Statement WARNING!!! This equipment generates, uses and can radiate radio frequency energy and, if not installed and used in accordance with the instruction manual, may cause interference to radio communications. This equipment has been tested and found to comply with the limits for a Class B computing device pursuant to Subpart J of Part 15 of FCC Rules, which are designed to provide reasonable protection against such interference when operated in a commercial environment. -
Page 59: Limited Warranty
Limited Warranty IN NO EVENT SHALL THE DIRECT VENDOR’S LIABILITY FOR DIRECT, INDIRECT, SPECIAL, INCIDENTAL OR CONSEQUENTIAL DAMAGES RESULTING FROM THE USE OF THE PRODUCT, DISK OR ITS DOCUMENTATION EXCEED THE PRICE PAID FOR THE PRODUCT. The direct vendor makes no warranty or representation, expressed, implied, or statutory with respect to the contents or use of this documentation, and especially disclaims its quality, performance, merchantability, or fitness for any particular purpose. - Page 60 ® Contact info. 23 Hubble • Irvine, CA 92618 • (P) 949.453.8782 • (F) 949.453.8785 • www.iogear.com...