Bosch Oven Instruction Manual
Hide thumbs
Also See for Oven:
- Installation instructions manual (56 pages) ,
- Instruction manual (50 pages) ,
- Instruction manual (43 pages)
Table of Contents
Advertisement
Advertisement
Table of Contents

Related Manuals for Bosch Oven


Summary of Contents for Bosch Oven
- Page 1 EN Instruction manual...
-
Page 2: Table Of Contents
........Before using your oven for the first time . - Page 3 ......Changing the light bulb at the top of the oven ..
-
Page 4: Safety Information
This instruction manual is for use with both stand-alone ovens and oven-hob combinations. Read the instruction manual supplied with the hobs of oven-hob combinations to find out how their hob controls work. Before installation Check the appliance after removing it from its Transport damage packaging. -
Page 5: Information For Your Safety
The oven door must remain closed when the oven is Oven door switched on. As a precaution, we recommend that you keep the oven door closed even when the oven is switched off. Hot cooking compartment There is a risk of burns. -
Page 6: Items That May Damage The Appliance
Do not place any accessory on the oven floor. Do not Accessories, pans, film, greaseproof paper or cover the oven floor with any type of film or paper. Do aluminium foil on the oven not place any cookware on the oven floor if the floor temperature is set at more than 50ºC. - Page 7 Keep the oven door seal clean at all times. The oven door as a Do not rest or sit on the oven door when it is open. Do support surface not place any cookware or accessory on the oven door.
-
Page 8: Your New Oven
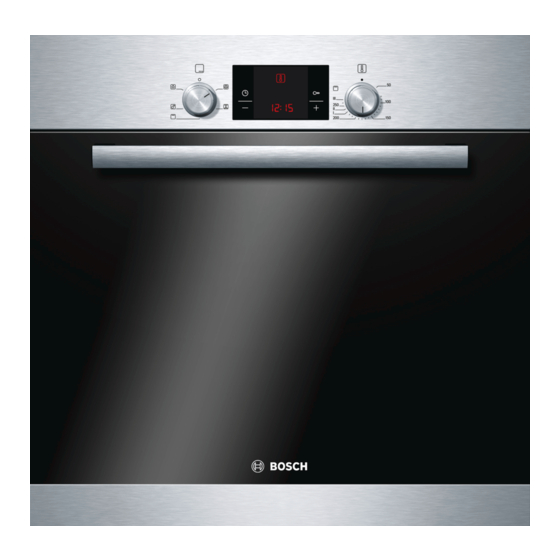
Your new oven We will now describe your new oven. This chapter explains the functions of the control panel and its individual elements. Information is also provided about the oven's accessories and internal components. Control panel Here is an overview of the control panel. The display never shows all of the symbols at the same time. -
Page 9: Function Control Knob
The oven is turned off. < Hot air* For cakes and pastries. These can be baked on two levels. A fan located on the rear wall of the oven disperses the heat evenly. 7 Grill with hot air For roasting joints of meat, poultry and fish. -
Page 10: Temperature Knob
= level 1, low II = level 2, medium III = level 3, high When the oven is heating up, the t symbol lights up on the indicator panel. This light goes off when the oven reaches the required temperature. The symbol does not light up with the light ^ or the defrosting function B. -
Page 11: Racks
Shelf For pans, cookware, baking tins, roasts, items placed directly on a shelf and frozen meals. Put the shelf in the oven so that it is curving downwards ¾. Flat enamel baking tray For cakes and biscuits. Place the baking tray in the oven with its raised lip facing the door. -
Page 12: Special Accessories
Glass casserole dish HEZ 915001 The glass casserole dish is ideal for preparing stews and foods that need browning in the oven. It is particularly suitable for automatic roasting. Three racks for complete removal of Three heights 1, 2 and 3 ensure that accessories can be fully cookware removed without them tipping over. -
Page 13: Before Using Your Oven For The First Time
1. Select top and bottom heating % using the function control knob. 2. Select 240ºC with the temperature knob. Turn the oven off after one hour. To do this, turn the function control knob to zero. Cleaning the accessories... -
Page 14: Setting The Oven
Setting the oven There are various ways in which you can set your oven. In it, we will explain how you can select the desired type of heating and temperature or grill setting. You can select the oven cooking time and end time for your dish. -
Page 15: Setting The Time Setting Options
Setting the time setting options Your oven has different time setting options. Use button 0 to access the menu and switch between the individual functions. While you can make settings, all time symbols are lit. -
Page 16: Cooking Time
The value is shown on the display for a few seconds. Cooking time The cooking time for your dish can be set on the oven. When the cooking time has elapsed, the oven switches itself off automatically, so you do not have to interrupt other work to switch off the oven. - Page 17 @ button default value = 30 minutes A button default value = 10 minutes The oven will start up after a few seconds. The cooking time counts down in the display and the [r] symbol lights up. The other time symbols go out.
-
Page 18: End Time
The oven starts automatically and finishes at the desired time. For example, you can place your dish in the cooking compartment in the morning and set the oven so that it is ready at lunchtime. Ensure that the food is not left in the cooking compartment for too long as it may spoil. - Page 19 After a few seconds, the oven adopts the settings and switches to standby position. The time at which the dish will be ready is shown in the display and the p symbol is in brackets. The U and 0 symbols go out.
-
Page 20: Time
Childproof lock The oven has a childproof lock to prevent children switching it on accidentally. The oven will not react to any settings. The timer and clock can also be set when the childproof lock has been switched on. If the type of heating and temperature or grill have been set, the childproof lock interrupts the heating. -
Page 21: Modifying The Basic Settings
The basic settings may be modified again at any time. Note The basic settings will not be retained if the appliance is switched off at the mains or there is a power cut. The oven will be reset to the manufacturer's settings. -
Page 22: Care And Cleaning
Dark patches in the door's glass panel may seem to be dirt but they are in fact reflections from the oven light. Enamel burns at very high temperatures. This may cause slight discolouration. - Page 23 Use a cleaning cloth and hot water with a little soap or enamelled bottom and vinegar. walls If very dirty, use a fine steel scourer or a special oven cleaning product. These must only be used on a cold oven.
-
Page 24: Light
Light The oven light can be turned on manually to facilitate cleaning. Turn the function control knob to the ^ position. Connecting the oven bulb The light will come on. The temperature knob must be turned off. Turn the function control knob to the Û position. -
Page 25: Removing The Grill Heating Element
Unhooking and The front panel can be unhooked to facilitate removal hanging the oven of the oven door and cleaning of the glass panels. door The oven door hinges are fitted with a locking lever. The door cannot be unhooked if the locking lever is closed (figure A). - Page 26 2. Remove both locking levers located on the right and left hand sides. (Figure A) 3. Fully close the oven door as far as its limit stop. (figure B) Grip the left and right hand sides of the door with both hands.
-
Page 27: Troubleshooting
Check whether the kitchen light or other kitchen appliances are working. 0 and zeros light up in the Power cut. Reset the clock. display. The oven does not heat up. There is dust on the Turn the control knobs backwards contacts. and forwards several times. -
Page 28: Changing The Light Bulb At The Top Of The Oven
1. Risk of electric shock! Switch the appliance off at the mains. Ensure that it has been switched off. 2. Place a dishcloth into the cold oven to avoid damage. 3. Remove the protective glass panel by unscrewing it to the left. -
Page 29: Protective Glass Panels
4. Replace the light bulb with a similar one. 5. Replace the glass protective glass panel. 6. Remove the dishcloth and switch the oven back on at the mains. Protective glass panels Damaged protective glass panels must be replaced. Protective glass panels may be obtained from the Technical Assistance Service. -
Page 30: Energy-Saving And Environmental Protection Tips
Saving energy Preheat the oven only if this is required by a recipe or is indicated in the tables. Use dark, lacquered or black enamel baking tins. -
Page 31: Tables And Suggestions
The cooking times in the table below have been calculated for use without preheating the oven. This will help you to save energy. If the oven has been preheated, the cooking times indicated can be reduced by 5 to 10 minutes. - Page 32 130*+ 90 100 < Jacket Potatoes baking tray 60 70 < Bread loaf tin (900 g or 25 35 2 x 450 g) < Scones* baking tray 15 20 < Yorkshire Pudding* 12 hole bun tin 25 35 Preheat oven...
-
Page 33: Practical Cooking Tips And Suggestions
The cake is ready when the skewer comes out clean, with no traces of cake batter left on the skewer. Next time, try using less liquid or reduce the oven temperature The cake is too flat. by 10 degrees. Ensure you mix the batter according to the times given in the recipe. -
Page 34: Meat, Poultry, Fish
. Although several baking trays may be placed in different levels. Cakes on the the oven at the same time, this does not mean that they will upper tray are darker than those necessarily all be ready at the same time. - Page 35 You should also insert the enamel tray at level 1. The meat juices are collected here and the oven is kept clean. Turn the pieces of meat after two thirds of the cooking time indicated.
-
Page 36: Practical Tips For Grilling And Roasting
spoon test". Press down on the meat using a spoon. If the ready? meat feels firm when pressed, it is ready; if not, give it a little longer in the oven. Check that you have selected the correct height and The meat looks too dark and the temperature. -
Page 37: Defrosting
Defrosting Remove the food from the packaging, put it in a suitable container and place it on the shelf. Follow the food manufacturer's instructions on the packaging. The defrosting times will depend on the nature and amount of food concerned. Food Accessorie Level... - Page 38 DE http://www.bosch hausgeraete.de GB http://www.boschappliances.co.uk http://www.bosch electromenager.com NL http://www.bosch huishoudelijke apparaten.ni http://www.bosch kodinkoneet.com DK http://www.bosch hvidevarer.com http://www.bosch ed.com http://www.bosch.pt BE http://www.electro.bosch.be AU http://www.bosch.com.au http://www.bosch hausgeraete.at BR http://www.boschelectrodomesticos.com.br GR http://www.bosch home.gr US http://www.bosch appliances.com 9000356598 (1W09QM) 00 8810...