Table of Contents
Advertisement
Available languages
Available languages
OWNER'S MANUAL • MANUAL DEL USUARIO
Model / Modelo:
Manual Battery Charger • Cargador de Batería Manual
•
READ THE ENTIRE MANUAL BEFORE USING THIS PRODUCT.
FAILURE TO DO SO COULD RESULT IN SERIOUS INJURY OR DEATH.
•
LEA EL MANUAL COMPLETO ANTES DE UTILIZAR ESTE PRODUCTO.
CUALQUIER FALLA PODRÍA RESULTAR EN SERIAS LESIONES O PODRÍA SER
MORTAL.
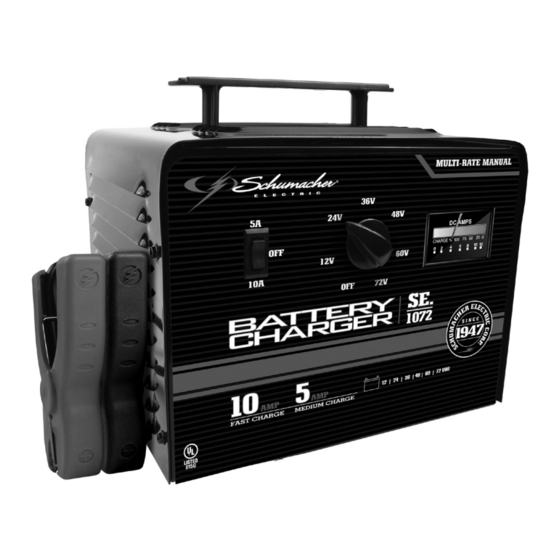
SE-1072
Voltage / Tensión: 12, 24, 36, 48, 60, 72
Amperage / Amperaje: 5, 10
ADVERTENCIA
00-99-001097/0610
Advertisement
Table of Contents

Related Manuals for Schumacher Electric SE-1072


Summary of Contents for Schumacher Electric SE-1072
- Page 1 OWNER’S MANUAL • MANUAL DEL USUARIO SE-1072 Model / Modelo: Manual Battery Charger • Cargador de Batería Manual Voltage / Tensión: 12, 24, 36, 48, 60, 72 Amperage / Amperaje: 5, 10 ADVERTENCIA • READ THE ENTIRE MANUAL BEFORE USING THIS PRODUCT. FAILURE TO DO SO COULD RESULT IN SERIOUS INJURY OR DEATH.
- Page 2 DO NOT RETURN THIS PRODUCT TO THE STORE! Call Customer Service for Assistance: 800-621-5485 ¡NO LO DEVUELVA ESTE PRODUCTO A LA TIENDA! Llame a Servicios al Cliente para Asistencia: 800-621-5485...
-
Page 3: Table Of Contents
TABLE OF CONTENTS SECTION PAGE IMPORTANT SAFETY INSTRUCTIONS PERSONAL PRECAUTIONS PREPARING TO CHARGE CHARGER LOCATION DC CONNECTION PRECAUTIONS FOLLOW THESE STEPS WHEN BATTERY IS INSTALLED IN VEHICLE FOLLOW THESE STEPS WHEN BATTERY IS OUTSIDE VEHICLE GROUNDING AND AC POWER CORD CONNECTIONS FEATURES ASSEMBLY INSTRUCTIONS CONTROL PANEL... - Page 4 ÍNDICE À SECCIÓN GINA INSTRUCCIONES IMPORTANTES DE SEGURIDAD PRECAUCIONES PERSONALES PREPARACIÓN PARA LA CARGA UBICACIÓN DEL CARGADOR PRECAUCIONES DE CONEXIÓN EN CC SIGA ESTOS PASOS CUANDO LA BATERÍA ESTÉ COLOCADA EN EL VEHÍCULO SIGA ESTOS PASOS CUANDO LA BATERÍA SE ENCUENTRE FUERA DEL VEHÍCULO CONEXIONES A TIERRA Y ENERGÍA DE CA CARACTERÍSTICAS...
- Page 5 IMPORTANT: READ AND SAVE THIS SAFETY AND INSTRUCTION MANUAL. SAVE THESE INSTRUCTIONS – The SE-1072 offers a wide range of features to accommodate your needs. This manual will show you how to use your charger safely and effectively. Please read, understand and follow these instructions and precautions carefully, as this manual contains important safety and operating instructions.
-
Page 6: Important Safety Instructions
IMPORTANT SAFETY INSTRUCTIONS - SAVE THESE INSTRUCTIONS - This manual contains important safety and operating instructions RISK OF ELECTRIC SHOCK OR FIRE. Keep out of reach of children. Do not expose the charger to rain or snow. Use only recommended attachments. Use of an attachment not recommended or sold by Schumacher® Electric Corporation may result in a risk of fire, electric shock or injury to persons or damage to property. -
Page 7: Personal Precautions
1.12 This charger employs parts, such as switches and circuit breakers, that tend to produce arcs and sparks. If used in a garage, locate this charger 18 inches or more above floor level. PERSONAL PRECAUTIONS RISK OF EXPLOSIVE GASES. NEVER smoke or allow a spark or flame in the vicinity of a battery or engine. Remove personal metal items such as rings, bracelets, necklaces and watches when working with a lead-acid battery. -
Page 8: Charger Location
Clean the battery terminals before charging the battery. During cleaning, keep airborne corrosion from coming into contact with your eyes, nose and mouth. Use baking soda and water to neutralize the battery acid and help eliminate airborne corrosion. Do not touch your eyes, nose or mouth. Add distilled water to each cell until the battery acid reaches the level specified by the battery manufacturer. Do not overfill. For a battery without removable cell caps, such as valve regulated lead acid batteries (VRLA), carefully follow... -
Page 9: Follow These Steps When Battery Is Installed In Vehicle
FOLLOW THESE STEPS WHEN BATTERY IS INSTALLED IN VEHICLE A SPARK NEAR THE BATTERY MAY CAUSE A BATTERY EXPLOSION. TO REDUCE THE RISK OF A SPARK NEAR THE BATTERY: Position the AC and DC cables to reduce the risk of damage by the hood, door and moving or hot engine parts. -
Page 10: Grounding And Ac Power Cord Connections
Do not face the battery when making the final connection. As stated in 7.4, face away from the battery when connecting the negative clip to the cable. Connect charger AC supply cord to electrical outlet. When disconnecting the charger, always do so in the reverse order of the connecting procedure and break the first connection while as far away from the battery as practical. A marine (boat) battery must be removed and charged on shore. To charge it onboard requires equipment specially designed for marine use. -
Page 11: Features
FEATURES Charge Rate Selector Switch Voltage Selector Switch Ammeter ASSEMBLY INSTRUCTIONS Remove all cord wraps and uncoil the cables prior to using the battery charger. CONTROL PANEL Charge Rate Selector Switch Use the Charge Rate selector switch to select the charge rate setting you require. -
Page 12: Operating Instructions
• Percent of Charge The percent of charge scale is intended as a visual aid to help simplify reading the state of charge. The percent of charge is based on the current drawn by the battery. For this reason, accuracy will vary with the size and battery type. -
Page 13: Maintenance Instructions
Example: Amp Hour Rating = Reserve Capacity + 16 NOTE: The Reserve Capacity can be obtained from the battery specification sheet or the owner’s manual. To calculate the time needed for a charge: Find the percent of charge needed. (A battery at 50 percent charge that will be charged to 100 percent needs another 50 percent (.50)). Multiply the Amp Hour Rating by the charge needed (.50) and divide by the charger setting. Multiply the results by 1.25 and you will have the total time needed, in hours, to bring the battery to full charge. -
Page 14: Troubleshooting
TROUBLESHOOTING PROBLEM POSSIBLE CAUSE REASON/SOLUTION No reading on the ammeter. Charger is not plugged in. Plug the charger into an AC outlet. No power at the receptacle. Check for open fuse or circuit breaker supplying AC outlet. Clips are not making a good Check for poor connection connection to the battery. -
Page 15: Before Returning For Repairs
7:00 am to 5:00 pm Central Time Monday through Friday LIMITED WARRANTY WARRANTY NOT VALID IN MEXICO. SCHUMACHER ELECTRIC CORPORATION, 801 BUSINESS CENTER DRIVE, MOUNT PROSPECT, IL 60056-2179, MAKES THIS LIMITED WARRANTY TO THE ORIGINAL RETAIL PURCHASER OF THIS PRODUCT. - Page 16 Manufacturer does not provide any warranty for any accessories used with this product that are not manufactured by Schumacher Electric Corporation and approved for use with this product. This Limited Warranty is void if the product is misused, subjected to careless handling, repaired, or modified by anyone other than Manufacturer or if this unit is resold through an unauthorized retailer.
- Page 17 The warranty card should be submitted within 30 days of purchase. The customer must keep the ORIGINAL receipt because it will be required for any warranty claims. This warranty is not transferable. Mail To: Schumacher Electric Corporation 801 Business Center Drive Mount Prospect, IL 60056-2179 Name_______________________________________________________________...
- Page 18 • •...
- Page 19 IMPORTANTE: LEA Y GUARDE ESTE MANUAL DE INSTRUCCIONES Y SEGURIDAD. GUARDE ESTAS INSTRUCCIONES: El SE-1072 ofrece una amplia gama de características para satisfacer sus necesidades. Este manual le mostrará cómo utilizar su cargador en forma segura y efectiva. Por favor, lea, comprenda y siga estas instrucciones y precauciones cuidadosamente, ya que este manual contiene instrucciones operativas y de seguridad de importancia.
-
Page 20: Instrucciones Importantes De Seguridad
INSTRUCCIONES IMPORTANTES DE SEGURIDAD - GUARDE ESTAS INSTRUCCIONES - Este manual contiene instrucciones operativas y de seguridad de importancia EL RIESGO DE DESCARGA ELÉCTRICA O INCENDIO Manténgase alejado de los niños. No exponga el cargador a la lluvia o a la nieve. Utilice solamente accesorios recomendados. -
Page 21: Precauciones Personales
RIESGO DE GASES EXPLOSIVOS. 1.10 RESULTA PELIGROSO TRABAJAR EN FORMA CERCANA A UNA BATERÍA DE PLOMO. LAS BATERÍAS GENERAN GASES EXPLOSIVOS DURANTE SU NORMAL FUNCIONAMIENTO. POR ESTE MOTIVO, RESULTA DE SUMA IMPORTANCIA qUE SIGA LAS INSTRUCCIONES CADA VEZ qUE UTILIZA EL CARGADOR. -
Page 22: Preparación Para La Carga
2.10 Si el ácido de la batería tiene contacto con su piel o su ropa, lave de inmediato el área afectada con agua y jabón. En caso de que ingrese ácido en un ojo, sumerja el mismo de inmediato bajo agua potable corriente por al menos 10 minutos y obtenga atención médica en forma inmediata. -
Page 23: Ubicación Del Cargador
UBICACIÓN DEL CARGADOR RIESGO DE CONTACTO CON EL ÁCIDO DE LA BATERÍA. Ubique el cargador a la mayor distancia posible de la batería como lo permitan los cables de CC. Nunca ubique el cargador directamente por encima de la batería que se carga; los gases de la batería corroerán y dañarán el cargador. -
Page 24: Siga Estos Pasos Cuando La Batería Se Encuentre Fuera Del Vehículo
En un vehículo con descarga a tierra por borne negativo, conecte el gancho POSITIVO (ROJO) del cargador de batería al borne POSITIVO (POS, P, +) sin descarga a tierra de la batería. Conecte el gancho NEGATIVO (NEGRO) al chasis del vehículo o al bloque motor alejado de la batería. No conecte el gancho al carburador, líneas de combustible o cuerpos metálicos. Conecte a una pieza metálica de calibre grueso del marco o del bloque motor. -
Page 25: Conexiones A Tierra Y Energía De Ca
CONEXIONES A TIERRA Y ENERGÍA DE CA EL RIESGO DE DESCARGA ELÉCTRICA O INCENDIO Este cargador de batería está destinado a un uso en un circuito con tensión nominal de 120 V y posee un enchufe con descarga a tierra que luce como el enchufe ilustrado. -
Page 26: Instrucciones De Montaje
INSTRUCCIONES DE MONTAJE Desenrede todos los cordones y extienda los cables antes de usar el cargador de baterías. PANEL DE CONTROL Interruptor de selección de índice de carga Utilice el interruptor de selección de índice de carga para seleccionar el índice de carga que necesite. • Índice de carga 5A o 10A : utilice para la carga de baterías de automóviles, marinas y de ciclo profundo. -
Page 27: Cálculo De Tiempo De Carga
Para desconectar, proceda en forma contraria a la conexión inicial. ADVERTENCIA Carga manual Cuando se realiza una carga manual, el cargador manual continuará la carga y no se apagará. Debe realizar un control visual del amperímetro para determinar cuando la batería se encuentra cargada. Asegúrese de controlar el proceso de carga y detenerlo cuando la batería se encuentre cargada. -
Page 28: Instrucciones De Mantenimiento
Ejemplo: Índice de amperio por hora x % de la carga necesaria x 1,25 = horas de carga Configuraciones del cargador 100 (índice AH) x 0,50 (carga necesaria) x 1,25 = 3,125 horas 20 (Configuraciones del cargador) 100 x 0,50 x 1,25 = 6,25 Necesitará cargar la batería de 100 amperes por hora por un poco más de 6 horas a un índice de carga de 10 amperes utilizando el ejemplo anterior. -
Page 29: Localización Y Solución De Problemas
LOCALIZACIÓN Y SOLUCIÓN DE PROBLEMAS PROBLEMA POSIBLE CAUSA SOLUCIÓN No se manifiesta la lectura Cargador desenchufado. Enchufe el cargador a un en el amperímetro. tomacorriente de CA. No hay electricidad en el Verifique la posible tomacorriente. presencia de fusibles abiertos o disyuntores que suministren energía al tomacorriente de CA. - Page 30 PROBLEMA POSIBLE CAUSA SOLUCIÓN Se escucha un sonido seco El disyuntor se resetea. Las configuraciones podrían en el cargador (“clic”). ser erróneas. Verifique las configuraciones del cargador. Batería defectuosa. Haga revisar la batería. Cables o ganchos de la El disyuntor se resetea batería en cortocircuito. cuando el consumo de corriente es demasiado elevado.
-
Page 31: Antes De Devolver A Reparaciones
ésta se pueda reparar o reemplazar. El Fabricante no presta garantía por lo accesorios utilizados con este producto que no sean los fabricados por Schumacher Electric Corporation y que no estén aprobados para su uso con este producto. La presente Garantía Limitada será... - Page 32 EXPRESA Y EL FABRICANTE NO ASUME NI AUTORIZA A NADIE A ASUMIR O A ADQUIRIR NINGUNA OTRA OBLIGACIÓN RESPECTO DEL PRODUCTO QUE NO SEA LA PRESENTE GARANTÍA. Servicio de atención al cliente de Schumacher Electric Corporation 1-800-621-5485 Lunes-viernes 7:00 a. m. a 5.00 p. m. CST...
- Page 36 DO NOT RETURN THIS PRODUCT TO THE STORE! Call Customer Service for Assistance: 800-621-5485 ¡NO LO DEVUELVA ESTE PRODUCTO A LA TIENDA! Llame a Servicios al Cliente para Asistencia: 800-621-5485...