Makita HR2450 Instruction Manual
Hide thumbs
Also See for HR2450:
- Instruction manual (57 pages) ,
- Parts list (5 pages) ,
- Technical information (22 pages)

Related Manuals for Makita HR2450


Summary of Contents for Makita HR2450
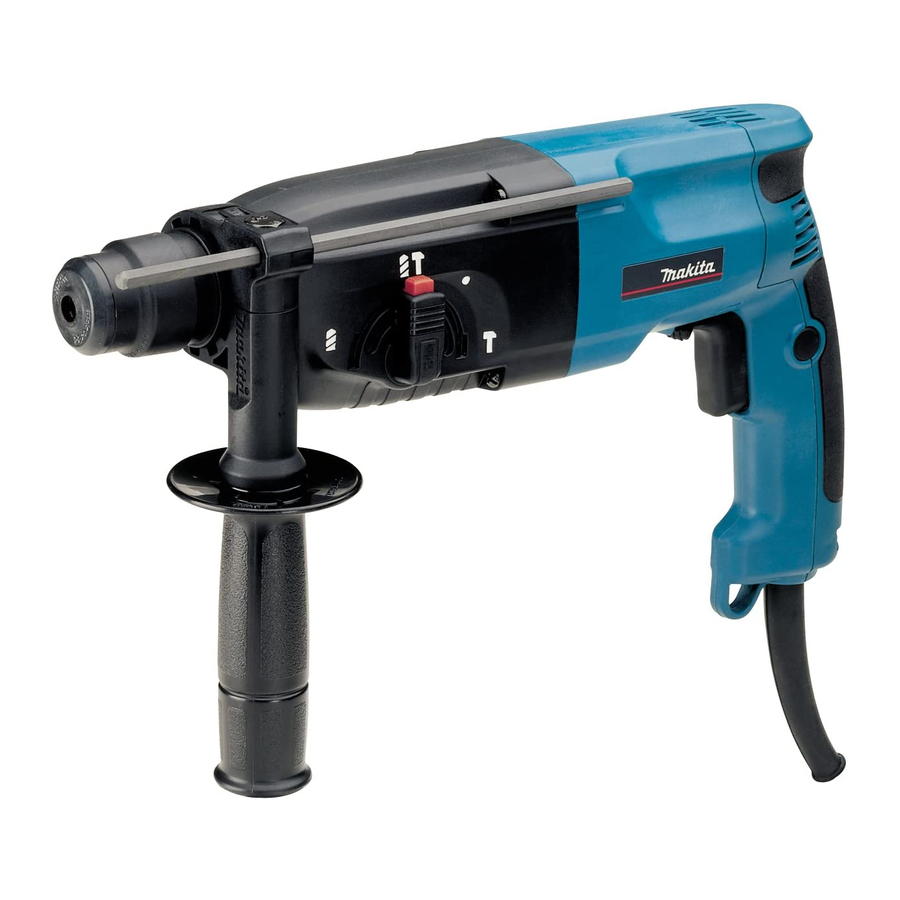
- Page 1 INSTRUCTION MANUAL Rotary Hammer HR2450 HR2450F HR2450X HR2450T HR2450FT HR2451 003571 DOUBLE INSULATION WARNING: For your personal safety, READ and UNDERSTAND before using. SAVE THESE INSTRUCTIONS FOR FUTURE REFERENCE.
-
Page 2: Specifications
ENGLISH (Original instructions) SPECIFICATIONS HR2450 / HR2450X / Model HR2450T/HR2450FT HR2450F / HR2451 Tungsten-carbide tipped bit 24 mm Concrete Core bit 54 mm Capacities Diamond core bit 65 mm Steel 13 mm Wood 32 mm No load speed (min 0 - 1,100... -
Page 3: General Power Tool Safety Warnings
Makita Corporation responsible Electrical safety manufacturer declare that the following Makita Power tool plugs must match the outlet. Never machine(s): modify the plug in any way. Do not use any Designation of Machine: adapter plugs with earthed (grounded) power Rotary Hammer tools. -
Page 4: Specific Safety Rules
12. Prevent unintentional starting. Ensure the and the work to be performed. Use of the power switch is in the off-position before connecting tool for operations different from those intended to power source and/or battery pack, picking could result in a hazardous situation. up or carrying the tool. -
Page 5: Functional Description
Always be sure that the tool is switched off and • lower the illumination. unplugged before adjusting or checking function on Reversing switch action the tool. For Model HR2450,HR2450F,HR2450X,HR2450T and Switch action HR2450FT 1. Switch trigger 1. Switch trigger 2. Lock button 2. -
Page 6: Torque Limiter
Changing the quick change chuck for SDS-plus For drilling in concrete, masonry, etc., depress the lock For model HR2450T/HR2450FT button and rotate the action mode changing knob to the The quick change chuck for SDS-plus can be easily symbol. Use a tungsten-carbide tipped bit. exchanged for the quick change drill chuck. - Page 7 the torque limiter to actuate too frequently. 1. Bit 2. Chuck cover ASSEMBLY CAUTION: Always be sure that the tool is switched off and • unplugged before carrying out any work on the tool. 001297 Side grip (auxiliary handle) 1. Grip base To remove the bit, pull the chuck cover down all the way 2.
-
Page 8: Operation
Depth gauge Set the action mode changing knob to the symbol. 1. Depth gauge Position the bit at the desired location for the hole, then pull the switch trigger. Do not force the tool. Light pressure gives best results. Keep the tool in position and prevent it from slipping away from the hole. -
Page 9: Drilling In Wood Or Metal
"Installing or removing the bit" described on the To maintain product SAFETY and RELIABILITY, repairs, previous page. carbon brush inspection and replacement, any other maintenance or adjustment should be performed by Makita Authorized Service Centers, always using Makita... - Page 10 Only use accessory or attachment for its stated purpose. If you need any assistance for more details regarding these accessories, ask your local Makita Service Center. SDS-Plus Carbide-tipped bits • Bull point • Cold chisel •...
- Page 12 Makita Corporation Anjo, Aichi, Japan 884425J220...