Table of Contents
Advertisement
Available languages
Available languages
Quick Links
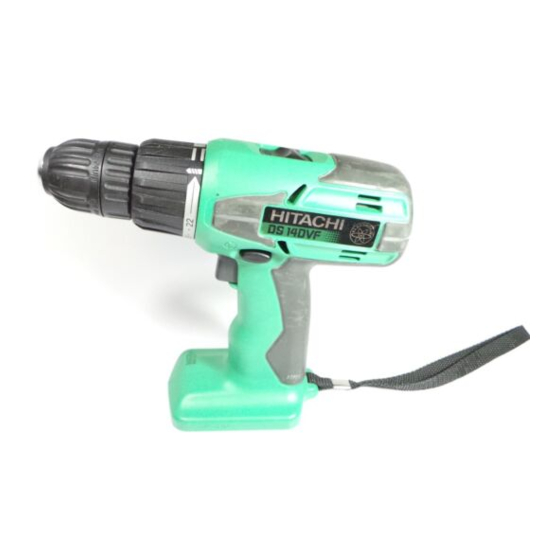
Variable speed
MODEL
DS 12DVF • DS 14DVF
MODÈLE
MODELO
SAFETY INSTRUCTIONS AND INSTRUCTION MANUAL
IMPROPER OR UNSAFE use of this power tool can result in death or serious bodily
injury!
This manual contains important information about product safety. Please read and
understand this manual BEFORE operating the power tool. Please keep this manual
available for other users and owners before they use the power tool. This manual should
be stored in safe place.
INSTRUCTIONS DE SECURITE ET MODE D'EMPLOI
Une utilisation INCORRECTE OU DANGEREUSE de cet outil motorisé peut entraîner la
mort ou de sérieuses blessures corporelles!
Ce mode d'emploi contient d'importantes informations à propos de la sécurité de ce
produit. Prière de lire et de comprendre ce mode d'emploi AVANT d'utiliser l'outil
motorisé. Garder ce mode d'emploi à la disponibilité des autres utilisateurs et
propriétaires avant qu'ils utilisent l'outil motorisé. Ce mode d'emploi doit être conservé
dans un endroit sûr.
INSTRUCCIONES DE SEGURIDAD Y MANUAL DE INSTRUCCIONES
¡La utilización INAPROPIADA O PELIGROSA de esta herramienta eléctrica puede resultar
en lesiones de gravedad o la muerte!
Este manual contiene información importante sobre la seguridad del producto. Lea y
comprenda este manual ANTES de utilizar la herramienta eléctrica. Guarde este manual
para que puedan leerlo otras personas antes de utilizar la herramienta eléctrica. Este
manual debe ser guardado en un lugar seguro.
WARNING
AVERTISSEMENT
ADVERTENCIA
CORDLESS DRIVER DRILL
PERCEUSE-VISSEUSE À BATTERIE
TALADRO ATORNILLADOR A BATERÍA
DS14DVF
Advertisement
Table of Contents

Related Manuals for Hitachi Koki DS 14DVF


Summary of Contents for Hitachi Koki DS 14DVF
- Page 1 Variable speed MODEL DS 12DVF • DS 14DVF MODÈLE MODELO SAFETY INSTRUCTIONS AND INSTRUCTION MANUAL IMPROPER OR UNSAFE use of this power tool can result in death or serious bodily injury! This manual contains important information about product safety. Please read and understand this manual BEFORE operating the power tool.
-
Page 2: Table Of Contents
English IMPORTANT SAFETY INFORMATION ... 3 MEANINGS OF SIGNAL WORDS ... 3 SAFETY ... 4 GENERAL SAFETY RULES – FOR ALL BATTERY OPERATED TOOLS ... 4 SPECIFIC SAFETY RULES AND SYMBOLS ... 6 IMPORTANT SAFETY INSTRUCTIONS FOR BATTERY CHARGER ... 8 IMPORTANT SAFETY INSTRUCTIONS FOR USE OF THE BATTERY AND BATTERY CHARGER ... -
Page 3: Important Safety Information
English IMPORTANT SAFETY INFORMATION Read and understand all of the safety precautions, warnings and operating instructions in the Instruction Manual before operating or maintaining this power tool. Most accidents that result from power tool operation and maintenance are caused by the failure to observe basic safety rules or precautions. -
Page 4: Safety
English GENERAL SAFETY RULES – FOR ALL BATTERY OPERATED TOOLS WARNING: Read and understand all instructions. Failure to follow all instructions listed below, may result in electric shock, fire and/or serious personal injury. SAVE THESE INSTRUCTIONS Work Area (1) Keep your work area clean and well lit. Cluttered benches and dark areas invite accidents. - Page 5 Tool Use and Care (1) Use clamps or other practical way to secure and support the workpiece to a stable platform. Holding the work by hand or against your body is unstable and may lead to loss of control. (2) Do not force tool. Use the correct tool for your application. The correct tool will do the job better and safer at the rate for which it is designed.
-
Page 6: Specific Safety Rules And Symbols
English SPECIFIC SAFETY RULES AND SYMBOLS Hold tools by insulated gripping surfaces when performing an operation where the cutting tool may contact hidden wiring. Contact with a “live” wire will make exposed metal parts of the tool “live” and shock the operator. ALWAYS wear ear plugs when using the tool for extended periods. - Page 7 14. NEVER use a tool which is defective or operating abnormally. If the tool appears to be operating unusually, making strange noises, or otherwise appears defective, stop using it immediately and arrange for repairs by a Hitachi authorized service center. 15.
-
Page 8: Important Safety Instructions For Battery Charger
English IMPORTANT SAFETY INSTRUCTIONS FOR BATTERY CHARGER This manual contains important safety and operating instructions for battery charger Model UC9SD, UC12SD and UC14SD. Before using battery charger, read all instructions and cautionary markings on (1) battery charger, (2) battery, and (3) product using battery. To reduce risk of injury, charge HITACHI rechargeable battery type EB1212S and EB1214L for UC12SD and EB1412S and EB1414 for UC14SD. -
Page 9: Important Safety Instructions For Use Of The Battery And Battery Charger
10. Do not operate battery charger if it has received a sharp blow, been dropped, or otherwise damaged in any way; take it to a qualified serviceman. 11. Do not disassemble battery charger; take it to a qualified serviceman when service or repair is required. -
Page 10: Disposal Of The Exhausted Battery
English DISPOSAL OF THE EXHAUSTED BATTERY WARNING: Do not dispose of the exhausted battery. The battery must explode if it is incinerated. The product that you have purchased contains a rechargeable battery. The battery is recyclable. At the end of it’s useful life, under various state and local laws, it may be illegal to dispose of this battery into the municipal waste stream. -
Page 11: Functional Description
FUNCTIONAL DESCRIPTION NOTE: The information contained in this Instruction Manual is designed to assist you in the safe operation and maintenance of the power tool. NEVER operate, or attempt any maintenance on the tool unless you have first read and understood all safety instructions contained in this manual. - Page 12 English Battery <EB1212S or EB1214L> Terminal Hole Nameplate 2. Battery Charger (UC12SD and UC14SD) Cord Plug <EB1412S or EB1414> Latch Latch Fig. 1 Air vent Battery Installation Hole Pilot Lamp Name Caution Plate Plate Fig. 2 Terminal Hole Nameplate...
-
Page 13: Specifications
SPECIFICATIONS 1. Cordless Driver Drill Model Motor No-load speed High Capacity Drilling Wood (Thickness 11/16" (18mm)) Metal (Thickness 1/16" (1.6mm)) Screw Wood screw Driver Small screw Drill chuck capacity Battery Model Type Voltage Charging & discharging frequency Weight 2. Battery Charger Model Input power source Charging time... -
Page 14: Assembly And Operation
English ASSEMBLY AND OPERATION APPLICATIONS Use as a drill Drilling of soft steel, wood, plastic and aluminum materials. Use as a screwdriver Tightening and loosening of machine screws, wood screws and tapping screws. REMOVAL AND INSTALLATION METHOD OF BATTERY How to install the battery. Align the battery with the groove in tool handle and slip it into place. - Page 15 1. Insert the battery to the battery charger. Insert the battery into the battery charger as shown in Fig. 4. Make sure it contacts the bottom of the battery charger. <DS12DVF> Battery Pilot Lamp 2. Insert the plug of battery charger into the receptacle. WARNING: 3.
-
Page 16: Before Use
English CAUTION: Do not pull the plug out of the receptacle by pulling on the cord. Make sure to grasp the plug when removing from receptacle to avoid damaging cord. 5. Remove the battery from the battery charger. Supporting the battery charger with hand, pull out the battery from the battery charger. CAUTION: When the battery charger has been continuosly used, the battery charger will be heated, thus constituting the cause of the failures. -
Page 17: Operation
OPERATION 1. Mounting and dismounting of the bit Tighten Loosen Ring Sleeve Fig. 5 (2) Dismounting the bit Firmly grasp the ring and loosen the sleeve by turning it toward the left (in the counterclockwise direction as viewed from the front). (See Fig.5) CAUTION: When mounting a bit into the keyless chuck, tighten firmly. - Page 18 English 4. Change rotation speed Fig. 7 Operate the shift knob to change the rotational speed. Move the shift knob in the direction of the arrow (see Figs. 7 and 8). When the shift knob is set to “LOW”, the drill rotates at a low speed. When set to “HIGH”, the drill rotates at a high speed.
- Page 19 mark Black line Fig. 10 6. Tightening torque adjustment (1) Tightening torque Tightening torque should correspond in its intensity to the screw diameter. When too strong power is used, the screw head may be broken or be injured. Be sure to adjust the cap position according to the screw diameter. (2) Tightening torque indication (See Fig.
-
Page 20: The Scope And Suggestions For Uses
English THE SCOPE AND SUGGESTIONS FOR USES Work Wood Drilling Steel Aluminum Machine screw Screw Wood tightening screw HOW TO SELECT TIGHTENING TORQUE position Approximately 9 in-lbs. (10 kg-cm) Approximately 15 in-lbs. (17 kg-cm) Approximately 23 in-lbs. (26 kg-cm) Approximately 35 in-lbs. (40 kg-cm) Approximately 43 in-lbs. -
Page 21: Maintenance And Inspection
MAINTENANCE AND INSPECTION CAUTION: Pull out battery before doing any inspection or maintenance. 1. Checking the condition of the bit The bits should be checked regularly. If worn or broken bits can slip or decrease the efficiency of the motor and burn it out. Replace worn bits with new ones. -
Page 22: Accessories
English WARNING: ALWAYS use Only authorized HITACHI replacement parts and accessories. NEVER use replacement parts or accessories which are not intended for use with this tool. Contact HITACHI if you are not sure whether it is safe to use a particular replacement part or accessory with your tool. -
Page 23: Optional Accessories
English OPTIONAL ACCESSORIES...sold separately 1. Battery (EB1212S, EB1214L) (For DS12DVF) 2. Battery (EB1412S, EB1414) (For DS14DVF) NOTE Specifications are subject to change without any obligaiton on the part of the HITACHI. -
Page 24: Français
Français INFORMATIONS IMPORTANTES DE SÉCURITÉ Lire et comprendre toutes les précautions de sécurité, les avertissements et les instructions de fonctionnement dans ce mode d’emploi avant d’utiliser ou d’entretenir cet outil motorisé. La plupart des accidents causés lors de l’utilisation ou de l’entretien de l’outil motorisé proviennent d’un non respect des règles ou précautions de base de sécurité. -
Page 25: Sécurité
RÈGLES GÉNÉRALE DE SÉCURITÉ – POUR TOUS LES OUTILS FONCTIONNANT SUR BATTERIE AVERTISSEMENT: CONSERVER CES INSTRUCTIONS 1. Zone de travail (1) Garder la zone de travail propre et bien éclairée. Les établis mal rangés et les zones sombres invitent aux accidents. (2) Ne pas utiliser les outils motorisés dans une atmosphère explosive, telle qu’en présence de liquides inflammables, de gaz ou de poussières. - Page 26 Français Utilisation de l’outil et entretien (1) Utiliser un étau ou toutes autres façons de fixer et maintenir la pièce à usiner sur une plate-forme stable. Tenir la pièce avec la main ou contre son corps est instable et peut conduire à...
-
Page 27: Regles De Sécurité Specifiques Et Symboles
RÈGLES DE SÉCURITÉ SPÉCIFIQUES ET SYMBOLES Tenir les outils par les surfaces de grippage lors de la réalisation d’opération où l’outil de coupe risque d’entrer en contact avec des câbles cachés ou son propre cordon. Un contact avec un fil “sous tension” mettra les parties métalliques de l’outil “sous tension” et électrocutera l’utilisateur. - Page 28 Français 12. Ne pas utiliser les outils motorisés si le revêtement de plastique ou la poignée est fendu. Des fentes dans le revêtement ou la poignée peuvent entraîner une électrocution. De tels outils ne doivent pas être utilisés avant d’être réparé. 13.
-
Page 29: Consignes De Sécurité Importantes Pour Le
CONSIGNES DE SÉCURITÉ IMPORTANTES POUR LE CHARGEUR DE BATTERIE Ce manuel renferme des consignes de sécurité et d’utilisation importantes pour le chargeur de batterie modèle UC9SD, UC12SD et UC14SD. Avant d’utiliser le chargeur de batterie, lire toutes les étiquettes d’instruction et de précaution apposées sur (1) le chargeur de batterie, (2) la batterie, et (3) le produit utilisant la batterie. -
Page 30: Consignes De Sécurité Importantes Pour L'utilisation De La Batterie Et Du Chargeur De Batterie
Français Ne pas utiliser le chargeur si son cordon ou sa fiche sont endommagés - Le remplacer immédiatement. 10. Ne pas utiliser le chargeur s’il a reçu un coup, s’il est tombé ou endommagé de toute autre manière. L’apporter à un réparateur qualifié. 11. -
Page 31: Mise Au Rebut D'une Batterie Usée
12. TOUJOURS alimenter le chargeur sur une prise secteur domestique standard (120 volts). L’utilisation du chargeur à une autre tension peut entraîner une surchauffe et endommager le chargeur. 13. TOUJOURS attendre au moins 15 minutes entre deux recharges pour éviter toute surchauffe du chargeur. -
Page 32: Description Fonctionnelle
Français DESCRIPTION FONCTIONNELLE REMARQUE: Les informations contenues dans ce mode d’emploi sont conçues pour assister l’utilisateur dans une utilisation sans danger et un entretien de l’outil motorisé. NE JAMAIS utiliser ni entreprendre une révision de l’outil sans avoir d’abord lu et compris toutes les instructions de sécurité... - Page 33 Batterie <EB1212S ou EB1214L> Orifice de prise Plaque signalétique 2. Chargeur de batterie (UC12SD et UC14SD) Cordon Fiche Taquet Taquet Fig. 1 Évent d’air Orifice d’installation de la batterie Lampe témoin Plaque Plaque de précaution signalétique Fig. 2 Français <EB1412S ou EB1414> Orifice de prise Plaque signalétique...
-
Page 34: Specifications
Français SPECIFICATIONS 1. Perceuse-visseuse à batterie Modèle Moteur Vitesse à vide Faible Elevée Capacité Perçage Bois (Epaisseur 11/16" (18mm)) Métal (Epaisseur 1/16" (1,6mm)) Vissage Vis en bois Petite vis Capacité de mandrin Batterie Modèle Type Tension Fréquence de recharge et de décharge Poids 2. -
Page 35: Assemblage Et Fonctionnement
ASSEMBLAGE ET FONCTIONNEMENT UTILISATIONS Utilisation comme mèche Perçage d’acier doux, de bois, de plastique et d’aluminium. Utilisation comme tournevis Serrage et desserrage de vis à métaux, vis en bois et vis auto-taraudeuses. MÉTHODE DE RETRAIT ET D’INSTALLATION DE LA BATTERIE Installation de la batterie Aligner la batterie sur la fente de la poignée de l’outil et la glisser à... - Page 36 Français 1. Insérer la batterie dans le chargeur de batterie. Insérer la batterie dans le chargeur de batterie comme indiqué à la Fig. 4. Bien s’assurer qu’elle touche le fond du chargeur de batterie. <DS12DVF> Batterie Lampe témoin 2. Brancher la fiche du chargeur de batterie dans la prise. AVERTISSEMENT: 3.
-
Page 37: Avant L'utilisation
4. Débrancher le chargeur de batterie de la prise. PRÉCAUTION : Ne pas débrancher la fiche de la prise en tirant sur le cordon. Pour éviter tout dommage lorsqu’on débranche la fiche de la prise, bien tenir la fiche proprement dite. 5. -
Page 38: Utilisation
Français UTILISATION 1. Pose et dépose du foret Serrer Desserrer Anneau Manehon Fig. 5 (2) Dépose du foret Saisir fermement la bague et desserrer le manchon en le tournant vers la gauche (sens inverse des aiguilles d’une montre vu de face). (Voir Fig. 5) PRÉCAUTION: Lorsqu’on monte un foret dans un mandrin sans clavette, bien serrer à... - Page 39 4. Changement de vitesse de rotation Bouton de décalage Fig. 7 Actionnez le bouton de décalage pour changer la vitesse de rotation. Enfoncez le bouton de blocage pour relâcher le blocage et déplacez le bouton de décalage dans la direction de la flèche (Voir les Fig.
- Page 40 Français Indice de Filet noir Fig. 10 6. Réglage du couple de serrage (1) Couple de serrage Le couple de serrage devra correspondre au diamètre de la vis utilisée. Si trop de force est utilisée, il se peut que la vis se casse ou s’endommage dans la partie de sa tête. Ne pas manquer de régler le capuchon en conformité...
-
Page 41: Plage D'utilisation Et Suggestions
PLAGE D’UTILISATION ET SUGGESTIONS Travail Bois Perçage Acier Aluminium Vis à métaux Vissage Vis en bois SÉLECTION DU COUPLE DE SERRAGE Sélection du couple de serrage Environ 9 in-lbs (10 kg-cm) Environ 15 in-lbs (17 kg-cm) Environ 23 in-lbs (26 kg-cm) Environ 35 in-lbs (40 kg-cm) Environ 43 in-lbs (49 kg-cm) Environ 52 in-lbs (60 kg-cm) -
Page 42: Entretien Et Inspection
Français ENTRETIEN ET INSPECTION PRÉCAUTION: Sortir la batterie avant toute opération d’inspection ou d’entretien. 1. Vérifier l’état de la mèche Les mèches doivent être vérifiées régulièrement. Si elles sont usées ou cassées, elles risquent de glisser ou de réduire le rendement du moteur et de le brûler. Remplacer les mèches usées par des neuves. -
Page 43: Accesoires
AVERTISSEMENT: REMARQUE: Les accessoires sont sujets à changement sans obligation de la part de HITACHI. ACCESSOIRES STANDARD DS12DVF DS14DVF ACCESSOIRES TOUJOURS utiliser UNIQUEMENT des pièces de rechange et des accessoires HITACHI. Ne jamais utiliser de pièce de rechange ou d’accessoires qui ne sont pas prévus pour être utilissl avec cet outil. -
Page 44: Accessoires En Option
Français ACCESSOIRES EN OPTION...vendus séparément 1. Batterie (EB1212S, EB1214L) (Pour DS12DVF) 2. Batterie (EB1412S, EB1414) (Pour DS14DVF) REMARQUE: Les spécifications sont sujettes à modification sans aucune obligation de la part de HITACHI. -
Page 45: Español
Español INFORMACIÓN IMPORTANTE SOBRE SEGURIDAD Antes de utilizar o de realizar cualquier trabajo de mantenimiento de esta herramienta eléctrica, lea y comprenda todas las precauciones de seguridad, advertencias e instrucciones de funcionamiento de este Manual de instrucciones. La mayoría de los accidentes producidos en la operación y el mantenimiento de una herramienta eléctrica se deben a la falta de observación de las normas o precauciones de seguridad. -
Page 46: Seguridad
Español NORMAS GENERALES DE SEGURIDAD – PARA TODAS LAS HERRAMIENTAS ALIMENTADAS CON BATERÍA ADVERTENCIA: GUARDE ESTAS INSTRUCCIONES. Área de trabajo (1) Mantenga el área de trabajo limpia y bien iluminada. Los bancos de trabajo desordenados y las áreas obscuras pueden conducir a accidentes. (2) No utilice la herramienta en atmósferas explosivas, como en presencia de líquidos inflamables, gases, o polvo. - Page 47 Utilización y cuidados de la herramienta (1) Utilice abrazaderas u otra forma práctica de asegurar y sujetar la pieza de trabajo sobre una plataforma estable. La sujeción de la pieza de trabajo con la mano o contra su cuerpo puede ser inestable y conducir a la pérdida del control. (2) No fuerce la herramienta.
-
Page 48: Normas Y Símbolos Específicos De Seguridad
Español NORMAS Y SÍMBOLOS ESPECÍFICOS DE SEGURIDAD Sujete las herramientas por las superficies de empuñadura aisladas cuando realice una operación en la que la herramienta de corte pueda entrar en contacto con cables ocultos. El contacto con un conductor “activo” “activará” las partes metálicas de la herramienta y el operador recibirá... - Page 49 13. Las cuchillas y los accesorios deberán montarse con seguridad en la herramienta. Evite lesiones personales y de otras personas. Las cuchillas, los accesorios de corte, y demás accesorios montados en la herramienta deberán fijarse con seguridad. 14. NO utilice NUNCA una herramienta defectuosa o que funcione anormalmente. Si la herramienta parece que funciona anormalmente, produciendo ruidos extraños, etc., deje inmediatamente de utilizarla y solicite su arreglo a un centro de reparaciones autorizado por Hitachi.
-
Page 50: Instrucciones Importantes De Seguridad Para El Cargador De Baterías
Español INSTRUCCIONES IMPORTANTES DE SEGURIDAD PARA EL CARGADOR DE BATERÍAS Este manual contiene instrucciones importantes de seguridad para el cargador de baterías modelo UC9SD, UC12SD y UC14SD. Antes de utilizar el cargador de baterías, lea todas las instrucciones y tenga en cuenta las marcas de precaución de (1) el cargador de baterías, (2) la batería, y (3) el producto que utiliza la batería. -
Page 51: Instrucciones Importantes De
No utilice el cargador de baterías con un cable o un enchufe dañado. Si están dañados, reemplácelos inmediatamente. 10. No utilice el cargador de baterías si ha recibido un golpe, si ha caído, o si está dañado de alguna otra forma. Llévelo a un técnico cualificado. 11. -
Page 52: Eliminación Las Baterías Agotadas
Español 14. SIEMPRE desconecte el cable de alimentación del tomacorriente cuando no vaya a utilizar el cargador. ELIMINACIÓN DE LAS BATERÍAS AGOTADAS ADVERTENCIA: ¡GUARDE ESTAS INSTRUCCIONES PÓNGALAS A DISPOSICIÓN DE OTROS USUARIOS PROPIETARIOS DE ESTA HERRAMIENTA! No tire las baterías agotadas. Las baterías pueden explotar si se incineran. -
Page 53: Descripción Funcional
DESCRIPCIÓN FUNCIONAL NOTA: La información contenida en este Manual de instrucciones ha sido diseñada para ayudarle a utilizar con seguridad y mantener esta herramienta eléctrica. NUNCA haga funcionar ni efectúe el mantenimiento de la herramienta antes de leer y comprender todas las instrucciones de seguridad contenidas en este manual. Algunas ilustraciones de este Manual de Instrucciones pueden mostrar detalles o accesorios diferentes a los de la propia herramienta eléctrica. - Page 54 Español Batería <EB1212S o EB1214L> Orificio de terminal Place de características 2. Cargador de baterías (UC12SD y UC14SD) Cable Clavija <EB1412S o EB1414> Cierre Cierre Fig. 1 Rejillas de ventilación Orificio de instalación de la batería Lámpara piloto Placa de Placa de precaución características Fig.
-
Page 55: Especificaciones
ESPECIFICACIONES 1. Taladro atornillador a batería Modelo Motor Baja Velocidad sin carga Alta Capacidad Taladro Madera (Grosor 11/16" (18mm)) Metal (Grosor 1/16" (1,6mm)) Destornil- Tornillo para lador madera Tornillo pequeño Capacidad del portabrocas Battería Modelo Tipo Tensión Frecuencia de carga y descarga Peso 2. -
Page 56: Montaje Y Operación
Español MONTAJE Y OPERACIÓN APLICACIONES Utilización como taladro Taladrado de materiales de acero dulce, madera, plástico, y aluminio Utilización como destornillador Apriete y aflojado de tornillos para metal, tornillos para madera, y tornillos autorroscantes. MÉTODO DE EXTRACCIÓN E INSTALACIÓN DE LA BATERÍA Forma de instalar la batería Alinee la batería con la ranura de la empuñadura de la herramienta y deslícela en su lugar. - Page 57 1. Inserte la batería en el cargador de baterías. Inserte la batería en el cargador de baterías como se muestra en la Fig. 4. Cerciórese de que haya quedado en contacto con la base del cargador de baterías. <DS12DVF> Batería Lámpara piloto 2.
-
Page 58: Antes De La Utilización
Español 4. Desconecte el cargador de baterías del tomacorriente. PRECAUCIÓN: No desconecte el cable del tomacorriente tirando delmismo. Cerciórese de tirar del enchufe para desconectarlo del tomacorriente a fin de evitar dañar el cable. 5. Extraiga la batería del cargador de baterías. Sujetando el cargador de baterías con una mano, extraiga la batería del mismo. -
Page 59: Operación
OPERACIÓN 1. Montaje y desmontaje de la broca Apretar Aflojar Anillo Manguito Fig. 5 (2) Desmontaje de la broca Sujete firmemente el anillo y afloje el manguito girándolo hacia la izquierda (en sentido contrario al de las agujas del reloj visto desde el frente). (Consulte la Fig. 5) PRECAUCION: Cuando instale una broca en el portabroca sin llave, apriételo firmemente. - Page 60 Español 4. Cambio de velocidad de rotación Mando de cambio Fig. 7 Operar la perilla de cambio para cambiar la velocidad de rotación. Oprimir el botón de cierre para desenganchar el cerrojo y mover la perilla de cambio en la dirección de la flecha (Ver la Figs.
- Page 61 Marca del Línea negra Fig. 10 6. Ajuste del par de apriete (1) Par de apriete La intensidad del par de apriete deberá corresponder con el diámetro del tornillo. Cuando se utiliza un par excesivo el tornillo se romperá o se dañará su cabeza. Cerciorarse de ajustar la cubierta en conformidad con el diámetro del tornillo.
-
Page 62: Alcance Y Sugerencias Para La Utilización
Español ALCANCE Y SUGERENCIAS PARA LA UTILIZACIÓN Trabajo Madera Taladrado Acero Aluminium Tornillo para metales Apriete de tornillos Tornillos para madera FORMA DE SELECCIONAR EL PAR DE APRIETE Posición de la tapa Aproximadamente 9 in-lbs. (10 kg-cm) Aproximadamente 15 in-lbs. (17 kg-cm) Aproximadamente 23 in-lbs. -
Page 63: Mantenimiento E Inspección
MANTENIMIENTO E INSPECCIÓN PRECAUCIÓN: Extraiga la batería antes de realizar cualquier trabajo de inspección o de mantenimiento. 1. Comprobación de las condiciones de la broca Las brocas deberán comprobarse regularmente. Si una broca está desgastada o rota, puede patinar o reducir la eficacia del motor, o hacer que se queme. Reemplace las brocas gastadas por otras nuevas. -
Page 64: Accesorios
Español ADVERTENCIA: NOTA: Las especificaciones están sujetas a cambio sin ninguna obligación por parte de HITACHI. ACCESORIOS ESTÁNDAR DS12DVF DS14DVF ACCESSORIOS UTILICE únicamente repuestos y accesorios autorizados por HITACHI. No utilice nunca repuestos o accesorios no previstos para usar con esta herramienta. Si tiene dudas en cuanto a la seguridad de usar determinado repuesto o accesorio junto con su herramienta, póngase en contacto con HITACHI. -
Page 65: Accesorios Opcionales
Español ACCESORIOS OPCIONALES...de venta por separado 1. Batería (EB1212S, EB1214L) (Para DS12DVF) 2. Batería (EB1412S, EB1414) (Para DS14DVF) NOTA: Las especificationes están sujetas a cambio sin ninguna obligación por parte de HITACHI. - Page 68 Please contact HITACHI KOKI U.S.A. LTD. at 1-800-59-TOOLS (toll free), or HITACHI AUTHORIZED POWER TOOL SERVICE CENTER recarding COLLECTION. Pour le RAMASSAGE, contacter HITACHI KOKI U.S.A. LTD. au 1-800-59-TOOLS (appel gratuit), ou UN SERVICE APRES-VENTE D’OUTILS ELECTRIQUE AGREE PAR HITACHI. Con respecto a la RECOLECCIÓN de baterías, póngase en contacto con HITACHI KOKI U.S.A.