DeWalt D28111 Instruction Manual
Angle grinder
Hide thumbs
Also See for D28111:
- Instructions manual (120 pages) ,
- User manual (28 pages) ,
- Instruction manual (17 pages)
Table of Contents
Advertisement
Available languages
Available languages
¿Dudas? Visítenos en Internet: www.dewalt.com
Questions? See us on the World Wide Web at www.dewalt.com
MANUAL DE INSTRUCCIONES
INSTRUCTION MANUAL
D28111, D28112
Esmeriladora Angular
Angle Grinder
INSTRUCTIVO DE OPERACIÓN, CENTROS DE SERVICIO Y PÓLIZA DE
GARANTÍA. ADVERTENCIA: LÉASE ESTE INSTRUCTIVO ANTES DE USAR EL
PRODUCTO.
1
Advertisement
Table of Contents

Related Manuals for DeWalt D28111


Summary of Contents for DeWalt D28111
- Page 1 ¿Dudas? Visítenos en Internet: www.dewalt.com Questions? See us on the World Wide Web at www.dewalt.com MANUAL DE INSTRUCCIONES INSTRUCTIVO DE OPERACIÓN, CENTROS DE SERVICIO Y PÓLIZA DE GARANTÍA. ADVERTENCIA: LÉASE ESTE INSTRUCTIVO ANTES DE USAR EL PRODUCTO. INSTRUCTION MANUAL D28111, D28112...
-
Page 3: Defi Niciones: Normas De Seguridad
1) SEGURIDAD DEL ÁREA DE TRABAJO Defi niciones: Normas a) Mantenga el área de trabajo limpia y bien iluminada. Las de seguridad áreas abarrotadas u oscuras propician accidentes. b) No haga funcionar las herramientas eléctricas en Las siguientes definiciones describen el nivel de gravedad de atmósferas explosivas, como ambientes donde haya cada advertencia. -
Page 4: Seguridad Personal
f) Si no se puede evitar el uso de una herramienta eléctrica f) Use la vestimenta adecuada. No use ropas holgadas ni en una zona húmeda, utilice un dispositivo diferencial de joyas. Mantenga el cabello, la ropa y los guantes alejados seguridad. -
Page 5: Normas De Seguridad Adicionales
e) Mantenimiento de las herramientas eléctricas. Revise • No utilice accesorios distintos de las muelas y discos de que no haya piezas en movimiento mal alineadas o corte reforzados con fibra. trabadas, piezas rotas o cualquier otra situación que • Utilice exclusivamente muelas y discos de corte pueda afectar el funcionamiento de las herramientas recomendados por el fabricante. - Page 6 • No utilice la herramienta mientras se encuentre en línea tenerlo, para lograr el máximo control sobre el retroceso con el disco. No permita que otras personas se acerquen el lugar o la reacción de torsión durante el encendido. El operador de trabajo.
- Page 7 c) Los discos sólo deben utilizarse para las aplicaciones un retroceso. Investigue y tome las medidas correctivas para recomendadas. Por ejemplo: no esmerile con el costado eliminar la causa del atascamiento del disco. del disco de corte. Los discos para cortes abrasivos están d) No vuelva a iniciar la operación de corte en la pieza de diseñados para esmerilados periféricos, si se aplican fuerzas trabajo.
- Page 8 Oculte o corte cualquier correa de sujeción desprendida. Tensión (Voltios) Longitud del cable en metros (m) Las correas de sujeción desprendidas y girando podrían 120–127 V 0–7 7–15 15–30 30–50 atrapar sus dedos o engancharse en la pieza de trabajo. 220–240 V 0–15 15–30...
- Page 9 Su riesgo de exposición a estos químicos varía, dependiendo de la producirse un movimiento repentino y violento de la herramienta si el frecuencia con la cual realiza usted este tipo de trabajo. Para reducir disco u otro accesorio entra en contacto con una segunda superficie su exposición a estas sustancias químicas: trabaje en una zona o un borde.
-
Page 10: Uso Previsto
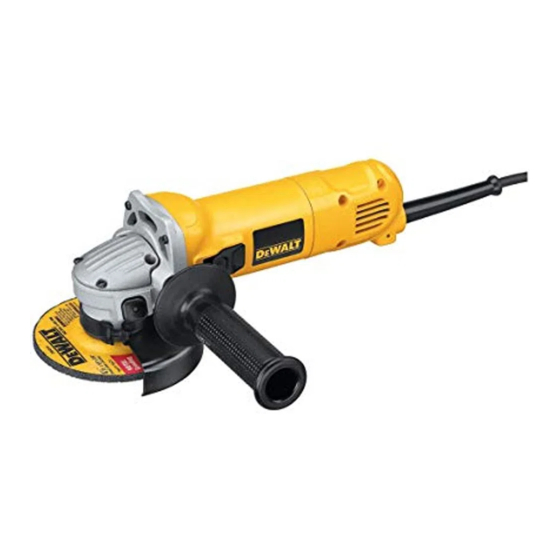
A. Interruptor de C. Guarda con llave Características (D28112) marcha/parada D. Empuñadura lateral EMPUÑADURA LATERAL ANTIVIBRACIÓN B. Traba del eje La empuñadura lateral antivibración ofrece una comodidad adicional USO PREVISTO absorbiendo las vibraciones provacadas por la herramienta. La esmeriladora angular de alto rendimiento fue diseñada para PROTECTOR SIN LLAVE aplicaciones demandantes, por ejemplo obras de construcción. -
Page 11: Montaje Y Ajustes
D28134, D28135, D28139 o D28141 para cortar metal o mampostería DEBE usarse un protector Tipo 1. Los protectores Tipo 1 pueden obtenerse por un precio adicional de los distribuidores de DeWALT. NOTA: Consulte la Tabla de accesorios de amolado y corte al final de esta sección que muestra otros accesorios que pueden utilizarse... - Page 12 lesiones personales, lleve la herramienta y el protector a un centro de FIG. 2B servicios para que reparen o remplacen el protector. FIG. 3A FIG. 3B 4. Cierre el cerrojo del protector para asegurarlo a la caja de engranajes. No se debe poder girar el protector manualmente cuando el cerrojo está...
- Page 13 FUNCIONAMIENTO 4 Enrosque la brida exterior (M) en el eje (J) (fig. 3B): – el aro del eje (M) debe quedar hacia el disco cuando se instala ADVERTENCIA: Deje que la herramienta alcance su velocidad un disco de esmerilar (K); total antes de tocar con ella la superficie de la pieza de trabajo.
-
Page 14: Mantenimiento
Su herramienta D WALT ha sido diseñada para funcionar durante un ADVERTENCIA: No encienda ni apague la herramienta cuando largo período con un mínimo de mantenimiento. Un funcionamiento esté con carga. continuo satisfactorio depende del cuidado adecuado de la Aplicaciones metálicas herramienta y de una limpieza periódica. -
Page 15: Protección Del Medio Ambiente
Si desea más información sobre los accesorios adecuados, consulte a su distribuidor. ADVERTENCIA: Para reducir el riesgo de lesiones, use SIEMPRE las protecciones adecuadas al esmerilar y gafas protectoras. Reparaciones Para garantizar la SEGURIDAD y la CONFIABILIDAD, deberán hacerse reparaciones, mantenimiento y ajustes de esta herramienta en los centros autorizados de servicio D WALT u otras organizaciones autorizadas. -
Page 16: Especificaciones
ESPECIFICACIONES D28111-AR D28111-B2 D28111-B3 D28112-AR D28112-B2 Potencia 850 W 850 W 850 W 1100 W 1100 W Frecuencia 50 Hz 50-60 Hz 50-60 Hz 50 Hz 50-60 Hz Velocidad 10000 / min 10000 / min 10000 / min 11000 / min... - Page 17 TABLA DE ACCESORIOS PARA ESMERILAR Tipo de guarda Accesorio Descripción Cómo colocar la Tipo de guarda Accesorio Descripción Cómo colocar la esmeriladora esmeriladora Disco para Copa de alambre esmerilar con tuerca con centro GUARDA Guarda Tipo 27 GUARDA Guarda Tipo 27 roscada deprimido TIPO 27...
- Page 18 TABLA DE ACCESORIOS PARA ESMERILAR (cont.) Tipo de guarda Accesorio Descripción Cómo colocar la esmeriladora Disco de corte para mampostería GUARDA Guarda Tipo 1 TIPO 1 Disco de corte para metal Flange Disco diamantado Disco de corte para cortar Tuerca de presión roscada SIN GUARDA Bonete para...
-
Page 19: Save All Warnings And Instructions For Future Reference
c) Keep children and bystanders away while operating a Defi nitions: Safety Guidelines power tool. Distractions can cause you to lose control. The definitions below describe the level of severity for each 2) ELECTRICAL SAFETY signal word. Please read the manual and pay attention to these a) Power tool plugs must match the outlet. -
Page 20: Additional Specific Safety Rules
c) Prevent unintentional starting. Ensure the switch is in d) Store idle power tools out of the reach of children and do not allow persons unfamiliar with the power tool or the off position before connecting to power source and/ these instructions to operate the power tool. -
Page 21: Causes And Operator Prevention Of Kickback
• The max. allowable speed of the grinding wheel or cutting Causes and Operator Prevention disc must always be equal to or greater than the no-load of Kickback speed of the tool specified on the nameplate. Kickback is a sudden reaction to a pinched or snagged rotating •... -
Page 22: Safety Warnings Specifi C For Grinding And Abrasive Cutting-Off Operations
e) Do not attach a saw chain woodcarving blade or toothed b) Do not position your body in line with and behind the saw blade. Such blades create frequent kickback and loss of rotating wheel. When the wheel, at the point of operation, is control. -
Page 23: Safety Warnings Specifi C For Polishing Operations
Safety Warnings Specifi c for Polishing Voltage (Volts) Total length of cord in meters (m) Operations 120–127V 0–7 7–15 15–30 30–50 a) Do not allow any loose portion of the polishing bonnet 220–240V 0–15 15–30 30–60 60–100 or its attachment strings to spin freely. Tuck away or trim any loose attachment strings. -
Page 24: Description (Fig. 1)
• Avoid prolonged contact with dust from power sanding, …/min . per minute RPM ..revolutions per minute sawing, grinding, drilling, and other construction activities. IPM ..impacts per minute sfpm ..surface feet per minute Wear protective clothing and wash exposed areas with SAVE THESE INSTRUCTIONS soap and water. -
Page 25: Assembly And Adjustments
An accidental to enhance application versatility. start-up can cause injury. When using the D28111 or the D28112 grinder for cutting metal or DUST EJECTION SYSTEM masonry a Type 1 guard MUST be used. Type 1 guards are available... - Page 26 (G). This will align the lugs on the guard with the slots on the gear case cover. D28111 2. Push the guard down until the guard lugs engage and rotate freely 1. Align the lugs (F) on the guard with the slots on the gear case (G).
- Page 27 NOTE: The guard is pre-adjusted to the diameter of the gear FIG. 3A FIG. 3B case hub at the factory. If, after a period of time, the guard becomes loose, tighten the adjusting screw (O) with clamp lever in the closed position with guard installed on the tool. CAUTION: Do not tighten the adjusting screw with the clamp lever in the open position.
-
Page 28: Operation
Mounting the Side Handle (Fig. 4) PRIOR TO OPERATION Install the guard and appropriate disc or wheel. Do not use excessively Screw the side handle (D) tightly into one of the holes (N) on either worn discs or wheels. side of the gear case. Be sure the inner and outer flange are mounted correctly. -
Page 29: Maintenance
MAINTENANCE Purchasing Accessories WARNING: Since accessories, other than those offered by WARNING: To reduce the risk of injury, turn unit off and WALT, have not been tested with this product, use of such disconnect tool from power source before installing and accessories with this tool could be hazardous. -
Page 30: Specifications
You can check the location of your nearest authorized service center by contacting your local D WALT office. Alternatively, a service center listing is included in the packaging of this product. SPECIFICATIONS D28111-AR D28111-B2 D28111-B3 D28112-AR D28112-B2 Power... - Page 31 GRINDING AND CUTTING ACCESSORY CHART Guard Type Accessory Description How to Fit Grinder Guard Type Accessory Description How to Fit Grinder Depressed Wire centre cup with grinding threaded TYPE 27 Type 27 guard TYPE 27 Type 27 guard disc GUARD GUARD Flap wheel Backing flange...
- Page 32 GRINDING AND CUTTING ACCESSORY CHART (cont.) Guard Type Accessory Description How to Fit Grinder Masonry cutting disc TYPE 1 Type 1 guard GUARD Metal cutting disc Backing flange Diamond Cutting wheel cutting wheels Threaded clamp Polishing GUARD bonnet...
- Page 36 MADE IN CHINA WALT Industrial Tool Co., 701 East Joppa Road, Baltimore, MD 21286 (NOV11) Part No. N142324 D28111, D28112 Copyright @ 2011 D WALT The following are trademarks for one or more D WALT power tools: the yellow and black color scheme; the “D” shaped air intake grill; the...