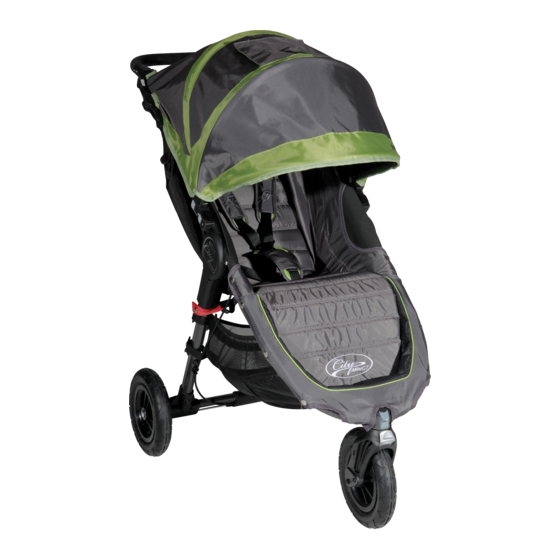
Baby Jogger City Mini GT Assembly Instructions Manual
Hide thumbs
Also See for City Mini GT:
- Assembly instructions manual (59 pages) ,
- Assembly instructions manual (13 pages) ,
- Assembly instructions manual (32 pages)

Related Manuals for Baby Jogger City Mini GT


Summary of Contents for Baby Jogger City Mini GT
- Page 1 Gt Assembly InstructIons Read these instructions carefully before use and keep them for future reference. Your child’s safety may be affected if you do not follow these instructions. www.babyjogger.com...
- Page 2 For the sake of your precious cargo, please read these warnings before using your stroller. Warning: • This stroller is not suitable for running, jogging, skating or rollerblading. • Prevent serious injury to your child by always using the safety harness. •...
-
Page 3: Frame
Frame Unpack stroller from box and set Begin to unfold stroller by pulling the Auto-lock lever wheels aside. while pushing the handle up and away from the lower frame. The stroller will click into place. Turn stroller over to upright position. Snap red safety strap to frame under the fold mechanism before use. -
Page 4: Front Wheel
• Raise the lever up to lock the front wheel assembly in the straight position for long distance strolling. note: • When loading and unloading child, always press the lever down to lock the front wheel straight. • Although the front wheel of your City Mini GT locks it is not intended for jogging or exercise purposes. -
Page 5: Rear Wheels
rear wheels to install rear wheels: Align wheel axle with wheel mount on stroller frame. Insert the wheel axle into the wheel mount until it clicks into place. Gently tug on wheel to make sure the rear wheel is properly attached. to remove the rear wheels: Press the wheel release button while gently sliding the wheel away from the wheel mount. -
Page 6: Canopy
The bottom hole can be used bracket. Repeat on opposite to attach Baby Jogger acessories side to remove entire canopy to your stroller. from stroller. -
Page 7: Brake
brake To engage parking brake: Gently pull brake lever into upright position until it clicks into place. To release parking brake: Pinch gray tabs and pull towards you. Push brake lever down until it is parallel with the frame. Warning: engage parking device before loading and unloading passenger. -
Page 8: Safety Harness
saFety harness to adjust harness height: to adjust harness length: Unclip top of shoulder strap Pull shoulder pads down close to main harness buckle. from the seat and re-clip on Hold the plastic guide and pull the strap end to tighten the pair of seat loops closest or pull the upper harness strap to loosen. -
Page 9: Reclining Seat
reClining seat to recline: 1 Pinch the clamp behind the seat, and slide it down to desired recline. Pull seat down on both sides to match recline position of clamp.Reverse steps to return to the upright position. Weather Cover: If desired, pull weather cover down and over the seat back mesh. -
Page 10: To Remove The Basket
City Mini gt comes fully attached. to remove the basket: From the rear of the stroller: Unsnap the top From the front of the stroller: Unsnap lower snaps of the basket from around the frame seat fabric to expose the bottom front tubing above the middle crossbar. -
Page 11: Removing The Seat
seat removing the seat: Warning: Always be sure the safety strap is securely snapped onto the frame before using stroller! Remove the canopy. Unfasten seat straps from around the bottom/back of Starting with the top snap the frame, located behind closest to the handle and the front wheel. -
Page 12: Quick Fold Technology
quiCk Fold teChnology simple lift & Fold (patented) Remove child from seat. Unsnap red safety straps from frame. Pull upwards on the "Pull to Fold" strap with a gentle tug and your stroller will fold in half. -
Page 13: Care And Maintenance
• To minimize shrinkage, simply reattach the seat to the frame to dry. • Do not press, iron, dry clean, tumble dry or wring the fabric. • If the seat covers need to be replaced, only use parts from a Baby Jogger Authorized Dealer. Plastic/Metal Parts •... -
Page 14: Available Accessories
available aCCessories Car Seat Adaptor Universal Parent Console Chicco Car Seat and multi-model versions Features a cup holder and additional are available. storage compartments. Child Tray Glider Board Features cup holder and easy to clean surface. Allows your toddler to ride along. Holds up Child Tray for double requires use of belly bar. - Page 15 Baby Jogger's limited lifetime Warranty: Baby Jogger warrants that the frame is free of manufacturer defects for the lifetime of the product. Manufacturer’s defects include but are not limited to the breaking of welds and frame tube damage. Textile or soft side materials and all other components shall be warranted for one year from the date of purchase (except for tubes and tires).
- Page 16 Baby Jogger is a Division of Dynamic Brands 8575 Magellan Parkway, Suite 1000 • Richmond, VA 23227 T: 800.241.1848 • F: 804.262.6277 • www.babyjogger.com...