Interlogix TruVision Configuration Manual
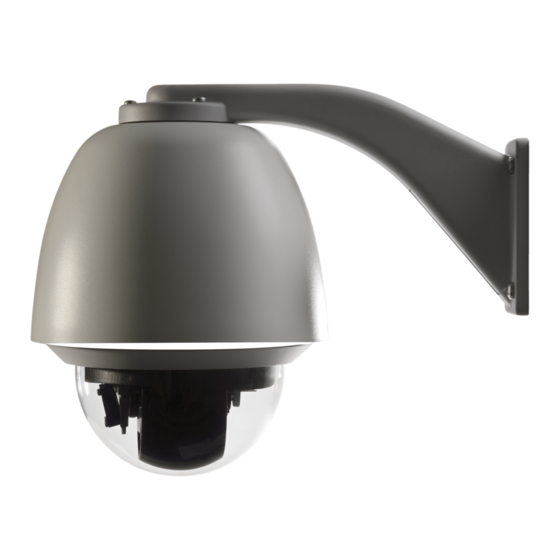
Ip ptz camera
Hide thumbs
Also See for TruVision:
- User manual (169 pages) ,
- Quick start manual (113 pages) ,
- Configuration manual (65 pages)

Related Manuals for Interlogix TruVision


Summary of Contents for Interlogix TruVision
- Page 1 TruVision IP PTZ Camera Configuration Manual Firmware 5.0X P/N 1072664A-EN • REV 1.0 • ISS 24SEP13...
- Page 2 Copyright © 2013 UTC Fire & Security Americas Corporation, Inc. Interlogix is part of UTC Climate Controls & Security, a unit of United Technologies Corporation. All rights reserved. Trademarks and The TruVision and Interlogix names and logos are trademarks of patents United Technologies.
-
Page 3: Table Of Contents
NAS settings 39 Format storage devices 40 Recording schedule 41 Chapter 4 Camera management 45 User management 45 Adding and deleting users 46 Modifying user information 47 RTSP authentication 47 IP address filter 48 TruVision IP PTZ Camera Configuration Manual... - Page 4 Live view mode 53 Playing back recorded video 54 Searching event logs 57 Operating PTZ control 59 PTZ control panel 59 Using presets 60 Using preset tours 61 Using shadow tours 62 Index 63 TruVision IP PTZ Camera Configuration Manual...
-
Page 5: Chapter 1 Introduction
Chapter 1 Introduction This is the configuration manual for the following TruVision IP PTZ camera models: TVP-1101 (1.3MPX pendant, PAL) TVP-3101 (1.3MPX pendant, NTSC) TVP-1102 (1.3MPX surface, PAL) TVP-3102 (1.3MPX surface, NTSC) TVP-1103 (1.3MPX flush, PAL) ... - Page 6 0BChapter 1: Introduction TruVision IP PTZ Camera Configuration Manual...
-
Page 7: Network Connection
This manual explains how to configure the camera over the network with a web browser. TruVision IP PTZ cameras can be configured and controlled using Microsoft Internet Explorer (IE) and other browsers. The procedures described use Microsoft Internet Explorer (IE) web browser. -
Page 8: Windows Vista And 7 Users
PC from any malicious software being installed. To have complete functionality of the web browser interface with Windows Vista and Windows 7, do the following: • Run the Browser interface as an administrator in your workstation TruVision IP PTZ Camera Configuration Manual... -
Page 9: Accessing The Camera Over The Internet
To access the camera online: 1. In the web browser enter the camera’s IP address (default is 192.168.1.70). Use the tool, TruVision Device Finder, enclosed on the CD to find the IP address of the camera. The Login dialog box appears. - Page 10 View live video. Time, date and camera name are displayed here. Stream type and Click to select dual or substream and to select the aspect aspect ratio ratio (4×3, 16×9, or ×1). Start/stop live view Click to start/stop live view. Audio Adjust volume. TruVision IP PTZ Camera Configuration Manual...
- Page 11 Click to take a snapshot of the video. The snapshot will be saved to the default folder in JPEG format. Start/stop recording Click to record live video. 3D Zoom Click to enable 3D zoom. Manual Tracking Click to enable manual tracking. TruVision IP PTZ Camera Configuration Manual...
- Page 12 1BChapter 2: Network connection TruVision IP PTZ Camera Configuration Manual...
-
Page 13: Camera Configuration
Use the Configuration panel to configure the server, network, camera, alarms, users, transactions, and other parameters such as upgrading the firmware. See Figure 2 and Table 2 below for descriptions of the configuration folders available. TruVision IP PTZ Camera Configuration Manual... -
Page 14: Local Configuration
Use the Local menu to manage the protocol type, live view performance, and local storage paths. In the Configuration panel, click Local Configuration display the local configuration window. See Figure 3 and Table 3 below for descriptions of the different menu parameters. TruVision IP PTZ Camera Configuration Manual... - Page 15 Specifies the directory for saving snapshots in live view mode. Live View To Save Snapshots Specifies the directory for saving snapshots in playback mode. When Playback To Save Clips To Specifies the directory for saving video clips in playback mode. TruVision IP PTZ Camera Configuration Manual...
-
Page 16: System Time
4. Check Enable DST (4) to enable the DST function, and set the date of the DST period. 5. Click Save to save changes. TruVision IP PTZ Camera Configuration Manual... -
Page 17: Network Settings
239.255.255.255. Only specify this option if you are using the multicast function. Some routers prohibit the use of multicast function in case of a network storm. DNS server: Specifies the DNS server for your network. TruVision IP PTZ Camera Configuration Manual... - Page 18 DynDNS: Enter the user name and password registered to the DynDNS web site. The domain name is that of the DynDNS web site. • ezDDNS: Enter the host name, it will automatically register it online. • IPServer: Enter the address of the IP Server. TruVision IP PTZ Camera Configuration Manual...
- Page 19 2. Configure the QoS settings, including Video / Audio DSCP, Event / Alarm DSCP and Management DSCP. The valid value range of the DSCP is 0-63. The bigger the DSCP value is the higher the priority is. 3. Click Save to save changes. TruVision IP PTZ Camera Configuration Manual...
- Page 20 Enter the login user name and password. Receiver: The name of the user to be notified. Receiver’s Address: The email address of user to be notified. 3. Click Save to save changes. TruVision IP PTZ Camera Configuration Manual...
-
Page 21: Recording Parameters
Default is Constant. Video Quality Specifies the quality level of the image. It can be set when variable bit rate is selected. Options include: Lowest, Lower, Medium, Higher, and Highest. TruVision IP PTZ Camera Configuration Manual... -
Page 22: Video Image
Use this menu to also adjust camera behavior parameters such as exposure time, iris mode, video standard, day/night mode, image flip, WDR, digital noise reduction, white balance, and indoor/outdoor mode. See Figure 6 and Table 6 below for more information. TruVision IP PTZ Camera Configuration Manual... - Page 23 Manual: You can adjust the values of Gain, Shutter, and Iris manually. Video Standard The camera cannot auto-sense the power supply. Select 50 Hz (PAL) or 60 Hz (NTSC) depending on your region. TruVision IP PTZ Camera Configuration Manual...
- Page 24 Set Zoom Limit value to limit the maximum value of zooming. The value can be set to 20, 40, 80, 160 and 320. Chroma Suppress Adjust this value to control the color especially in low night scene. TruVision IP PTZ Camera Configuration Manual...
-
Page 25: Osd
Date format list box (4). 7. Select a display mode for the camera from the Display Mode list box (5). Display modes include: • Transparent & Not flickering. The image appears through the text. TruVision IP PTZ Camera Configuration Manual... -
Page 26: Overlay Text
2. Check the box for the first line of text. 3. Enter the text in the text box. 4. Use the mouse to click and drag the red text in the live view window to adjust the text overlay position. TruVision IP PTZ Camera Configuration Manual... -
Page 27: Roi Encoding Of An Image
(5). This lets you manually configure the image quality enhancement level as well as name the region. 5. Select the region number and enhancement level. Enter the region’s name. 6. Draw an area in the image. TruVision IP PTZ Camera Configuration Manual... -
Page 28: Intelligent Tracking
Enable Intelligent Tracking (3). 3. Set the duration time. 4. Set the zoom ratio (4). This is the zoom level used when you start to track the person or object. 5. Click Save to save changes. TruVision IP PTZ Camera Configuration Manual... -
Page 29: Ptz Parameters
(2) to open its window. 2. Configure the following settings: Proportional pan: If you enable this function, the pan/tilt speeds change according to the amount of zoom. When there is a large amount of zoom, the TruVision IP PTZ Camera Configuration Manual... -
Page 30: Limit Camera Movement
To define the limit stop parameters: 1. In the folder (1), click the Limit tab (2) to open its window. TruVision IP PTZ Camera Configuration Manual... -
Page 31: Schedule Tasks
You can configure the network camera to perform a certain action automatically during a user-defined time period. To define a schedule task: 1. In the PTZ folder (1), click the Schedule Tasks tab (2) to open its window. TruVision IP PTZ Camera Configuration Manual... - Page 32 The Timing Tasks window appears: Select All Day to set the schedule as all day, or Customize and input the start and end times for each task. Click Enter on your keyboard to enter the time. TruVision IP PTZ Camera Configuration Manual...
-
Page 33: Park Actions
You can create up to four privacy masks per camera. Note: There may be a small difference in size of the privacy mask area depending on whether local output or the web browser is used. TruVision IP PTZ Camera Configuration Manual... - Page 34 Enter its name, color, and active zoom ratio. Each mask can be individually set. Note: The active zoom ratio is the magnification level the camera will zoom into when motion is detected. 7. Click Save to save changes. TruVision IP PTZ Camera Configuration Manual...
-
Page 35: Clear Ptz Configurations
Defining a motion detection alarm requires the following tasks: 1. Area Settings: Define the on-screen area that can trigger a motion detection alarm as well as the detection sensitivity level. 2. Arming Schedule: Define the schedule which the system detects motion. TruVision IP PTZ Camera Configuration Manual... - Page 36 5. Move the Sensitivity slider (5) to set the sensitivity of the detection. All areas will have the same sensitivity level. 6. Click Edit to edit the arming schedule. The Edit Schedule Time window opens: TruVision IP PTZ Camera Configuration Manual...
-
Page 37: Tamper-Proof Alarms
You can configure the camera to trigger an alarm when the lens is covered and to take an alarm response action. To set up tamper-proof alarms: 1. In the Events folder (1), click the Tamper-proof tab (2) to open its window. TruVision IP PTZ Camera Configuration Manual... -
Page 38: Exception Alarms
• Network Disconnected: Disconnected network cable. • IP Address Conflicted: Conflict in IP address setting. • Illegal Login: Wrong user ID or password used to login to the cameras. TruVision IP PTZ Camera Configuration Manual... -
Page 39: Alarm Inputs And Outputs
4. Repeat steps 2 and 3 for each of the exception alarms to be configured. 5. Click Save (5) to save changes. Alarm inputs and outputs To define an external alarm input: 1. In the Events folder (1), click the Alarm Input tab (2) to open its window. TruVision IP PTZ Camera Configuration Manual... - Page 40 4. Check the checkbox to select the linkage method. 5. Click Save to save changes. To define an alarm output: 1. In the Events folder (1), click the Alarm Output (2) tab to open its window. TruVision IP PTZ Camera Configuration Manual...
-
Page 41: Video Loss Alarms
To define video loss alarm: 1. In the Events folder (1), click the Video Loss tab (2) to open its window. 2. Check the Enable Video Loss Detection checkbox (3) to enable the video loss detection. TruVision IP PTZ Camera Configuration Manual... -
Page 42: Snapshot Parameters
FTP tab, the snapshots will be uploaded to the FTP. If you also check Upload Snapshot for motion detection or alarm input, the snapshots will be uploaded to the FTP when motion detection or an alarm input is triggered. TruVision IP PTZ Camera Configuration Manual... -
Page 43: Nas Settings
Notes: Up to eight NAS disks can be connected to the camera. To set up a NAS system: 1. In the Storage folder (1), click the tab (2) to open its window. TruVision IP PTZ Camera Configuration Manual... -
Page 44: Format Storage Devices
Storage folder (1), click the Storage Management tab (2) to open its window. 2. Check the HDD Number column to select the storage. 3. Click Format. A window appears to check your formatting permission. TruVision IP PTZ Camera Configuration Manual... -
Page 45: Recording Schedule
2. Click the Enable Record Schedule box to enable recording. Note: To disable recording, deselect the option. 3. Click Edit to edit the recording schedule. The following window appears: TruVision IP PTZ Camera Configuration Manual... - Page 46 6. Set the recording periods for the other days of the week if required. Click Copy (3) to copy the recording periods to another day of the week. 7. Click Save (4) to save changes. TruVision IP PTZ Camera Configuration Manual...
- Page 47 2BChapter 3: Camera configuration Note: If you set the record type to “Motion detection” or “Alarm”, you must also define the arming schedule in order to trigger motion detection or alarm input recording. TruVision IP PTZ Camera Configuration Manual...
- Page 48 2BChapter 3: Camera configuration TruVision IP PTZ Camera Configuration Manual...
-
Page 49: Camera Management
When creating a new user, you must give the user a password. There is no default password provided for all users. Users can not modify their password, and only the administrator can create or modify password for a user. TruVision IP PTZ Camera Configuration Manual... -
Page 50: Adding And Deleting Users
4. Select the type of user (2) from the drop-down list. The options are Viewer and Operator. 5. Assign the user a password (3). Passwords can have up to 16 alphanumeric characters. 6. Assign permissions to users (4). TruVision IP PTZ Camera Configuration Manual... -
Page 51: Modifying User Information
3. Change the information required. Note: The user “Admin” can only be changed by entering the admin password. 4. Click Save to save changes. RTSP authentication You can secure the stream data of live view. TruVision IP PTZ Camera Configuration Manual... -
Page 52: Ip Address Filter
Note: If "RTSP Authentication" is disabled, although the user has no permission for “Remote Live View", he can still see live view images IP address filter This function makes it possible for access control. TruVision IP PTZ Camera Configuration Manual... -
Page 53: Telnet
Use the Default menu to restore default settings to the camera. There are two options available: Restore: Restore all the parameters, except the IP parameters, to the default settings. Default: Restore all the parameters to the default settings. TruVision IP PTZ Camera Configuration Manual... -
Page 54: Import/Export A Configuration File
1. Download on to your computer the latest firmware from our web site at: www.interlogix.com/video/product/truvision-ip-open-standards-outdoor- cameras/ - Or - www.utcfssecurityproductspages.eu/videoupgrades/ 2. In the Configuration folder, select the System tab. 3. Select the Maintenance tab. 4. Click the Browse button to locate the latest file on your computer. TruVision IP PTZ Camera Configuration Manual... -
Page 55: Reboot Camera
1. In the Configuration folder select the System tab. 2. Select the Maintenance tab. 3. Click the Reboot button to reboot the device. 4. Click in the pop-up message box to confirm reboot operation. TruVision IP PTZ Camera Configuration Manual... - Page 56 3BChapter 4: Camera management TruVision IP PTZ Camera Configuration Manual...
-
Page 57: Chapter 5 Camera Operation
Record: You can record live video and stored it in the directory you have configured. In the live view window, click the Record button at the bottom of the window. To stop recording, click the button again. TruVision IP PTZ Camera Configuration Manual... -
Page 58: Playing Back Recorded Video
Note: You must configure NAS or insert SD card in the dome camera to be able to use the playback functions. To search recorded video stored on the camera’s storage device for playback, click Playback on the menu toolbar. The Playback window displays. See Figure 11 on page 55. TruVision IP PTZ Camera Configuration Manual... - Page 59 Time moment Vertical bar shows where you are in the playback recording. The current time and date are also displayed. Download functions Download video files. Download captured images. TruVision IP PTZ Camera Configuration Manual...
- Page 60 1. While playing back a recorded file, click to start clipping. Click it again to stop clipping. A video segment is created. 2. Repeat step 1 to create additional segments. The video segments are saved on your computer. TruVision IP PTZ Camera Configuration Manual...
-
Page 61: Searching Event Logs
The Log window appears. See Figure 12 on page 58. Note: You must have view log access rights to search and view logs. See “Modifying user information” on page 47 for more information. TruVision IP PTZ Camera Configuration Manual... - Page 62 Record, Remote Stop Record, Remote PTZ Control, Remote Playback by File, Remote Playback by Time, Remote Get Parameters, Remote Get Working Status, Start Bidirectional Audio, Stop Bidirectional Audio, Remote Alarm Arming, Remote Alarm Disarming TruVision IP PTZ Camera Configuration Manual...
-
Page 63: Operating Ptz Control
Zoom, focus and iris: Adjusts zoom, focus and iris. PTZ movement: Adjusts the speed of PTZ movement. Turns on/off the light, it is supported by those have RS-485 port cameras. Turns on/off camera wiper. Auto focus Initializes the lens TruVision IP PTZ Camera Configuration Manual... -
Page 64: Using Presets
Call shadow tour 3 Call preset tour 7 Call shadow tour 4 Call preset tour 8 Start to set limit stops To set a preset: 1. Select a preset number from the preset list. TruVision IP PTZ Camera Configuration Manual... -
Page 65: Using Preset Tours
7. Click to save all the patrol settings. To call a preset tour: In the PTZ control panel, select a defined preset tour from the drop-down list and click to call the preset tour. TruVision IP PTZ Camera Configuration Manual... -
Page 66: Using Shadow Tours
• Tilt the PTZ dome up or down. • Zoom in or out. • Refocus the lens. 5. Click to save the settings. To call a shadow tour: Select one shadow and click to call the shadow tour. TruVision IP PTZ Camera Configuration Manual... -
Page 67: Index
Logs configuring, 18 information type, 58 day/night, 20 search logs, 57 Camera name viewing logs, 57 display, 21 Configuration file import/export, 50 Motion detection Contrast setup, 19 configuring, 31 Date format set up, 21 TruVision IP PTZ Camera Configuration Manual... - Page 68 56 snapshots in live view mode, 54 Web browser Recording parameters, 17 accessing the camera, 5 overview of the interface, 5 Web browser security level checking, 3 Saturation setup, 19 TruVision IP PTZ Camera Configuration Manual...