Table of Contents
Advertisement
Advertisement
Table of Contents

Related Manuals for Leupold GX 1i


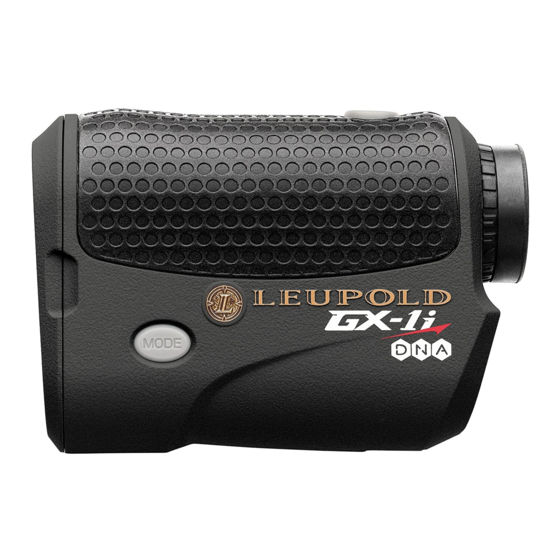
Summary of Contents for Leupold GX 1i
- Page 1 GX 1 and 2 Series ® Rangefinders OPERATING INSTRUCTIONS...
-
Page 3: Table Of Contents
About Leupold . . . . . . . . . . . . . . . . . . . -
Page 4: Introduction
GX-1i or GX-2i rangefinder . Your new Leupold GX Series digital laser rangefinder is a revolutionary, range- finding device that incorporates advanced digital electronics with state-of-the- art trajectory algorithms . The next generation Digitally eNhanced Accuracy... - Page 5 and advanced trajectory calculations . The result is distance measurements accurate to less than a yard, no matter the angle at which the laser is fired .
-
Page 6: About Leupold
About Leupold & Stevens, Inc. It’s a decidedly American story: in 1907, a young German immigrant named Fred Leupold set up a one-man shop at 5th and Oak Streets in Portland, Oregon, repairing optics for surveying equipment . The small company survived the First World War and the Great Depression, however, it was the Second World War that would forever change the company . - Page 7 In true American style, the philosophical foundation laid in our early years has served us well as we’ve grown and changed over the decades . In fact, the firm’s founder established the clarity of purpose that we see at Leupold & Stevens today: “We solemnly promise never to let down on quality, the customer is entitled to...
-
Page 8: Accuracy
Accuracy The ranging accuracy of the GX-1i and GX-2i rangefinders is +/- .5 yard/meter . The maximum effective range depends upon a number of factors including light- ing conditions and air quality, but the most important factor is the reflectivity of the target . - Page 9 How it Works The Leupold GX series of rangefinders emit a series of invisible, infrared energy pulses that are reflected off the selected target back to the optical unit . State- of-the-art circuitry and precision computing circuits are used to calculate the distance instantaneously by measuring the time it takes for each pulse to travel from the GX rangefinder to the object and back .
- Page 10 Safety and Operation Precautions The Leupold GX-1i and GX-2i 6x23mm rangefinders employ an eye safe FDA Class 1 laser in their operation. Outside of the United States, the IEC is the gov- erning body over laser products and has classified the GX rangefinders as Class 3R.
- Page 11 Safety and Operation Precautions (cont.) • Caution: Use of controls or adjustments or performance of procedures other than those specified herein may result in hazardous laser radiation exposure • When you see the display through the eyepiece, please be aware that the product is active and emitting an invisible laser and the laser aperture should not be pointed toward anyone.
- Page 12 Specification The GX Series of digital laser rangefinders provides a variety of useful modes to tailor performance to the conditions you experience in the field . Model features are identified on the following pages . gx-1i gx-2i Magnification inclinometer ® (true golf Range ™...
-
Page 13: Operation
Operation QUICk SeT MeNU ™ *GX-2i display shown with all possible characters visible... - Page 14 GX-1i & GX-2i POWER Focus MODE Battery The GX-1i and GX-2i have two buttons: POWeR and MODe . When you initially...
- Page 15 from other potential targets in the distance behind the pin . The GX-1i and GX-2i series rangefinders feature PinHunter Laser Technology, which will always provide you the distance measurement to the closet object ranged . When you press and hold the MODe button for 1 second then release it, the Quick Set Menu is prepared for navigation .
-
Page 17: Using Prism Lock
Using Prism Lock Many courses have highly reflective prisms included in key course features . These prisms pro vide your GX rangefinder with an extremely intense return signal, allowing it to lock onto the prism quickly and provide instant feedback that you have accurately ranged the intended target . - Page 18 Note: The audible beep can be turned on/off utilizing the Quick Set Menu . Simply toggle through the functions using the mode button until “beeP” is shown in the display . Press POWeR to select on or off . FUNCTION 1: FOG MODe The Fog Mode can be used in foggy/rainy conditions to screen out false read- ings from raindrops or other atmospheric interference to provide an accurate range .
- Page 19 How do I activate Fog Mode? 1) Press POWeR to activate the rangefinder . 2) Press and hold MODe for at least 1 second to enter the Quick Set Menu; release the MODe button, the word “Fog” will now appear in the upper display . 3) While the word “Fog”...
- Page 20 FUNCTION 2: TRUe GOLF RANGe (TGR) (GX-2i ONLY) TGR is an adjusted range that will compensate for uphill shots that play long and downhill shots that play short . TGR is calculated from the line of sight distance, incline or decline, and current temperature and altitude .
- Page 21 When entering the Quick Set Menu, TGR is the second mode encountered . The TGR icon will be displayed in the upper display, and the lower display will show whether it is on or off . Press POWeR to toggle TGR on and off . Press MODe to save your selection and move on to the next function .
- Page 22 press and hold MODe for at least 1 second . To continue through the Quick Set Menu and manipulate another feature, press and release MODe until the appropriate icon is displayed . FUNCTION 3: CURReNT TeMPeRATURe INPUT (GX-2i ONLY) Temperature is one of the factors used to determine TGR ranges;...
- Page 23 How do I manually Input tHe cuRRent tempeRatuRe? (GX-2i only) 1) Press POWeR to activate the rangefinder . 2) Press and hold MODe for at least 1 second to enter the Quick Set Menu . 3) Verify that TGR is turned on; if TGR is not activated, you will not be able to enter the current temperature .
- Page 24 FUNCTION 4: ALTITUDe INPUT (GX-2i ONLY) Altitude is one of the factors used to determine TGR ranges; inputting the local elevation/altitude will increase the accuracy of your TGR measurement . The default altitude setting is 1000 feet, and will be shown in the lower portion of the display .
- Page 25 3) Verify that TGR is turned on; if TGR is not activated, you will not be able to enter the current temperature or altitude . To activate TGR, see “How do I activate TGR?” (page 17) . 4) Press and release Mode; the last saved current temperature will now be flashing .
- Page 26 FUNCTIONS 5 & 6: CLUB SeLeCTOR & DISTANCe INPUT (GX-2i ONLY) When activated, the Club Selector function recommends the proper iron for the current distance, shot angle, environmental conditions, and multiple other factors . This will be shown by a pointer leading to the appropriate club on the right side of the display .
- Page 27 For shots longer than recommended with a 2-iron, the 2-iron will be highlighted and the 3 closest pointers will flash . The same is true for shots under the recommended distance for your pitching wedge; the pitching wedge will be highlighted and the 3 closest arrows will flash .
- Page 28 To activate the Club Selector, TGR must be activated . Use MODe to navigate through the Quick Set Menu until the Club icon is displayed; the lower display will show whether it is on or off . Press POWeR to toggle the Club setting on or off .
- Page 29 NOTe: Though we strongly recommend inputting the specific distances obtained with each of the irons mentioned above, the specialized algorithms used by the GX-2i will make logi- cal assumptions about the remaining club(s) if specific distances are not known for one or more of the remain- ing clubs.
- Page 30 When your selection is shown in the upper numeric dis- play, press MODe to save your selection and move on to the 6-iron . The 6-iron symbol and pointer will now be highlighted . Press POWeR to begin toggle through the 6-iron distance settings .
- Page 31 display, press MODe to save your selection and move on to the temperature input (the temperature at which these distances were measured) . NOTe: You cannot input a distance value less than or equal to the previous club. For example, if you choose 175 yards for your 6-iron, the lowest available distance for your 4-iron will be 180 yards.
- Page 32 The last saved altitude will be flashing in the bottom portion of the display . Press POWeR to toggle through the altitude settings . The default set- ting is 1,000 feet . Pressing POWeR will toggle through a range of 0 feet to 9999 feet in 500 foot increments . When the appropriate altitude is displayed, press MODe to save your selection and move to the next mode (yards/meters) .
- Page 33 4) Press and release MODe to input the current temperature and altitude as described on pages 19-22 . 5) Press and release MODe again to progress until the Club Selector icon is shown on the left side of the display . 6) While the Club Selector icon is displayed, press and release POWeR as necessary until the word “On”...
- Page 34 How do I Input tHe StRIkInG dIStance of tHe 8, 6 and 4-IRon? (GX-2i only) NOTe: Though we strongly recommend inputting the specific distances obtained with each of the irons mentioned above, the specialized algorithms used by the GX-2i will make logical assumptions about the remaining club(s) if specific distances are not known for one or more of the remaining clubs.
- Page 35 8-iron shot in 5-yard/meter increments beginning with the last saved distance, until 200 yards has been reached . Once 200 yards has been reached, it will reset to 60 yards, and start over again . When the appropriate distance is displayed, press MODe . 3) The 6-iron symbol will now be highlighted and the last saved distance will be shown in the upper numeric display .
- Page 36 until an automatic power-down occurs, or simply press and hold MODe for at least 1 second . To continue through the Quick Set Menu and manipulate another feature, press and release MODe until the appropriate icon is displayed . 6) Press POWeR to set the distance obtained with your 4-iron shot in 5-yard/ meter increments beginning with the last saved distance, until 240 yards has been reached .
- Page 37 How do I Input tHe tempeRatuRe and altItude at wHIcH tHe StRIkInG dIStance foR eacH club waS meaSuRed? (GX-2i only) The procedure for inputting the temperature and altitude at which each striking distance was measured begins immediately after inputting the specific club dis- tances .
- Page 38 3) The last saved altitude will be flashing in the bot- tom portion of the display . If you wish to input an altitude other than the one shown, proceed to step 4 . To save the shown altitude and return to ranging mode, let the unit sit idle for at least 20 seconds until an automatic power-down occurs, or simply press and hold Mode for at least 1 second .
- Page 39 4) Press POWeR to toggle through the altitude settings . The default setting is 1,000 feet . Pressing POWeR will toggle through a range of 0 feet to 9,999 feet in 500 foot increments . When the appropriate altitude is displayed, you have completed the input process for setting up the temperature and altitude at which the striking distances were measured .
- Page 40 FUNCTION 7: SeLeCTABLe ReTICLeS Reticle Reticle without Plus Point...
- Page 41 ply press and hold MODe for at least 1 second . To continue through the Quick Set Menu and manipulate another feature, press and release MODe until the appropriate icon is displayed .
- Page 42 FUNCTION 8: YARDS/MeTeRS OUTPUT This mode allows you to toggle between yards or meters for the measurement output unit . TGR is dis- played in large numbers just above the reticle; LOS is displayed in small numbers below and to the right of the reticle (above the angle readout) .
- Page 43 shown in the lower right portion of the display . release...
-
Page 44: Trouble Shooting
Trouble Shooting How do I actIvate tHe InclInometeR? (GX-2i only) Yes, TGR can be used without entering the Club Selector values, it will sim- ply use the default settings appropriate for the average player . entering your specific values will improve accuracy up to one club length . -
Page 46: Cleaning/Maintenance
Leupold LensPen) . To remove fingerprints, water spots or tougher dirt, use a soft cotton cloth or the cleaning end of the Leupold LensPen . A lens tissue with lens cleaning fluid may be used for more stubborn dirt . Always apply cleaning fluid to the cleaning cloth, never directly to the lens . -
Page 47: Warranty/Repair
. Any warranty claim must be accompanied by a copy of the origianl receipt showing the date of purchase . In the event of a need for service or repair, please contact Leupold Product Service at:... - Page 48 Leupold & Stevens, Inc. All marks, including corporate logos and emblems, are subject to Leupold’s rights and may not be used in connection with any product or service that is not Leupold’s, or in any manner that disparages or discredits Leupold, or in a manner likely to cause confusion.
- Page 49 Notes...
- Page 50 Notes...
- Page 51 Notes...
- Page 52 Part # 117332 Artwork # 117335...