Table of Contents
Advertisement
Advertisement
Table of Contents

Related Manuals for Leupold GX-5i3


Summary of Contents for Leupold GX-5i3
- Page 1 ® RANGEFINDERS OPERATING INSTRUCTIONS...
-
Page 3: Table Of Contents
Table of Contents Introduction ..................Page 1 About Leupold & Stevens, Inc...............Page 3 Accuracy ....................Page 5 How GX Rangefinders Work..............Page 6 GX Rangefinder Specifications ...............Page 9 Operation .....................Page 10 Cleaning/Maintenance ................Page 34 Warranty/Repair..................Page 35... -
Page 4: Introduction
GX Series digital laser ® rangefinder that has been crafted by Leupold’s engineers and designers to be the best rangefinder on the market, and to provide you with years of solid performance on the course. Following are instructions detailing the proper use and employment of your GX Series rangefinder. - Page 5 result is distance measurements accurate to less than a yard, no matter the angle at which the laser is fired.
-
Page 6: About Leupold & Stevens, Inc
It’s a decidedly American story: in 1907, a young German immigrant named Fred Leupold set up a one-man shop at 5th and Oak Streets in Portland, Oregon, repairing optics for surveying equipment. The small company survived the First World War and the Great Depression. - Page 7 In fact, the firm’s founder established the clarity of purpose that we see at Leupold & Stevens, Inc. today: “We solemnly promise never to let down on quality, the customer is entitled to a square deal.”...
-
Page 8: Accuracy
Accuracy The ranging accuracy of the GX-5i series of rangefinder is +/- .5 yard/meter. The max- imum effective range depends upon a number of factors including lighting conditions and air quality, but the most important factor is the reflectivity of the target. For most objects, the maximum distance is 550 yards, while for highly reflective targets (such as pin prisms), distances of 700 yards can be obtained. - Page 9 How it Works The Leupold GX-5i rangefinder emits a series of invisible, infrared energy pulses that are reflected off the selected target back to the optical unit. State-of-the-art circuitry and precision computing circuits are used to calculate the distance instantaneously by measuring the time it takes for each pulse to travel from the GX rangefinder to the object and back.
- Page 10 60825-1: 2014-05 Ed. 3.0 and complies with FDA performance standards for laser products except for deviations pursuant to Laser Notice No. 50, dated June 24, 2007. :<5.14mW. λ:895-915nm. t :10-20ns. LEUPOLD & STEVENS, Inc, 14400 NW Greenbrier Parkway, Beaverton, OR 97006...
- Page 11 Safety and Operation Precautions (cont.) • Read this instruction manual in its entirety before using this rangefinder. If the product is used in a manner not specified by the manufacturer, the protection provided by the equipment may be impaired • Caution: Use of controls or adjustments or performance of procedures other than those specified herein may result in hazardous radiation exposure •...
-
Page 12: Specifications
Specifications The GX-5i digital laser rangefinder provides a variety of useful modes to tailor performance to the conditions you experience in the field. Model features are identified on the following pages. GX-5i Magnification Inclinometer (Selectable for USGA rule 14-3) (True Golf Range ) (Selectable for USGA rule 14-3) ®... -
Page 13: Operation
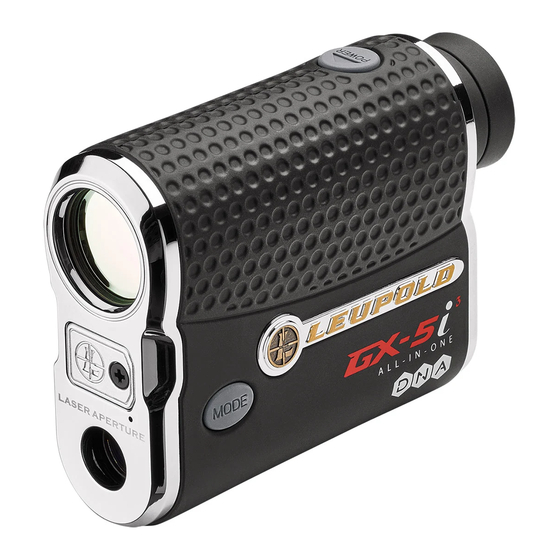
Operation QUICK SET MENU ™ *GX-5i display shown with all possible characters visible... - Page 14 GX-5i POWER FOCUS MODE BATTERY The GX-5i has two buttons: POWER and MODE. When you initially press the POWER button, the display is activated and the unit is ready for ranging. Press the POWER button a second time to range, or hold the POWER button depressed to scan.
- Page 15 When you press and hold the MODE button for 2 seconds and then release it, the Quick Set Menu is activated. To set or activate a mode, you must advance to that function by pressing the MODE button until that function is displayed. To activate or manipulate a function, press the POWER button as necessary.
- Page 16 FOG MODE The Fog Mode can be used in foggy/rainy conditions to screen out false readings from raindrops or other atmo- spheric interference to provide an accurate range. Fog Mode changes the algorithm to look for the “last” tar- get. To increase ranging accuracy always range the ground around the pin/flag when Fog Mode is on.
- Page 17 4) To save the changes and return to ranging mode, let the unit sit idle for at least 30 seconds until an automatic power-down occurs, or simply press and hold MODE for at least 2 seconds. To continue through the Quick Set Menu and manipulate another feature, press and release MODE until the appropriate icon is displayed.
- Page 18 TRUE GOLF RANGE (TGR) True Golf Range is an adjusted range that will compen- sate for uphill shots that play long and downhill shots that play short. TGR is calculated from the line of sight distance, incline or decline, current temperature and altitude, and will display the adjusted range the golfer should play to.
- Page 19 NOTE: Turning TGR off will also disable the Club Selector and inclinometer display; all distance readings will be line-of-sight measurements. TO ACTIVATE TGR: 1) Press POWER to activate the rangefinder. 2) Press and hold MODE for at least 1 second and then release to enter the Quick Set Menu;...
- Page 20 DAY OF PLAY TEMPERATURE INPUT (dp) Temperature is one of the factors used to determine TGR ranges; inputting the current temperature will increase the accu- racy of your TGR measurement. The default temperature setting is 75 degrees F (25 degrees C). NOTE: If yards is selected as the desired measurement output, the temperature will automatically be measured in Fahrenheit.
- Page 21 MANUALLY INPUT THE DAY OF PLAY TEMPERATURE: 1) Press POWER to activate the rangefinder. 2) Press and hold MODE for at least 1 second and release to enter the Quick Set Menu. 3) Verify that TGR is turned on; if TGR is not activated, you will not be able to enter the current temperature, see “To Activate TGR:”...
- Page 22 DAY OF PLAY ALTITUDE INPUT (dP) Altitude is one of the factors used to determine TGR ranges; inputting the local elevation/altitude will increase the accuracy of your TGR measurement. The default altitude setting is 1000 feet, and will be shown in the lower portion of the display.
- Page 23 5) While the “Alt” is flashing, press and release POWER to change the current altitude setting to match current conditions; each depression of POWER will increase the altitude setting by 500 feet until 9999 has been reached, at which time the setting will return to 0 and begin increasing again.
- Page 24 CLUB SELECTOR NOTE: If TGR is not activated, you will not be able to use the CLUB SELECTOR function. When TGR is activated, the Club Selector function recommends the proper iron for the current distance, shot angle, environmental conditions, and multiple other factors.
- Page 25 TO ACTIVATE CLUB SELECTOR: 1) Press POWER to activate the rangefinder. 2) Press and hold MODE for at least 1 second and then release to enter the Quick Set Menu. 3) Verify that TGR is turned on; if TGR is not activated, you will not be able to enter club selections.
- Page 26 Critical to accurate club recommendations is the known striking distance of the user with specific clubs. By inputting the actual distance obtained with a few clubs, a specialized algorithm accurately determines the distance obtained with others. The actual distance obtained from an 8-iron, 6-iron, and 4-iron shot should be input as accurately as possible. If no club distance is input, the Club Selector will automatically default to the preset distances (130 yards for an 8-iron, 150 yards for a 6-iron, and 170 yards for a 4-iron).
- Page 27 YARDS/METERS MODE NOTE: “SET UP” will briefly flash before transition to YARDS/METERS. This mode allows you to toggle between yards or meters for the measurement output unit. When set to Yards mode, all temperature settings will be in Farenheit. When set to Meters mode, all temperature settings will be in Celsius.
- Page 28 5) To save the changes and return to ranging mode, let the unit sit idle for a least 30 seconds until an automatic power-down occurs, or simply press and hold MODE for at least 2 seconds. If yards is selected, the temperature will automatically be measured by Fahrenheit.
- Page 29 CLUB SELECTOR SETUP (SU) NOTE: You cannot input a distance value less than or equal to the previous club. For example, if you choose 155 yards for your 8-iron, the lowest available distance for your 6-iron will be 160 yards. 1) Press POWER to activate the rangefinder.
- Page 30 last saved distance, until 200 yards (185 meters) has been reached. Once 200 yards (185 meters) has been reached, it will reset to 60 yards (55 meters), and start over again. When the appropriate distance is displayed, press MODE. The 6-iron indicator will be shown in the upper display, and either the last saved distance or 8-iron distance plus 20 yards will be shown in the lower display.
- Page 31 8) The 4-iron indicator will be shown in the upper display, and either the last save distance or 6-iron distance plus 20 yards will be shown in the lower display. If you wish to input a distance other than the one shown, proceed to step 9. To save the shown distance for your 4-iron, let the unit sit idle for at least 30 seconds until an automatic power-down occurs, or simply press and hold MODE for at least 2 seconds.
- Page 32 INPUT THE TEMPERATURE AND ALTITUDE AT WHICH THE CLUB SELECTOR SETUP WAS MEASURED. Once the striking distances have been input, press MODE and follow the steps below: The last saved Temperature will be flashing in the bottom portion of the display. If you wish to input a temperature other than the one shown, proceed to step 2.
- Page 33 mode, let the unit sit idle for at least 30 seconds until an automatic power-down occurs, or simply press and hold MODE for at least 2 seconds. To continue through the Quick Set Menu and manipulate another feature, press and release MODE until the appropriate mode is displayed.
- Page 34 SELECTABLE RETICLES This mode is used to choose from any one of 3 preloaded aiming reticles for your GX series digital laser rangefinder. HOW TO CHOOSE A PARTICULAR AIMING RETICLE/CROSSHAIR: 1) Press POWER to activate the rangefinder. 2) Press and hold MODE for at least 1 second and then release to enter the Quick Set Menu.
- Page 35 PRISM LOCK BEEP Prism Lock is always activated and will automatically detect the presence of prisms in course features when scanning at a distance of 30 yards or greater. When using Scan Mode to range a course feature with integral prisms, your GX rangefinder by default, will produce an audible beep and the Prism Lock bracket will be displayed along with the measured distance.
- Page 36 4) While the word “bEEP” is displayed press and release POWER as necessary until the word “OFF” is displayed. Press MODE to save the changes. NOTE: Prism Lock works best in Scan Mode while pressing and holding the POWER button.
-
Page 37: Cleaning/Maintenance
Leupold LensPen). To remove fingerprints, water spots or tougher dirt, use a soft cotton cloth or the cleaning end of the Leupold LensPen. A lens tissue with lens cleaning fluid may be used for more stubborn dirt. Always apply cleaning fluid to the cleaning cloth, never directly to the lens. -
Page 38: Warranty/Repair
If in that five-year period, these products are found to have defects in materials and workmanship, Leupold will repair, or if repair is not possible, replace the product, free of charge. Exclusions apply, please visit Leupold.com for warranty exclusions. - Page 39 Leupold & Stevens, Inc. All marks, including corporate logos and emblems, are subject to Leupold’s rights and may not be used in connection with any product or service that is not Leupold’s, or in any manner that disparages or discredits Leupold, or in a manner likely to cause confusion.
- Page 40 Part # 172443 Artwork # 172447B...