Table of Contents

Related Manuals for Alesis Q88


Summary of Contents for Alesis Q88
- Page 1 USB/MIDI KEYBOARD CONTROLLER USER GUIDE ENGLISH ( 3 – 10 ) GUÍA DEL USUARIO ESPAÑOL ( 11 – 18 ) GUIDE D’UTILISATION FRANÇAIS ( 19 – 26 ) GUIDA PER L'USO ITALIANO ( 27 – 34 ) BENUTZERHANDBUCH DEUTSCH ( 35 – 43 )
-
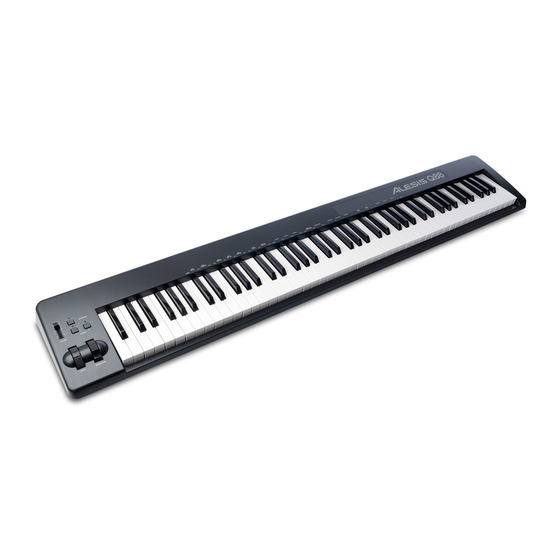
Page 3: Box Contents
If you are using a USB hub, make sure it is a powered hub. 3. Connect the other end of the USB cable to the USB port on Q88. 4. Turn Q88’s power switch on. The USB cable not only powers Q88 but also sends MIDI data to and from your computer. -
Page 4: Rear Panel Overview
9V DC 500mA 9V DC 500mA POWER ADAPTER INPUT – Connect a power adapter here if you do not want to power Q88 by using a USB connection. USB CONNECTION – Connect the included USB cable here and then connect it to a USB port on your computer. -
Page 5: Advanced Functions
MIDI CHANNELS – Selects the MIDI channel (1-16) over which Q88 will transmit MIDI messages. The default is Channel 1. MIDI OUT FROM USB – Enables/disables the Q88's ability to receive MIDI data from a USB connection (i.e., a DAW via a computer) and send it to an external sound engine. - Page 6 MIDI Channel MIDI data from Q88 can be sent on any of the 16 MIDI channels. However, certain MIDI devices and MIDI software applications may require the keyboard to send MIDI data on a specific channel. If this is the case, you can change the channel that the MIDI data is sent using the following method: Press the ADVANCED button.
-
Page 7: Using A Sustain Pedal
To cancel the numeric data you are entering, press the CANCEL key to exit Edit Mode without changing the assignment of the Modulation Wheel. Note: Each time Q88 is powered off, the value assigned to the Modulation Wheel will be lost and reset to the default value of CC#1 (Modulation). - Page 8 Click the drop-down menu for the MIDI input, labeled MIDI From and set this to All Ins. If you have Q88 set to a specific MIDI channel that you would like only this virtual instrument to respond to, you can choose the specific MIDI channel from the drop-down menu. Generally, this should stay on All Channels.
- Page 9 Example: The Volume Slider on Q88 is all the way down. Fader 1 in the software is halfway up. When set to Pickup, Fader 1 will not move until the Volume Slider on Q88 goes past the halfway point. It will then “pickup”...
-
Page 10: General Troubleshooting
Q88 is not properly connected. If controlling an external hardware module, make sure that the MIDI cable is connected to Q88 and to the device's MIDI IN port. Q88 was connected after the Restart the software application. -
Page 11: Contenido De La Caja
Conecte el otro extremo del cable USB al puerto USB del Q88. Encienda el Q88. EL cable USB no solo alimenta al Q88 sino que también envía datos MIDI desde y hacia su computadora. -
Page 12: Vista Del Panel Trasero
Pulse ADVANCED. Pulse la tecla del Q88 cuyo parámetro MIDI (impreso arriba de la tecla) desea ajustar o enviar. Ingrese un valor numérico con las teclas numéricas. -
Page 13: Funciones Avanzadas
Mensajes MIDI CANALES MIDI – Selecciona el canal MIDI (1 a 16) por el cual el Q88 transmite los mensajes MIDI. El valor predeterminado es el Canal 1. SALIDA MIDI DE USB – Habilita/deshabilita la capacidad del Q88 para recibir datos MIDI desde una conexión USB (es decir, una DAW a través de una computadora) y enviarlos a un motor de sonido externo. - Page 14 Octave + y - al mismo tiempo para cancelar la transposición del teclado. Canal MIDI Los datos MIDI del Q88 se pueden enviar por cualquiera de los 16 canales MIDI. Sin embargo, ciertos dispositivos y aplicaciones MIDI pueden requerir que el teclado envíe datos MIDI por un canal específico. En este caso, usted puede cambiar el canal por el que se envían los datos MIDI usando el siguiente método:...
- Page 15 Para cancelar los datos numéricos que está ingresando, pulse la tecla CANCEL para salir del modo de edición sin cambiar la asignación de la rueda de modulación. Nota: Cada vez que se apaga el Q88, se pierde el valor asignado a la rueda de modulación y se restablece el valor predeterminado CC#1 (Modulación).
- Page 16 El Q88 está seleccionado ahora como superficie de control. En los menús Input/Output, visualice las opciones Track (Pista), Sync (Sincronismo), y Remote (Remoto): La opción Track encamina las notas MIDI enviadas por el Q88. Cuando se usa el Q88 para disparar instrumentos virtuales en Live Lite, active Track para la entrada MIDI.
- Page 17 Pulse la tecla RESET ALL CONTROLLERS. Salida MIDI El puerto MIDI Out (Salida MIDI) se puede usar para conectar el Q88 a un módulo de sonido externo u otro teclado MIDI. Como acción predeterminada (cuando se enciende el Q88), todos los datos de controladores se envían por su salida MIDI y conexión USB.
-
Page 18: Solución De Problemas Generales
El Q88 no está conectado computadora. correctamente. Si está controlando un módulo de hardware externo, asegúrese de que el cable MIDI esté conectado al Q88 y al puerto de ENTRADA MIDI del dispositivo. El Q88 se conectó antes de que arrancara la aplicación Reinicie la aplicación de software. -
Page 19: Contenu De La Boîte
MAINTIEN* *VENDU SÉPARÉMENT DÉMARRAGE Le Q88 peut être alimenté par une connexion USB ou par un câble d’alimentation externe vendu séparément. Alimentation et connexion USB Vérifiez que l'interrupteur d'alimentation à l'arrière du Q88 est éteint (OFF). Branchez le câble USB à un port USB sur votre ordinateur. Pour une meilleure performance, utilisez un des ports USB sur le panneau arrière de l’ordinateur. -
Page 20: Caractéristiques Du Panneau Arrière
ENTRÉE D’ALIMENTATION – Branchez un câble d’alimentation externe à cette entrée si vous ne désirez pas utiliser la connexion USB pour alimenter le Q88. CONNEXION USB – Branchez le câble USB fourni dans cette sortie et l'autre extrémité dans le port USB de votre ordinateur. -
Page 21: Fonctions Évoluées
Messages MIDI MIDI CHANNELS – Ces touches permettent de sélectionner le canal MIDI (1 à 16) sur lequel le Q88 transmettra les messages MIDI. Le canal 1 est celui par défaut. MIDI OUT FROM USB – Cette touche permet d'activer/désactiver la fonction de réception de données MIDI d’une connexion USB (p. - Page 22 Appuyez sur la touche ADVANCED. Appuyez sur une des 16 touches canal sur le Q88, en fonction du canal MIDI dont vous avez besoin. Le canal MIDI peut également être affecté aux touches Octave + et -. Une fois affectée, la touche + ou - permet d’augmenter ou de diminuer le canal par incrément.
- Page 23 Changement de programme Les changements de programme permettent de modifier l’instrument ou la voix utilisé. Il y a deux façons d’envoyer un message de changement de programme : Modification de programme par incrémentation/décrémentation : Appuyez sur la touche ADVANCED. Appuyez sur la touche DATA : PROGRAM. Maintenant les touches Octave + et Octave –...
- Page 24 Pour annuler les données numériques entrées, appuyez sur la touche CANCEL afin de quitter le mode Edit sans modifier l’affectation de la molette de modulation. Remarque : Chaque fois que le Q88 est mis hors tension, la valeur affectée à la molette de modulation est réinitialisée au réglage par défaut CC #1 (Modulation).
- Page 25 Cliquez sur le bouton MIDI dans le coin supérieur droit pour quitter le mode d’affectation MIDI. Utilisez la commande sur le Q88 que vous venez d’affecter afin de vérifier si cela commande bien son affectation dans le logiciel.
- Page 26 Sortie MIDI Le port de sortie MIDI (MIDI OUT) peut être utilisé afin de brancher le Q88 à un module de son externe ou à un autre clavier MIDI. Par défaut (lors de la mise sous tension du Q88), toutes les données de commande sont envoyées par la sortie MIDI et la connexion USB.
-
Page 27: Guida Per L'uso (Italiano)
2,5 mm. Se si riceve alimentazione da un hub USB alimentato, non è necessario l'uso di un adattatore di alimentazione esterno. Nota bene: non lasciare l'adattatore di alimentazione collegato per lunghi periodi di tempo se il Q88 non è in uso. -
Page 28: Panoramica Pannello Posteriore
Premere ADVANCED (Avanzate). Premere sul Q88 i tasti le cui impostazioni MIDI (stampate sopra il tasto) si desidera regolare o inviare. Inserire un valore numerico servendosi dei tasti numerici. -
Page 29: Funzioni Avanzate
CANALI MIDI – Seleziona il canale MIDI (1-16) sul quale il Q88 trasmetterà messaggi MIDI. Quello predefinito è il Canale 1. USCITA MIDI DA USB – Abilita/disabilita la capacità del Q88 di ricevere dati MIDI da un collegamento USB (ossia un DAW tramite un computer) e inviarli ad un motore audio esterno. - Page 30 Octave + e - per annullare la trasposizione della tastiera. Canale MIDI I dati MIDI del Q88 possono essere inviati su uno qualsiasi dei 16 canali MIDI. Ciò nonostante, alcuni dispositivi MIDI e applicazioni software MIDI possono richiedere che la tastiera invii dati MIDI su un canale specifico.
- Page 31 Si può collegare un pedale sustain (venduto separatamente) al Q88 per controllare la lunghezza delle note, in maniera simile a ciò che fa il pedale sustain di un pianoforte. Collegare il pedale prima di accendere il Q88 in modo che possa individuare la polarità corretta. Per invertire la polarità predefinita del pedale, premere e...
- Page 32 Ins (tutti gli ingressi). Se il Q88 è impostato su un canale MIDI specifico cui si desidera che lo strumento virtuale risponda, è possibile scegliere il canale MIDI specifico dal menu a discesa. Normalmente, dovrebbe stare su All Channels(tutti i canali).
- Page 33 MIDI Out La porta MIDI Out può essere utilizzata per collegare il Q88 ad un modulo audio esterno o ad un'altra tastiera MIDI. In via predefinita (quando si accende il Q88), tutti i dati controller sono inviati tramite la sua uscita MIDI e il collegamento USB.
- Page 34 Il Q88 non è collegato bene. Se si controlla un modulo hardware esterno, assicurarsi che il cavo MIDI sia collegato al Q88 e alla porta MIDI IN del dispositivo. Il Q88 è stato collegato dopo il lancio dell'applicazione Riavviare l'applicazione software.
-
Page 35: Deutsch
Hub mit Strom versorgt wird. 3. Stecken Sie das andere Ende des USB-Kabels in die USB-Buchse am Q88. 4. Schalten Sie das Q88 ein. Das USB-Kabel versorgt das Q88 nicht nur mit Strom, sondern überträgt auch MIDI-Daten vom und zum Computer. - Page 36 POWER 9V DC 500mA 9V DC 500mA NETZTEILBUCHSE - Schließen Sie hier ein Netzteil an, wenn Sie das Q88 nicht über eine USB- Verbindung mit Strom versorgen möchten. USB-VERBINDUNG - Schließen Sie das mitgelieferte USB-Kabel hier an und verbinden es anschließend mit einem USB-Port Ihres Computers.
-
Page 37: Erweiterte Funktionen
Drücken Sie die Taste ENTER oder ABBRECHEN, um Ihre Wahl zu bestätigen oder abzubrechen. MIDI-Nachrichten MIDI-KANÄLE - Wählt den MIDI-Kanal (1-16) aus, über den das Q88 die MIDI-Nachrichten überträgt. Die Standardeinstellung ist Kanal 1. MIDI OUT VIA USB - Aktiviert/deaktiviert die Fähigkeit des Q88, MIDI-Daten über eine USB-Verbindung (d.h. - Page 38 Transponierung des Keyboards abzubrechen. MIDI-Kanal MIDI-Daten vom Q88 können von jedem der 16 MIDI-Kanäle gesendet werden. Bei manchen MIDI-Geräten und MIDI-Softwares muss das Keyboard die MIDI-Daten jedoch über einen bestimmten Kanal senden. Wenn dies der Fall ist, können Sie den Kanal, der die MIDI-Daten sendet, folgendermaßen einstellen: Drücken Sie die Taste ERWEITERT.
- Page 39 Programmwechsel Programmwechsel werden verwendet, um das verwendete Instrument oder die Stimme zu wechseln. Es gibt zwei Möglichkeiten, um eine Programmwechsel-Nachricht zu senden: Programmwechsel in Einzelschritten: Drücken Sie die Taste ERWEITERT. Drücken Sie die Taste DATEN: PROGRAMM. Nun können die Oktavetasten + und - dazu verwendet werden, das Programm zu wechseln. Drücken Sie die Oktaventasten + oder - und spielen Sie auf den Tasten, bis Sie das gewünschte Instrument finden.
- Page 40 Oktave (nach unten oder oben) verändern. VERWENDUNG EINES SUSTAIN-PEDALS Sie können ein Sustain-Pedal (separat erhältlich) an das Q88 anschließen, um die Länge der Noten zu steuern, ähnlich dem Haltepedal eines Klaviers. Schließen Sie das Pedal an bevor Sie das Q88 einschalten, damit es die richtige Polarität erkennt.
- Page 41 Parameter erst dann bewegen, wenn das Hardware-Steuerelement des Q88 den aktuellen Wert dieses Parameters übersteigt. Beispiel: Der Lautstärkeregler am Q88 steht auf 0. Der Fader 1 in der Software steht auf mittlerer Position. Ist Pickup eingestellt, wird der Fader 1 sich solange nicht bewegen, bis der Lautstärkeregler des Q88 über diese mittlere Position hinaus bewegt wird.
- Page 42 ALLE STEUERELEMENTE ZURÜCKSETZEN. MIDI Out Der MIDI Out-Anschluss kann verwendet werden, um das Q88 mit einem externen Sound-Modul oder einem anderen MIDI-Keyboard zu verbinden. Standardmäßig werden (beim Einschalten des Q88) alle Controller- Daten von seinem MIDI-Ausgang und dem USB-Anschluss gesendet.
-
Page 43: Allgemeine Fehlersuche
Verwendung eines USB-Hub es direkt mit dem Computer. verursacht. Stellen Sie sicher, dass das Q88 oder das USB MIDI- Die Software ist nicht Gerät als aktive MIDI-Quelle in Ihrer Anwendung eingestellt, MIDI-Daten vom aufgeführt ist. Normalerweise können die MIDI- Q88 zu erhalten. -
Page 44: Midi Implementation Chart
MIDI IMPLEMENTATION CHART Transmit/Export Recognize/Import Remarks 1. Basic Information MIDI channels 1-16 Default = 1 Note numbers 0-127 With Octave +/- buttons Program change 1-128 Bank Select response 0-127 Modes supported: Mode 1: Omni-On, Poly Mode 2: Omni-On, Mono Mode 3: Omni-Off, Poly Mode 4: Omni-Off, Mono Multi Mode Note-On Velocity... -
Page 45: Midi Cc List
MIDI CC LIST CC Number Description Bank Select (MSB) Modulation Wheel Breath Controller Undefined Foot Pedal (MSB) Portamento Time (MSB) Data Entry (MSB) Volume (MSB) Balance (MSB) Undefined Pan (MSB) Expression (MSB) 12-13 Effect Control (MSB) 14-15 Undefined 16-19 General Purpose Controllers 20-31 Undefined 32-63... -
Page 46: Specifications
USB; 9V DC, 500 mA, center pin-positive, 5.5 mm outside barrel diameter and 2.5 mm inside barrel diameter (sold separately) KEYBOARD: 88 keys ACCESSORIES: USB cable, Software DVD, User Guide MIDI OUTPUT: 5-pin jack USB: 1 slave connector (MIDI over USB) www.alesis.com/Q88... - Page 48 7-51-0388-A...