Table of Contents
Advertisement
Quick Links
Advertisement
Table of Contents

Related Manuals for Alesis Q20


Summary of Contents for Alesis Q20
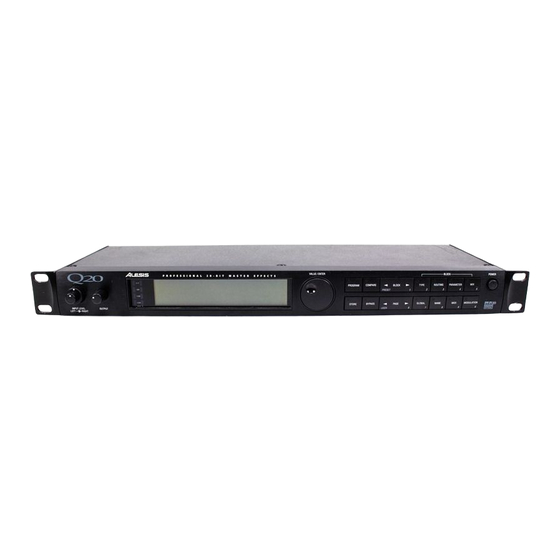
- Page 1 ALESIS User Manual...
-
Page 2: How To Use This Manual
Modulation, Local Generators, footswitches and using Òtap tempoÓ to control delay times. Chapter 7: Digital Connections. How to use the Q20Õs digital ins and outs in an all- digital studio. Chapter 8: Troubleshooting. Contains the Troubleshooting Index, maintenance and service information, and MIDI implementation chart. - Page 3 Q20 Reference Manual...
-
Page 4: Table Of Contents
MIDI ...16 Digital Connections...16 Footswitches...17 Advance ...17 Bypass...17 Tap Tempo ...18 2: Your First Session With The Q20 ... 19 Powering Up ...19 Setting Levels...19 The Value/Enter Knob...20 Adjusting the Display Contrast ...20 Auditioning Internal Programs...21 Switching Between Preset and User Banks ...21 Example Programs...22... - Page 5 Spring...50 Nonlinear ...50 Reverse...50 Reverb Parameters...51 Decay...51 Damping Ð Hi & Lo ...51 Reverb Density ...51 Diffusion ...51 Input High Frequency Roll Off...52 Predelay...52 Predelay Mix ...52 Reflection Level and Spread...52 Reverberation Swirl...52 Reverberation Attack...52 Gating ...53 Q20 Reference Manual...
- Page 6 Digital In ...- S/PDIF Digital Audio In ...80 Digital Out...- S/PDIF Digital Audio Out ...80 Left/Right In...- Analog Audio In...80 Left/Right Out ...- XLR Analog Audio Out ...80 Left/Right Out ...- 1/4Ó Analog Audio Out ...80 Q20 Reference Manual Contents...
- Page 7 From a QuadraSynth or QS-Series Synthesizer ...110 Routings...111 To specific ADAT tracks...111 From ADAT through the Q20 back to ADAT...112 From the QuadraSynth or QS-Series through the Q20 back to ADAT...113 8: Trouble-Shooting... 115 Trouble-Shooting Index ...115 Checking the Software Version ...116 Re-initializing ...116...
- Page 8 Contents Q20 Reference Manual...
-
Page 9: 1: Setting Up
Note that the Q20 uses a soft power switch which will turn the unit on when plugged in. It is good practice to turn your mixer inputs or returns down while connecting the Q20. -
Page 10: Audio Connections
Alternatively, you could use the INSERTS on your mixer to Òpatch inÓ only the left or right channel of the Q20. If using the effect sends of a mixer, you have the advantage of sending any of the mixerÕs input channels to the Q20Õs input(s), and have control over the level of each channel being sent. -
Page 11: Interfacing Directly With Instruments
The Q20 has two balanced inputs and two balanced outputs. These provide three different (analog) audio hookup options: ¥ Mono. Connect a cable to the [L] INPUT of the Q20 from a mono source, and another cable from the [L] OUTPUT of the Q20 to an amplification system or mixer input. -
Page 12: Interfacing To A Mixing Console
Still another way of interfacing the Q20 to a mixer or recording console would be in-line across the output of your mixing console. - Page 13 Setting the Effect/Dry Balance No matter where you connect the output of the Q20 into the mixer, you are in control of the balance between the mixerÕs channel inputs (the uneffected signal being routed to the aux sends and the Mix) and the effect returns coming from the Q20. The...
- Page 14 Chapter 1 - Setting Up Mono In - Stereo Out. If you only want to feed the Q20 a mono input, but wish to connect both of its outputs back to the mixer, you will need three audio cables. Connect a cable from an effect send to the [L] INPUT of the Q20, another cable from the [L] OUTPUT of the Q20 to an effect return or other mixer input, and another cable from the [R] OUTPUT of the Q20 to an adjacent mixer input.
- Page 15 If you do not hear any audio after making these connections, swap the input and output cables at the Q20, as these may be wired backwards. If the cable is color-coded, usually the red jack represents the send (which connects to the Q20Õs INPUT) and black is the return (which connects to the OUTPUT).
- Page 16 Left and Right Main Outputs of the mixing console to the [L] and [R] INPUTs of the Q20. The [L] and [R] OUTPUTs of the Q20 are then connected to a stereo amplifier, or two input channels of another mixing console (for sub-mixing applications).
-
Page 17: When To Use Balanced Connectors
Keeping this in mind, your order of preference when connecting the Q20 to a mixer should be to use the XLR connectors first, then to use balanced 1/4Ó cables, then unbalanced 1/4Ó... -
Page 18: Midi
The proprietary Alesis Optical format carries up to 8 audio channels on a single fiber optic cable. Since the Q20 has two channels (left and right), you may choose two of the incoming 8 channels for the Q20 to process or output. -
Page 19: Footswitches
[BYPASS]. Any momentary single-pole/single-throw footswitch, normally open or normally closed, will work for the two footswitch functions. These should be plugged in prior to power-up so that the Q20 can configure itself for the type of footswitch being used. Advance The [ADVANCE] jack lets you scroll through the Programs in memory by advancing to the next higher numbered Program each time the connected footswitch is pressed. -
Page 20: Tap Tempo
Note that some programs can override these footswitch settings by re-assigning pedals as Local Generator Sources in the Modulation pages. See Chapter 6 for more information. Q20 Reference Manual... -
Page 21: 2: Your First Session With The Q20
For quietest operation, you should adjust the level of the source being sent to the Q20 so that the green [-3dB] LEDs in the Q20Õs peak meter flash, but not so loud that the red [CLIP] LEDs turn on. A nominal input sound make the -12dB LED turn on Note: The Input and Output level controls effect the analog inputs and outputs only. -
Page 22: The Value/Enter Knob
Chapter 2 - Your First Session with the Q20 The Value/Enter Knob Located just to the right of the custom LCD display, the [VALUE/ENTER] knob is used to select Programs and adjust parameter values that appear in the display. However, it is not just a knob, it is also a button. Depending on what parameter you are editing, the [VALUE/ENTER] knob will work in either one of two ways: Immediate. -
Page 23: Auditioning Internal Programs
PRESET Switching Between Preset and User Banks There are three banks in the Q20: Preset, User 0 and User 1. They each contain 100 Programs. However, the Preset bank cannot be permanently changed. You can edit the Preset Programs, but you can store them only in the User banks. To switch between the Preset and User banks, follow these steps: Press and hold the [PROGRAM] button. -
Page 24: Example Programs
This Program includes two Pitch Blocks feeding a delay Block, into another Pitch Block, then into a Reverb Block, and finally yet another Pitch Block. This is a prime example of the flexibility the Q20 offers to programmers. The Program creates a thick, swirling, ambient effect that greatly enhances an electric guitarÕs sound. -
Page 25: Adjusting Effects Levels
Outputs, from 0Ð100%. This parameter comes between the combined Effect BlocksÕ outputs and the Q20Õs outputs, and controls the output levels of all active Blocks that are routed to the L/R Outputs simultaneously. However, it does not change the individual output levels of Effect Blocks that are routed internally (i.e. -
Page 26: Comparing An Edited Program To Its Original Settings
Chapter 2 - Your First Session with the Q20 Use the [< BLOCK >] buttons to select other Blocks, and adjust their levels, as described above. Mix parameters affect the Program and are only temporary unless the Program is stored into memory before a another Program is recalled. See later in this Chapter for more about comparing and storing edited Programs. -
Page 27: Storing Edited Programs
Program into memory yet. However, if you select another Program from memory before storing the edited Program, your changes will be lost. Although the Q20 has two banks (Preset and User), you can only store Programs in the User bank. -
Page 28: Bypassing Effects
Since most Q20 Programs route the L/R IN signal to the L/R OUT, you will need to mute this connection when connecting to a mixerÕs aux sends and returns. This can be done globally for all Programs. -
Page 29: 3: Overview
The Architecture of the Q20 The Q20 provides eight Effect Blocks per Program, each of which can serve as either EQ, Pitch, Delay or Reverb. The display shows these Blocks from first to last, between the L/R IN (left and right inputs) and the L/R OUT (outputs). The display also illustrates the routings between the Blocks. -
Page 30: Routing Òpatch Cordsó Between Blocks
L/R IN routed to the L/R OUT will not display these Òpatch cordsÓ except when editing the ProgramÕs routings. This is to avoid confusion when operating in this mode. For more information on Global Direct Signal Mute, see Chapter 2. Q20 Reference Manual... -
Page 31: Quick Route
There are basically three places in the Q20 that can distort: at the input A/D converter, within the blocks, and at the output. The routing levels within a well-designed program are set so that none of these three will distort before the other ones do. -
Page 32: The L/R In
DSP power available. However, if the signal is attenuated (by setting the level below +0dB), 2% of DSP is used. The following section discusses how the Q20 reacts when DSP is nearly fully taxed. One way to free up more DSP power when you need it is to set some or all of your Òpatch cordÓ... - Page 33 Overview - Chapter 3 DSP. The DSP (Digital Signal Processor) chip inside the Q20 is what processes all signals in the digital domain and creates all of the effects (sometimes with the assistance of the microprocessor). The DSP chip has a limit to how many instructions (per sample) it can handle.
-
Page 34: Equalization
Bandwidth is inversely related to the conventional ÒQÓ value; that is, the higher the Q value, the lower the bandwidth. Bandwidth is used in the Q20 because it is a more familiar term to many musicians, and is more intuitive. Cutoff Frequency... -
Page 35: Shelving Eqs
A shelving EQ can boost or cut frequencies in its pass band, while allowing the frequencies outside its pass band to go through it. The shelving EQs of the Q20 provide gains from -14dB to +14dB in 0.1dB increments. Shelving filters are well suited for applications in which high or low frequencies need to be boosted or cut, but the remainder of the audio signal is to pass through unchanged. -
Page 36: Multiband Eqs
Multiband EQs can be used to flexibly and accurately tailor the tonality of a signal. The 3 band and 4 band parametric EQs in the Q20 can be used to boost and cut multiple bands, with the added flexibility of controlling the bandwidth of one or two mid bands. -
Page 37: Resonator
0 degrees, there is virtually no effect. At 90 degrees, there is an illusion that the speakers are on either side of the listener. At 99 degrees, the sound appears to come from slightly behind the listenerÕs head. 45° 90° Q20 Reference Manual Perceived Speaker Placement 0° 99° 99°... -
Page 38: Overdrive
Overdrive effect will start to distort almost right away. When set to a low number, the distortion will not occur until the signal feeding the overdrive becomes louder than the Direct Level setting. When you need that extra ÒpushÓ, try setting the Direct Level to 11. ThatÕs one louder, init? Q20 Reference Manual... -
Page 39: Triggered Panning With Doppler
When set to CONTINUOUS, the Panning effect (when triggered) will move from one channel to the other and back again over and over, until it is triggered again (at which point the cycle begins again). Q20 Reference Manual Overview - Chapter 3... -
Page 40: Phase Inverter
Or try flipping the signal out of phase before sending it through a chorus or flange for a thinner sound. The Phase Inverter can also be useful in video post production as a quick and dirty surround panner. Q20 Reference Manual... -
Page 41: Pitch Effects
All the parameters of the Mono Chorus are also found here, although each of the two detuned signals has its own individual Predelay amount. SIGNAL Q20 Reference Manual Overview - Chapter 3 DELAY DETUNE... -
Page 42: Quad Chorus
Negative values results in the signal being fed back to be out of phase, creating a more hollow sound. The value range goes from -99 to 0 to +99. DELAY FLANGED FEEDBACK OUTPUT DRY SIGNAL Q20 Reference Manual... -
Page 43: Stereo Flanging
You can select between the two simulation types by setting the Stereo Separation parameter to either a positive or negative value. Experiment with both to find which works better which your music. Q20 Reference Manual Overview - Chapter 3 DRY SIGNAL... -
Page 44: Pitch Shifter
Flanger effectÕs cycle it should begin when triggered. This can be set to a value between 0 and 255. On the Mono Triggered Flange, a value of 64 will produce a downward sweep. DETUNE EFFECTED SIGNAL DRY SIGNAL Q20 Reference Manual... - Page 45 (that of advancing to the next Program or bypassing effects, respectively). Instead, the Flanger effect will be triggered when the selected footswitch is pressed. Q20 Reference Manual Overview - Chapter 3...
-
Page 46: Delay
Each Delay type allows you to adjust delay time in milli- seconds, but also displays the equivalent tempo in BPM (beats per minute), with the exception of Multi Tap Delay. The Q20 offers four types of delay: Mono Delay and Stereo Delay Mono Delay provides a single delay of signal up to 5000.0ms (this is subject to the... -
Page 47: Sampling
Example: If the Play Trigger parameter is set to AUDIO LEFT & RIGHT, the Sample Buffer will play as long as audio is detected at either the analog or digital inputs, depending on which is selected as the Input Audio Source. Q20 Reference Manual Overview - Chapter 3... - Page 48 Sampler effect will record audio once recording has begun (see previous section). This can be set from 250.0 ms to 5000.0 ms (or 5 seconds), in .1 ms increments. If the Maximum Sample Length parameter is changed, the Sample Buffer is erased. Q20 Reference Manual...
- Page 49 (that of advancing to the next Program or bypassing effects, respectively). Instead, the Sample Buffer will be triggered when the selected footswitch is pressed. Q20 Reference Manual Overview - Chapter 3...
- Page 50 MIDI note message will trigger playback of the Sample Buffer. Note: The MIDI note messages must be received on the same MIDI channel that the Q20 is set to (MIDI Mode, Page 1). Rec Audio The Rec Audio parameter (Parameter Mode, Page 6) determines whether or not the audio being recorded into the Sample Buffer will be routed to the audio outputs.
-
Page 51: Reverberation
In a natural acoustic space, each reflectionÕs amplitude and brightness decays over time. This decaying action is influenced by the room size, the location of the sound source in the room, the hardness of the walls, and other factors. The Q20 offers many types of reverberation:... -
Page 52: Plate 2
Another popular trick in the 80Õs was to record the reverb with the tape flipped over, so it would play backwards in the mix. It is a useful effect for drums and other percussive sounds ÐÑ it adds space without washing out the instrument. Q20 Reference Manual... -
Page 53: Reverb Parameters
Reverb Parameters Most of the reverb effects in the Q20 operate under the same set of control parameters, which are listed and described in this section. However, reverbs which use more DSP provide parameters which take advantage of their extra processing power;... -
Page 54: Input High Frequency Roll Off
Reverberation Attack Only used in Plate 2 and Chamber 2, this controls the amount of extra signal added to the beginning of the reverbÕs effect, which in turn controls the intensity of the reverbÕs attack. Q20 Reference Manual... -
Page 55: Gating
In other words, if the Gate Level is set to 99, then no reverb will sound after the gate turns it off. If the Gate Level is set to 50, then some reverb signal will still be present even after the gate turns off the main reverb signal. Q20 Reference Manual... - Page 56 Chapter 3 - Overview Q20 Reference Manual...
-
Page 57: 4: Making Your Own Programs
Preset, User 0 and User 1 Ð of 100 Programs each. These Programs are numbered 0 through 99. The Q20 is shipped with 100 factory presets in the Preset bank; these can be modified but not permanently changed. All edited programs must be stored in the User bank . -
Page 58: Programming A Single Block
LetÕs select a 3 Band Parametric EQ. EQ TYPE: 3 BAND PARAMETRIC EQ Press the [VALUE/ENTER] button. The EQ type will now be selected for Block 1, and the display will move back to Page 1 of the Type function. Q20 Reference Manual... -
Page 59: Routing
FROM INPUT LEFT, FROM INPUT RIGHT, etc. With the ÒINPUT RIGHTÓ option selected, press the [VALUE/ENTER] button. This connects the signal from the Right input of the Q20 (IN R) to the input of the EQ module. - Page 60 EQ band, it can distort the internal processor of the Q20. The -6.0 dB setting will accommodate most blocks, but if there is clipping internally (when the red LED's flash on input), lower the input level.
-
Page 61: Parameter
Press the [PAGE >] button to move the cursor to the Q parameter. Turn the [VALUE/ENTER] knob to set the Mid Band EQÕs bandwidth from .20 to 2.50 octave. Q20 Reference Manual Making Your Own Programs - Chapter 4 1 000Hz GAIN: +0.0dB... -
Page 62: Mix
If the Global Direct Signal Mute function is turned on, the Direct Level From Input parameter will appear to have no effect. However, any changes you make will be remembered if you store the edited Program. For more information on Global Direct Signal Muting, see Chapter 2. Q20 Reference Manual... -
Page 63: Programming Multiple Blocks
REVERB TYPE: P LATE Turn the [VALUE/ENTER] knob until the display reads ÒHALL 1Ó, and press the [VALUE/ENTER] button. The display will flash until the [VALUE/ENTER] button is pressed. REVERB TYPE: H ALL Q20 Reference Manual Making Your Own Programs - Chapter 4... -
Page 64: Deleting Unnecessary Routings
Press [VALUE/ENTER] to set the input level. The display will automatically return to the "Add Route" page Press the [BLOCK >] button until the pointer appears above Block 3. 1 MIX Q20 Reference Manual... -
Page 65: Adjusting Parameters
We highly recommend experimentation in this area. Because the Q20 is so flexible, youÕll be able to create effect combinations never before possible. Example: You can route a BlockÕs output to its own input to create interesting ÒfeedbackÓ... -
Page 66: Moving, Swapping And Copying Blocks
Turn the [VALUE/ENTER] knob to select where you want to move it to (1Ð8). Press [VALUE/ENTER] to execute the move. If the selected destination is already occupied by a defined Block, the Blocks will slide into the now-vacant positions. Q20 Reference Manual... -
Page 67: Block Copy & Paste
Press the [VALUE/ENTER] button to paste the copied Block. The display will momentarily read: PASTING BLOCK... The Block will now appear in the selected location. If another Block already existed in the selected location, it will be replaced. Q20 Reference Manual Making Your Own Programs - Chapter 4... -
Page 68: Changing Effect Types
CONVERTING STEREO ROUTES TO MONO In this case, if only one of the effects outputs had been routed to one of the Q20Õs OUTS, it would be rerouted to come from the new mono BlockÕs M output. If both the Left and Right outputs of the stereo Block were connected to the L/R OUT, then the mono effectÕs M out would now be connected to both the L OUT and R OUT. -
Page 69: 5: Description Of Controls
[INPUT LEVEL] controls. Internal clipping is shown when the red LEDs flash; if the red LEDs flash while the -3 LEDs do not light, the levels within the Q20Õs program should be lowered. Display The Q20 is equipped with a custom LCD display, which provides (among other things) a complete view of the signal routing used by the current Program. -
Page 70: Value/Enter
Program before saving the edited one, your edits will be lost. L/R IN. This represents the inputs of the Q20 which need to be routed to the OUT L/R before it can pass along its signal. Along the way the signal may be routed through a variety of effects. -
Page 71: Program
[PROGRAM] button and using the [1] though [0] buttons (stenciled in gray), you can directly recall any Program (from 00Ð99) in the current bank (Preset or User) you happen to be in. Q20 Reference Manual Description of Controls - Chapter 5... -
Page 72: Store
Program number. If [COMPARE] is pressed, its LED will light and you will temporarily hear (and see) the original version of the Program. This allows you to compare the changes youÕve made with the original. Q20 Reference Manual... -
Page 73: Bypass
[ROUTING], [PARAMETER] and [MIX] buttons to determine which Block you wish to edit. When you are editing Block parameters, the Q20 remembers which page you were in last for each Block. This makes programming easier since, when you go from one... -
Page 74: Type
Reverb. Some effects have many more parameters and these can be found by [PAGE]ing through while in Parameter mode. Parameter Page # Block Function Effect Type Move Block Copy/Paste Block Block Function Move Block Copy/Paste Block Q20 Reference Manual... -
Page 75: Routing
Routing In order for us to hear our signal through the Q20 it must be routed from input to output. Also in order for us to hear our effects, the signal must be routed through the Blocks that contain our chosen effects. -
Page 76: Global
ADAT using the Q20Õs optical connectors, and you are using either an Alesis BRC or AI-2 synchronizer, you must feed the master 48 kHz clock signal back to the Q20 so that it is in sync with the recording system. This is done by connecting a BNC cable from the clock source (BRC or AI-2) to the [48kHz IN] connector no the Q20, and then setting the Sample Clock Source parameter to Ò48kHz INPUTÓ. - Page 77 L and R IN. Both inputs can be set to receive any channel on the buss, from 1 to 8. You can even route the same channel to both inputs. Since the Q20 has two outputs (left and right), you get to chose which of the 8 channels on the outgoing optical buss they should be sent on.
-
Page 78: Name
MIDI Page 1. There are a total of 6 pages in all, containing various MIDI related parameters. For more information about MIDI parameters, see Chapter 6. Page 1: MIDI Channel. This sets the basic MIDI channel of the Q20. This is the channel used to receive MIDI program change messages for recalling Programs, and... - Page 79 SysEx information. This can be sent to a MIDI storage device, or to another Q20. Select either ÒALLÓ or a Program number from 00Ñ99 (User bank only) or EDIT (the currently selected Program which is in the edit buffer). When ALL is selected, simply pressing the [VALUE/ENTER] button starts the MIDI dump.
-
Page 80: Modulation
Chapter 5 - Description of Controls Modulation The Q20 allows you to set up to 8 modulation routings which can control almost any parameter within a Program in realtime. This is especially useful for live applications, where the performer can actually interact or automate the changes in one or more effects. -
Page 81: Rear Panel
It needs to be used when recording the digital outputs of the Q20 to an ADAT system that uses either an Alesis BRC or AI-2 synchronizer. Once connected, it is necessary to set the Q20Õs Sample Clock Source to Ò48kHz INPUTÓ. -
Page 82: Digital In
Only one set of output jacks should be used at a time for optimal performance. - ADAT Digital Audio In - ADAT Digital Audio Out - S/PDIF Digital Audio In - S/PDIF Digital Audio Out - Analog Audio In Q20 Reference Manual... -
Page 83: Effect Parameters
Mono Tremolo Stereo Tremolo Stereo Simulator Soft Overdrive Hard Overdrive Triggered Panning Phase Inverter Q20 Reference Manual Description of Controls - Chapter 5 Parameters Lowpass Fc (frequency): 20Hz-10kHz Bandpass Fc: 200Hz-10kHz, BW (bandwidth): 0.20-2.50 Octaves Highpass Fc: 100Hz-20kHz Lowpass: 20Hz-10kHz, Gain: ± 14dB Highpass: 100Hz-20kHz, Gain: ±14dB... -
Page 84: Pitch
Sweeping Mode: Continuous/One Cycle Only Trigger Source: Audio Left, Audio Right, Audio L&R, Advance Footsw., Bypass Footsw. Retrigger Point: 0-255, Sweeping Mode: Continuous/One Cycle Only Trigger Source: Audio Left, Audio Right, Audio L&R, Advance Footsw., Bypass Footsw. Page# Q20 Reference Manual... -
Page 85: Delay
Multi Tap Delay Tap Tempo Mono Delay Tap Tempo Ping Pong Sampling Q20 Reference Manual Description of Controls - Chapter 5 Parameters Delay Time: 0.1-5000mS, Beat Count: 1/2, 1/4., 1/4, 1/4T, 1/8., 1/8, 1/8T, 1/16, 1/32 (. = dotted, T = triplet) Feedback: 0-99 Left Delay: 0.1-5000mS, Beat Count: 1/2, 1/4.,... -
Page 86: Reverberation
Reverb Density: 0-99, Diffusion: 0-99 High Frequency Roll Off: 200Hz-20,000Hz Predelay: 1-250mS, Mix: <99-<50>-99> Reflection Level: 0-99, Spread: 0-99 Reverberation Attack: 0-99 Gate Trig: Off/Left/Right/L&R, Hold: 10-500 mS Gate Release Time: 0-500mS Gate Level: 0-99 Page # Q20 Reference Manual... - Page 87 High Frequency Roll Off: 200Hz-20,000Hz Predelay: 1-250mS, Mix: <99-<50>-99> Reflection Level: 0-99, Spread: 0-99 Reverberation Swirl: 0-99 Gate Trig: Off/Left/Right/L&R, Hold: 10-500 mS Gate Release Time: 0-500mS Gate Level: 0-99 Q20 Reference Manual Description of Controls - Chapter 5 Page #...
- Page 88 Gate Hold Time: 0-99 Reverb Density: 0-99, Diffusion: 0-99 Input High Frequency Roll Off: 200Hz-20,000Hz Predelay: 1-250mS, Mix: <99-<50>-99> Reverse Reverse Time: 0-99 Reverb Density: 0-99, Diffusion: 0-99 Input High Frequency Roll Off: 200Hz-20,000Hz Predelay: 1-250mS, Mix: <99-<50>-99> Page # Q20 Reference Manual...
-
Page 89: 6: Advanced Applications
16, or OMNI (all 16 channels simultaneously). Receiving Program Changes In order to recall programs or control parameters on the Q20 from a MIDI control device (keyboard, drum pad, guitar or bass controller, sequencer, etc.): Connect the control deviceÕs MIDI OUT to the Q20Õs [MIDI IN]. -
Page 90: Selecting Banks Via Midi
Using the Program Table, you can have any incoming MIDI program change message recall any of the 300 Programs in the Q20. This is done by assigning the MIDI Program Change parameter (described above) to ÒTABLEÓ; then select a MIDI program change number and assign it a Program. -
Page 91: Sysex Storage
To send all User Programs, turn the [VALUE/ENTER] knob all the way to the right to select ÒALLÓ. Optionally, when sending a single Program to another Q20, you can choose to send it to a different location. When you select a Program to be sent, the second field (which represents the destination location) is linked and moves along with it. -
Page 92: Midi Thru
(you do not have to do anything special). When this occurs, the display will momentarily read: RECEIVING MIDI DATA... If you donÕt want the Q20 to receive SysEx dumps, go to MIDI Page 5, and set System Exclusive Receive to OFF. MIDI Thru... -
Page 93: Realtime Modulation Functions
8 different targets. It is this kind of flexibility that matrix modulation affords. Modulation sources must be received on the same MIDI channel the Q20 is set to in order for the Modulators to function properly. -
Page 94: Choosing A Target
Frequency Bandpass Frequency, Bandpass Width Frequency Frequency, Gain Frequency, Gain Bandpass Gain Bandpass Width Lowpass Frequency, Lowpass Gain Highpass Frequency, Highpass Gain Lowpass Frequency, Low pass Gain Bandpass Frequency, Bandpass Gain Bandpass Width Highpass Frequency, Highpass Gain Q20 Reference Manual... - Page 95 Stereo Delay Ping Pong Delay Multi Tap Delay Tap Tempo Mono Delay Tap Tempo Ping Pong Sampling Q20 Reference Manual Advanced Applications - Chapter 6 Target Lowpass Frequency, Lowpass Gain Low BP Frequency, Low BP Gain Low BP Bandwidth High BP Frequency, High BP Gain...
- Page 96 Reflection Level, Reflection Spread Decay, Density, Diffusion Damping Low Damping High Reverberation Swirl Gate Trigger On/Off, Gate Hold Time Gate Release Time, Gate Level Input Hi Rolloff Predelay Time, Predelay Mix Reverb Time (or Gate Time), Diffusion, Density Q20 Reference Manual...
-
Page 97: Choosing A Source
[VALUE/ENTER] knob to select any of the 8 Modulators. Press the [PAGE >] button again to advance the cursor to the next field. Use the [VALUE/ENTER] knob to set the ModulatorÕs amplitude from -99 to +99. Q20 Reference Manual Advanced Applications - Chapter 6 PITCH BEND Aftertouch... -
Page 98: Local Generators
Chapter 6 - Advanced Applications Local Generators The Q20 is equipped with two Local Generators which can be used as Modulation Sources. Each Local Generator can be set to either one of five types: Input Envelope, Peak Follower, Ramp, LFO or Footswitch. The first three allow different ways of having the audio signal at the Q20Õs inputs modulate the parameters of a Program,... - Page 99 Note that assigning the Advance or Bypass footswitches as local generators overrides their default functions (i.e. assigning the Bypass footswitch as a modulation source wonÕt bypass the effect youÕre modulating). Q20 Reference Manual Advanced Applications - Chapter 6 RISE TIME...
- Page 100 Press the [PAGE >] button to advance the cursor to the next field. Turn the [VALUE/ENTER] knob to select either Input Envelope or Peak Follower to be the selected Input GeneratorÕs type. Press the [PAGE >] button to advance to Modulation Page 5. Q20 Reference Manual...
- Page 101 Each Local GeneratorÕs pages differ from page 5. Each Local Generator typeÕs parameters are explaned in the chart below: Generator Type Envelope Peak Follower Ramp Q20 Reference Manual Advanced Applications - Chapter 6 Page Display Env Trigger Source: Left/Right/L&R Env Attack Threshold: -32Ð0dB...
- Page 102 This is the time the modulator takes to ramp up to the peak value This is the time the modulator takes to ramp down to zero modulation Q20 Reference Manual...
-
Page 103: Footswitch Controls
Bypassing Effects The [BYPASS] jack allows you to bypass the effects of the Q20 via a footswitch. This is the same as pressing the [BYPASS] button on the front panel. Each time either the [BYPASS] button is pressed, or the footswitch connected to the [BYPASS] jack is pressed, Bypass mode is toggled on and off again. -
Page 104: Block Bypass Via Midi
Chapter 6 - Advanced Applications Block Bypass via MIDI It is possible to engage Block Bypass via MIDI controller messages which the Q20 receives at its MIDI IN connector. The following controllers can be used to bypass the following Blocks and Block types:... -
Page 105: Midi Control Of Tap Tempo Delay
Play some audio through the Q20 to hear the effect. Note: If the MIDI clockÕs tempo changes, the Q20 will chase it. If the MIDI clock signal is discontinued, the delay time will remain set to the last tempo which the MIDI clock had been. - Page 106 Chapter 6 - Advanced Applications Q20 Reference Manual...
-
Page 107: 7: Digital Connections
Alesis optical interface uses a proprietary 8 channel buss, from which the Q20 can provide processing for 2 channels. This means you can come into the Q20Õs digital input from one or two tracks of an ADAT, and go out of the Q20Õs digital out to one or two ADAT tracks. -
Page 108: Digital Clock Synchronization
Just remember that there can only be one master clock. If the BRC is the master, the Q20 must be synchronized to its clock via the optical or the 48 kHz in. If you have a single ADAT with no BRC, the Q20 becomes the master clock source whenever the ADAT is set to DIGITAL IN and the Q20's Input Audio Source is set to ANALOG. -
Page 109: Connections
Connections To a Single ADAT Connection between the Q20 and one or more ADATs is a simple task of creating a digital audio network that loops all the devices together. When using a single ADAT, simply connect two fiber optic cables between the devices to provide two- way communication. -
Page 110: To Two Or More Adats
The fiber optic cables that make up the digital buss need to be connected in the same order as the Sync cables. The Q20 is inserted in the fiber optic loop from the output of the second ADAT to the input of the master ADAT. The Q20 lets you turn its digital output into a ÒthroughputÓ... -
Page 111: To Two Or More Adats With A Brc Or Ai-2
BNC-to-BNC cable between the BRCÕs 48 kHz Clock Out to the Q20Õs 48 kHz Clock In. When you are ready to record onto ADAT from the Q20, be sure to set the Q20Õs Sample Clock Source function to Sample Clock. -
Page 112: To The Ai-1
If you wish to route the digital output to a device that uses the AES/EBU standard, you can connect the Q20 to an Alesis AI-1 (discontinued). This can be done directly, by connecting the Q20Õs [OPTICAL OUT] to the AI-1Õs ADAT IN or the Q20Õs [OPTICAL IN] connected to the AI-1Õs ADAT OUT. -
Page 113: Routings
If you want to record in stereo onto tracks 1 and 2 of ADAT (or 9 and 10 on ADAT #2 in a chain), route the Q20Õs Left output to channel 1 and its Right output to channel 2. Likewise, if you were recording onto tracks 5 and 6, then it would be channels 5 and 6 that you would use. -
Page 114: From Adat Through The Q20 Back To Adat
BRC to choose at least one of the tracks on the ADAT you wish to process audio in the Q20. The Q20 then intercepts any two of the 8 channels coming from the transmitting ADAT, and then processes them and routes them to the same or different channel numbers, to be recorded back onto another ADAT in the beginning of the loop. -
Page 115: From The Quadrasynth Or Qs-Series Through The Q20 Back To Adat
AI-2 (see earlier in the chapter for more information about the 48 kHz Clock). The Q20 does not need to receive a 48 kHz Clock from the BRC or AI-2, since it will be synchronizing to the QSÕs clock coming in on its digital inputs, which in turn will be synchronized to the 48 kHz clock coming from the BRC or AI-2. - Page 116 Chapter 7 - Digital Connections Q20 Reference Manual...
-
Page 117: 8: Trouble-Shooting
ROUBLESHOOTING Troubleshooting Index If you are experience problems while operating the Q20, please use the following table to locate possible causes and solutions before contacting Alesis customer service for assistance. Symptom The display does not light when the ON/OFF switch is turned on. -
Page 118: Checking The Software Version
Preset bank are changed when re-initializing the unit this way. Total Reset A more drastic version of re-initializing the Q20 will erase all User Programs, as well as resetting all Global parameters. Hold down [PROGRAM], [COMPARE], and [<BLOCK] simultaneously while turning on the power. -
Page 119: Error Messages
LFOs available. While the Q20 has a custom DSP chip that processes all the effects, some of the effects available require that the main microprocessor assist in handling some of this responsibility. -
Page 120: Maintenance/Service
Maintenance/Service Cleaning Disconnect the AC cord, then use a damp cloth to clean the Q20Õs metal and plastic surfaces. For heavy dirt, use a non-abrasive household cleaner such as Formula 409 or Fantastik. DO NOT SPRAY THE CLEANER DIRECTLY ONTO THE FRONT OF THE UNIT AS IT MAY DESTROY THE LUBRICANTS USED IN THE SWITCHES AND CONTROLS! Spray onto a cloth, then use cloth to clean the unit.