Haier XQG65-11SU User Manual
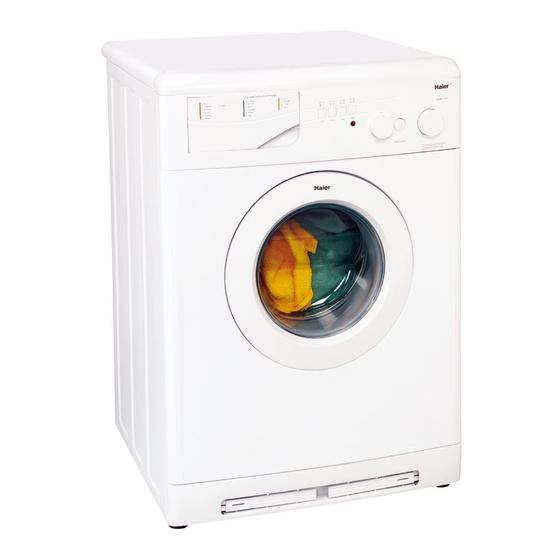
Front load clothes washer & dryer combo
Hide thumbs
Also See for XQG65-11SU:
- User manual (17 pages) ,
- User manual (83 pages) ,
- User manual (83 pages)
Table of Contents
Advertisement
Quick Links
XQG65-11SU -MANUAL
10/29/02
Off
No Soak Setting at Off Position
On
Cotton
Synthetics
Delicate
1. Prewash
6. Spin
A, Normal
I. Normal
2. Normal
B. Quick
II. Rinse
3. Quick
C. Express
III. Spin
4. Express
D. Rinse
5. Rinse
E. Spin
Soak
User Manual-
Guide de l'Utilisateur-
Manual del Usuario-
1:50 PM
Page 2
Off
Half
On
On
Full
Off
XQG65-11SU
Spin
Load
Power
Door Button
Lave-Linge Sechant a
Lavadora y Secadora
Model #
Modèle
Modelo #
Front Load
Clothes Washer &
Dryer Combo
Chargement Frontal
de Carga Frontal
XQG65-11SU
Advertisement
Table of Contents

Related Manuals for Haier XQG65-11SU


Summary of Contents for Haier XQG65-11SU
- Page 1 XQG65-11SU -MANUAL 10/29/02 1:50 PM Page 2 Front Load Clothes Washer & Dryer Combo Half No Soak Setting at Off Position Full XQG65-11SU Cotton Synthetics Delicate 1. Prewash 6. Spin A, Normal I. Normal 2. Normal B. Quick II. Rinse 3.
-
Page 2: Safety Instructions
XQG65-11SU -MANUAL 10/29/02 1:50 PM Page 3 English IMPORTANT SAFETY INSTRUCTIONS Warning – To reduce the risk of fire, electric shock, or injury to persons when using your appliance, follow basic precautions, including the following: 1. Read all instructions before using the appliance. -
Page 3: Save These Instructions
XQG65-11SU -MANUAL 10/29/02 1:50 PM Page 4 English 20. This appliance must be connected to proper electrical outlet with the correct electrical supply. 21. Proper grounding must be ensured to reduce the risk of shock and fire. DO NOT CUT OR REMOVE THE GROUNDING PLUG. If you do not have a three-prong electric receptacle outlet in the wall, have a certified electrician install the proper receptacle. - Page 4 Risk of child entrapment. Before you throw away your old appliance, take off the door so that children may not easily get trapped inside. Thank you for purchasing our Haier product. This easy-to-use manual will Model number guide you in getting the best use of your washer &...
-
Page 5: Table Of Contents
XQG65-11SU -MANUAL 10/29/02 1:50 PM Page 6 English Table Of Contents PAGE SAFETY INSTRUCTIONS ..............1 OPERATING INSTRUCTIONS ............4 Parts and Features..................5 Operations ....................7 Normal Operating Sounds..............16 Care and Cleaning Guide ............16 Cleaning and Maintenance ..............16 Moving and Vacationing ..............17 Storage of Your Washer ..............17 Troubleshooting................18... -
Page 6: Operating Instructions
XQG65-11SU -MANUAL 10/29/02 1:50 PM Page 7 English OPERATING INSTRUCTIONS Parts and Features Half No Soak Setting at Off Position Full XQG65-11SU Cotton Synthetics Delicate 1. Prewash 6. Spin A, Normal I. Normal 2. Normal B. Quick II. Rinse 3. Quick C. -
Page 7: Xqg65-11Su -Manual 10/29/02 1:50 Pm
XQG65-11SU -MANUAL 10/29/02 1:50 PM Page 8 English 1. Water Inlets (Hot/Cold) 2. Power Cord (115 V / 60 Hz) 3. Drain Hose 4. Rear Adjustable Leveling Legs 5. Hose Retainer Clips... -
Page 8: Operations
XQG65-11SU -MANUAL 10/29/02 1:50 PM Page 9 English Understanding Your "Front Load" Washer This style of washer is gentler on your laundry because it has a tumble wash action and there is no agitator to damage your clothes. Since there is no agitator in this style of washer, the washer runs quietly. - Page 9 XQG65-11SU -MANUAL 10/29/02 1:50 PM Page 10 English Note: Button In means OFF, button Out means ON. Soak Cycle Selector Button: • Push the button in to have soak "OFF" and push the button out to have soak "ON". After the rinse water fill and the softener is dispensed, the cycle will allow the clothes to soak before completing the rinse portion of the wash cycle.
- Page 10 XQG65-11SU -MANUAL 10/29/02 1:50 PM Page 11 English Wash Cycle • Before you begin washing your clothes, read the cycle reference chart for your clothes carefully. It is located on the front upper left corner on your washer. Note: Turn the knob CLOCKWISE to your desired setting when selecting the cycle.
- Page 11 XQG65-11SU -MANUAL 10/29/02 1:50 PM Page 12 English Cotton Cycle: Pre-Wash Cycle: The purpose of this cycle is that if you want to pre-wash heavily soiled clothes before the actual wash cycle begins. This cycle is configured in such a...
- Page 12 XQG65-11SU -MANUAL 10/29/02 1:50 PM Page 13 English Temperature The water temperature is preset so when you select wash cycle it will set the proper temperature for that wash load. Please see the chart below to understand the proper temperature for each cycle:...
-
Page 13: Proper Use Of Dispenser
XQG65-11SU -MANUAL 10/29/02 1:50 PM Page 14 English Proper Use of Dispenser: The detergent/softener dispenser is located on the upper left corner of the washer. Open the dispenser by pulling it out. You will see that there are three compartments. -
Page 14: Proper Use Of Detergent
XQG65-11SU -MANUAL 10/29/02 1:50 PM Page 15 English Proper Use of Detergent: Low-Susding is recommended for front load style washers. This type of detergent prevents damage to your washing machine; which may be caused by excess amount of suds entering the condensing compartment. - Page 15 XQG65-11SU -MANUAL 10/29/02 1:50 PM Page 16 English Note: For full loads, you may want to remove of the load and dry the remaining clothes seperately. This will be an efficient way to dry your clothes and will not take as long to dry. For less than full loads, you may want to reduce drying time.
- Page 16 XQG65-11SU -MANUAL 10/29/02 1:50 PM Page 17 English Lint Trap • Lint trap is located on the bottom front right corner behind the small door cover. Push to open the door cover. To remove the lint trap, turn the knob to counter clockwise position.
-
Page 17: Normal Operating Sounds
XQG65-11SU -MANUAL 10/29/02 1:50 PM Page 18 English Normal Operating Sounds The following sounds are normally heard during the operation of the washer: • Tumbling sounds: This is normal as the heavy wet clothes in the Washer are continuously being tossed around. -
Page 18: Moving And Vacationing
XQG65-11SU -MANUAL 10/29/02 1:50 PM Page 19 English Moving & Vacationing • Turn off water supply faucets and disconnect hoses. Drain water from all hoses. This will prevent from damaging due to water leakage if the hoses accidentally get ruptured or they become loose. -
Page 19: Troubleshooting
XQG65-11SU -MANUAL 10/29/02 1:50 PM Page 20 English Troubleshooting Washer does not operate: • Check if unit is plugged in. The plug may have come loose. • Check if the electrical wall receptacle is of proper voltage. • Check if the circuit breaker needs to be reset or if the fuse needs to be replaced. -
Page 20: Washer Is Making Noise
XQG65-11SU -MANUAL 10/29/02 1:50 PM Page 21 English Washer is making noise: • Washer may need to be reinstalled. (Check washer installation section) • Washer load may need to be re-balanced, as the load may be uneven. • Coins, loose change, buttons or other heavy objects could make noise (read Operating Guide –... - Page 21 XQG65-11SU -MANUAL 10/29/02 1:50 PM Page 22 English Dryer is working but not drying the clothes: • Unit may be over loaded. The dryer drum should only be half full. • Check if lint trap is clean and dust free.
-
Page 22: Installation Instructions
XQG65-11SU -MANUAL 10/29/02 1:50 PM Page 23 English INSTALLATION INSTRUCTIONS Tools and Materials Required You will need to have following tools to help you in the installation of your Washer: • Scissors • Phillips Screwdriver • Standard Screwdriver • Pliers •... -
Page 23: Unpacking Your Washer
XQG65-11SU -MANUAL 10/29/02 1:50 PM Page 24 English Unpacking Your Appliance • Remove all packing materials including transportation bolts and brackets. Also remove adhesive tape holding the accessories inside and outside. • Inspect and remove any remains of packing, tape or printed materials before using the washer. -
Page 24: Leveling Your Washer
XQG65-11SU -MANUAL 10/29/02 1:50 PM Page 25 English Leveling Your Appliance • Your washer has 4 leveling legs; which are located on the four bottom corners. After properly placing your washer in its final position, you can level your washer. - Page 25 XQG65-11SU -MANUAL 10/29/02 1:50 PM Page 26 English 2. Connect the hot and cold water inlet hoses to the hot and cold water faucet. 3. Connect the other end to their respective washer inlet located at the rear. Note: Hot water needs to be at a temperature of at least 120˚F – 140˚F.
-
Page 26: Unit Dimensions
XQG65-11SU -MANUAL 10/29/02 1:50 PM Page 27 English (Route Drain Hose through Clip) Note: Inspect carefully for any leaks around and back of the machine. If leak occurs, double check to see if any connections are loose. You may need to tighten any loose connections. -
Page 27: Electrical Connections
XQG65-11SU -MANUAL 10/29/02 1:50 PM Page 28 English Electrical Connections Grounding Instructions This appliance must be grounded. In the event of an electrical short circuit, grounding reduces the risk of electric shock by providing an escape wire for the electric current. This appliance is equipped with a cord having a grounding wire with a grounded plug. -
Page 28: Warranty
After one year from the original retail service area or hours. purchase date, Haier will provide a part at Damage to clothing. no cost, as indicated below, to replace said Damage incurred in shipping. - Page 29 1:50 PM Page 1 IMPORTANT Do Not Return This Product To The Store If you have a problem with this product, please contact the "Haier Customer Satisfaction Center" at 1-877-337-3639. DATED PROOF OF PURCHASE REQUIRED FOR WARRANTY SERVICE IMPORTANT Ne pas Réexpédier ce Produit au Magasin Pour tout problème concernant ce produit, veuillez contacter le service des...