Swann DVR4-5500 Operating Instructions Manual
19” all-in-one digital video recorder
Hide thumbs
Also See for DVR4-5500:
- Operating instructions manual (27 pages) ,
- Specifications (2 pages)

Related Manuals for Swann DVR4-5500


Summary of Contents for Swann DVR4-5500
-
Page 1: Operating Instructions
Advanced security made easy™ 19” All-in-One Digital Video Recorder DVR4-5500™ Operating Instructions SW349-DA9 www.swannsecurity.com SR349-DA9-60010-290509... - Page 2 Operating Instructions DVR4-5500™ This page intentionally left blank.
- Page 3 Operating Instructions DVR4-5500™ RISK OF ELECTRIC SHOCK CAUTION: To reduce the risk of electric shock, do not expose this apparatus to rain or moisture. Only operate this apparatus from the type of power source indicated on the label. company shall...
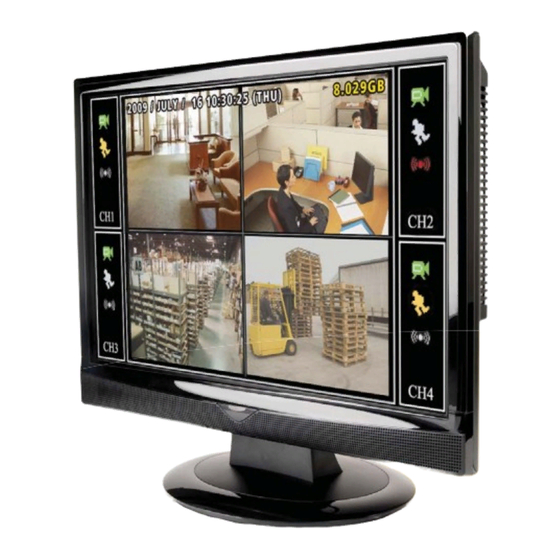
- Page 4 Operating Instructions DVR4-5500™ Introduction Congratulations on your purchase of this Swann DVR4-5500™ LCD Digital Video Recorder. This stand-alone unit is highly adaptable, and more than capable of providing a simple security solution for both home and business security needs. A high resolution, in-built LCD display as well as networking features makes this unit entirely self-sufficient, and does not require attachment to a television, external monitor or computer.
-
Page 5: Table Of Contents
Operating Instructions DVR4-5500™ ANUAL ONTENTS Part 1: Setting up the DVR Hardware…………………………………………………………. 5 1.1 Layout of the DVR…………………………………………………………………………………………… 5 1.2 Connecting Cameras to the DVR………………………………………………………………………….. 5 1.3 VGA Connection……………………………………………………………………………………………... 5 1.4 Connecting Power to the DVR…………………………………………………………………………….. 5 Part 2: Configuring the DVR Software ………………………………………………………………………. -
Page 6: Part 1: Setting Up The Dvr Hardware
Operating Instructions DVR4-5500™ Part 1: Setting up the DVR Hardware 1.1 Layout of Digital Video Recorder (DVR) AC POWER: Using the supplied power lead, connect this to a wall socket, using an extension lead if required. Uses IEC13/14 connectors (this is the same plug that most desktop computers use). -
Page 7: Part 2: Configuring The Dvr Software
Operating Instructions DVR4-5500™ Part 2: Configuring the DVR Software Before we can start recording video, we need to take a moment to configure some of the settings on the DVR. We need to set the DATE & TIME, and then assign a PASSWORD for you. To do this, we need to use the infrared remote control which came with the DVR –... -
Page 8: Setting The Date And Time
Operating Instructions DVR4-5500™ 2.2 Setting the Date and Time Once you have powered on the DVR for the first time, and it has finished initialising, we can now set the DATE AND TIME. To do this: Press the MENU button. -
Page 9: Part 3: Basic Functions
Operating Instructions DVR4-5500™ Part 3: Basic Functions 3.1 Overview of the Interface: The Live Monitoring Layout This section will cover everything you need to start monitoring your cameras and recording footage. It is worth taking some time to experiment with the basic functions of the DVR, so that you understand the features and limitations of your particular setup. -
Page 10: Motion Recording
Operating Instructions DVR4-5500™ 3.3.2 Motion Recording This is a little more complex than TIMER RECORDING, but has some distinct advantages. Basically, MOTION RECORDING will allow you to configure the DVR to record only when something is happening in front of the camera. -
Page 11: Playback
You can find and download the most recent version of the firmware for this DVR from our website: www.swann.com.au/downloads. Grab it via the Internet using your PC, and pop it onto the USB flash drive (simply click and drag, or copy and paste it there). Don’t change the filename: we named it that way for a reason! Put the USB flash drive into the USB port located on the back of the DVR, right next to the video inputs. -
Page 12: Part 4: Advanced Operations
Operating Instructions DVR4-5500™ Part 4: Advanced Operations 4.1 Quick Search If you’re hunting some specific footage and you know the date and time at which the DVR recorded it, the best option might be to do a QUICKSEARCH for the event you want. -
Page 13: Advanced Settings
Operating Instructions DVR4-5500™ 4.2.2 Advanced Settings To get to the ADVANCED CONFIGURATION settings for recording: Open the MENU and scroll down to the ADVANCED CONFIG. Select the RECORD option. There are a number of options that you can configure or engage here, such as: Engaging the manual record override. -
Page 14: Advanced Motion Detection Settings
Operating Instructions DVR4-5500™ 4.4 Advanced Motion Detection Settings To alter the MOTION DETECTION settings: Open the menu, and scroll down to ADVANCED CONFIG. Select DETECTION from the submenu and press This will open the DETECTION WINDOW. You can access settings for all four channels from here. -
Page 15: To Your Pc
Operating Instructions DVR4-5500™ 4.6.2 …to your PC Once you’ve finished backing up an event or two to the USB flash drive, you might be wondering what to do with it. Well, whilst you’re backing up footage, the DVR automatically copies a small program onto the flash drive that will allow you to access and playback the footage on a PC. -
Page 16: Part 5: Networking
Operating Instructions DVR4-5500™ Part 5: Networking Why would you put your DVR onto a network? Well, how about being able to monitor your security system from any Internet capable computer on Earth, or even in low orbit if you travel that far from home? It’s pretty cool, and really convenient. -
Page 17: Configuring The Dvr
Operating Instructions DVR4-5500™ 5.2 Configuring the DVR Once your DVR is connected to your network using a standard Ethernet cable (a cat5 or higher cable) – it plugs into the port on the back of the DVR and runs to the router (or to a network switch, if the ports on the router are full). It is... -
Page 18: Configuring Your Network For Remote Viewing
Operating Instructions DVR4-5500™ 5.3 Configuring your Network for Remote Viewing There are two final steps you’ll need to take to be able to access your DVR via the Internet. The first is to configure your router for port forwarding. If you’re totally unfamiliar with what this entails, we suggest talking to an IT professional. -
Page 19: Part 6: Remotely Accessing Your Dvr
Operating Instructions DVR4-5500™ Part 6: Remotely accessing your DVR There are a few methods available for you to access your DVR remotely or via your local network, ranging from using the dedicated software (supplied on the enclosed CD) to using an Internet Explorer browser window. -
Page 20: Using The Video Viewer Interface
Operating Instructions DVR4-5500™ 6.2.3 Using the Video Viewer Interface Icon Name Description Image Display The place where your images are displayed. Where you can enter the IP address of your DVR, and save it for Address Book future reference. Gives you a list of options that you can set. -
Page 21: The Miscellaneous Control Window
Operating Instructions DVR4-5500™ 6.2.4 The Miscellaneous Control Window When you click Miscellaneous Control icon ( ) you’ll be transported to the Miscellaneous Control window: Button Function Description Changes the appearance of selected video channels. Allows Colour Setting you to set the brightness, hue and saturation values in a similar manner to a television screen. -
Page 22: Playing Back Footage
Operating Instructions DVR4-5500™ 6.2.6 Playing Back Footage Access this window by clicking the Status List / Playback icon ( ) in the Miscellaneous Settings window, and selecting either the Record or Backup tab. The PLAYBACK Window The STATUS LIST Window To playback a recording, simply select the one you want from the list, double-click or click Play. -
Page 23: Accessing The Dvr Without Video Viewer
Operating Instructions DVR4-5500™ 6.3 Accessing the DVR without Video Viewer If you are away from your DVR and want to access the footage on it or configure your recording options, you can gain access to the DVR via Internet Explorer (Windows) window or QuickTime Player (Mac). -
Page 24: Accessing Dvr Via Quicktime
Operating Instructions DVR4-5500™ 6.3.2 Accessing your DVR via QuickTime Access to the DVR via QuickTime will allow you to log into the DVR and monitor the live images only. Ensure you are running the most up-to-date version of QuickTime. If you need to update, you can grab an update from the Internet, at www.apple.com/quicktime... -
Page 25: Appendix 1: Technical Specifications
Operating Instructions DVR4-5500™ Appendix 1. Technical Specifications LCD Panel Size 18.95” (measured across diagonal) Resolution WSXGA+ (1440 x 990 pixels) Aspect Ratio 16 : 10 Widescreen Peak Brightness 300cd/m (typical) Contrast Ratio 1000 : 1 (typical) Response Time 5ms [Tr + Tf] (typical) Viewing Angle 85/85/80/80 (CR ≥... -
Page 26: Appendix 3: Compatible Sata Hdd List
Operating Instructions DVR4-5500™ Appendix 3. Compatible SATA HDD List MANUFACTURER MODEL CAPACITY SPEED Seagate ST3320613AS 320GB 7200 rpm ST33500320AS 500GB 7200 rpm ST3750330AS 750GB 7200 rpm ST31000340AS 1000GB (1TB) 7200 rpm WD4200AAKS 320GB 7200 rpm WD5000AACS 500GB 7200 rpm WD6400AAKS... -
Page 27: Warranty Terms & Conditions
Swann. The end user is responsible for all freight charges incurred to send the product to Swann’s repair centres. The end user is responsible for all shipping costs incurred when shipping from and to any country other than the country of origin. - Page 28 NEW ZEALAND toll free 1-800-627-2799 (Option 1) 0800 479 266 (M-F, 9am-5pm US PT) INTERNATIONAL +61 3 8412 4610 See http://www.worldtimeserver.com for information on time zones and the current time in Melbourne, Australia compared to your local time. © Swann Communications 2009...
- Page 29 INSTRUCTIONS DE FONCTIONNEMENT DVR4-5500™ Page laissée intentionnellement vide.
- Page 30 INSTRUCTIONS DE FONCTIONNEMENT DVR4-5500™ MISE EN GARDE RISQUE DE CHOC ÉLECTRIQUE MISE EN GARDE : Afin de réduire les risques d’électrocution, veillez à ne pas exposer votre matériel à la pluie ou à l’humidité. N’utiliser qu’avec une source d’alimentation correspondant aux indications.
- Page 31 INSTRUCTIONS DE FONCTIONNEMENT DVR4-5500™ Introduction Félicitations pour votre achat de cet enregistreur vidéo numérique Swann DVR4-5500™ Cette unité autonome est hautement adaptable et offre plus qu’une simple solution de sécurité tant pour les besoins professionnels que pour les besoins domestiques.
- Page 32 INSTRUCTIONS DE FONCTIONNEMENT DVR4-5500™ Contenu du Manuel Partie 1 : Mise en place matérielle.…………………………………………………………. 1.1 Composition du DVR …………………………….………………………………………………………… 5 1.2 Connecter une ou plusieurs caméras au DVR..……………………………………………………….. 5 1.3 Connexion VGA ……………………………………………………………………………………………... 5 1.4 Brancher le DVR sur une source d’alimentation .……………………………………………………….. 5 Partie 2 : Configuration logicielle du DVR ..……………………………………………………………….
-
Page 33: Partie 1 : Mise En Place Matérielle
INSTRUCTIONS DE FONCTIONNEMENT DVR4-5500™ Partie 1 : Mise en place matérielle 1.1 Votre enregistreur vidéo numérique (DVR) Alimentation AC: A l’aide de la prise fournie, connectez le câble d’alimentation à une prise murale, en utilisant une rallonge si nécessaire. Utilise des connecteurs IEC13/14 (soit le meme type de prise que la majorité des ordinateurs) PORT VGA : Pour connecter le DVR à... -
Page 34: Partie 2 : Configuration Logicielle Du Dvr
INSTRUCTIONS DE FONCTIONNEMENT DVR4-5500™ Partie 2 : Configuration logicielle du DVR Avant de commencer à enregistrer des vidéos, il est nécessaire de paramétrer le DVR. Nous devons définir la DATE et l'HEURE puis choisir un MOT DE PASSE. Pour ce faire, nous utiliserons la télécommande infrarouge. Voici une vue d’ensemble rapide de cette dernière. -
Page 35: Paramétrage De La Date Et De L'heure
INSTRUCTIONS DE FONCTIONNEMENT DVR4-5500™ 2.2 Paramétrage de la date et de l’heure Une fois le DVR allumé pour la première fois et après son initialisation, vous pourrez paramétrer la DATE et l’HEURE. Pour ce faire : Appuyez sur le bouton MENU Le mot de passe peut vous être demandé. -
Page 36: Partie 3 : Fonctions De Base
INSTRUCTIONS DE FONCTIONNEMENT DVR4-5500™ Partie 3 : Fonctions de Base 3. 1 Vue d’ensemble de l’interface Contrôle Live Cette section vous explique tout ce que vous avez besoin de savoir à propos du contrôle de vos caméras et de vos enregistrements en direct. -
Page 37: Détecteur De Mouvements
INSTRUCTIONS DE FONCTIONNEMENT DVR4-5500™ 3.3.2 Détecteur de mouvements Cette fonction est légèrement plus complexe que l’ENREGISTREMENT PROGRAMMÉ mais possède certains avantages distincts. Elle vous permet de lancer un enregistrement à chaque fois qu’un changement est détecté dans l’image par le DVR. Cela signifie que le disque dur ne sera pas rempli inutilement d’heures d’enregistrements vides ! Ce mode est idéal si, par exemple, vous utilisez le DVR pour enregistrer des images d’un emplacement inoccupé. -
Page 38: Lecture
Vous pouvez trouver et télécharger la version la plus récente du firmware de notre produit sur notre site internet : www.swann.com.au/downloads. Téléchargez la mise à jour sur votre PC puis transférez-la sur la clé USB (and la faisant glisser ou en la copiant). Ne renommez pas le fichier. Nous lui avons donné ce nom pour une raison bien précise ! -
Page 39: Partie 4 : Options Avancées
INSTRUCTIONS DE FONCTIONNEMENT DVR4-5500™ Partie 4 : Options avancées 4.1 Recherche Rapide Si vous recherchez un enregistrement spécifique dont vous connaissez la date et l’heure, le meilleur moyen est de faire une RECHERCHE RAPIDE de l’élément désiré. Ouvrez le MENU et descendez jusqu’à la deuxième page. Sélectionnez le troisième sous-menu appelé... -
Page 40: Paramètres Avancés
INSTRUCTIONS DE FONCTIONNEMENT DVR4-5500™ 4.2.2 Paramètres avancés Pour vous rendre au panneau de CONIGURATION AVANCÉE d’enregistrement : Ouvrez le menu et descendez jusqu’à CONFIG AVANCÉE. Sélectionnez l’option ENREGISTREMENT. Il existe de nombreuses options que vous pouvez configurer ou activer, telles que : Activer l'enregistrement manuel. -
Page 41: Paramètres Avancées De Détection De Mouvement
INSTRUCTIONS DE FONCTIONNEMENT DVR4-5500™ 4.4 Paramètres avancées de détection de mouvement Pour modifier les paramètres de DETECTION DE MOUVEMENTI : Ouvrez le menu et descendez jusqu’à CONFIG AVANCÉE. Sélectionnez DETECTION à partir du sous-menu et appuyez sur La FENETRE DE DETECTION s’ouvrira Vous pouvez accéder aux paramètres des quatre chaînes à partir de cet emplacement. -
Page 42: Sauvegarde D'événements
INSTRUCTIONS DE FONCTIONNEMENT DVR4-5500™ 4.5 Sauvegarde d’événements 4.6.1... vers une clé USB Comme mentionné plus tôt, vous devez vous assurer que votre clé USB est formatée selon le système FAT32 (Voir la section 3.5 pour cette procédure). Il est également recommandé de supprimer toutes les données de votre clé... -
Page 43: Partie 5 : Réseau
INSTRUCTIONS DE FONCTIONNEMENT DVR4-5500™ Partie 5 : Réseau Pourquoi ne mettriez-vous pas votre DVR en réseau ? Que pensez-vous de la possibilité de contrôler votre système de sécurité à partir de n’importe quel ordinateur relié à internet sur terre ? Cette possibilité peut s'avérer bien pratique. -
Page 44: Configuration Du Dvr
INSTRUCTIONS DE FONCTIONNEMENT DVR4-5500™ 5.3 Configuration du DVR Une fois votre DVR connecté à votre réseau à l’aide d’un câble Ethernet standard (catégorie cat5 ou supérieure), vous devriez vous retrouver dans une configuration où le câble relie l’arrière du DVR à votre routeur (ou au Switch de votre routeur si tous les ports sont occupés) Il est fortement recommandé... -
Page 45: Transfert De Port
INSTRUCTIONS DE FONCTIONNEMENT DVR4-5500™ 5.3 Configuration du réseau pour visualisation à distance Il reste deux étapes pour accéder à votre DVR via internet. La première consiste à configurer votre routeur pour transfert de port. Si vous n’êtes pas familiarisé avec cette notion, nous vous suggérons de consulter un professionnel. -
Page 46: Partie 6 : Accès À Distance À Votre Dvr
INSTRUCTIONS DE FONCTIONNEMENT DVR4-5500™ Partie 6 : Accès à distance à votre DVR Il existe quelques méthodes vous permettant d'accéder à distance à votre DVR (ou à travers votre réseau à distance) à l'aide d'une fenêtre Internet Explorer. Note : la première fois que vous accédez à votre DVR à distance, votre nom d'utilisateur et mot de passe vous seront demandés. -
Page 47: Utilisation De L'interface De Visualisation Vidéo
INSTRUCTIONS DE FONCTIONNEMENT DVR4-5500™ 6.2.3 Utilisation de l’interface de visualisation vidéo Numéro Icône Description Affichage de l’image Emplacement d’affichage de vos images. Emplacement où vous pouvez saisir l’adresse IP de votre DVR Carnet d’adresses et l’enregistrer pour référence future. Vous donne une liste des options que vous pouvez paramétrer. -
Page 48: Fenêtre De Contrôle
INSTRUCTIONS DE FONCTIONNEMENT DVR4-5500™ 6.2.4 Fenêtre de contrôle Lorsque vous cliquez sur l’icône de contrôle ( ) la fenêtre de contrôle s’ouvre: Bouton Fonction Description Change l’apparence des chaînes vidéo sélectionnées. Vous Paramétrage des permet de paramétrer luminosité, contraste, teinte et saturation couleurs de la même manière que sur un écran de télévision. -
Page 49: Lecture D'enregistrements
INSTRUCTIONS DE FONCTIONNEMENT DVR4-5500™ 6.2.6 Lecture d’enregistrements Accéder à cette fen6etre en cliquant sur l’icône Liste Statut/Lecture ( ) dans la fenêtre de paramètres et en sélectionnant l’onglet Enregistrement ou Sauvegarde. The PLAYBACK Window The STATUS LIST Window Pour lire un enregistrement, sélectionnez simplement celui que vous souhaitez dans la liste et cliquez ou double- cliquez sur Lecture. -
Page 50: Accéder Au Dvr Sans Visualisation Vidéo
INSTRUCTIONS DE FONCTIONNEMENT DVR4-5500™ 6.3 Accéder au DVR sans visualisation vidéo Si vous n’6etes pas près de votre DVR et souhaitez accéder à l’enregistrement ou configurer vos options d’enregistrement, vous pouvez configurer le DVR via Internet Explorer (Windows) ou Quick Time Player (Mac). - Page 51 INSTRUCTIONS DE FONCTIONNEMENT DVR4-5500™ 6.3.2 Accéder à votre DVR via Quick Time Accéder à votre DVR via QuickTime vous permettra de contrôler les images live. Assurez-vous que vous possédez la version la plus récente de QuickTime Si vous avez besoin de mettre à...
-
Page 52: Annexe 1 : Spécifications Techniques
INSTRUCTIONS DE FONCTIONNEMENT DVR4-5500™ Annexe 1 : Spécifications techniques Panneau LCD Taille 18.95’’ (diagonale) Résolution WSXGA+ (1440 x 990 pixels) Aspect Ratio 16 : 10 grand écran Pic luminosité 300cd/m (typique) ratio contraste 1000 : 1 (typique) Durée de réponse... -
Page 53: Annexe 3 : Liste Des Hdd Sata Compatibles
INSTRUCTIONS DE FONCTIONNEMENT DVR4-5500™ Annexe 3 : Liste des HDD SATA compatibles CONSTRUCTEUR MODELE CAPACITE VITESSE Seagate ST3320613AS 320GB 7200 rpm ST33500320AS 500GB 7200 rpm ST3750330AS 750GB 7200 rpm ST31000340AS 1000GB (1TB) 7200 rpm WD4200AAKS 320GB 7200 rpm WD5000AACS 500GB... -
Page 54: Termes Et Conditions De Garantie
Toute unité qui s'avère défectueux durant la période indiquée sera réparé sans frais de pièces ou de travail ou remplacé à la seule discrétion de Swann. L'utilisateur final est responsable de tous frais de transport encourus pour retourner le produit à des centres de réparation Swann. L'utilisateur final est responsable de tous frais d'envoi encourus lors de l'expédition de et vers tout autre pays que le pays d'origine. - Page 55 Operating Instructions DVR4-5500™ Esta página se deja intencionalmente en blanco...
- Page 56 Operating Instructions DVR4-5500™ Ó Ó RISK OF ELECTRIC SHOCK PRECAUCIÓN: Para reducir el riesgo de una descarga eléctrica, no exponga este aparato a la lluvia o la humedad. Opere este aparato únicamente con el tipo de fuente de energía indicado en la etiqueta.
- Page 57 DVR4-5500™ Introducción Felicidades por su compra de esta Grabadora de Video Digital LCD DVR4-5500™ de Swann. Esta unidad independiente es altamente adaptable, y mucho más capaz de proveer una solución de seguridad simple tanto para necesidades de seguridad del hogar como del negocio.
- Page 58 Operating Instructions DVR4-5500™ CONTENIDO DEL MANUAL …………………………………………...……………………. 5 Parte 1: Ajustando el Equipo del DVR 1.1 Diseño del DVR ……………………………………………………………………...……………………… 5 1.2 Conectando Cámaras al DVR ………………………………………………………….………………….. 5 1.3 Conexión VGA ……………………………………………………………………………..……………... 5 1.4 Conectando la Corriente al DVR ………………………………………………………………………….. 5 Parte 2: Configurando el Software del DVR ……………………………………………………………………..…….
-
Page 59: Parte 1: Ajustando El Equipo Del Dvr
Operating Instructions DVR4-5500™ Parte 1: Ajustando el Equipo del DVR 1.1 Diseño de la Grabadora de Video Digital (DVR) Corriente AC: Usando la terminal de corriente suministrado, conéctela a la toma de la pared, usando una terminal de extensión si es necesario. Usa conectores IEC13/14 (este es el mismo enchufe que usan la mayoría de las computadoras de escritorio). -
Page 60: Parte 2: Configurando El Software Del Dvr
Operating Instructions DVR4-5500™ Parte 2: Configurando el Software del DVR Antes de comenzar a grabar video, necesitamos tomarnos un momento para configurar algunos de los ajustes en el DVR. Necesitamos ajustar la FECHA Y HORA, y luego asignar una CONTRASEÑA para usted. Para hacer esto, necesitamos usar el control remoto infrarrojo que viene con el DVR –... -
Page 61: Ajustando La Fecha Y Hora
Operating Instructions DVR4-5500™ 2.2 Ajustando la Fecha y Hora Una vez que haya conectado el DVR por primera vez, y haya terminado la inicialización, podemos ahora ajustar la FECHA Y HORA. Para hacer esto: Presione el botón MENU. Puede que le pida su contraseña. La contraseña predeterminada es “0000”. Ésta se puede ingresar usando el teclado numérico, o usando las flechas hacia arriba y hacia abajo para seleccionar “0”... -
Page 62: Parte 3: Funciones Básicas
Operating Instructions DVR4-5500™ Parte 3: Funciones Básicas 3.1 Vista General de la Interfase: El Diseño del Monitoreo en Vivo Esta sección cubrirá todo lo que necesita para comenzar a monitorear sus cámaras y grabar secuencia. Vale la pena tomar algo de tiempo para experimentar con las funciones básicas del DVR, de manera que comprenda las características y limitaciones de su configuración particular. -
Page 63: Grabación Por Movimiento
Operating Instructions DVR4-5500™ 3.3.2 Grabación por Movimiento Esto es un poco más complejo que la GRABACIÓN CON TEMPORIZADOR, pero tiene algunas ventajas distintivas. Básicamente, la GRABACIÓN POR TIEMPO le permitirá configurar el DVR para grabar solo cuando algo ocurre frente a la cámara. ¡Esto significa que el disco duro no se llenará con horas y horas de nada! Este es un buen modo a seleccionar si, por ejemplo, usa el DVR para grabar imágenes de una ubicación durante horas que está... -
Page 64: Reproducción
Puede buscar y descargar la versión más reciente del firmware para este DVR de nuestro sitio Web: www.swann.com.au/downloads. Tómelo vía Internet usando su PC, y cárguelo a su unidad flash USB (simplemente de clic y arrástrelo, o copie y péguelo). No cambie el nombre del archivo: ¡lo nombramos de esa manera por una razón! -
Page 65: Parte 4: Operaciones Avanzadas
Operating Instructions DVR4-5500™ Parte 4: Operaciones Avanzadas 4.1 Búsqueda Rápida Si está en búsqueda de una secuencia en específico y sabe la fecha y hora en que el DVR la grabó, la mejor opción puede ser el hacer una BÚSQUEDA RÁPIDA del evento que desea. -
Page 66: Ajustes Avanzados
Operating Instructions DVR4-5500™ 4.2.2 Ajustes Avanzados Para ir a los ajuste de CONFIGURACIÓN AVANZADA para grabar: Abra el MENÚ y desplácese hasta CONFIGURACIÓN AVANZADA. Seleccione la opción GRABAR. Hay un número de opciones que puede configurar o activar, tales como: Activando la anulación para grabación manual. -
Page 67: Ajustes Avanzados De Detección De Movimiento
Operating Instructions DVR4-5500™ 4.4 Ajustes Avanzados de Detección de Movimiento Para alterar los ajustes de DETECCIÓN DE MOVIMIENTO: Abra el menú, y desplácese hacia abajo a CONFIGURACIÓN AVANZADA. Seleccione DETECCIÓN del submenú y presione Esto abrirá la VENTANA DE DETECCIÓN. Puede acceder a los ajustes para todos los cuatro canales desde aquí. -
Page 68: Respaldando Eventos
Operating Instructions DVR4-5500™ 4.6 Respaldando Eventos 4.6.1 …a una Unidad Flash USB Como se mencionó anteriormente, asegúrese que su unidad flash USB esté formateada como FAT32 (vea 3.5 para hacer esto). Además, se recomienda que borre toda la información de la unidad USB antes de insertarla en el puerto USB en la parte posterior del DVR. -
Page 69: Parte 5: Conexión A Redes
Operating Instructions DVR4-5500™ Parte 5: Conexión a Redes ¿Por qué pondría su DVR en una red? Bueno, ¿que tal poder monitorear su sistema de seguridad desde cualquier computadora con Internet en la Tierra, o incluso en órbita baja si viaja así de lejos de su hogar? Es bastante genial, y verdaderamente conveniente. -
Page 70: Configurando El Dvr
Operating Instructions DVR4-5500™ 5.2 Configurando el DVR Una vez que su DVR está conectado a la red usando un cable de Ethernet estándar (un cable cat5 o superior) – se conecta en el puerto en la parte posterior del DVR y va hasta el rutedor (o a un interruptor de red, si los puertos en el ruteador están llenos). -
Page 71: Configurando Su Red Para Visualización Remota
Operating Instructions DVR4-5500™ 5.3 Configurando su Red para Visualización Remota Hay dos pasos finales que necesita hacer para poder acceder a su DVR vía Internet. El primero es configurar su ruteador para habilitación de puertos. Si no está familiarizado con lo que significa esto, le sugerimos hablar con un profesional de TI. -
Page 72: Parte 6: Accediendo Remotamente A Su Dvr
Operating Instructions DVR4-5500™ Parte 6: Accediendo remotamente a su DVR Hay algunos métodos disponibles para que accede a su DVR remotamente o vía su red local, que van desde usar un software dedicado (provisto en el CD incluido) a usar una ventana de navegador de Internet Explorer. - Page 73 Operating Instructions DVR4-5500™ 6.2.3 Usando la Interfase del Video Viewer Número. Icono Nombre Descripción Imagen de Pantalla El lugar donde se muestran sus imágenes. Donde puede ingresar la dirección de IP de su DVR, y guardarla Libreta de Direcciones para consultas futuras.
-
Page 74: La Ventana De Control Misceláneo
Operating Instructions DVR4-5500™ 6.2.4 La Ventana de Control Misceláneo Cuando da clic en el ícono del Control Misceláneo ( ) será transportado a la ventana de Control Misceláneo: Botón Función Descripción Cambia la apariencia de los canales de video seleccionados. Le Ajuste de Color permite ajustar los valores de brillo, color y saturación de... -
Page 75: Reproduciendo La Secuencia
Operating Instructions DVR4-5500™ 6.2.6 Reproduciendo la Secuencia Access this window by clicking the Status List / Playback icon ( ) in the Miscellaneous Settings window, and selecting either the Record or Backup tab. Para reproducir una grabación, simplemente seleccione una que desee de la lista, de doble clic o de clic en Reproducir. -
Page 76: Accediendo Al Dvr Sin El Video Viewer
Operating Instructions DVR4-5500™ 6.3 Accediendo al DVR sin el Video Viewer Si está lejos de su DVR y quiere acceder a la secuencia o configurar sus opciones de grabación, usted puede obtener acceso al DVR vía una ventana de Internet Explorer (Windows) o por QuickTime Player (Mac). - Page 77 Operating Instructions DVR4-5500™ 6.3.2 Accediendo a su DVR vía QuickTime Acceda al DVR vía QuickTime para permitirle registrar en su DVR y monitor las imágenes en vivo solamente. Asegúrese que esté corriendo la versión más actualizada de QuickTime. Si necesita actualizar, puede obtener una actualización por Internet, en...
-
Page 78: Apéndice 1: Especificaciones Técnicas
Operating Instructions DVR4-5500™ Apéndice 1. Especificaciones Técnicas Panel LCD Tamaño 18.95” (medida en diagonal) Resolución WSXGA+ (1440 x 990 píxeles) Radio de Aspecto 16 : 10 Pantalla Ancha Brillo Pico 300cd/m (típico) Radio de Contraste 1000 : 1 (típico) Tiempo de Respuesta 5ms [Tr + Tf] (típico) -
Page 79: Apéndice 3: Lista De Discos Duros Sata Compatibles
Operating Instructions DVR4-5500™ Apéndice 3. Lista de Discos Duros SATA Compatibles FABRICANTE MODELO CAPACIDAD VELOCIDAD Seagate ST3320613AS 320GB 7200 rpm ST33500320AS 500GB 7200 rpm ST3750330AS 750GB 7200 rpm ST31000340AS 1000GB (1TB) 7200 rpm WD4200AAKS 320GB 7200 rpm WD5000AACS 500GB 7200 rpm... - Page 80 Swann. The end user is responsible for all freight charges incurred to send the product to Swann’s repair centres. The end user is responsible for all shipping costs incurred when shipping from and to any country other than the country of origin.