Table of Contents
Advertisement
Advertisement
Table of Contents

Related Manuals for Swann ADVANCED-SERIES H.264


Summary of Contents for Swann ADVANCED-SERIES H.264
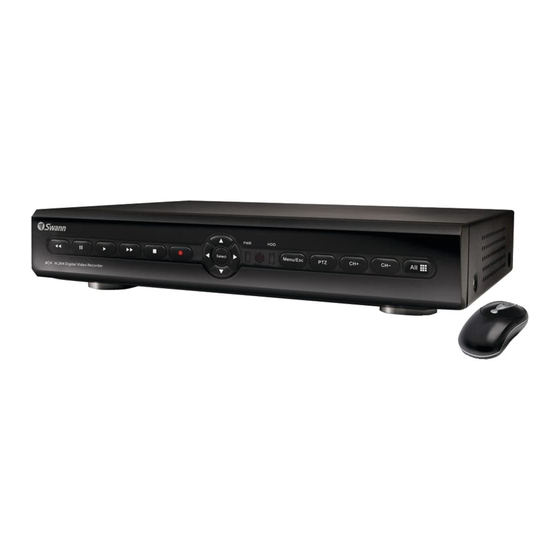
- Page 1 Advanced-Series Four Channel H.264 Digital Video Recorder M12C16031210E...
-
Page 2: Default Password
Choose something that you’ll remember, but that others would be unlikely to guess. • If you do manage to lock yourself out of the DVR, you’ll need to contact us at the Swann Technical Support Telephone Helpdesk - the number is on the back cover. -
Page 3: Table Of Contents
Table of Contents Before You Begin Table of Contents Overview Important Information & Package Contents Front Panel Rear Panel Remote Control Connecting Cameras Navigating the Menus Starting the DVR The Main Menu The Camera (Display Setup) Menu The Record Setup Menu The Record Schedule The Network Menu Video Search, File List &... -
Page 4: Overview
Overview Congratulations on your purchase of the DVR! You’ve chosen a versatile, powerful and great value security monitoring and recording solution for your home or business. Let’s just take a moment to talk about some of the great features that the DVR offers and some of the things to think about before installing the system. -
Page 5: Important Information & Package Contents
Choose something that you’ll remember, but that others would be unlikely to guess. • If you do manage to lock yourself out of the DVR, you’ll need to contact us at the Swann Technical Support Telephone Helpdesk - the number is on the back cover. -
Page 6: Front Panel
Layout of the Front Panel 1) Power Indicator: This LED is illuminated when the DVR is connected to power and switched on. 2) Infrared Sensor: Monitors signals coming from the infrared remote control. If this sensor is blocked or obstructed, then the functionality of the remote will be impaired. -
Page 7: Rear Panel
Layout of the Rear Panel 7 9 6 1) CH1 ~ CH4 (Video Inputs): These are the four camera inputs, labelled as per their channel in the DVR’s interface. Thus, plug the camera you want to be associated with Channel 1 into the port marked CH1 and so on. -
Page 8: Remote Control
Layout of Remote Control 1) 0 ~ 9 (Numeric Buttons): Used to input numbers. 1 ~ 4 can be used as quick channel changing buttons in a similar manner to a television, and these will work during either live-viewing mode or playback. Additionally, the numeric buttons will be used when inputting any numerical information –... -
Page 9: Connecting Cameras
Ensure these connections are secure, and shielded from weather, moisture or other hazards. Though Swann cameras use low voltage DC power supplies, there is still the possibility of short circuits if water gets into the power plug or socket. -
Page 10: Navigating The Menus
Navigating the Menus Camera Record Network Search Main Menu Device System There are two main ways to navigate through the menus on the DVR. One way is to use the buttons on the front panel of the DVR and/or the remote control. The other way is to use the included USB mouse. - Page 11 IMPORTANT - Remembering to Apply Your Changes When you’re using the menus to change settings or values, none of your changes will be saved until you choose the “Apply” option, which is usually located in the lower right-hand corner of the screen. Always select the APPLY button before leaving a menu if you want to save the changes that you have made.
-
Page 12: Starting The Dvr
Starting the DVR Once the DVR has been connected to power it will switch itself on automatically. The DVR takes approximately 45 seconds to boot up, during which time the image to the right will be displayed. The default mode of the DVR is live-viewing mode. This is the mode which monitors the images coming from your cameras in real-time, and allows you to configure your recording and channel options. -
Page 13: The Main Menu
The Main Menu Camera (Display Setup): The camera menu contains all the options for setting up how the DVR interfaces with and displays the images from the cameras connected to it. This is where channels are enabled or disabled in live viewing, and where the AUTOSEQ (Automatic Sequence) function can be configured. -
Page 14: The Camera (Display Setup) Menu
The Camera (Display Setup) Menu The DISPLAY SETUP MENU of the DVR. In this picture, the mouse cursor is currently highlighting the CH1 title field. Naming Channels You can change the name of any channel from the default (and rather drab) “CHx” to anything that you would like (provided it’s short enough to fit in the box). -
Page 15: The Record Setup Menu
The Record Setup Menu In the RECORD SETUP menu you can choose which channels will be active during recording, change the recording quality, enable & disable audio, select record mode and pack time (the maximum size of each recorded file). This menu contains many of the most important settings on the DVR, and correctly configuring them is important to its ongoing smooth operation. -
Page 16: The Record Schedule
The Recording Schedule The SCHEDULE screen. In this image, the schedule is configured to record constantly between 0:00 (12:00AM) Friday morning until midnight Monday, except between 12:00 and 19:00 (7:00PM) on Saturday afternoon, when it will record when triggered by the alarm settings. At all other times, the DVR is configured not to record anything at all. -
Page 17: The Network Menu
The Network Menu This is the NETWORK SETUP screen. This is the most technically complex aspect to setting up the DVR, and does require a working knowledge of network technologies. If you are unfamiliar with networking, then we suggest talking with a professional - ideally, the same person who installed your network, as they’ll know exactly how it’s configured and how best to setup the DVR. -
Page 18: Video Search, File List & Usb Backup
Video Search, File List & USB Backup In the VIDEO SEARCH screen you can search for a specific day for a recording and view it in playback mode. This is useful for hunting a specific recording of an incident if you know the time and date it occurred. -
Page 19: Backup
Backup • From the Device Management menu, select HDD Management. • Choose the FORMAT USB option. The process will take a few moments, depending on the size of the USB flash drive. • First, insert a USB flash drive into the USB port on the back of the DVR. Inserting a flash drive into the mouse port will not work correctly. -
Page 20: Playback
PlayBack This is an example of the PLAYBACK interface, currently playing back four channels simultaneously in quad view. Channels 1, 3 and 4 were actively recording. Channel 2 was not recording at this time - hence the display appears blank. (The image content has been intentionally blurred.) The playback controls are displayed across the... -
Page 21: Playing Backed-Up Footage On A Pc
Playing Backed Up Footage on a PC The video files which the DVR backs up are not playable by standard multimedia software. This means that your usual media player is not going to be able to open or display footage from the DVR. The main reason for this is that footage from the DVR is always made of multiple channels of video which are synchronised into one data stream. -
Page 22: Device Management & Hdd Menu
Device Management & HDD Menu For accessing information about your hard drive. This is where you go to correct or analyze any problem with your hard drive. Additionally, you’ll be able to see at a glance how much recording time you have left at your current quality settings, as well as being able to format (erase all data from) the hard drive here. -
Page 23: Hdd Menu (Ctd) & Ptz Menu
HDD Menu (ctd) & PTZ Menu OVERWRITE: When enabled, the DVR will record over the files already stored on the hard drive. Us- ing the overwrite option is advisable, as the DVR will always be able to record events as they happen. However, it does mean that you’ll need to get important events off the HDD before they’re overwritten. -
Page 24: The Alarm Menu
The Alarm Menu From this menu you can configure the DVR to emit an alarm tone from it’s internal buzzer, or configure the DVR to send an ‘Auto-Mail’ email alert when motion is detected or other events occur. Copy To: A quick way to copy the settings for the current channel to any or all other channels. MD Alarm: Whether the DVR’s Motion Detection function will trigger an alarm event. -
Page 25: Auto Email Setup
Auto Email Setup You can configure the DVR to automatically send you email alerts when it detects an alarm event. Please note that this function is not compatible with all email servers - as the email the DVR sends is procedurally generated, many email servers misidentify it as spam. -
Page 26: Mobile Devices & Motion Detection Menus
Mobile Devices & Motion Detection Menu For more information about accessing the DVR via a mobile device, see page 35. SERVER PORT: The port number that the DVR will use to stream data to your mobile device. See the section on Remote Access (pages 51 - 55) for more information about selecting and configuring ports. The MOTION DETECTION menu Here, you’ll be able to choose which channel(s) you want to be sensitive to motion. -
Page 27: Motion Detection Configuration
Motion Detection Configuration Say, for example, you are trying to monitor your front yard, whilst in the background there is a busy street, and the cars driving past continually set off the motion detection. What can you do about it? Setting only part of the camera’s view to be motion sensitive might be the answer. -
Page 28: System Setup And Date & Time Menus
System Setup and Date & Time Menus The SYSTEM SETUP menu is where most of the advanced settings for the DVR hide out. Most of the time, there isn’t much you’ll need to change here. However, a few settings might need tweaking from time to time, particularly when you’re first configuring the DVR. -
Page 29: Password And Video Setup Menus
If, down the track, you lose or forget your password (thus locking yourself out of the DVR) you’ll need to contact Swann Technical Support. Our number is on the back of this booklet. However, we strongly advise that you choose a password you’ll remember! It’ll save grief later... -
Page 30: Language, Info And Maintenance Menus
SYSTEM UPDATE: For loading new soft/firmware onto the DVR via a USB flash drive. Usually, you won’t need to use this setting unless directed to do so by Swann Technical Support. LOAD DEFAULT: Returns the DVR to it’s initial factory settings. Can be useful if, for some unknown reason, the DVR is behaving erratically. -
Page 31: Ptz Controls
PTZ Controls You can bring up the PTZ Setup window by pressing the PTZ button on the remote control, or by right-clicking the mouse in the live view mode, and choosing PTZ. Note: the features which will be usable depend on the capabilities and limitations of your PTZ system. -
Page 32: Remote Access
Remote Access The primary requirements for accessing the DVR via the Internet are: A High-Speed Internet Connection Video uses a lot of data, so you’ll need a fast Internet connection in order to get smooth playback and monitoring remotely. Note that upload speed refers to the rate at which an Internet connection can send data, not receive it. - Page 33 Public and Private IP Addresses The IP address used by the DVR, whether entered manually (STATIC) or assigned by the dynamic host (DHCP) is the private IP address of the DVR. The private IP address is used to locate the DVR on your private network.
-
Page 34: Remote Access Via Internet Expolorer
Remote Access via Internet Explorer The easiest way to access your DVR remotely is via an Internet browser. These instructions will detail how to access the DVR via Microsoft Internet Explorer the DVR and your network to operate properly. Remotely accessing the DVR via Internet Explorer (IE) is a great way to test if your network is functioning as it should. -
Page 35: Remote Access Via A Mobile Device
Remote Access from a Mobile Device The DVR supports access from mobile devices, such as mobile phones with Microsoft Windows Mobile as their operating system, as well as the increasingly popular iPhone. To correctly configure your DVR for remote access via a mobile device, or indeed any remote access, it is important to have your network and Internet connection configured correctly. -
Page 36: Changing Or Installing A Hard Drive
Changing or installing a Hard Drive Note: the following instructions are for installing or changing the hard drive. If your DVR already has a hard drive pre-installed, and you don’t want to change it, disregard these steps. Ensure the DVR is switched off and unplugged from mains power. -
Page 37: Troubleshooting
Try connecting another (working) hard drive to the DVR; if this still doesn’t work then the DVR maybe faulty. We suggest calling Swann Technical Support. The contact information is on the rear cover of this booklet. -
Page 38: Technical Specifications
Technical Specifications Video Video Format Video Inputs Video Outputs Display Resolution Display Frame Rate Audio Audio Inputs Audio Output Recording Compression Format Recording Resolution Recording Frame Rate (Global) Maximum Frame Rate per Channel Recording Modes Multiplex Operation HDD Interface Hard Drive Support Network LAN Connection Network Interface... -
Page 39: Warranty Information
Swann. The end user is responsible for all freight charges incurred to send the product to Swann’s repair centres. - Page 40 Any unit which proves defective during the stated period will be repaired without charge for parts or labour or replaced at the sole discretion of Swann. The end user is responsible for all freight charges incurred to send the product to Swann’s repair centres. The end user is responsible for all shipping costs incurred when shipping from and to any country other than the country of origin.